Step-by-Step Guide to Glossing Hair at Home for Shine
I remember sitting on my bathroom floor crying over completely dull hair. My strands felt like dry rough straw. I spent thousands on expensive salon visits yearly. Nothing fixed the extreme dryness long term. Then I found the exact secret salons use daily. I started doing a hair glossing treatment myself right in my bathroom. My hair suddenly looked exactly like liquid glass. You want this exact mirror shine for your own hair. I will walk you through exactly what to do right now.
You will get exact brand names and strict timelines right here. I share my exact shopping list for mandatory tools. You will save massive money skipping the salon washing bowl. Your strands will feel like pure liquid silk tomorrow morning. We cover clear liquid coats and deep tinted options completely. You get strict exact rules to follow safely. I share exact homemade recipes you can mix in your kitchen. You will finally win the fight against dry dull hair permanently.
What Is A Hair Glossing Treatment Exactly
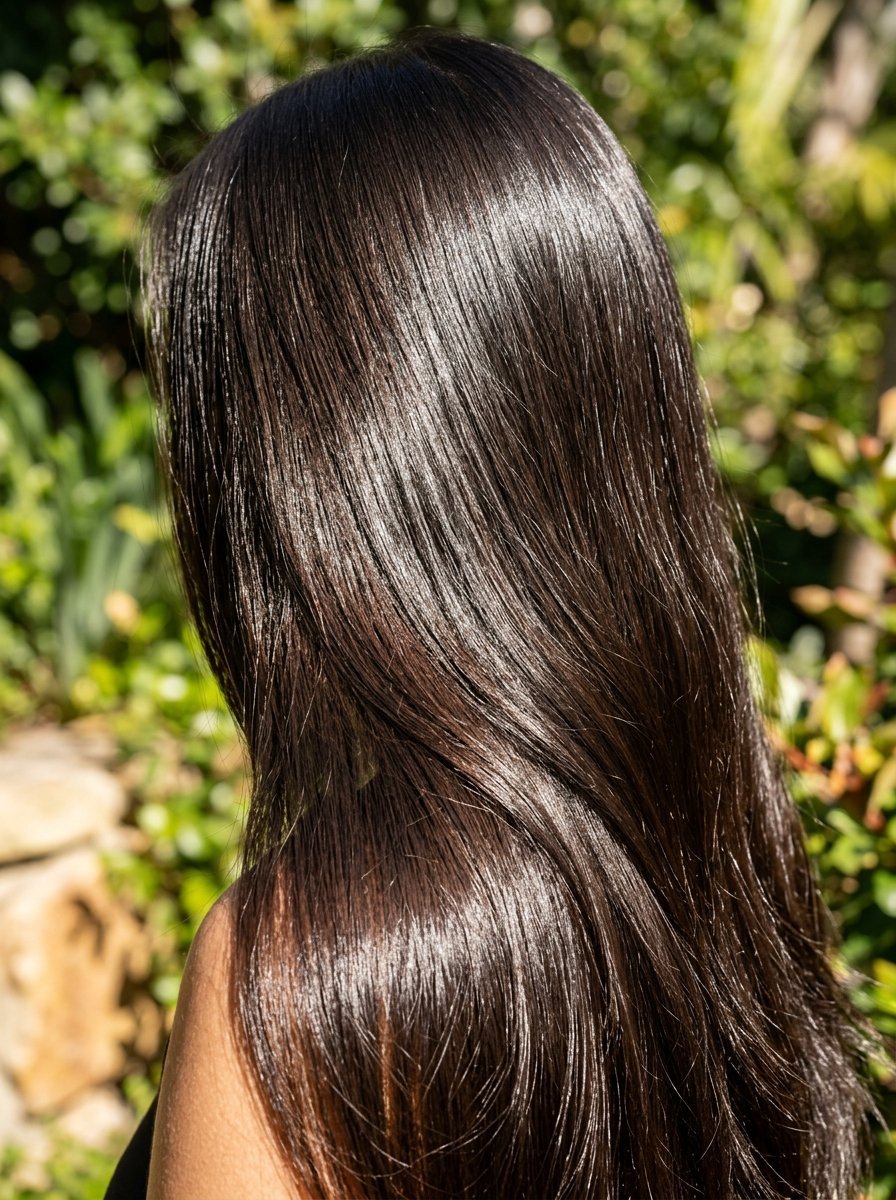
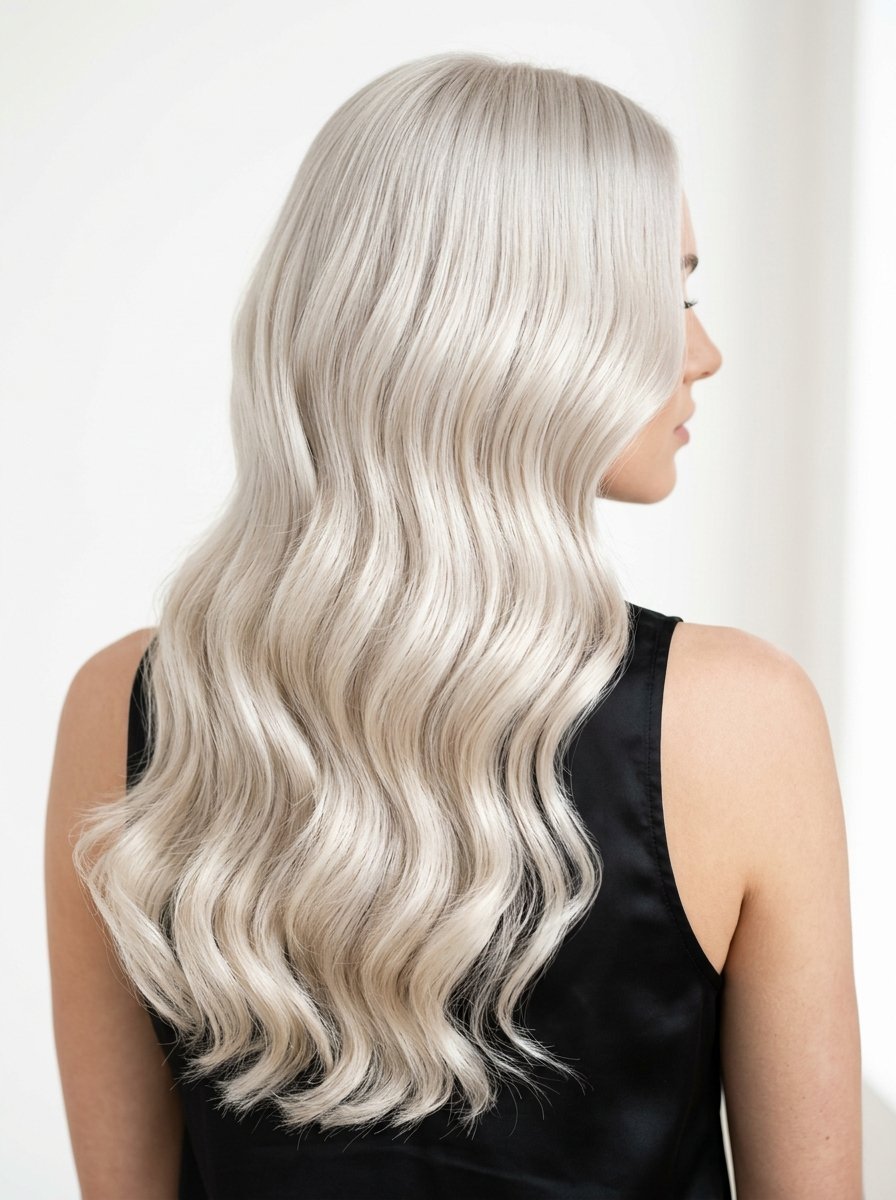
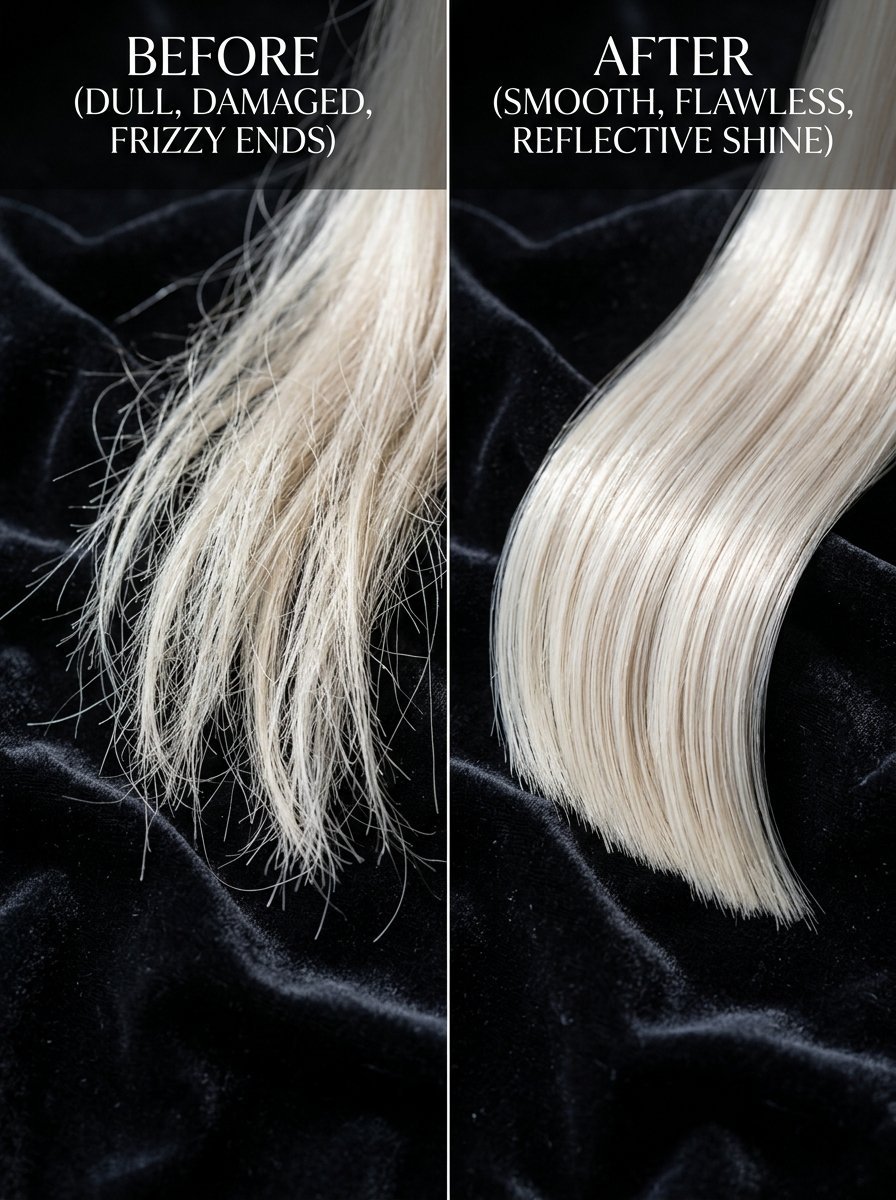
You need to know exactly how a gloss works physically. Think of your hair strand like a roof covered in shingles. A healthy hair strand has completely flat shingles. Light bounces perfectly off those flat closed shingles. That light reflection creates a massive mirror shine visually. Bleach and heat styling force those tiny shingles to lift completely open. An open hair cuticle traps light instantly. Trapped light makes your hair look incredibly dull and completely lifeless.
A gloss acts like a liquid top coat for your hair roof. It fills in the tiny microscopic holes permanently. It forces the open cuticles to snap completely flat again. The liquid formula coats the entire outside of the physical strand. It requires absolutely zero harsh ammonia or raw bleach. You get massive pure shine without any structural damage whatsoever. I apply a clear gloss to my hair monthly without fail. The extreme shine makes my hair look incredibly expensive and healthy.
Decoding Hair Gloss Colors For Your Base
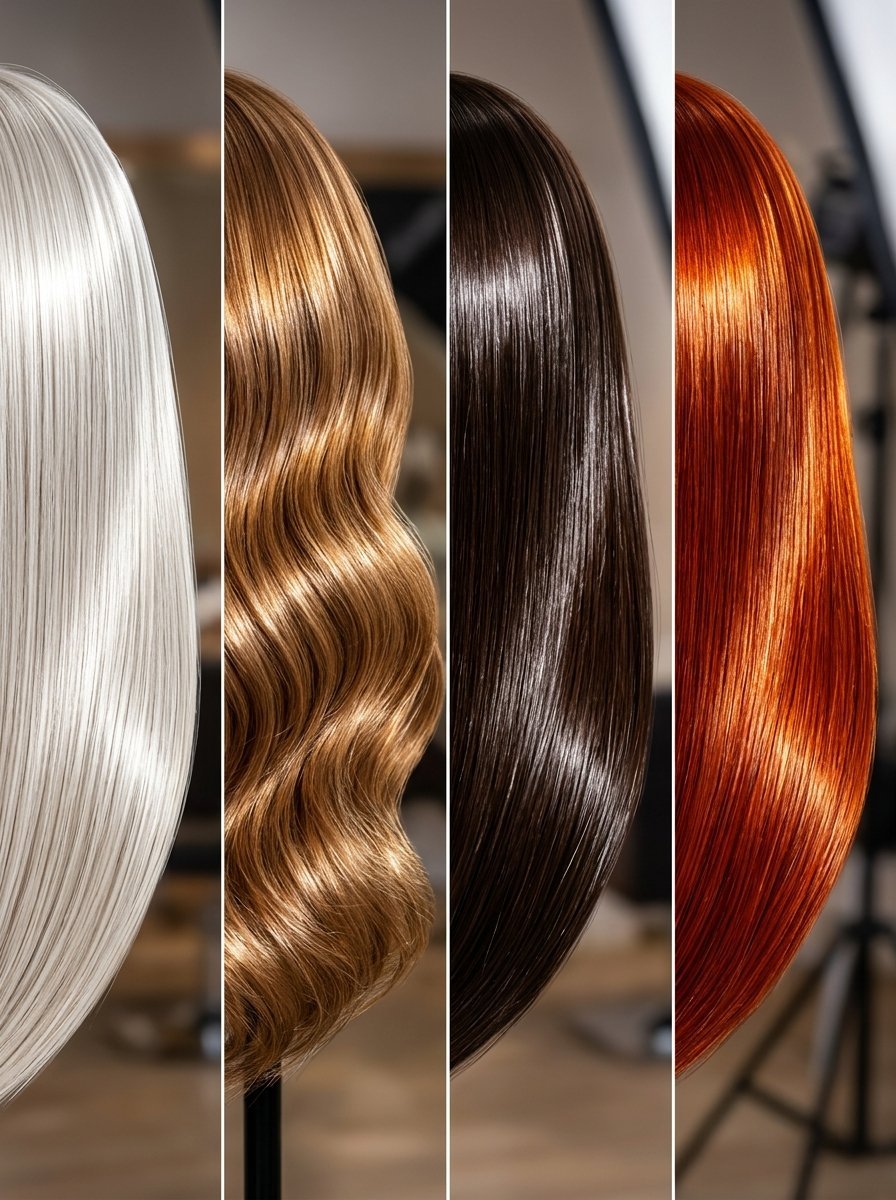
You must pick the exact right formula for your specific hair shade. Gloss hair color comes in two totally distinct variations. You can choose a completely clear sheer gloss. You can choose a deep pigmented tinted gloss. A clear gloss deposits zero color molecules onto your physical strands. It only deposits pure reflective shine completely. I strictly tell clients to use clear gloss on virgin untouched hair.
Tinted glosses fix terrible brassy tones instantly. Platinum blondes need a sheer pearl tint to kill harsh yellow. Caramel blondes need a warm gold tint to look rich. Brunettes need a dark espresso tint to kill rusty orange flashes. Redheads need a pure copper tint to stay completely bright. In my experience playing with tints completely changes your hair vibe. You must match the exact tint to your desired ending shade. Picking the wrong tint will turn your hair a muddy dark color.
Exactly How To Make Blonde Hair Shiny
Blondes struggle with severe dullness more than anyone else. Raw chemical bleach literally eats the natural moisture entirely. The bleach leaves microscopic empty holes inside the delicate strand. These tiny empty holes absorb natural light instantly. You must fill these exact holes to get any visual shine back. A sheer pearl gloss fills the missing gaps physically.
You need a strict routine to keep blonde hair reflective. Wash your hair exactly twice a week only. Heat style your hair on the lowest temperature setting possible. Apply a sheer pearl gloss exactly every three weeks strictly. I have seen this work magic on heavily bleached clients constantly. Their dry brittle ends turn into soft flowing silk quickly. You stop the hair from snapping off by keeping it heavily coated. Blonde hair demands absolute constant maintenance to look wealthy and polished.
Essential Tools For Your Hair Gloss At Home
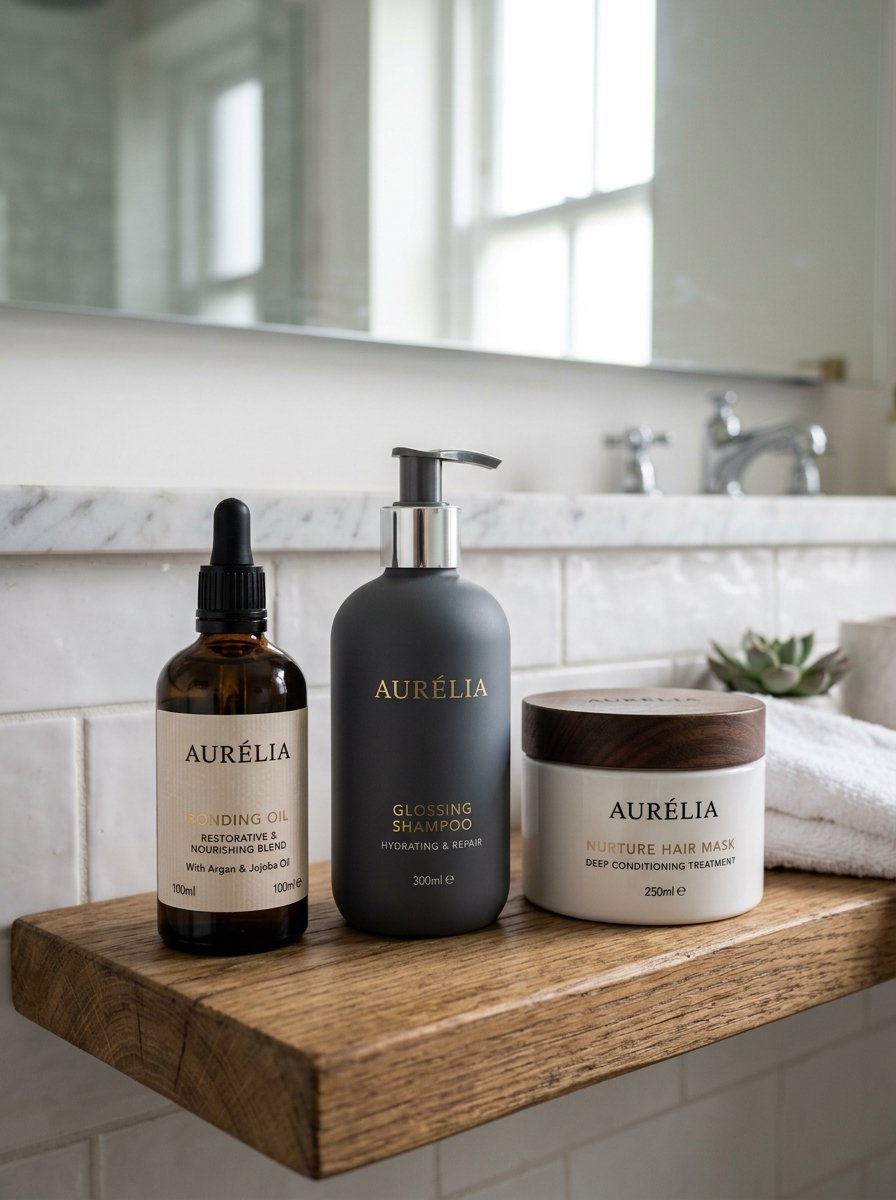
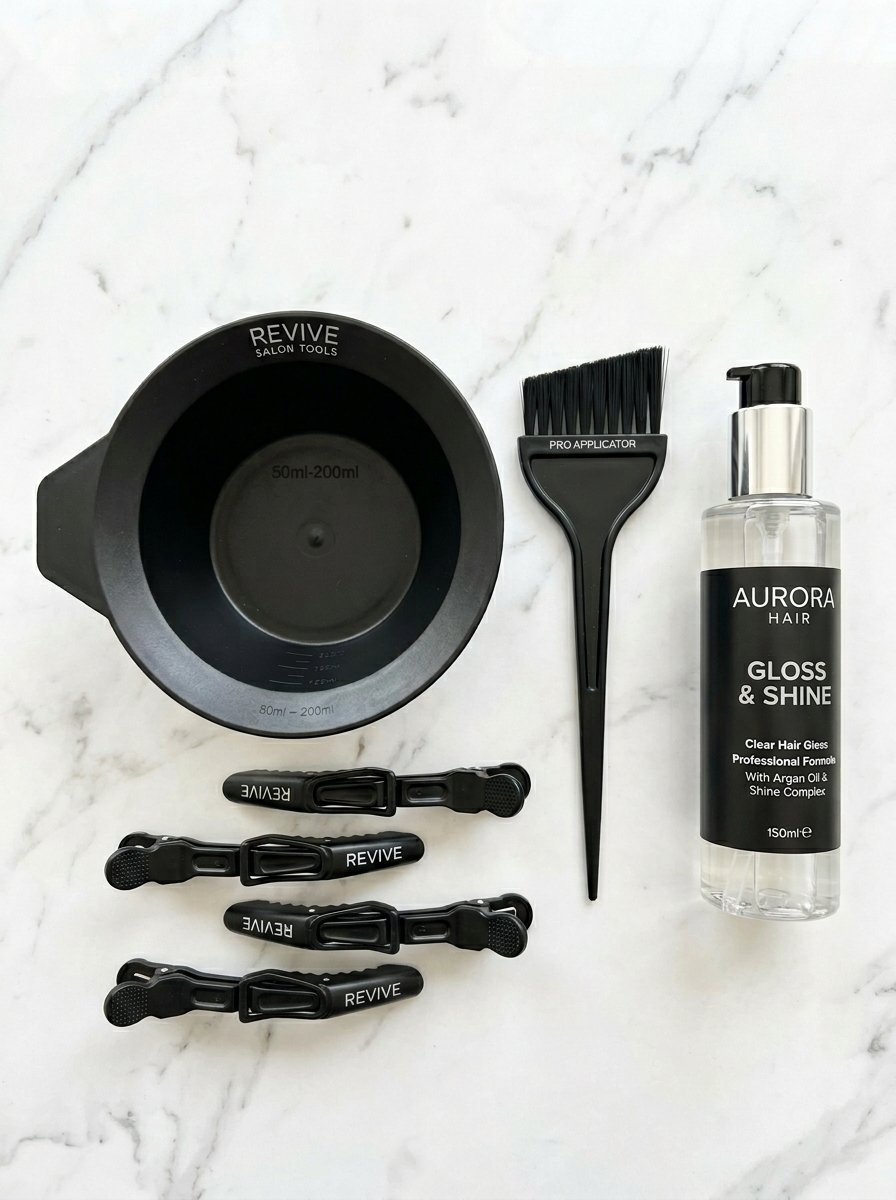
You need specific physical tools before you start this routine. Buy a proper plastic mixing bowl from a beauty supply store. Buy a standard plastic color brush with stiff nylon bristles. Buy four heavy duty plastic alligator clips to hold thick hair. Buy a cheap dark towel you do not mind staining permanently.
You must buy the actual liquid gloss formula next. Redken Shades EQ remains the absolute top tier choice globally. Professional salons use Redken exclusively for glass hair finishes. Kristin Ess Signature Gloss works amazingly well for beginners. It costs about fifteen dollars and smells completely incredible. dpHUE Color Touch Up Gloss feels very conditioning on dry ends. Madison Reed Color Reviving Gloss acts like a thick heavy mask. IGK Expensive Top Coat gives instant glass hair in three minutes. Glaze Super Color Conditioning Gloss comes in gorgeous warm brunette shades. I strictly keep Olaplex Number 7 Bonding Oil nearby for aftercare. I spray Color Wow Dream Coat heavily before picking up a hairdryer. You need Pureology Hydrate Shampoo to wash the gloss out gently. Amika Soulfood Mask delivers massive moisture after the treatment ends. K18 Molecular Hair Mask fixes broken internal bonds perfectly. You arm yourself with these exact products to win entirely.
Preparing Your Canvas Perfectly
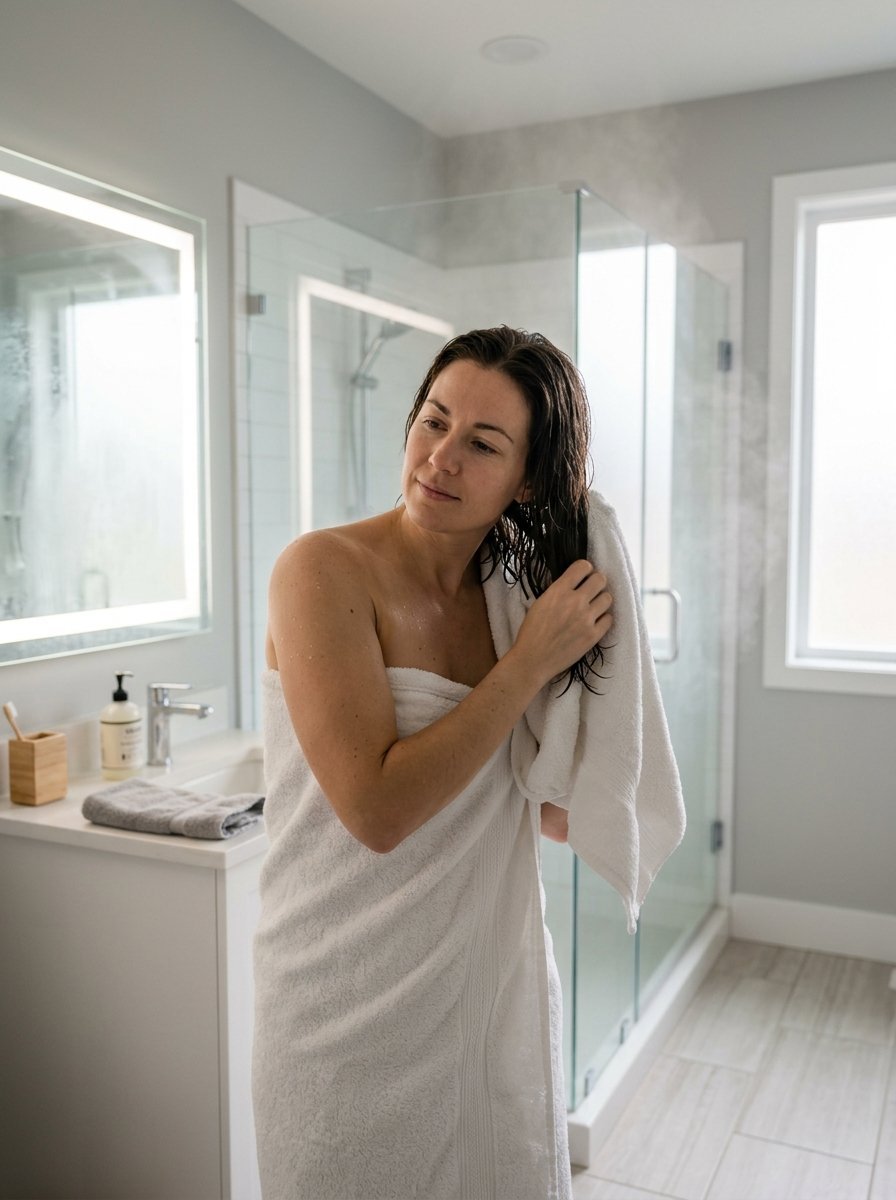
You must start with a completely naked hair strand strictly. Step into your shower and turn the water perfectly warm. Wash your hair twice using a strong clarifying shampoo. Scrub your scalp aggressively with your bare fingertips. Rinse the heavy soap completely down the open drain. Do not touch your conditioner bottle under any circumstances yet.
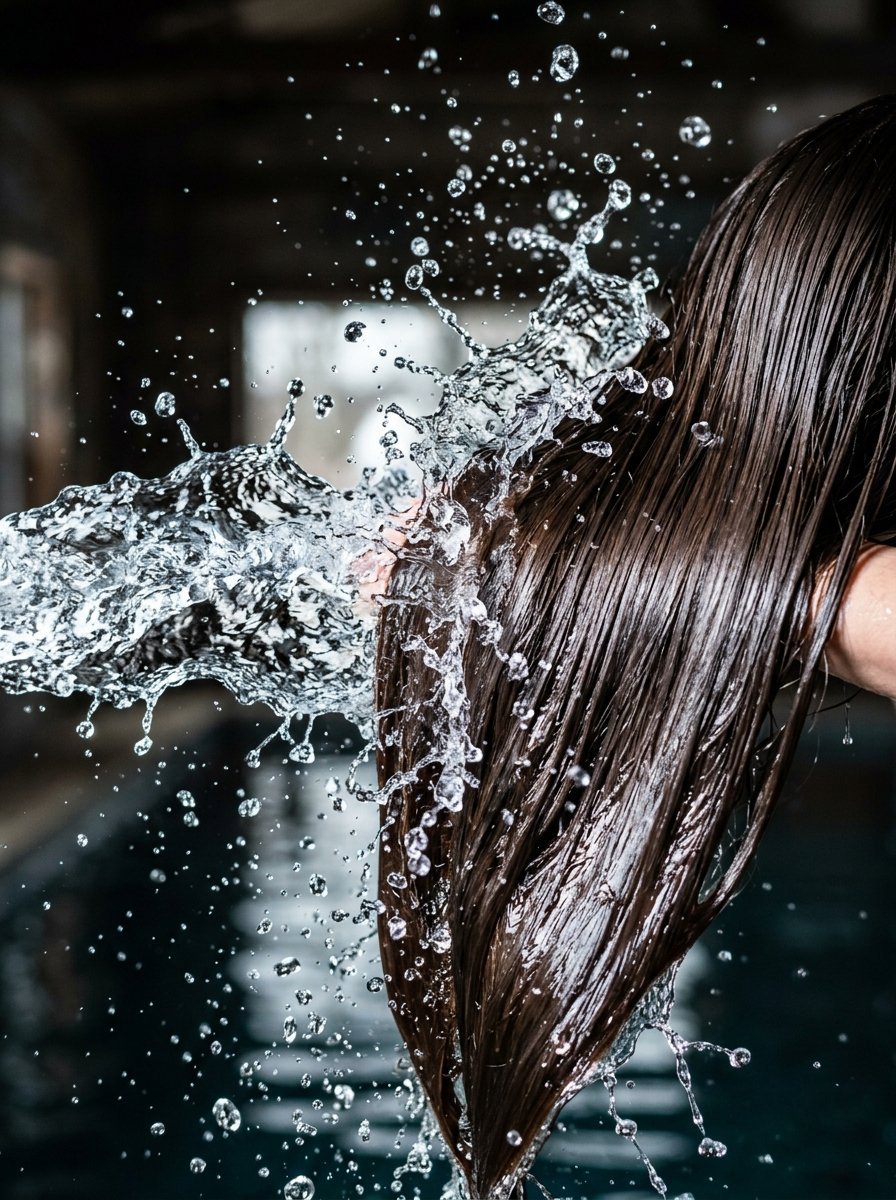
Conditioner leaves a heavy slippery wax coating entirely over the strand. The liquid gloss cannot stick to a heavily waxed surface physically. You need the hair cuticle slightly open and completely naked. Step out of the shower and grab your dark towel. Towel dry your hair very gently by squeezing the heavy water out. Do not rub the towel aggressively against your fragile wet strands. Leave your hair slightly damp to the physical touch. Damp hair absorbs the liquid gloss formula perfectly and evenly.
The Step By Step Glossing Application
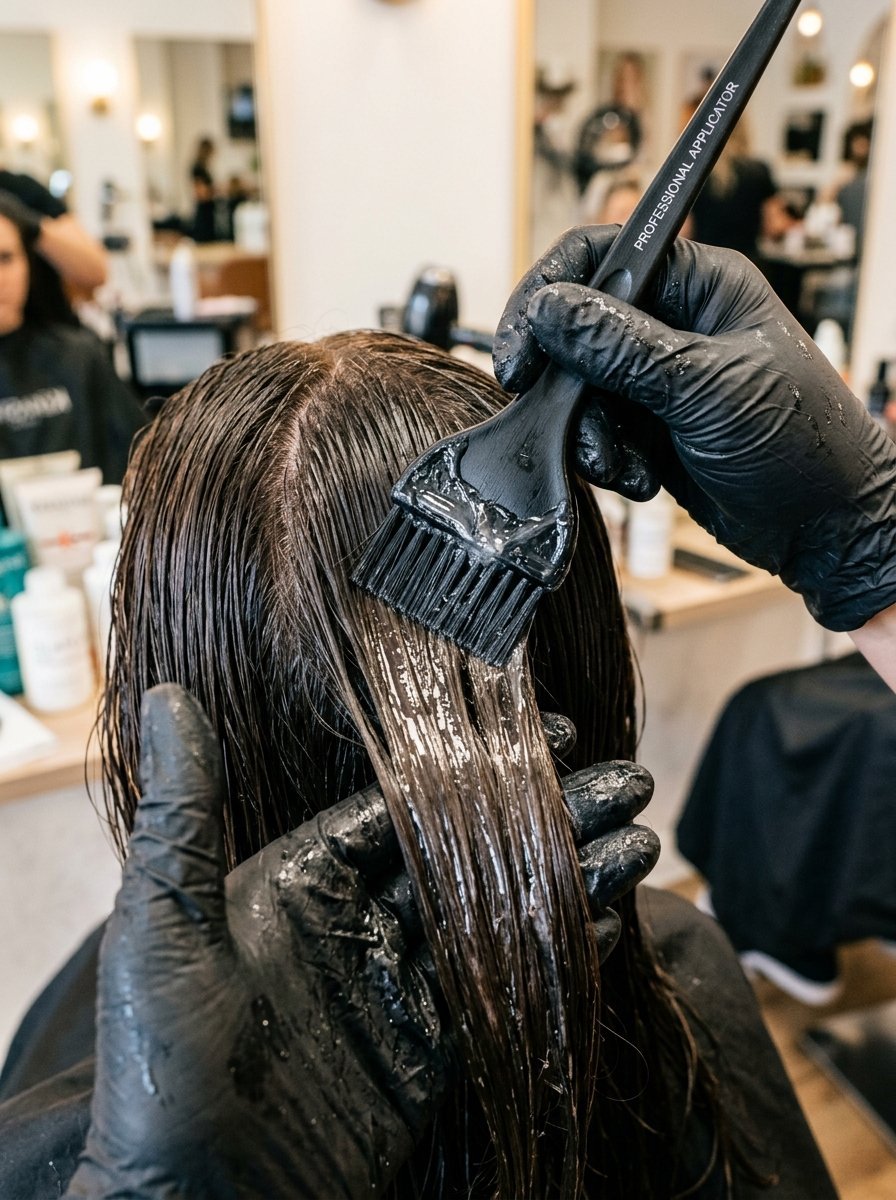
You must apply the liquid systematically to avoid terrible patchy spots. Part your damp hair straight down the middle of your head. Part it again from your left ear to your right ear. You now have four completely equal sections of hair. Twist three sections up and clip them tightly out of the way.
Start with one bottom back section completely loose. Dip your plastic brush directly into the liquid gloss bowl. Paint the liquid generously from your dark root to your light tips. Put down the brush and use your bare hands next. Massage the slippery liquid deep into the physical strands aggressively. Make sure every single tiny hair gets completely coated entirely. Drop the next section down and repeat this exact painting motion. Move to the very front face pieces absolutely last. The front pieces are highly porous and grab color extremely fast.
Timing Your Gloss Hair Color Correctly
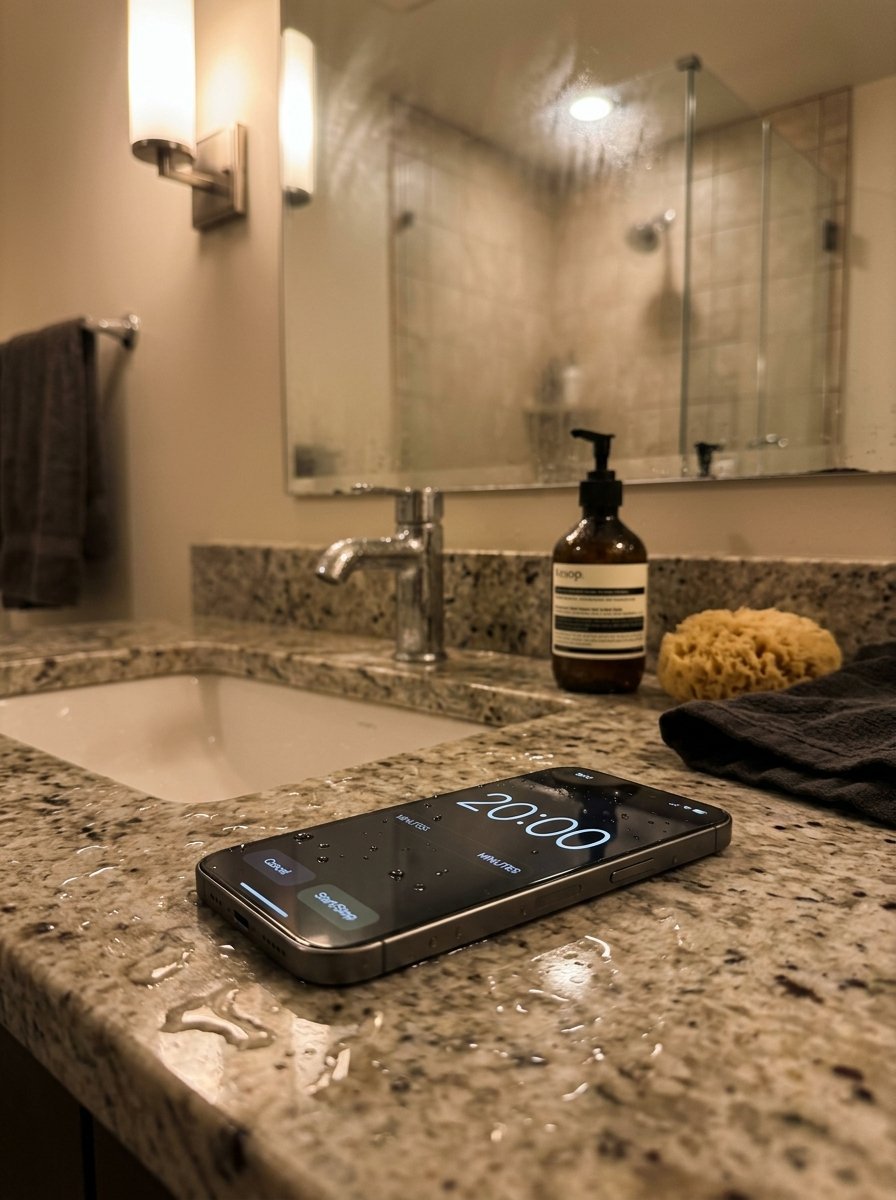
You must follow a strict timing schedule to get flawless hair. Grab your phone and set a specific digital timer immediately. Most treatments need exactly twenty short minutes to work perfectly. Do not leave the liquid on your head for an entire hour. Tinted formulas get extremely dark and muddy if left too long. Clear formulas stop working entirely after twenty exact minutes anyway.
I ruined a sheer blonde tint once by waiting forty full minutes. My bright hair turned completely dark muddy gray instantly. I had to wash it ten times to fix the terrible mistake. You must trust the exact timing printed on the cardboard box strictly. Sit quietly and read a book while the timer counts down. Do not wrap your head in a hot towel unless the box says so. Extreme heat forces the liquid dye to stain the hair permanently.
Rinsing And Locking In The Shine
The timer rings and you must move fast. Step back into your shower immediately. Turn the water temperature to freezing cold entirely. Freezing cold water snaps the open hair cuticle completely shut instantly. It physically locks the new liquid shine tightly inside the strand. Wash the slippery gloss out until the water runs completely clear.
You must apply a thick heavy conditioner immediately after rinsing. The cuticle needs extreme moisture to stay completely smooth visually. Apply the Amika Soulfood mask generously to your wet ends. Let the thick cream sit for five exact minutes. Rinse the cream out completely with freezing cold water again. Wrap your wet hair gently in a clean microfiber towel safely. You will feel the extreme slippery softness immediately upon touching it.
Mixing A Diy Hair Gloss Homemade
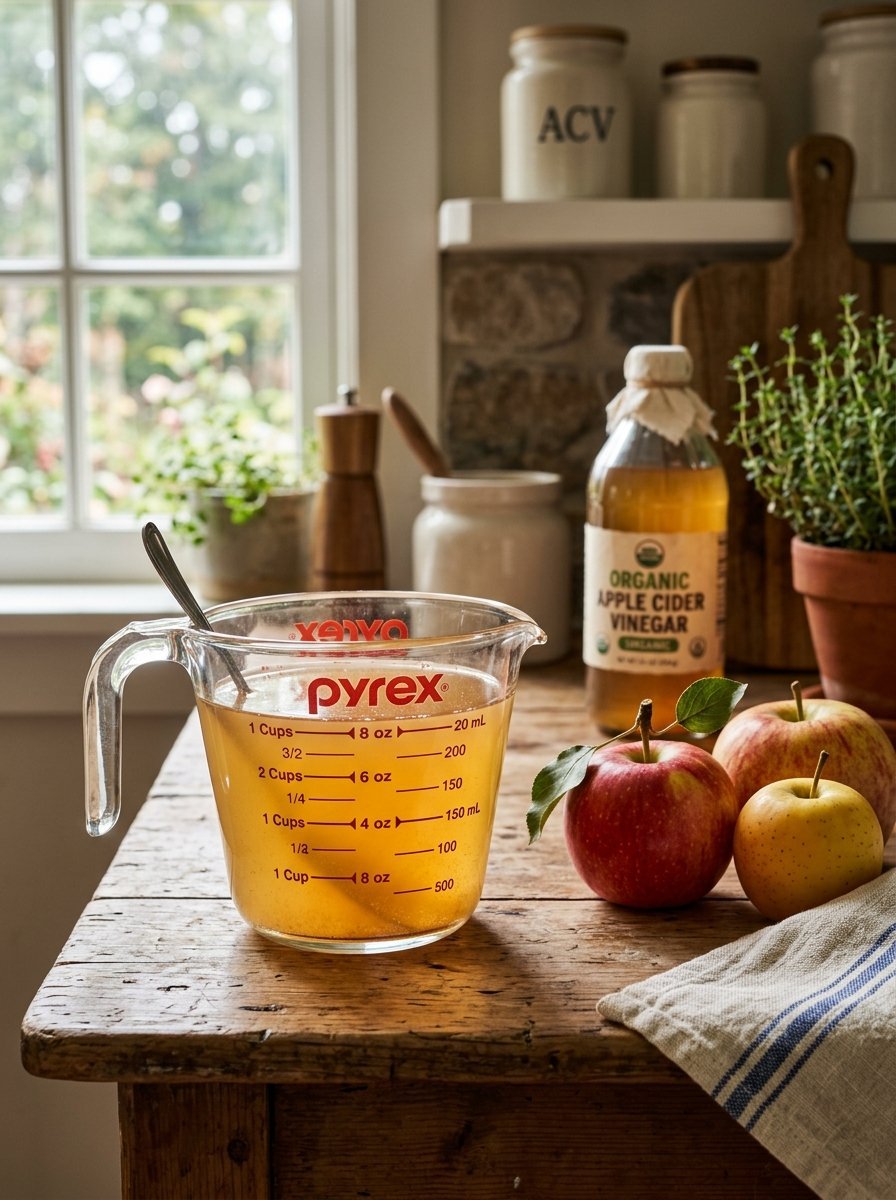
You can mix natural shine treatments right in your own kitchen. Apple cider vinegar acts exactly like a natural liquid gloss physically. The extreme high acidity forces the hair cuticle completely closed instantly. You must dilute the strong vinegar before pouring it on your head.
Mix two tablespoons of vinegar with one cup of cold water. Pour the exact mixture slowly over your clean wet hair. Let the acidic liquid sit for three short minutes. Rinse it out fully with cold tap water. The strong vinegar smell vanishes entirely when your hair dries completely. I do this specific vinegar wash twice a month faithfully. It strips away dull hard water mineral buildup extremely fast. You get massive pure shine for exactly two dollars.
Creating A Homemade Hair Mask For Shiny Hair
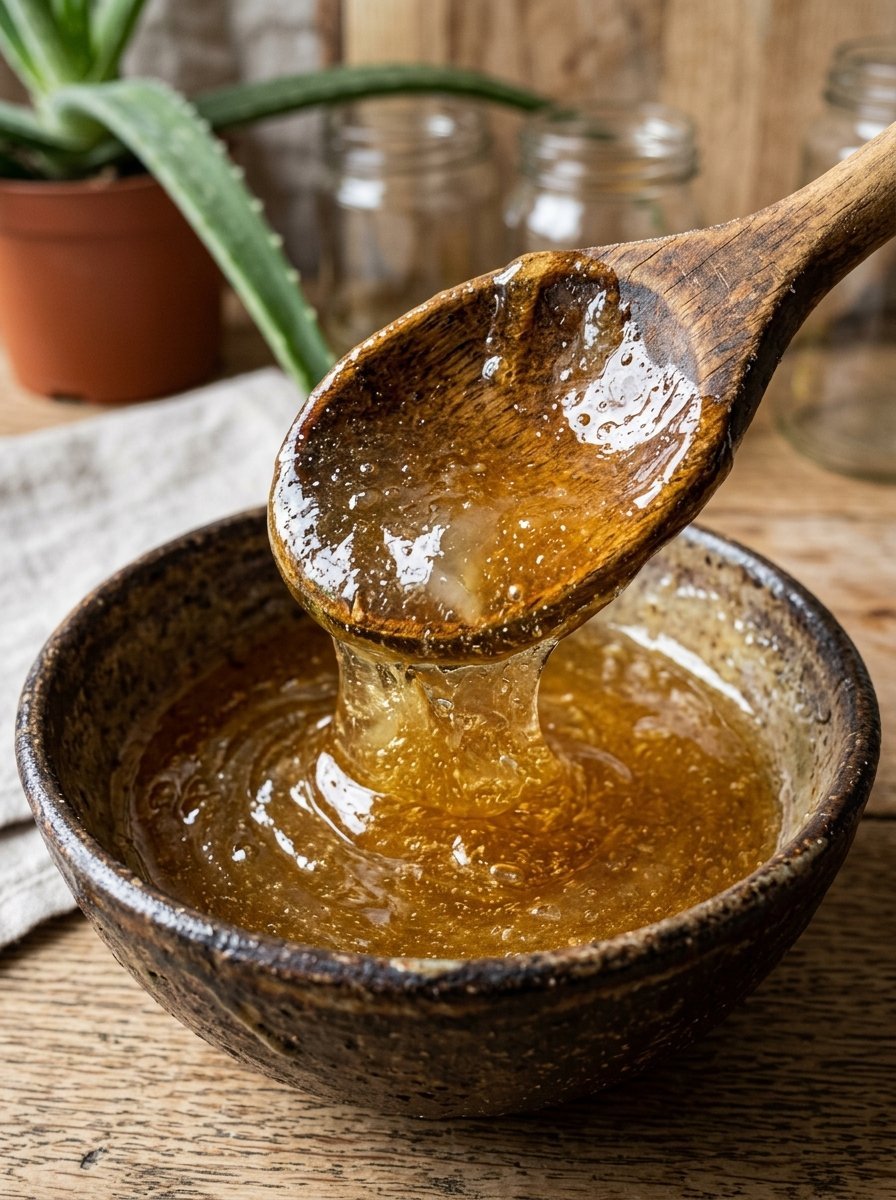
You need raw kitchen ingredients to build extreme moisture physically. A proper diy hair mask for glossy hair requires heavy natural oils. Scoop two large tablespoons of raw natural honey into a bowl. Mix in two tablespoons of pure clear aloe vera gel. Honey physically pulls moisture from the air directly into your dry hair.
Aloe vera perfectly smooths the rough outer layer of the strand. Put one single spoon of melted coconut oil into the bowl. Blend the entire sticky mixture until completely smooth visually. Apply this exact thick paste to your damp unwashed hair entirely. Let it sit for thirty full minutes under a warm towel. Wash it out thoroughly with a very gentle sulfate free shampoo. Your previously dry strands will feel like literal flowing silk.
Crafting Your Homemade Hair Care Routine
You need a strict weekly schedule to keep your hair flawless. Wash your hair exactly twice a week to preserve natural scalp oils. Use the raw honey homemade mask every single Sunday night strictly. Apply your professional clear gloss exactly once a month faithfully.
This specific routine helps you get silky hair naturally over time. I put a struggling client on this exact routine last winter. Her damaged hair grew four full inches in six short months. It stopped breaking off at the fragile ends completely. Consistency dictates your final hair health entirely. You cannot do a mask once and expect permanent glass hair forever. You must stick to the strict weekly calendar completely without failing.
Maintaining Shine Between Gloss Hair Treatments
Your daily physical habits determine how long the glass shine lasts. Protect your hair from extreme hot styling tools every single day. Spray Color Wow Dream Coat heavily on wet hair before blow drying. It creates a physical waterproof shield entirely around the fragile strand.
Sleep on a pure silk pillowcase every single night strictly. Rough cotton pillowcases cause terrible friction and break your hair physically. Apply exactly one drop of K18 molecular oil to your dry ends daily. It actively fixes broken chemical bonds deep inside the strand directly. I have noticed huge changes using this specific oil daily. Brush your hair very gently starting from the bottom entirely. Ripping a hard brush through wet hair destroys the protective cuticle completely.
How Do You Highlight Your Hair At Home
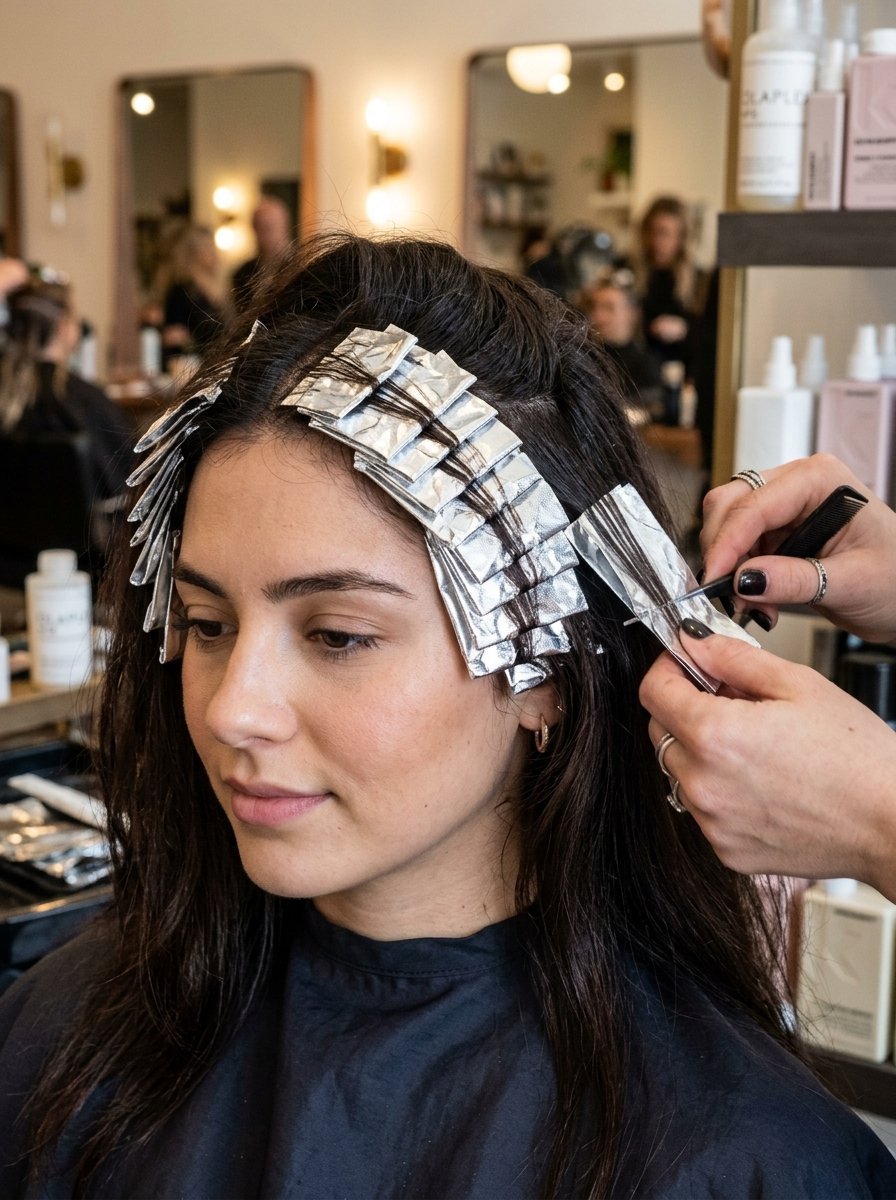
You must act with extreme caution when dealing with raw bleach. Painting blonde pieces at home requires severe patience and strict rules. Buy a very low volume cream developer to protect your strand physically. Mix the raw bleach powder until it looks like thick cake frosting.
Paint tiny micro pieces solely around your front face frame. Wrap the painted pieces gently in standard aluminum kitchen foil. Wash the harsh bleach out after exactly twenty short minutes. You absolutely must follow a raw bleach session with a sheer gloss. The raw bleach blows holes completely through your protective hair cuticle. The sheer gloss fills those dangerous holes and returns the visual shine immediately. Never skip the glossing step after painting blonde pieces ever.
Case Study One Recovering Damaged Strands
My sister bleached her dark hair pure platinum blonde last year. Her fragile hair felt exactly like dry crispy noodles physically. She literally could not brush it wet without it snapping completely. We started a completely strict intensive glossing routine immediately.
We used the Amika Flash Instant Shine Mask every single week faithfully. We applied a clear sheer Redken gloss exactly every three weeks. After two full months her hair felt completely normal and soft again. The clear liquid physically filled the massive missing gaps in her hair cuticle. She stopped using her blazing hot flat iron entirely during this recovery. The strict combination of heavy moisture and regular glossing saved her hair completely.
Case Study Two Fixing Brassy Brunette Hair

A close friend complained bitterly about bright orange tones in her brown hair. She completely hated the rusty metallic color in direct bright sunlight. We bought a dark ash tinted liquid gloss from the beauty store. The cool ash tint neutralized the terrible orange warmth instantly physically.
Her hair suddenly looked like a rich dark chocolate bar visually. She now does this exact twenty minute gloss treatment strictly monthly. It costs her exactly fifteen dollars instead of a massive hundred dollar salon bill. She applies the dark liquid exactly like regular shampoo in her shower. The deep tint washes out very slowly over four full weeks. She completely regained her hair confidence with one simple cheap box.
Case Study Three Maintaining Vibrant Red Hair
Red dye physically fades faster than any other artificial color globally. A regular client struggled keeping her bright copper hair perfectly vivid. She hated watching the expensive red dye wash directly down the drain weekly. We switched her to a pure copper pigmented home gloss entirely.
She applies the thick copper liquid exactly every two weeks in her shower. The vivid orange copper stays incredibly bright and totally flawless all month long. She saves massive money skipping the expensive monthly salon toner visits completely. Redheads absolutely need regular heavy glossing to survive the severe fading physically. She mixes a tiny drop of the copper gloss directly into her daily conditioner. This keeps the red stain perfectly fresh every single time she washes.
Picking Between A Thick Mask And A Liquid Gloss
You must understand the exact physical difference between these two treatments. A heavy thick mask delivers pure heavy moisture deep inside the inner core. A liquid gloss delivers pure reflective shine solely on the hard outside layer. You actually strictly need both treatments for perfectly flawless glass hair.
Do a heavy moisture mask on Sunday night faithfully. Do a sheer liquid gloss on Wednesday night faithfully. They work perfectly together to build extremely healthy strong hair physically. Pureology Color Fanatic mask gives intense deep internal hydration fast. Mix that exact hydration with a weekly clear gloss for massive external shine. You attack the severe dryness from the inside and the outside simultaneously.
Avoiding Common Gloss Hair Treatment Mistakes

You must strictly avoid these exact specific errors to get perfect hair. Never apply a liquid gloss to soaking wet dripping hair ever. The heavy water physically dilutes the gloss mixture completely and entirely. Your final color will look extremely patchy and completely uneven visually.
Never use a blazing hot flat iron right after rinsing a fresh gloss. Give the freshly sealed hair cuticle twenty four full hours to settle safely. Do not use strong clarifying shampoo right after applying a fresh gloss. The harsh strong soap literally strips the new expensive shine right off the strand. Wash your hands thoroughly with strong soap after handling dark tinted glosses. The dark dye will stain your fingernails completely brown for several entire days.
Frequently Asked Questions
How long does a hair glossing treatment actually last
Most home treatments last exactly about four full weeks physically. It depends entirely on your exact personal weekly washing habits. Washing your hair every single day fades the fresh gloss very fast. Washing exactly twice a week keeps it perfectly bright for a full month.
Does a sheer gloss cover gray hair completely
A sheer gloss absolutely does not cover silver gray hair fully. It blends harsh grays very slightly by depositing a sheer light tint. You need harsh permanent dye to completely hide silver gray roots perfectly. Gloss simply softens the harsh extreme silver contrast completely perfectly.
Can I sleep with a chemical gloss treatment in my hair
You absolutely never sleep with a chemical gloss wet in your hair. The active chemical ingredients literally stop working after thirty short minutes anyway. Leaving it wet overnight causes severe red itchy scalp irritation completely. Rinse the thick liquid out exactly when your digital phone timer rings.
Will a clear home gloss lighten my natural dark hair
A clear home gloss contains absolutely zero raw bleach or chemical lifter. It physically cannot lighten your natural dark base shade at all entirely. It only deposits pure clear reflective shine strictly on top of your existing color.
Final Thoughts On Home Glossing

You have the exact strict blueprint for absolute glass hair right now. You know exactly what specific physical tools to buy at the store today. You see exactly how to apply the slippery liquid correctly and perfectly safely. Stop paying massive extreme salon markups for a simple twenty minute sink service.
Buy a high quality sheer gloss and try it in your bathroom tonight. Your dull dry hair will reflect light beautifully and perfectly tomorrow morning. Follow the exact strict timeline rules I gave you completely. Mix the exact homemade honey mask to build massive internal moisture physically. Take total absolute control of your personal hair health exactly right now. You will never cry over dry rough straw hair ever again.

Sarah Mitchell — Founder & Editor-in-Chief
Sarah Mitchell is the founder and editorial voice behind Hair Level Up. A licensed cosmetologist with more than 15 years of experience, she has styled A-list celebrities for editorial shoots and red carpets, with work featured in Vogue, Elle, and Harper’s Bazaar. Early in her career, she trained under the legendary hairstylist Oribe in New York, an apprenticeship that still shapes her editorial eye today. Sarah founded Hair Level Up in 2020 after one bad haircut convinced her that women deserved a destination that felt like a magazine, taught like a stylist, and inspired like an art gallery. She oversees every story from concept to publication, guided by a simple belief: a good story teaches you something, but a great one makes you feel beautiful while it does.