How to Prep Hair Before a Major Color Change
I remember staring at my bathroom mirror three years ago feeling totally defeated. My dull blonde ends felt like dry brittle straw. I wanted a rich dark chocolate shade immediately. I skipped all preparation routines entirely. My strands absorbed the dark pigment unevenly. I walked outside with muddy grey patches everywhere. You cannot rush a chemical transformation. Your strands need serious physical preparation first. I learned this lesson through terrible personal mistakes. I spent hundreds of dollars fixing my broken strands at a local salon. You deserve a flawless glossy finish right away. Chemical changes require a healthy physical canvas. You must repair your hair cuticle completely before opening a single box of dye. I will show you exactly what to do beforehand. Your next color session will go perfectly.
You will get a strict physical timeline for color preparation here. I outline exact routines starting four weeks before your dye day. You will spend around forty dollars on proper hydration masks. I list specific tools you need for safe application. You will see exactly how to wash and treat your strands. We cover both subtle shifts and major bleach sessions. Your strands will survive the chemical shock beautifully. You skip the terrible damage and keep your length intact. I share exact salon secrets for home application. You will confidently execute these dye hair tips yourself. Your friends will assume you paid a professional colorist.
Stop Heat Styling Four Weeks Early
Why Hot Tools Melt Your Cuticle
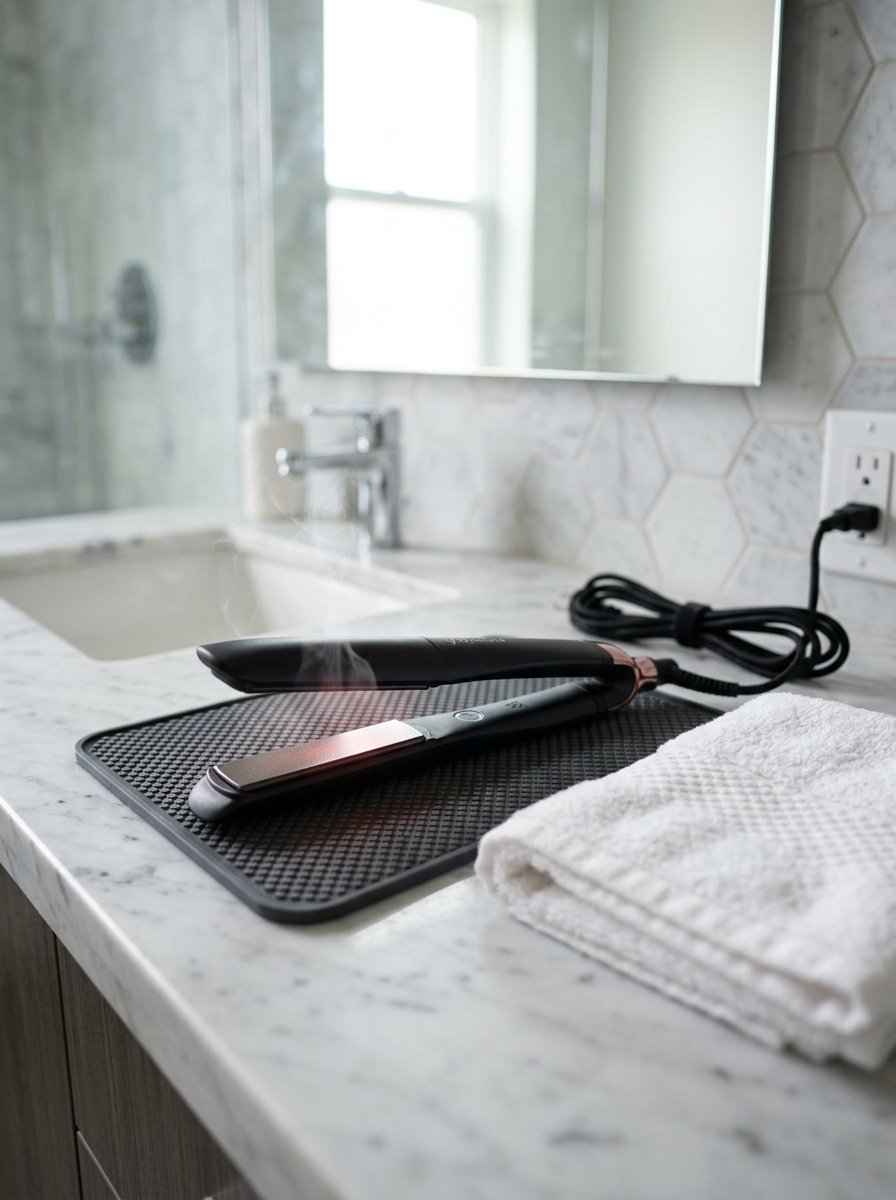
Your hair cuticle resembles a physical shingled roof. Extreme heat forces these shingles upward permanently. Flat irons literally boil the internal moisture completely. Chemical dye requires a smooth closed cuticle to work evenly. Damaged open shingles absorb artificial pigments entirely too fast. This creates dark muddy patches across your mid-lengths. I learned this through a terrible personal mistake previously. I flat ironed my hair daily before a blonde lightening session. My ends snapped off instantly inside the aluminum foil. You must put down the hot tools right now. Give your strands a strict four-week vacation. This mandatory break heals the physical structure entirely.
Air Drying for Healthier Strands
You must embrace your natural texture temporarily. Air drying preserves the internal hydration levels perfectly. Wash your hair in the evening instead of the morning. Squeeze the excess water out with a soft cotton t-shirt. Traditional bath towels rough up the delicate cuticle harshly. I gently scrunch a light leave-in conditioner through my wet ends. You can braid damp hair for heatless overnight waves. I have noticed clients fighting their natural texture constantly. They ruin their canvas before the dye even touches their head. Air drying feels frustrating initially. Your hair will thank you with pure glass shine later.
Trimming a New Hair Cut Style
Dead split ends will never hold artificial color properly. The frayed physical tips will turn completely muddy and dark. You must visit a professional for a fresh trim first. I strictly advise getting your new hair cut style before coloring. Cutting the dead weight off guarantees an even color application. Short shag haircuts look incredible with fresh multidimensional highlights. You save money by using less dye on shorter strands. Do not trim your own hair with dull kitchen scissors ever. Dull blades crush the hair shaft and cause massive splitting. Invest fifty dollars in a proper professional haircut beforehand.
Strip Hard Water Minerals Completely
The Danger of Hidden Rust
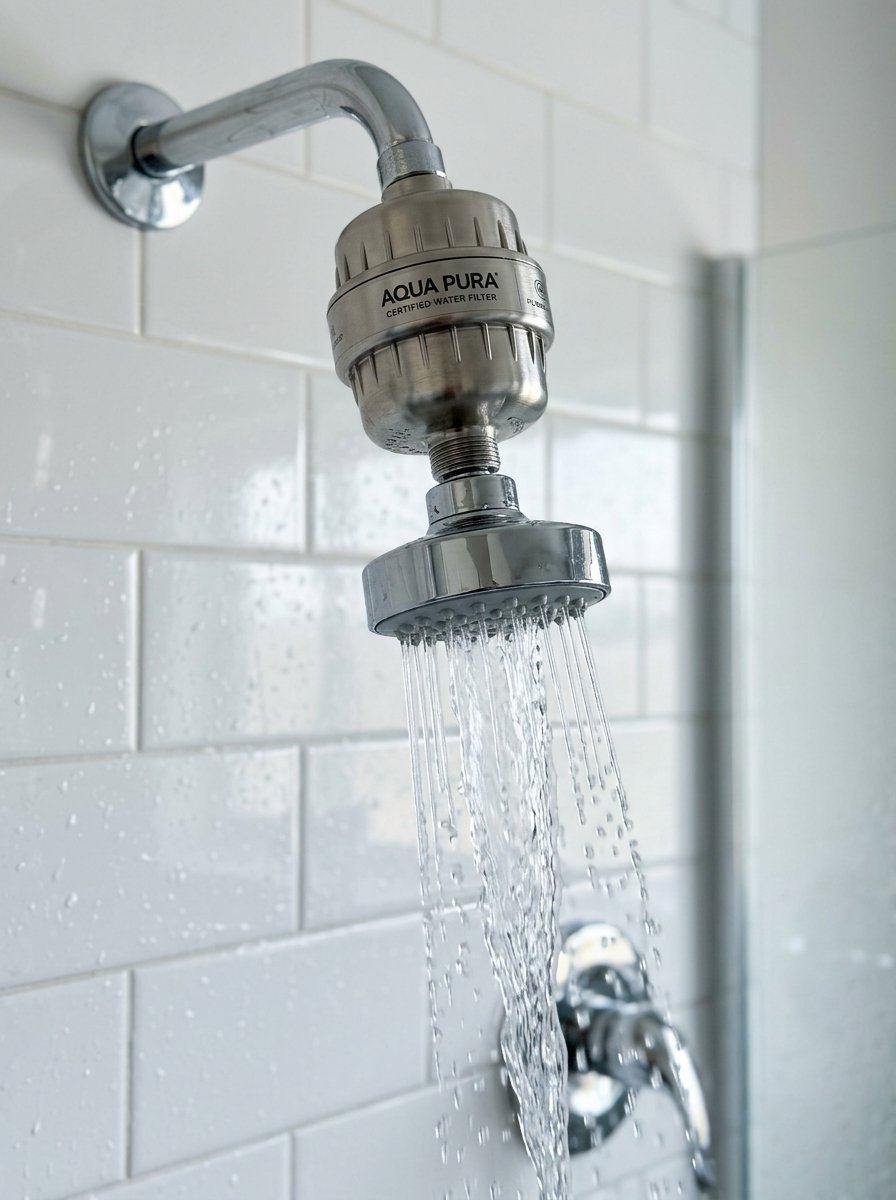
Your home shower water completely dictates your hair health. Metal pipes deliver heavy rust and calcium directly onto your head daily. These heavy metals stick tightly to your highly porous strands. Chemical bleach reacts violently with hidden rust and copper buildup. The physical reaction literally melts the hair off your scalp. You cannot see these microscopic minerals with your naked eye. I watched a client suffer severe chemical burns from hidden well water minerals. The bleach started smoking inside the foil packets instantly. You must strip these invisible metals away strictly. Your home hair dye will fail entirely otherwise.
Clarifying Washes for Clean Slates
You need a strong physical cleanser to strip the stubborn mineral buildup. Buy a high-quality clarifying shampoo from a beauty supply store. Wash your hair with this strong soap twice a week. Scrub your scalp aggressively with your bare fingertips safely. The harsh soap lifts the heavy waxes and metallic films away. Your strands will feel incredibly squeaky and slightly stiff afterward. This stiffness means the physical canvas is finally perfectly clean. Do not use clarifying shampoo within forty-eight hours of your dye session. You need natural scalp oils to act as a protective barrier later.
Installing a Proper Shower Filter
You must stop the heavy metals from returning entirely. Install a filtered shower head in your bathroom today. You can buy a highly rated filter for forty dollars easily. It takes exactly five minutes to screw onto the shower pipe. The physical filter traps the rust before it touches your head. I install a fresh filter cartridge every three months strictly. My blonde clients swear by this mandatory bathroom upgrade. Their icy tones stay perfectly bright for months. Your glossy hair will survive much longer with clean filtered water. Stop washing your expensive color down the drain with rusty water.
Start a Deep Moisture Routine Weekly
Hydration Versus Protein Treatments
Your strands need intense physical preparation to survive harsh chemicals. You must understand the difference between pure moisture and heavy protein. Raw bleach literally eats the natural protein inside your hair shaft. Thick hydrating masks push pure water deep inside the dry cuticle. You need a strict balance of both elements exactly. I alternate between a heavy protein mask and a pure moisture mask weekly. Too much protein makes the physical strand brittle and stiff. Too much moisture makes the hair feel weak and overly stretchy. You must alternate them to build total physical strength safely.
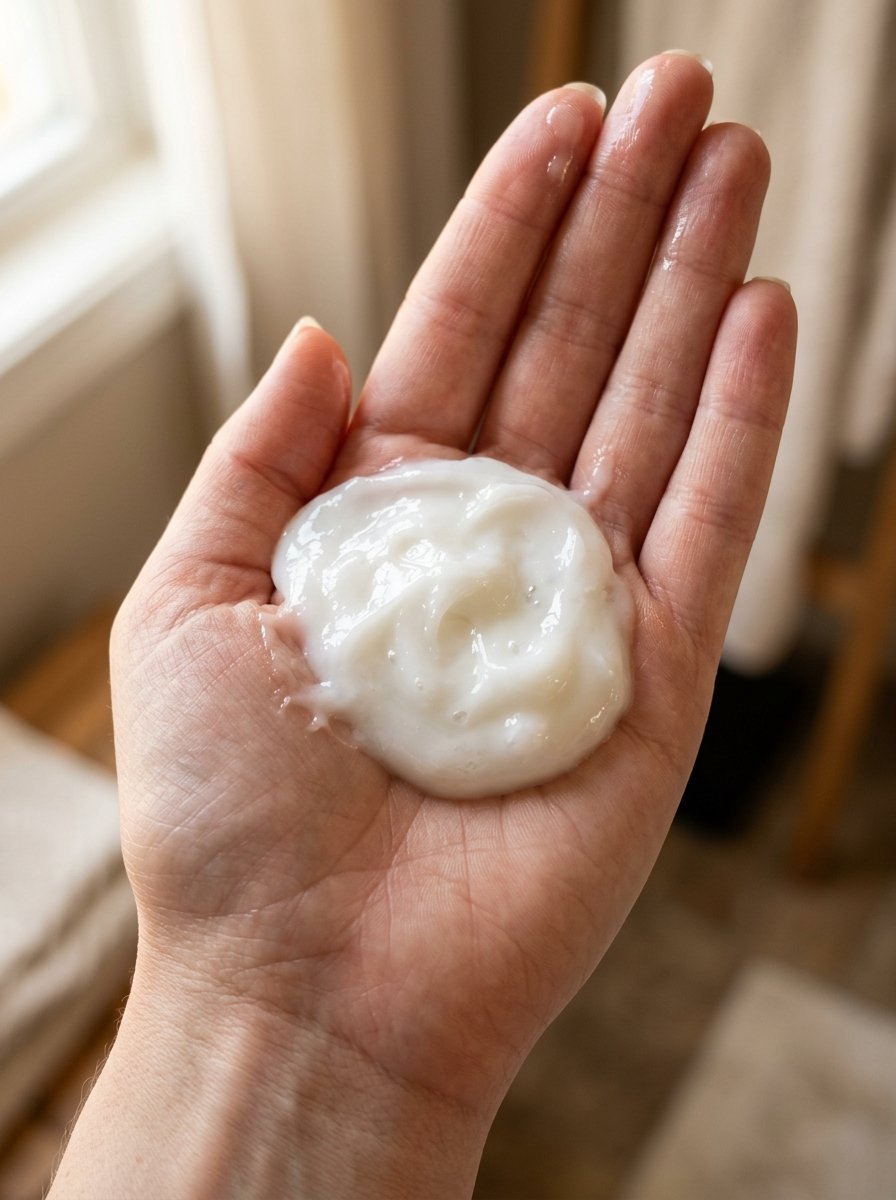
Applying Masks for Glossy Hair
You must apply these heavy creams correctly to see actual changes. Wash your hair with a gentle shampoo first. Squeeze every single drop of water out with a towel. Apply a generous scoop of the thick mask strictly to your ends. Do not put heavy cream directly on your scalp. Use a wide-tooth plastic comb to distribute the cream evenly. Set a physical timer for exactly twenty minutes. Rinse the heavy cream out with freezing cold water entirely. The freezing water locks the pure moisture inside the physical strand. You will feel the extreme slippery softness immediately.
Overnight Oil Soaks
Dry scalps burn terribly under harsh chemical hair dyes. You must protect your skin with heavy natural oils. I coat my entire scalp in pure jojoba oil the night before a color session. Massage the thick oil deeply into your hair follicles. The oil creates a thick physical barrier against the burning chemicals. Raw bleach will still lift through the heavy oil perfectly. I have tried coloring my hair with a dry itchy scalp previously. The chemical burning sensation felt completely unbearable within five minutes. Oil prevents these terrible chemical burns completely.
Gather Professional Grade Tools First

Bowls and Brushes Over Bottles
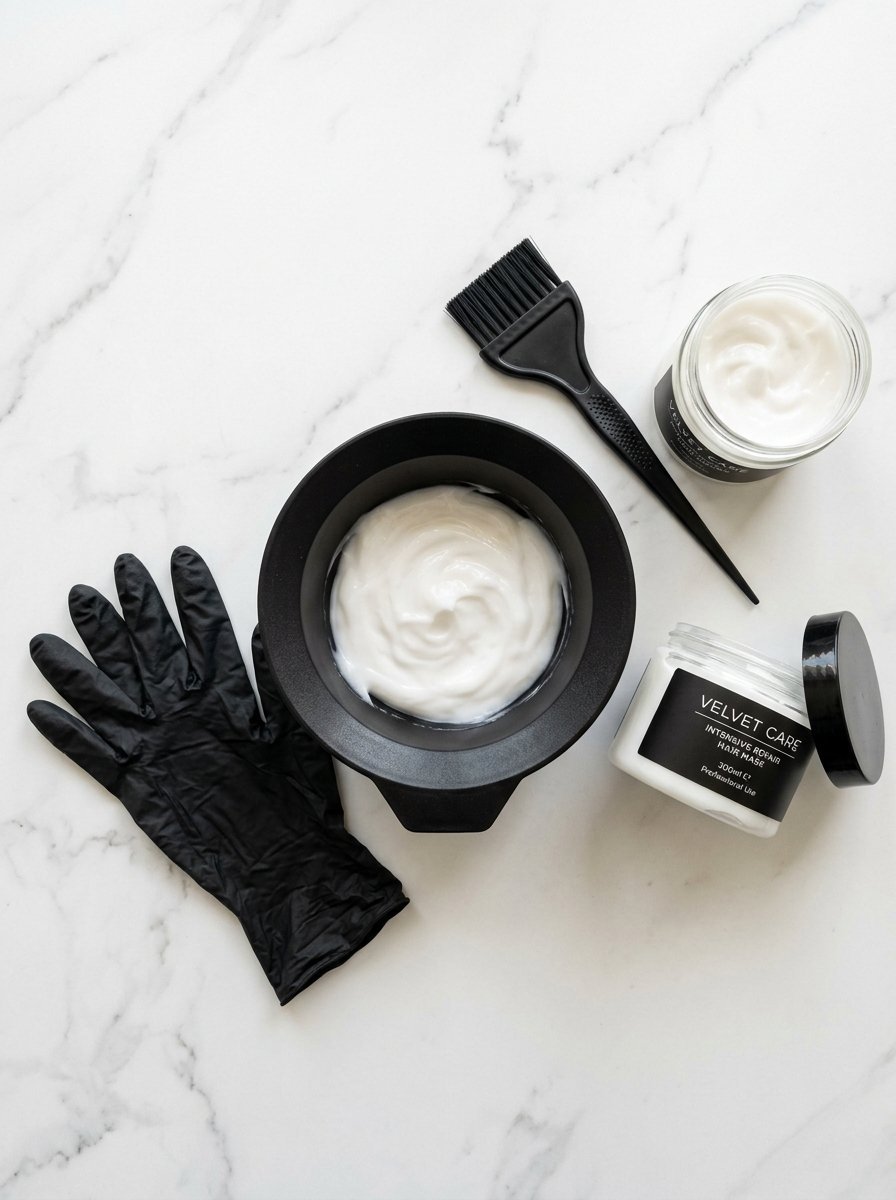
You absolutely cannot use the cheap plastic squeeze bottle included in the box. Squeeze bottles guarantee a terribly patchy and completely uneven application. You must buy a professional plastic mixing bowl and a nylon application brush. These physical tools cost exactly five dollars at the beauty supply store. The stiff brush physically forces the dye deep into the hair strands. You paint the liquid on exactly like a professional salon artist. I throw away the plastic squeeze bottles immediately. Proper tools dictate the entire success of your coloring session. You cannot fake a professional finish with cheap plastic bottles.
Protecting Your Skin and Clothes
Hair dye permanently stains everything it touches instantly. You must physically protect your bathroom environment entirely. Buy a cheap dark towel strictly for your home dye sessions. Wear a dark button-down shirt that you do not care about ruining. You can easily unbutton the shirt without pulling it over your wet dyed head. Lay thick plastic garbage bags flat across your bathroom sink. Wipe up any physical spills on the floor immediately with a wet paper towel. I completely ruined a white porcelain sink with black dye once. Proper physical preparation saves you massive cleaning headaches later.
The Best At Home Hair Dyes
You must carefully select a high-quality physical product entirely. I strictly avoid cheap drugstore metallic dyes. They contain unpredictable salts that ruin your hair structurally. Buy professional-grade color tubes and separate developer liquids instead. Sally Beauty Supply sells completely safe salon-quality liquid dyes. Wella Color Charm and L’Oreal Technique remain the best at home hair dyes available. You get massive pure shine without the terrible metallic damage. Professional tubes cost slightly more but save your hair completely. Ask the store clerk to help you match the developer volumes perfectly.
Plan Your Hair Colour Design Safely
Choosing Realistic Dimensional Color
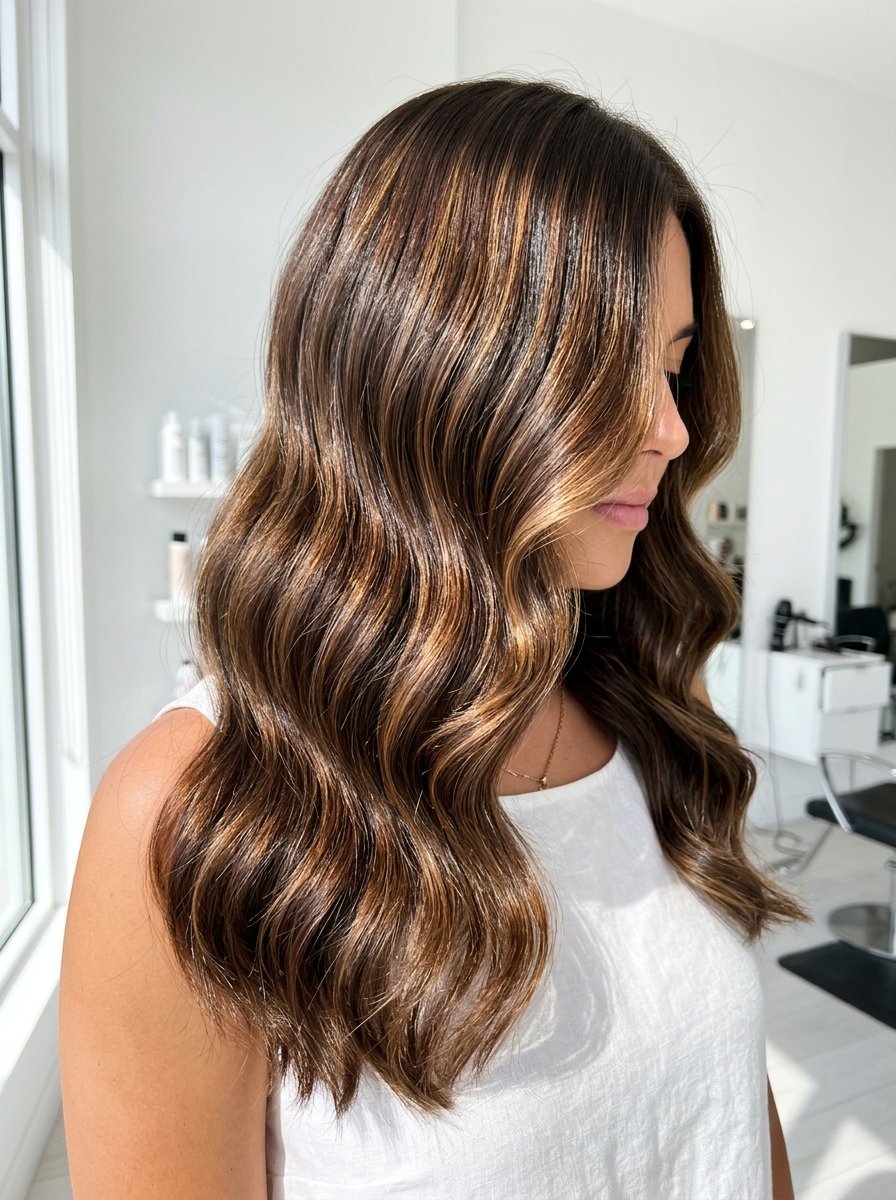
You must manage your physical expectations perfectly beforehand. You cannot go from jet black to platinum blonde in one day. Box dye hair color at home lifts a maximum of two shades safely. You must choose a color extremely close to your current natural level. I advise choosing a shade one level lighter than your exact goal. Home dyes always pull much darker than the picture on the cardboard box. Dimensional color requires multiple different dye formulas painted precisely. Beginners should strictly stick to one solid all-over glossy hair color initially. Master the basic solid application before attempting complex painted highlights.
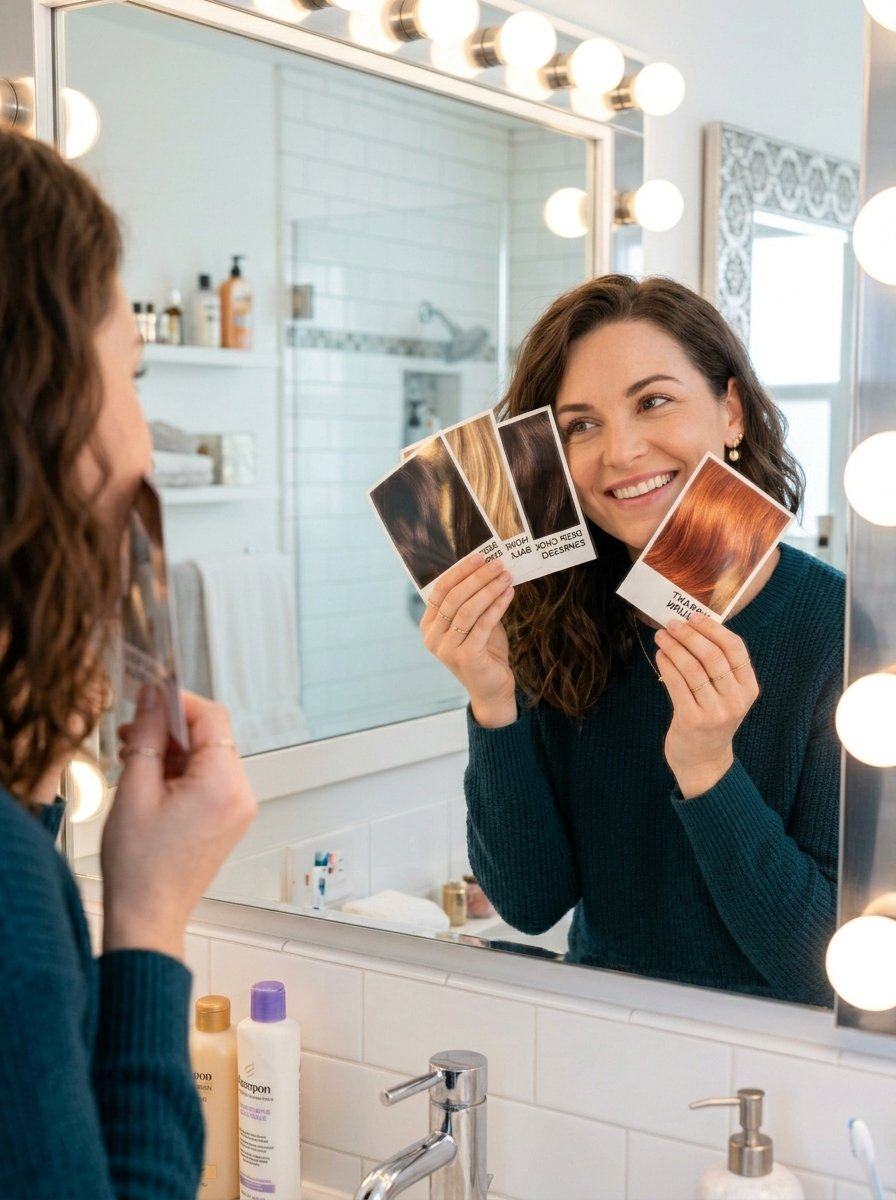
Mapping At Home Hair Color Ideas
You need a clear physical plan before mixing the active chemicals. Find three reference pictures of your exact dream color. Look specifically at the lighting in the physical photographs. A rich copper looks totally different indoors versus outdoors. Save these hair dye at home ideas directly on your phone. Tape the reference pictures to your bathroom mirror physically. You will stare at them while painting the dye onto your head. This keeps your physical application totally focused and entirely intentional. I see women panic halfway through the application constantly. A visible reference picture stops the sudden panic instantly.
Transitioning from Dark to Light
Hair bleaching at home remains the most dangerous chemical session possible. You must proceed with extreme physical caution. You cannot put raw bleach over old dark box dye ever. The chemical reaction literally turns the hair bright orange instantly. You must use a chemical color remover first to strip the dark dye. I strictly advise leaving massive bleaching sessions to professional salon stylists. If you must bleach at home, use a low volume twenty developer strictly. Paint the bleach onto your dark ends first. The roots lift twice as fast due to extreme body heat.
Perform a Non-Negotiable Strand Test
Testing for Chemical Reactions
You must test the active chemicals on a hidden piece of hair first. This remains the most skipped step in home coloring entirely. A strand test completely prevents massive chemical disasters. Mix a tiny dime-sized amount of dye and developer together. Isolate a tiny hidden physical strand behind your ear. Paint the chemical mixture tightly onto that single strand. Check the physical strand exactly ten minutes later. If the hair feels boiling hot or starts smoking, wash it off immediately. This physical reaction means metallic salts are currently destroying your cuticle.
Checking the Final Color Tone
The strand test shows you exactly what color you will actually get. You do not have to guess blindly and pray for a good outcome. Leave the test dye on for the full thirty minutes recommended. Rinse the single strand with cold water and dry it completely. Look at the dried strand in bright natural sunlight. You might realize the shade looks too dark or completely muddy. I saved a client from a terrible green tint by demanding a physical strand test first. We changed the formula completely before painting her whole head.
Timing the Actual Application
The strand test acts as your exact physical timing guide. You will see exactly how long your porous hair takes to absorb the dye. Fine fragile hair absorbs dark pigment in exactly ten minutes. Thick coarse hair requires the full forty minutes to absorb the dye completely. Write the exact timing down physically on a piece of paper. You will follow this strict timing rule during the full application. Do not guess the timing blindly ever. Over-processing the dye causes terrible dryness and extreme breakage.
Protect Your Scalp and Skin Zones
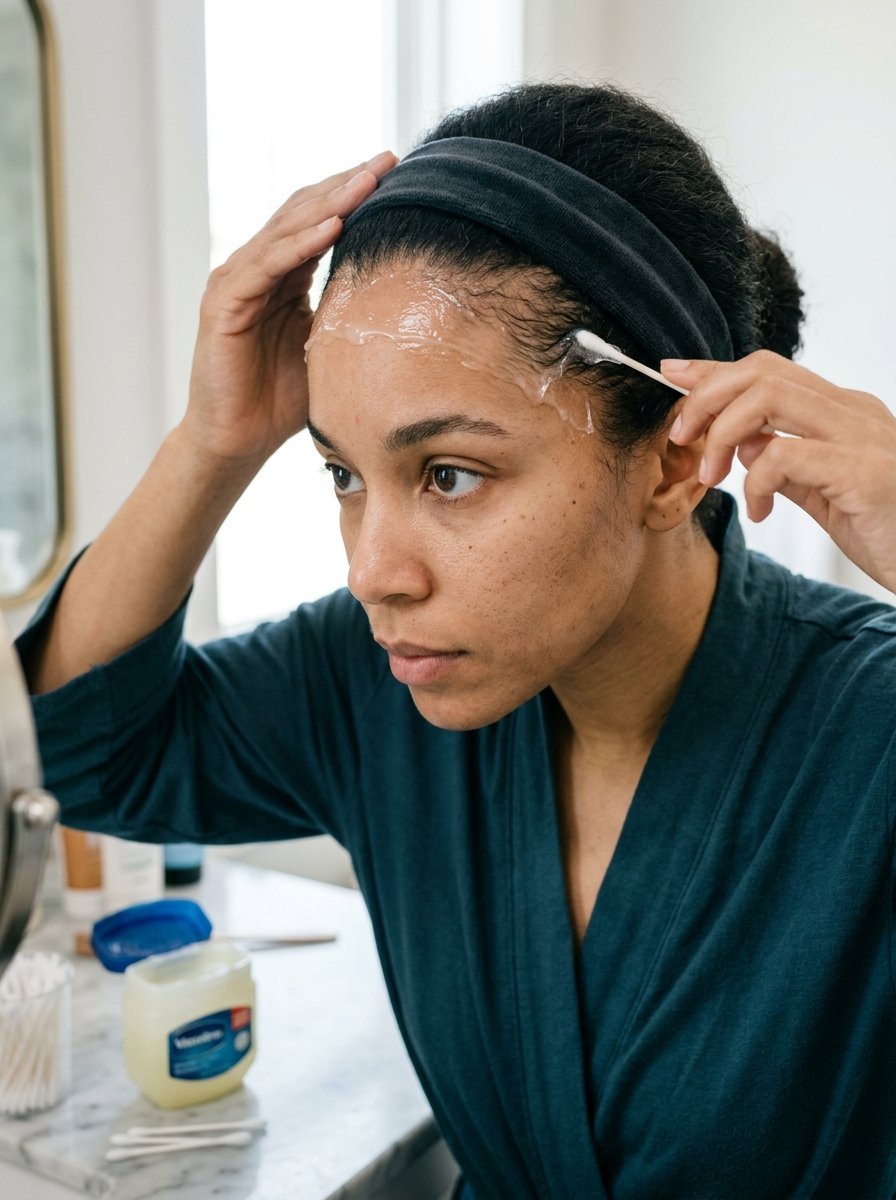
Creating a Barrier Cream Shield
Dark dye physically stains the skin on your face instantly. You must build a thick physical wall to protect your forehead. Scoop a heavy glob of pure petroleum jelly out of the jar. Smear a thick visible line entirely around your physical hairline. Coat the tops and backs of your ears heavily. Swipe a thick layer precisely down the back of your neck. I walked around with a black stained forehead for an entire week previously. I scrubbed my raw skin until it bled trying to remove the dye. The thick jelly completely blocks the dye molecules from penetrating the skin.
Wearing Proper Gloves
You absolutely must protect your hands from the active chemicals. The cheap plastic gloves included in the box rip instantly. They slide right off your hands during the slippery application. Buy a box of tight black nitrile gloves from the pharmacy. These physical gloves fit skin-tight and give you total physical control. You can feel the exact hair strands through the thin rubber material. I wear exactly two pairs of gloves layered on top of each other physically. I peel the dirty top layer off before touching the bathroom sink. This keeps the sink completely perfectly clean.
Managing Bathroom Spills
You will drop wet dye onto the floor eventually. You must clean it up the literal second it hits the physical tile. Keep a wet soapy paper towel sitting exactly on the counter. Wipe any stray chemical drops away immediately. Hair dye chemically stains porous bathroom grout permanently. I dropped red dye onto a white rug and ruined it instantly. Stand entirely still while painting the slippery chemicals onto your head. Do not walk around your house with wet dye on your head ever.
Map Out Your Sectioning Strategy
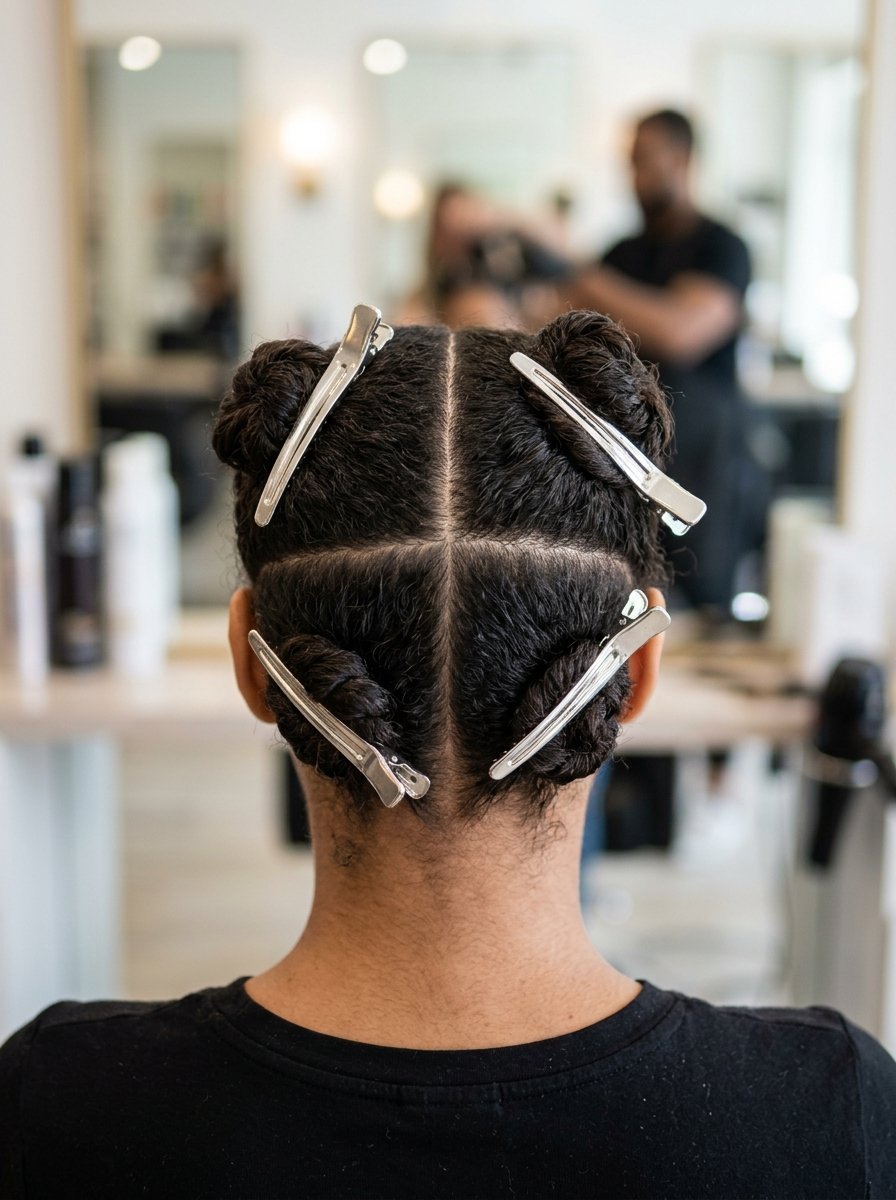
Slicing the Hair into Quadrants
You cannot just rub the wet dye wildly into your head. Coloring your own hair requires extreme physical organization. You must slice your head into four exact quadrants perfectly. Part your hair straight down the physical middle from forehead to neck. Part it again from the left ear exactly across to the right ear. You now have four completely equal physical sections. Twist three of these sections up and clip them tightly. Leave one front quadrant hanging completely loose. This strict organization prevents you from missing large patches entirely.
Handling Short Shag Haircuts
Short layers require a slightly different physical approach entirely. You cannot twist tiny short layers up with heavy plastic clips. Use flat metal duckbill clips to pin the short layers down flat. Paint the wet dye onto the longest physical layers first. The short layers at the crown process much faster due to scalp heat. I paint short shag haircuts starting exactly at the bottom neckline. You work your way physically up to the top crown very slowly. This guarantees an even processing time for the entire layered haircut.
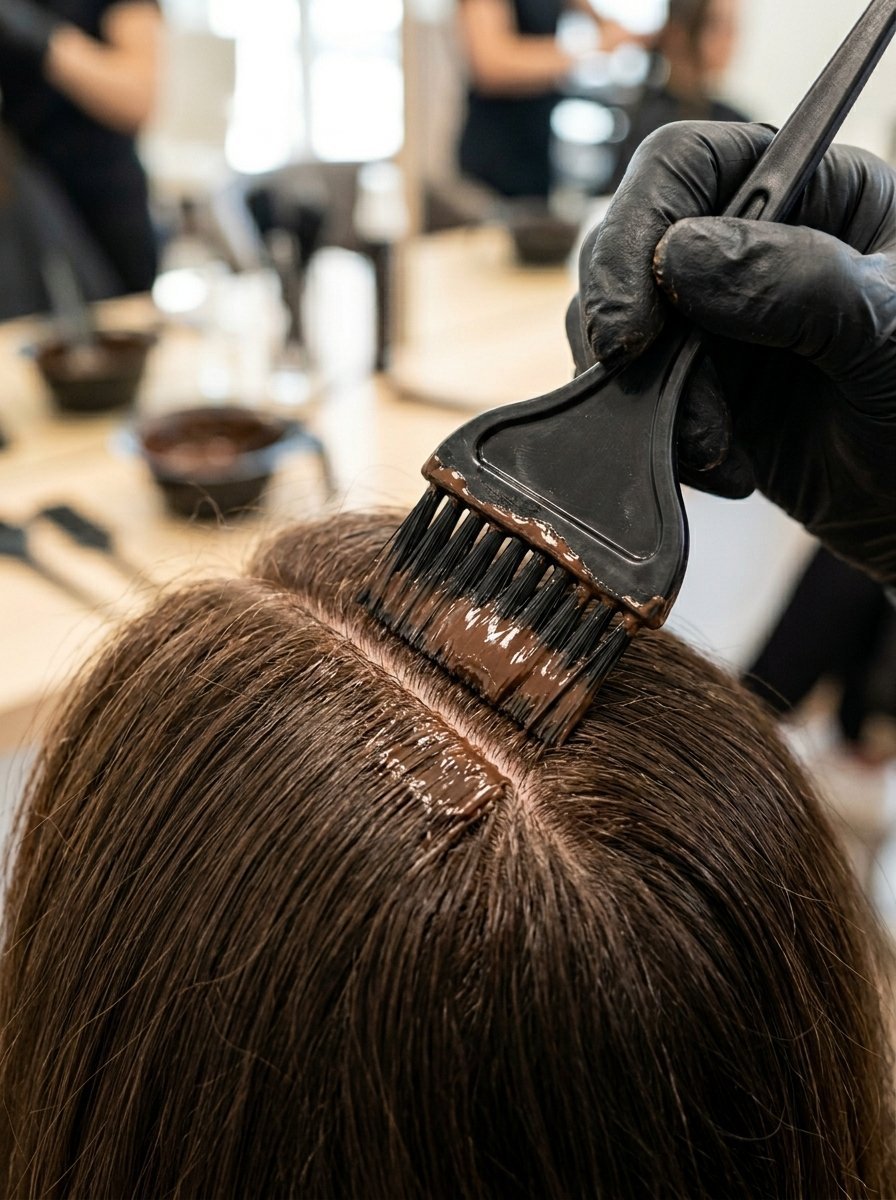
Working from Back to Front
Always start painting the chemicals exactly at the back of your head. The hair at your neckline is physically the darkest and thickest. It requires the longest chemical processing time entirely. The fine baby hairs around your face are extremely porous and fragile. They will absorb the dark dye instantly and turn completely black. Leave the delicate front hairline completely untouched until the very end. I have seen clients paint the front pieces first constantly. They wash the dye out and discover completely black front pieces contrasting with light brown backs.
How To Box Dye Your Hair At Home
Mixing the Formula Correctly
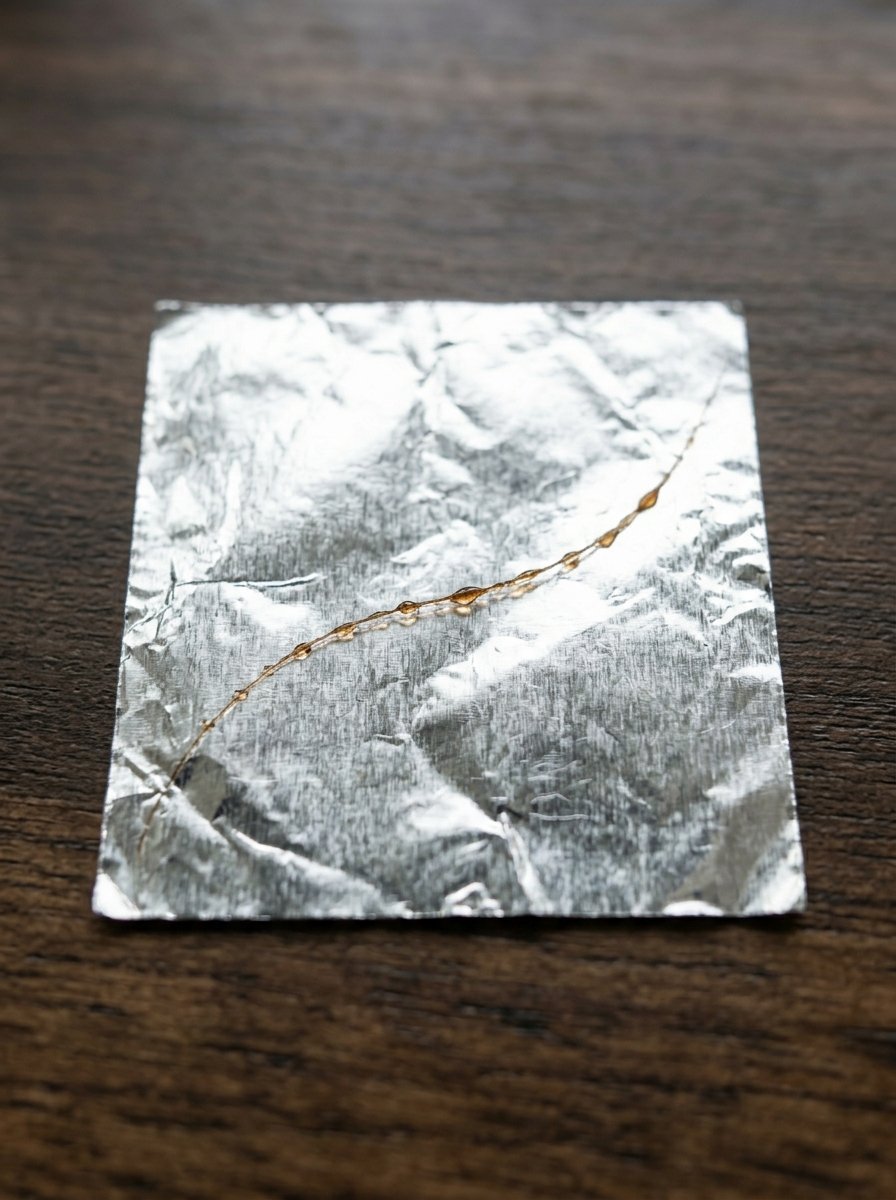
You must mix the active chemicals with total physical precision. Pour the developer liquid into your plastic mixing bowl first. Squeeze the thick color cream perfectly into the clear liquid. Use your nylon brush to stir the mixture aggressively. You must blend it until it looks exactly like smooth thick pudding. Leave zero physical lumps in the plastic bowl. Any unmixed lumps will create a terrible dark spot on your hair. I strictly advise mixing the chemicals right before you apply them. The chemical oxidation starts the exact second the two liquids touch.
Saturating the Strands Evenly
You must use massive amounts of wet dye for a flawless finish. One single box of dye barely covers shoulder-length hair perfectly. Buy exactly two boxes if your hair touches your collarbones physically. Buy exactly three boxes if your hair reaches your middle back entirely. You must physically drown every single strand in the wet chemical mixture. Dry patches will remain your old color and look entirely patchy. I massage the wet slippery dye deep into the strands with my gloved fingers. Total physical saturation guarantees pure glossy hair finishes.
Coloring Your Own Hair Safely
Start painting the dye exactly at your dark physical root line. Drag the wet brush down the hair shaft exactly two inches. Move quickly and methodically through the four clipped sections. Once the roots are completely saturated, apply dye to the mid-lengths. Pull the remaining wet dye through your dry porous ends absolutely last. Use a wide-tooth plastic comb to drag the slippery dye evenly downward. This physical combing ensures the color gradient looks completely perfectly blended. I constantly check my bathroom mirrors to ensure total coverage.
Lock in Glossy Hair Color Afterward

Rinsing with Freezing Water
The chemical processing timer finally rings loudly. You must step into the shower immediately. Turn the water temperature to freezing cold entirely. Freezing cold water snaps the open hair cuticle completely shut instantly. It physically locks the new artificial dye molecules tightly inside the strand. Wash the slippery chemicals out until the shower water runs completely clear. Hot water melts the new color right off the physical strand entirely. I strictly wash my colored hair in freezing water permanently. This keeps the red and copper tones incredibly bright for months.
Sealing the Cuticle Tight
You must apply a thick heavy conditioner immediately after rinsing the dye. The newly dyed cuticle needs extreme physical moisture to stay completely smooth. Apply the heavy conditioning mask included in the dye box generously. Let the thick cream sit for exactly five full minutes. Rinse the cream out completely with freezing cold water again. Wrap your wet head gently in a clean soft microfiber towel physically. You will feel the extreme slippery softness immediately upon touching the wet strands.
Avoiding Regular Shampoo Early
Do not wash your freshly dyed hair with shampoo for exactly seventy-two hours. The artificial dye molecules need three full days to settle physically inside the cortex. Washing the hair too early strips the expensive color completely down the drain. Use dry shampoo powder heavily at your physical roots if they look oily. When you finally wash the hair, use a gentle sulfate-free soap strictly. I strictly tell my clients to buy Pureology Hydrate shampoo constantly. It physically cleans the scalp without stripping the delicate new tones entirely.
Frequently Asked Questions
How many days should I wait to wash my hair before coloring?
You should wait exactly forty-eight hours after your last shampoo session strictly. Your scalp needs two full days to build up a thick natural oil layer. This physical oil layer completely protects your skin from harsh chemical burns entirely. Do not exercise heavily or sweat profusely during these two days. You want a perfectly clean but naturally protected physical canvas.
Can I dye my hair if it has coconut oil in it?
You absolutely can apply box dye over pure natural coconut oil physically. The active chemical developer easily pushes straight through the natural physical oil barrier. The heavy oil actually protects your delicate physical ends from extreme chemical damage perfectly. I specifically coat my dry ends in pure coconut oil ten minutes before painting the dye.
What is the best way to dye your hair at home safely?
The safest routine requires extreme physical preparation and strict timing strictly. You must perform a physical strand test before painting the entire head entirely. You must use a plastic mixing bowl and a stiff nylon brush physically. You must slice the hair into four equal quadrants for totally even application. Never rush the physical mixing or the delicate sectioning stages.
How to dye hair at home for beginners without making a mess?
You must protect your bathroom environment strictly before opening the chemical bottles. Lay thick plastic trash bags directly over your bathroom sink entirely. Wear a dark junk shirt and keep wet soapy paper towels nearby instantly. Smear a thick physical layer of petroleum jelly around your entire hairline perfectly. Wear tight black nitrile gloves exactly to keep your hands completely clean.
Does hair bleaching at home ruin your curl pattern?
Raw chemical bleach absolutely destroys the physical bonds that hold your natural curls together. Extreme bleaching will make your tight bouncy curls fall completely flat and frizzy physically. You must use a heavy physical bond builder like Olaplex Number 1 mixed into the bleach. I strictly advise girls with tight natural coils to seek a professional salon stylist entirely.
How do I fix a patchy box dye hair color at home application?
You must wait exactly one full week before attempting to fix a terrible patchy application. Wash the hair with a strong harsh clarifying shampoo three times strictly. Buy a semi-permanent physical gloss that is one shade darker than the patchy spots. Paint the dark gloss entirely over the whole head to blend the terrible mistakes physically.
Should I wet my hair before applying home hair dye?
You must apply permanent chemical box dyes directly to bone-dry hair strictly. Water physically dilutes the active chemical developer and completely ruins the lifting power entirely. You apply semi-permanent sheer glosses to slightly damp towel-dried hair strictly. Read the exact physical instructions printed clearly on the cardboard box before starting entirely.
How do I maintain dimensional color without fading?
You must switch your shower temperature to freezing cold water permanently physically. Buy a specific color-depositing conditioner that matches your exact tone perfectly. Use this physical color mask exactly once a week to refresh the fading tones perfectly. Stop using blazing hot flat irons and wear a physical hat outdoors in direct sunlight.
Can I color my hair immediately after getting a new hair cut style?
You absolutely should color your hair immediately after receiving a fresh physical trim entirely. The dead split ends are completely gone and the cuticle sits perfectly healthy physically. The wet chemical dye will absorb completely evenly across the fresh blunt ends strictly. I specifically advise my clients to book their color session the day after a physical haircut.
What happens if I leave the dye on too long?
Permanent chemical dyes technically stop depositing dark pigment after exactly forty-five minutes physically. Leaving the chemicals sitting wet on your head simply burns your physical scalp entirely. The harsh heavy ammonia continues to dry out the physical hair shaft completely. Set a strict digital timer on your phone and rinse it out the exact second it rings.
Do I need a clarifying shampoo before a gloss treatment?
You absolutely must use a strong clarifying shampoo exactly before a sheer gloss treatment perfectly. The sheer gloss cannot physically stick to a hair strand coated in heavy silicone waxes. The harsh clarifying soap completely strips the physical canvas perfectly completely naked. Apply the sheer gloss to the perfectly clean damp hair for pure mirror shine finishes.
Why did my glossy hair color turn dull after one wash?
You likely used a terrible harsh drugstore shampoo loaded with cheap heavy sulfates entirely. Sulfates act exactly like cheap dish soap and strip the delicate gloss completely down the drain. You also likely washed the freshly dyed hair in blazing hot water physically. Switch to a gentle sulfate-free soap and strictly use freezing cold water permanently physically.
Is it safe to mix two different at home hair color ideas together?
You can strictly mix two different physical tubes of professional salon dye perfectly together. You cannot mix two different brands of cheap drugstore box dye together ever entirely. The differing chemical developers will react violently and physically burn your hair completely off. I strictly stick to mixing different shades perfectly within the exact same brand line safely.
How do I remove dark dye stains from my bathroom sink?
You must mix thick baking soda and pure white vinegar into a heavy paste completely. Smear the thick acidic paste directly over the dark physical dye stains immediately. Let the thick paste sit physically for exactly thirty short minutes entirely. Scrub the stained porcelain aggressively with a rough sponge and completely rinse it cleanly entirely.
Can I dye hair at home if I have a sensitive scalp?
You must take extreme physical precautions if your scalp burns easily entirely. Coat your entire scalp deeply in pure jojoba oil exactly twenty-four hours beforehand physically. Avoid using high volume developers that burn the delicate physical skin violently entirely. Use an ammonia-free demi-permanent gloss strictly instead of harsh permanent box dye completely physically.
Plan Your Long Term Maintenance Routine

You now hold the exact physical blueprint for a flawless home color session. You completely understand the strict preparation rules starting four weeks early. You know exactly why hot styling tools ruin the chemical absorption physically. You physically possess the knowledge to mix and apply the dye like a professional salon artist. Stop wasting massive amounts of money sitting in expensive salon chairs for basic color jobs.
Buy your professional bowls and strict nylon brushes directly today. Schedule your strict physical clarifying wash and heavy moisture masks for this exact Sunday. Your hair will reflect pure glass shine when you follow these strict rules entirely. You will walk outside completely confidently with your gorgeous rich new shade physically. Tell me exactly what physical shade you plan to paint on your strands next. Take absolute total physical control of your personal hair journey perfectly today.

Sarah Mitchell — Founder & Editor-in-Chief
Sarah Mitchell is the founder and editorial voice behind Hair Level Up. A licensed cosmetologist with more than 15 years of experience, she has styled A-list celebrities for editorial shoots and red carpets, with work featured in Vogue, Elle, and Harper’s Bazaar. Early in her career, she trained under the legendary hairstylist Oribe in New York, an apprenticeship that still shapes her editorial eye today. Sarah founded Hair Level Up in 2020 after one bad haircut convinced her that women deserved a destination that felt like a magazine, taught like a stylist, and inspired like an art gallery. She oversees every story from concept to publication, guided by a simple belief: a good story teaches you something, but a great one makes you feel beautiful while it does.