20 Boho Wedding Hair Ideas for Outdoor Ceremonies
You step outside and a gentle breeze catches your dress. The sun filters through the trees and your guests wait in the garden. Your wedding day has finally arrived. An outdoor ceremony asks for a specific kind of styling. You want something that moves with the wind and looks beautiful in natural light. Stiff curls and tight pins feel out of place in a forest or on a beach. I have styled hair for dozens of outdoor brides over the years. The weather always plays a role. Humidity drops curls and wind pulls at pins. A bohemian style works with these changes instead of fighting them. Messy pieces add character to the look. Natural texture holds up better as the day goes on. You want to look like yourself, just beautifully polished for your walk down the aisle.

Finding the right look takes a little planning. You should budget around 200 to 400 dollars for a professional bridal stylist. The appointment usually takes two full hours. Your stylist will need strong holding spray and specialized pins that hide in the hair. They will likely use a texturizing powder to give braids grip. We will review twenty distinct styles perfect for an outdoor setting. These looks stand up to humidity and embrace natural movement. You will find choices for long thick braids and options for shorter natural curls. Prepare to save your favorites and share them with your stylist.
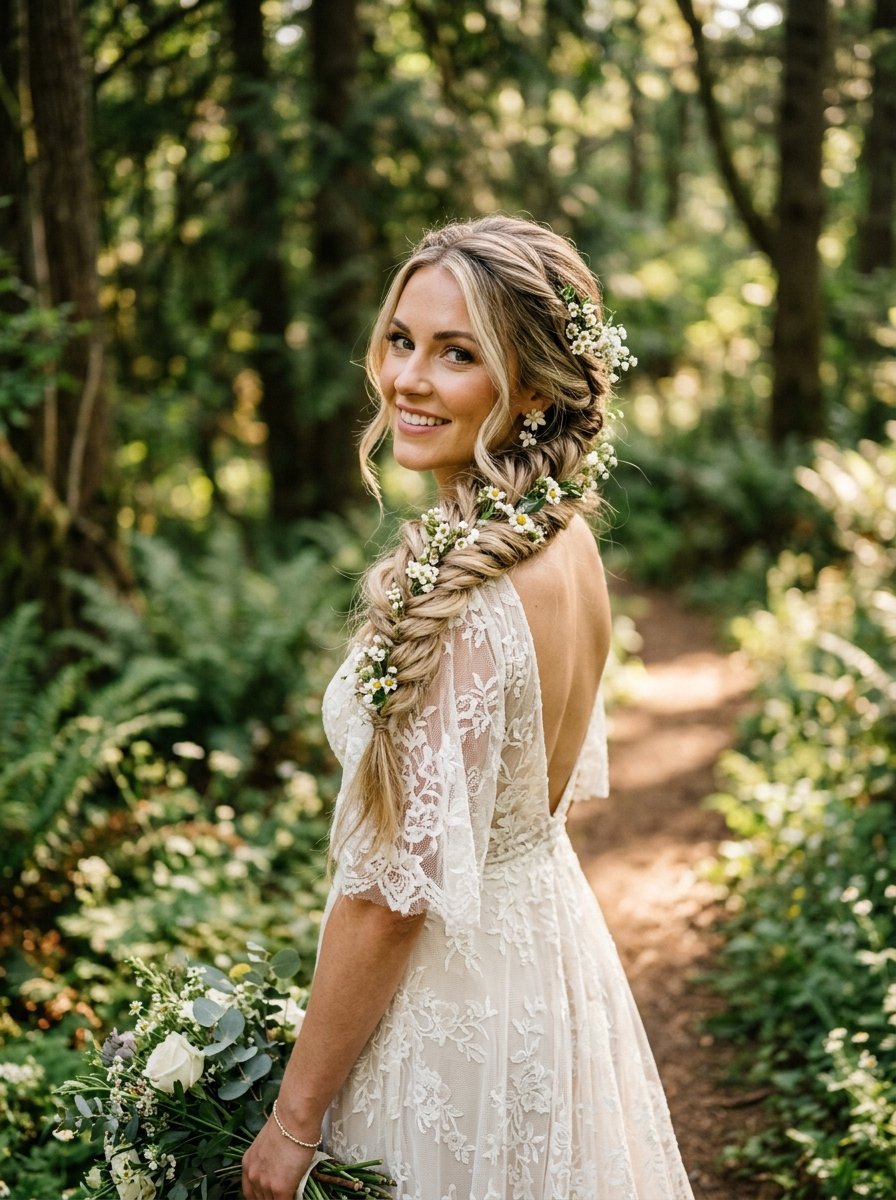
1. Loose Messy Fishtail Braid
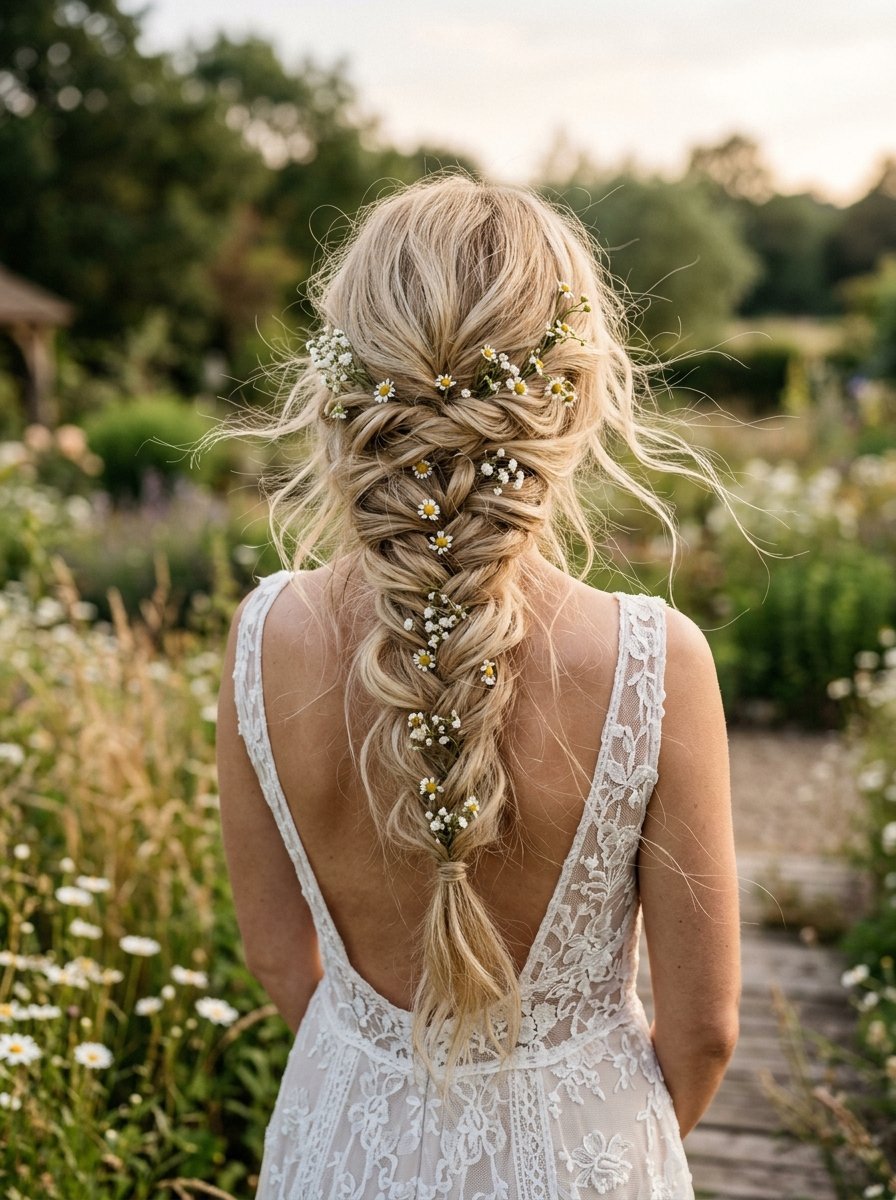
I styled a bride on a windy beach last summer with this exact look. A loose fishtail braid captures the wind beautifully. The breeze pulled a few pieces out around her face. It looked better at sunset than it did in my chair. You want your hair to move freely in an outdoor setting. A tight style feels completely out of place in nature.
Ask your stylist to prep your hair with a dry texture spray. This gives the strands grip and volume. They will weave small sections loosely down your back. Once finished, they will pull the edges of the braid apart gently. We refer to this as panning. It makes the braid look thick and full.
You can weave small wildflowers right into the links of the braid. Daisy buds look perfect tucked into the hair. Expect the styling process to take about an hour. It holds up perfectly against humidity and hours of dancing under the stars.
2. Half Up Braided Crown
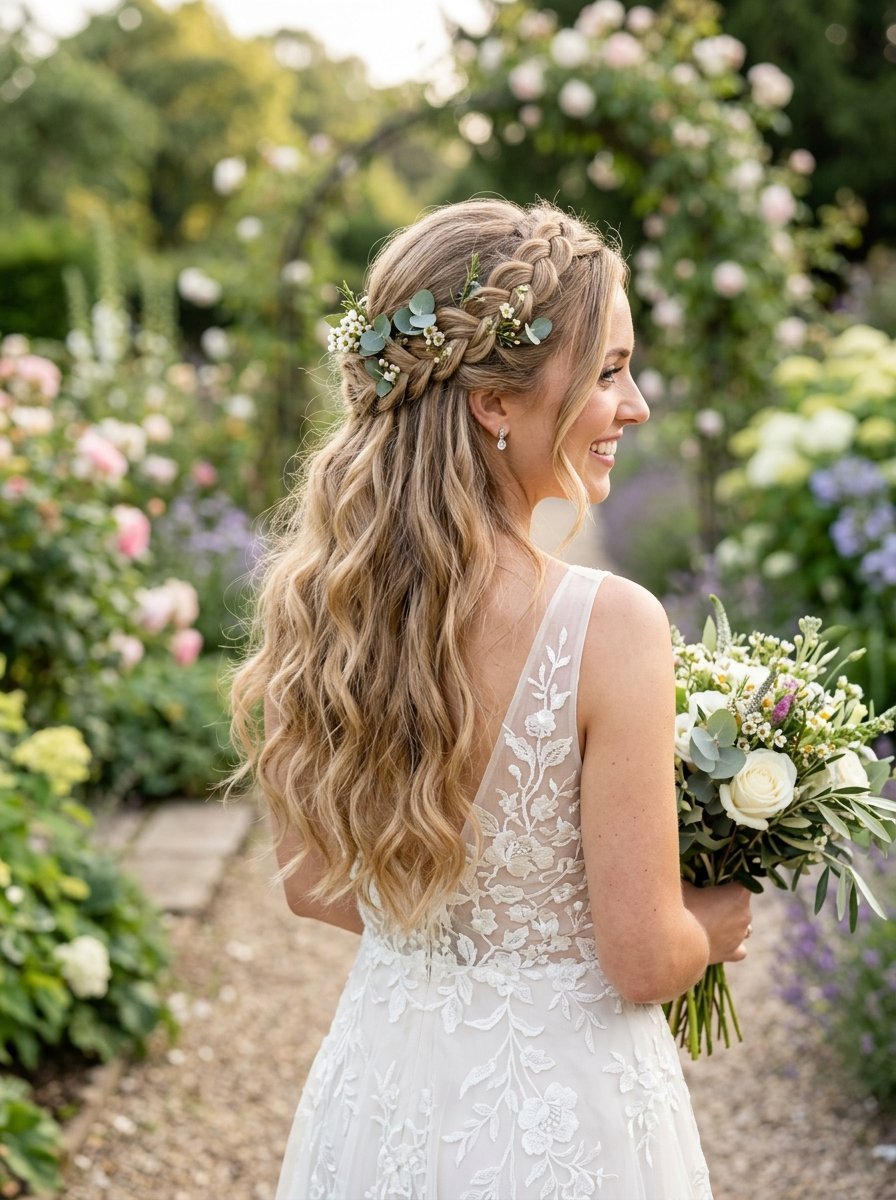
A braided crown keeps hair out of your face while letting the rest flow down. I love this for brides getting married in warm weather. You get the beauty of long hair without the sweat on your neck. I always recommend this style for garden weddings. It looks romantic and stays secure through hugs and photos.
Your stylist will create two braids on either side of your head. They will pull them back and pin them seamlessly together. The rest of your hair falls in soft waves down your back. I usually use a one inch curling iron for those waves. It creates a natural bend instead of a tight ringlet.
You can tuck small greenery stems into the pinned section. Eucalyptus leaves look amazing against blonde or brunette hair. This style takes about ninety minutes to complete. The pins hold the front securely so you never have to touch your hair during vows.
3. Textured Low Bun
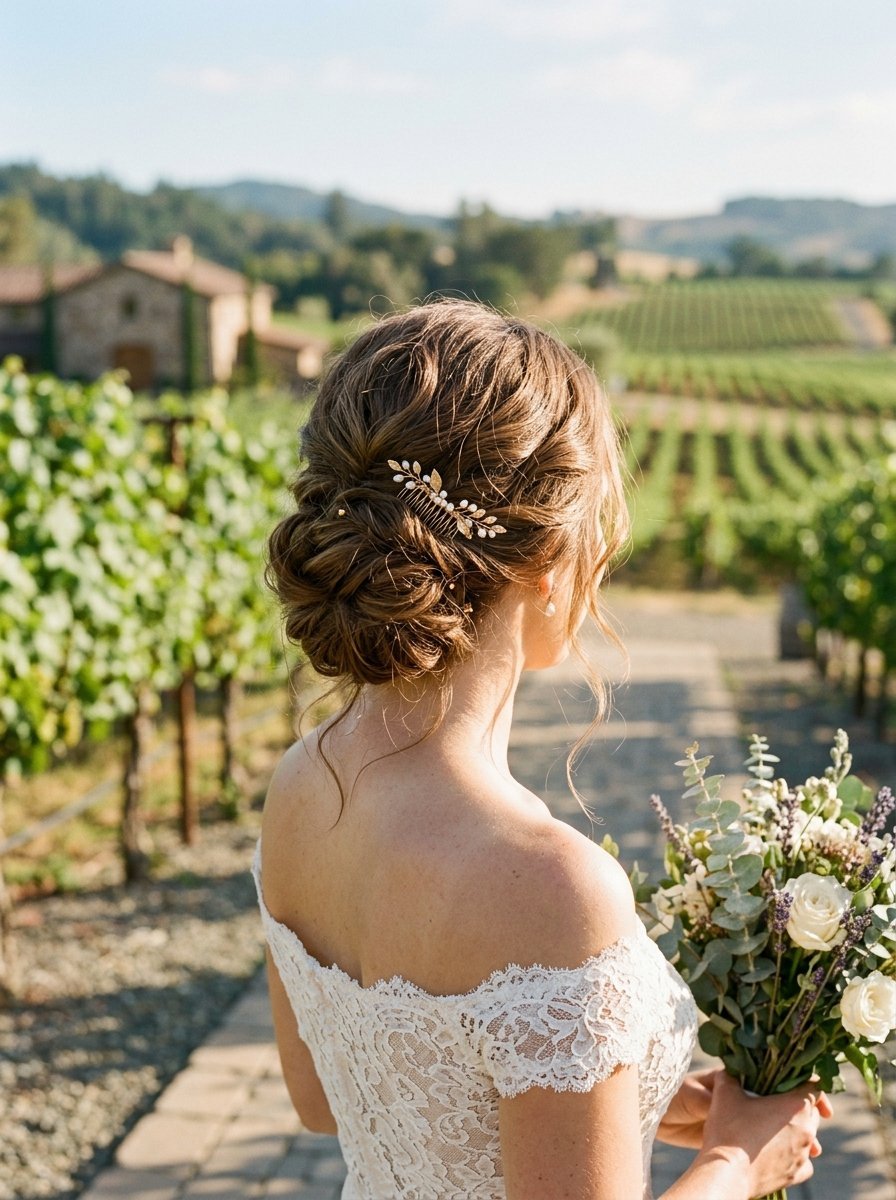
A low bun offers classic beauty with a relaxed feel. Outdoor weddings require styles that do not blow around too much. A textured bun sits softly at the nape of your neck. It avoids the harsh pulling of a traditional tight updo. I styled a bride in a vineyard with this look. It looked stunning with her backless dress.
The preparation makes all the difference here. Your hair needs curl and texture before it goes into the bun. The stylist will curl everything first and let it cool. They will then gather it loosely and pin small sections at a time. The goal is to make it look effortless.
You can slide a simple metal comb or a few fresh floral sprigs into the top of the bun. The style requires about two dozen bobby pins to feel secure. It takes around an hour to style. You will feel comfortable all day without any heavy pulling on your scalp.
4. Floral Intertwined Vine Braid
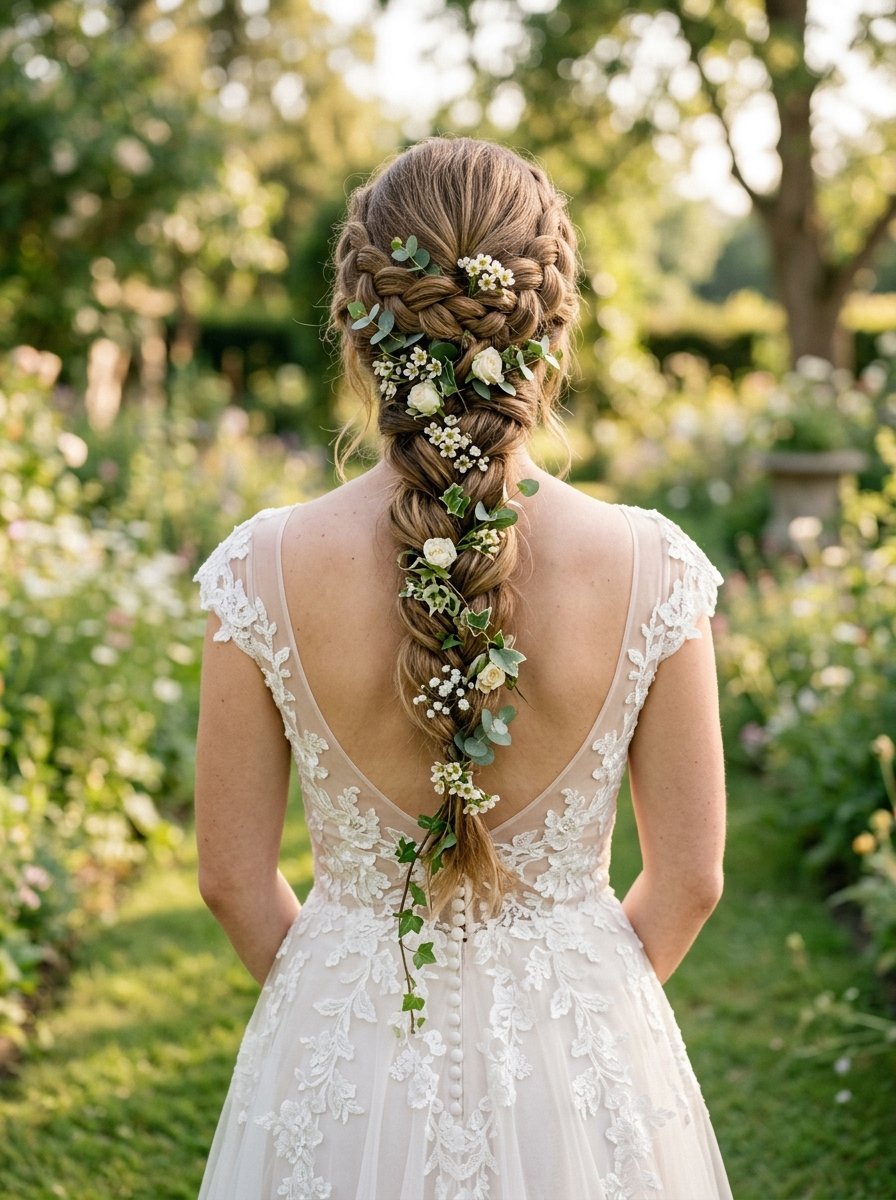
This look defines the modern bohemian bride. A vine braid incorporates actual floral vines woven directly into the hair. I worked with a florist last spring to create a custom greenery piece for a bride. We wined it through a thick Dutch braid. The result looked like a piece of art.
You need long hair or high quality extensions for this look. The stylist creates a thick three strand braid down the center of your back. They will weave the floral vine in as they cross each piece of hair. The hair and the greenery become one single structure.
This style costs slightly more because you need the florist to prepare the piece. You should plan for a two hour styling session. The hair feels heavy at first but settles comfortably. It stays locked in place through strong winds and aggressive dancing.
5. Beach Waves With Fresh Flowers
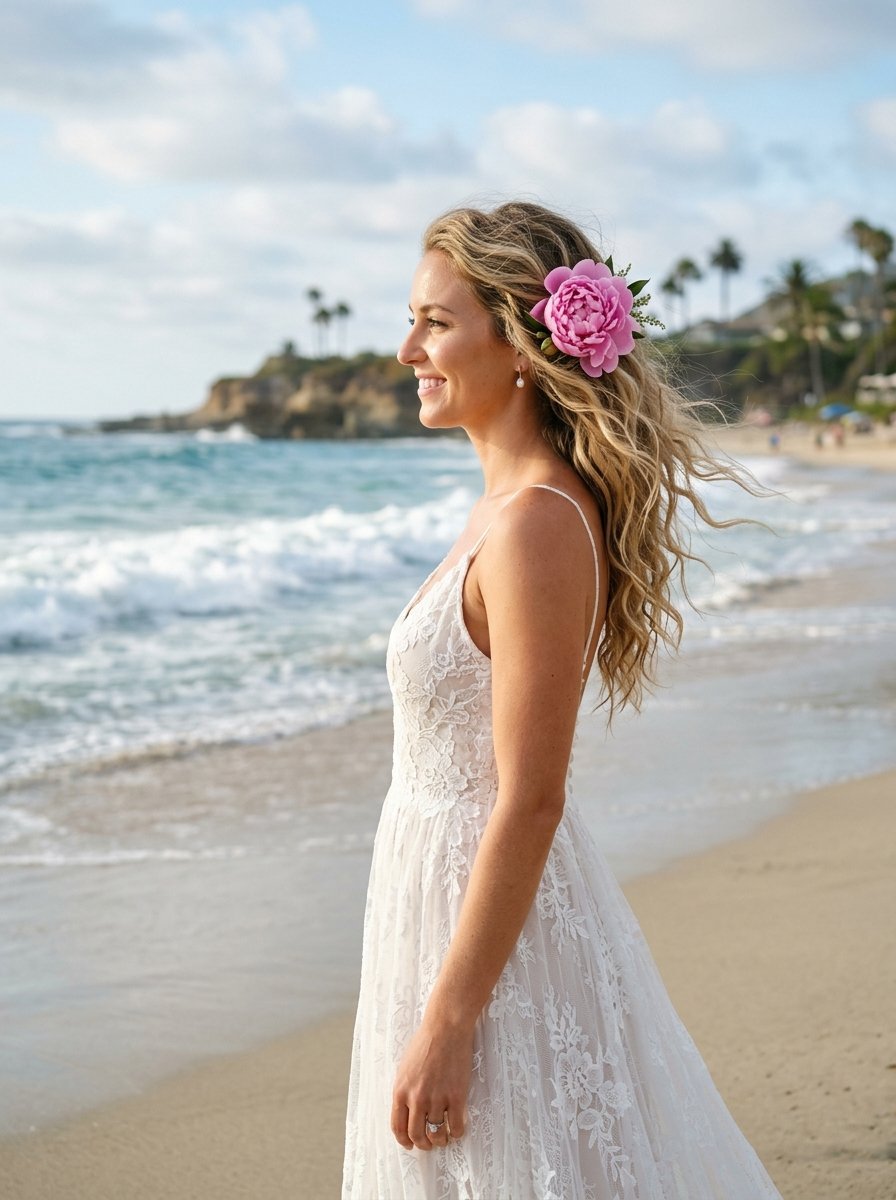
Sometimes the simplest choice works best. Loose beach waves look incredible against a natural background. I tell brides to embrace their natural texture for outdoor events. Fighting humidity with hot tools usually ends poorly. Beach waves lean into the moisture in the air.
The stylist uses a sea salt spray on damp hair. They blow dry it with a diffuser to bring out the natural wave. They might use a wand to touch up a few pieces around the face. The key is making it look like you spent the day in the ocean.
You can pin one large flower behind your ear to finish the look. A hibiscus or a large peony makes a gorgeous statement. This takes only forty five minutes to style. It requires almost zero maintenance during the day. You can just run your fingers through it and keep celebrating.
6. Wrapped Ponytail With Wispy Ends
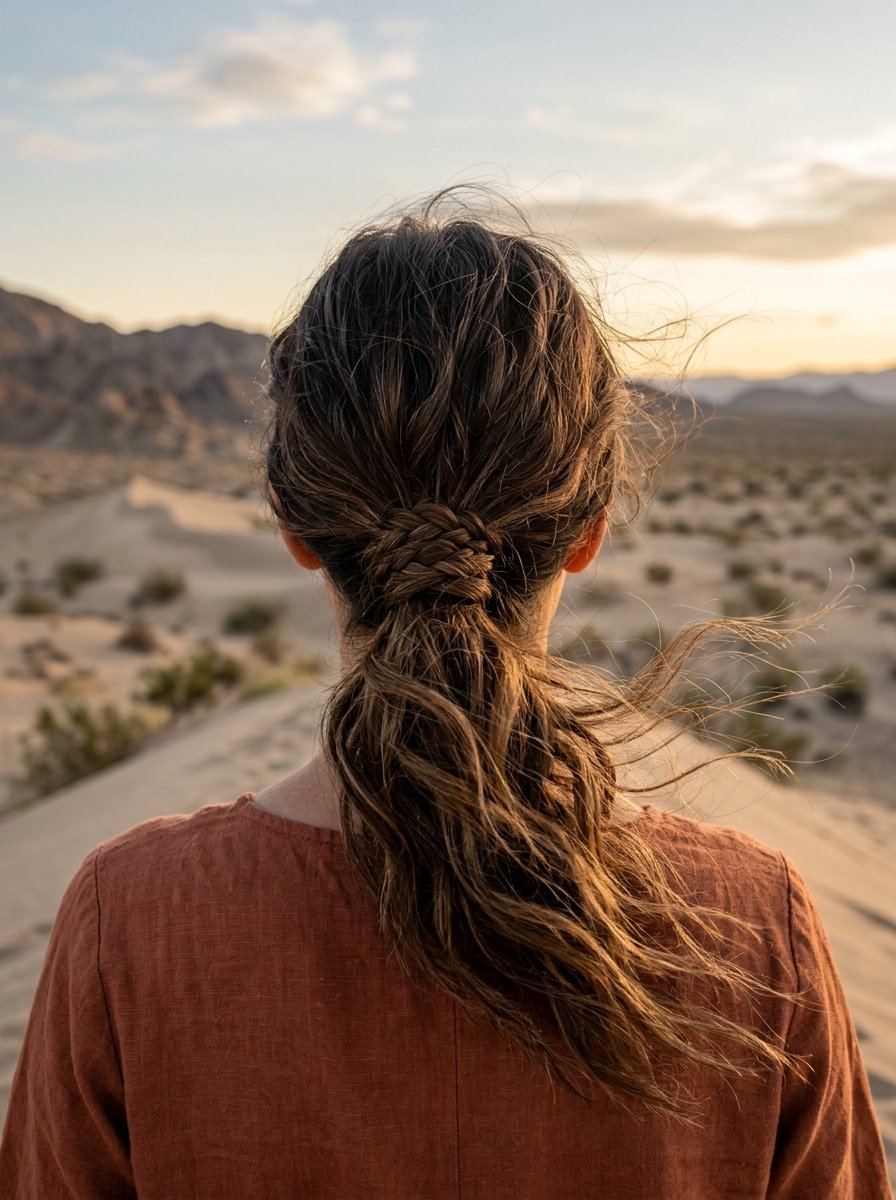
A ponytail belongs at a wedding when you style it right. A wrapped ponytail looks chic and stays completely out of your way. I styled a bride in the desert who wore this look. The wind howled all day long. Her hair looked perfect in every single photo.
The stylist pulls the hair into a mid level placement. They take a small piece of hair and wrap it around the hair tie. This hides the elastic and makes it look polished. The ends of the ponytail get textured and teased. It should look thick and messy in a purposeful way.
This style works perfectly with a high neck dress. It costs less than a full updo and takes about forty minutes. You will need a strong hair tie and heavy holding spray. The wispy ends dance in the wind while the base stays locked tightly in place.
7. Double Dutch Braid Into Low Bun
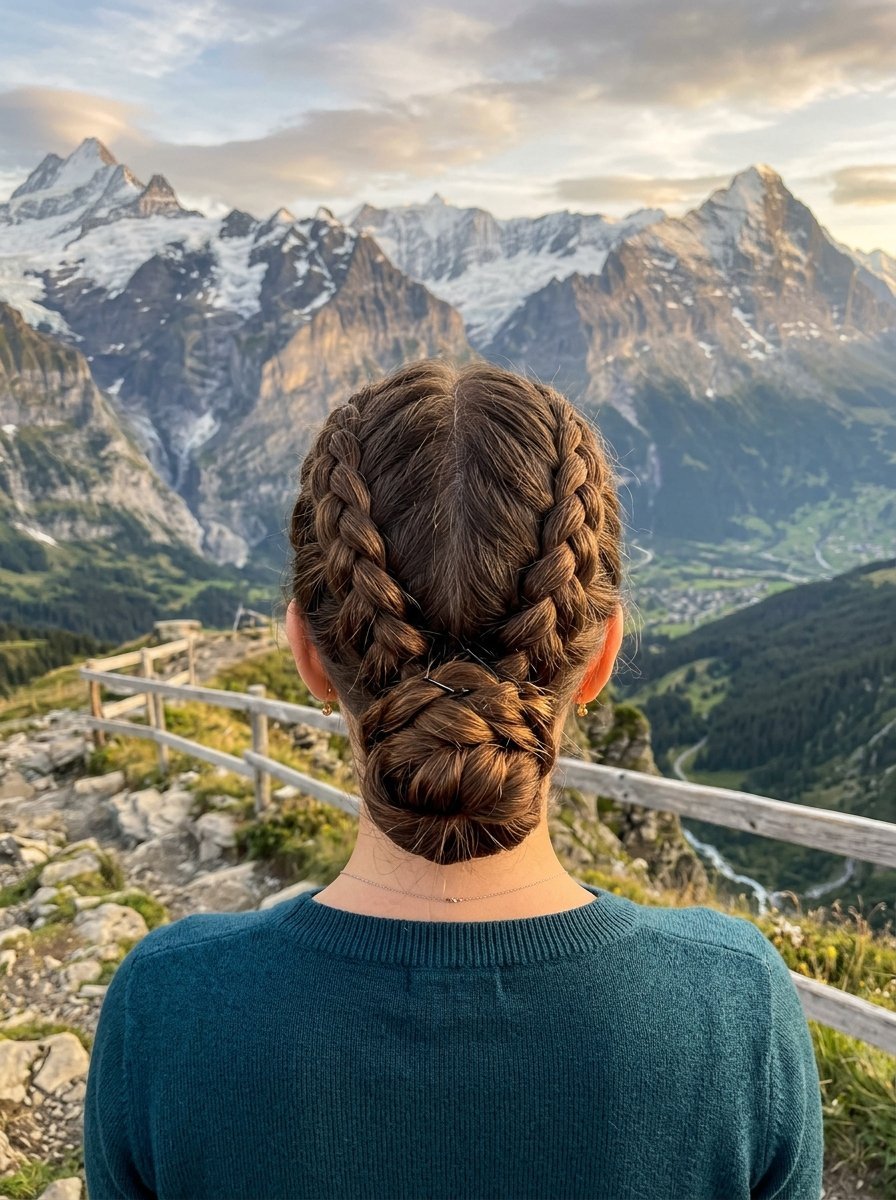
This style gives you beautiful detail from every angle. I love suggesting this for brides who want heavy texture. Two Dutch braids run along the sides of your head and meet at the bottom. The remaining hair twists into a soft bun. I did this for a mountain wedding where the bride hiked to her ceremony.
The stylist needs strong fingers to keep the braids tight at the scalp. A Dutch braid pulls the hair under instead of over. This makes the braid pop out off the head. Once the braids meet at the bottom they get tied together. The tail gets twisted and pinned flat against the neck.
You do not need many accessories for this look. The braids provide all the visual interest you need. It takes about ninety minutes from start to finish. The style survives sweat wind and hours of movement without dropping a single pin.
8. Soft Pinned Back Curls

You can wear your hair mostly down without it getting in your eyes. Pinning back just the front pieces changes everything. I use this style for brides who feel nervous about wearing an updo. You still feel like yourself but the hair stays controlled.
The stylist will spend most of the time prepping the curls. They need to use a strong heat protectant and holding mousse. Once the curls cool they brush them out softly. They take one piece from above each ear and pull it back. A few hidden pins secure the pieces at the back of the head.
This is a great place to put a small decorative clip. A vintage pearl barrette looks amazing holding the pieces together. The styling takes about an hour. You might need to touch up the bottom curls with a wand right before the reception begins.
9. Tucked Chignon With Greenery
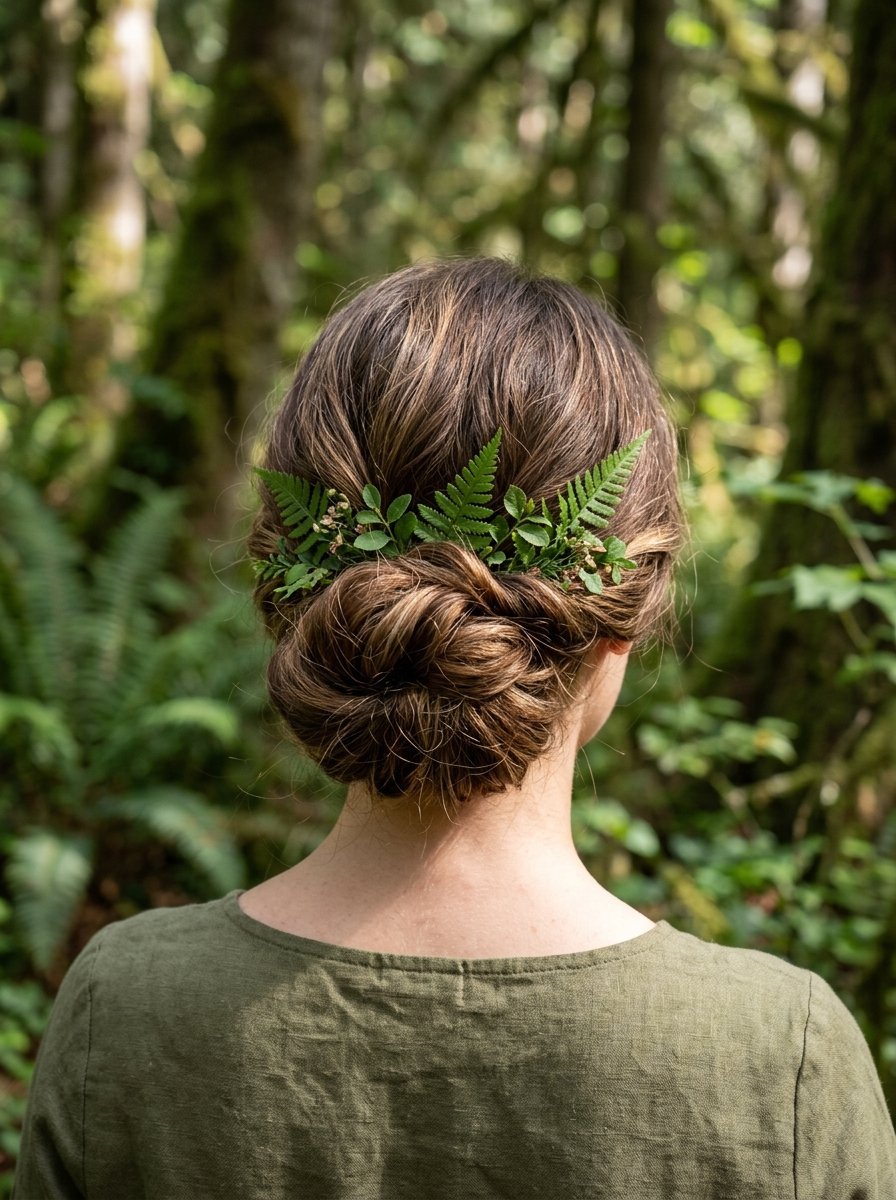
A chignon sounds formal but you can make it bohemian easily. The trick is keeping the tension loose. I created a soft chignon for a bride in a rainy forest setting. The damp air made the hair slightly frizzy in the best way possible. It gave the style genuine character.
The stylist rolls the hair upward from the bottom and pins it securely. They leave out small pieces around the ears and the back of the neck. These pieces soften the look and frame your face. A traditional chignon has zero flyaways. A boho chignon welcomes them.
We tucked small fern leaves into the top seam of the roll. The green popped beautifully against her dark hair. This style requires at least shoulder length hair. It takes about an hour to pin correctly. You will need a stylist who understands how to balance messy and secure.
10. Side Swept Mermaid Braid
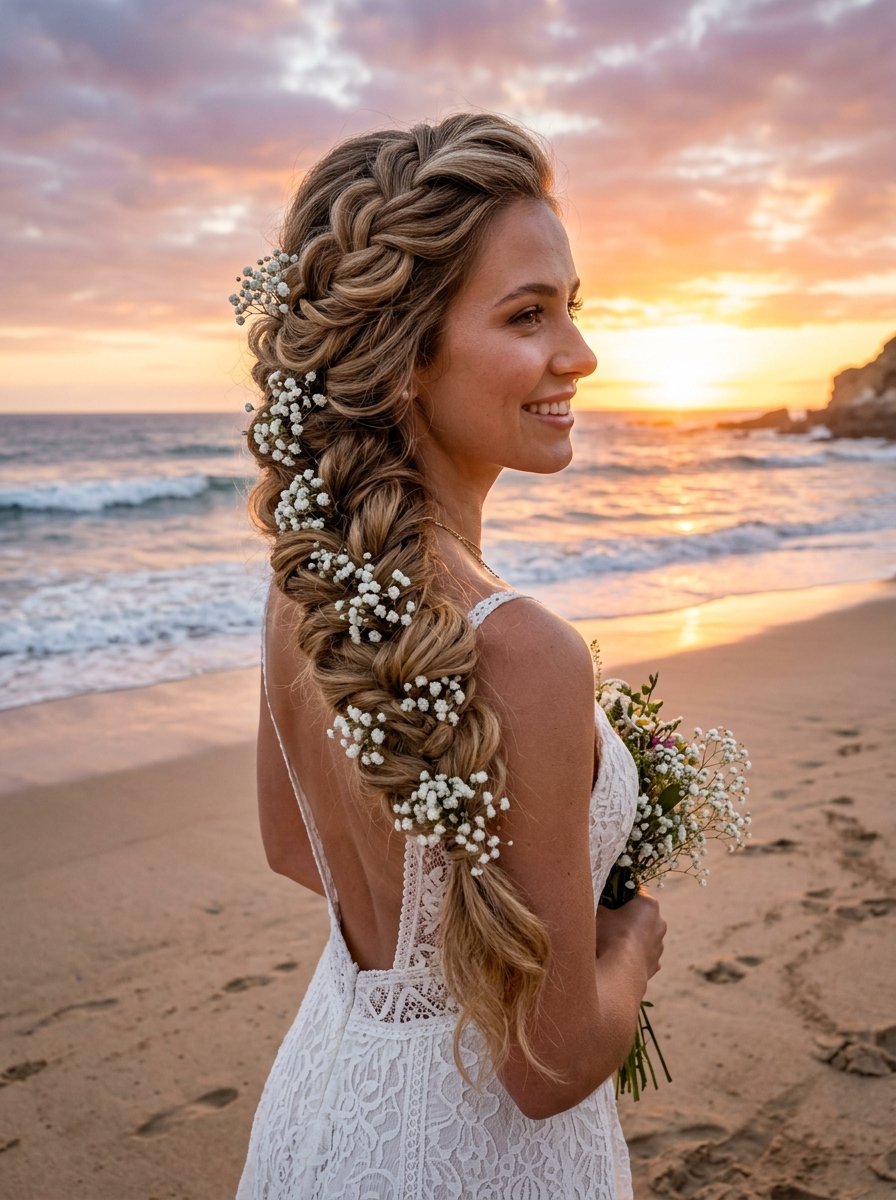
A mermaid braid looks thick intricate and deeply romantic. You sweep all your hair over one shoulder. I love this for brides wearing off the shoulder dresses. It draws the eye down the neckline and looks beautiful in side profile photos.
The braid itself is actually a series of small topsy tails or twists. The stylist pulls small sections together and flips them inward. This creates the illusion of a massive intricate braid. It requires dozens of small clear elastics. You definitely need long thick hair or a set of clip in extensions to pull this off.
You can place tiny baby breath clusters down the length of the braid. It takes about two hours to construct this style. It feels very secure because of all the elastics. You will need a friend to help you take it down at the end of the night.
11. Natural Curls With A Halo
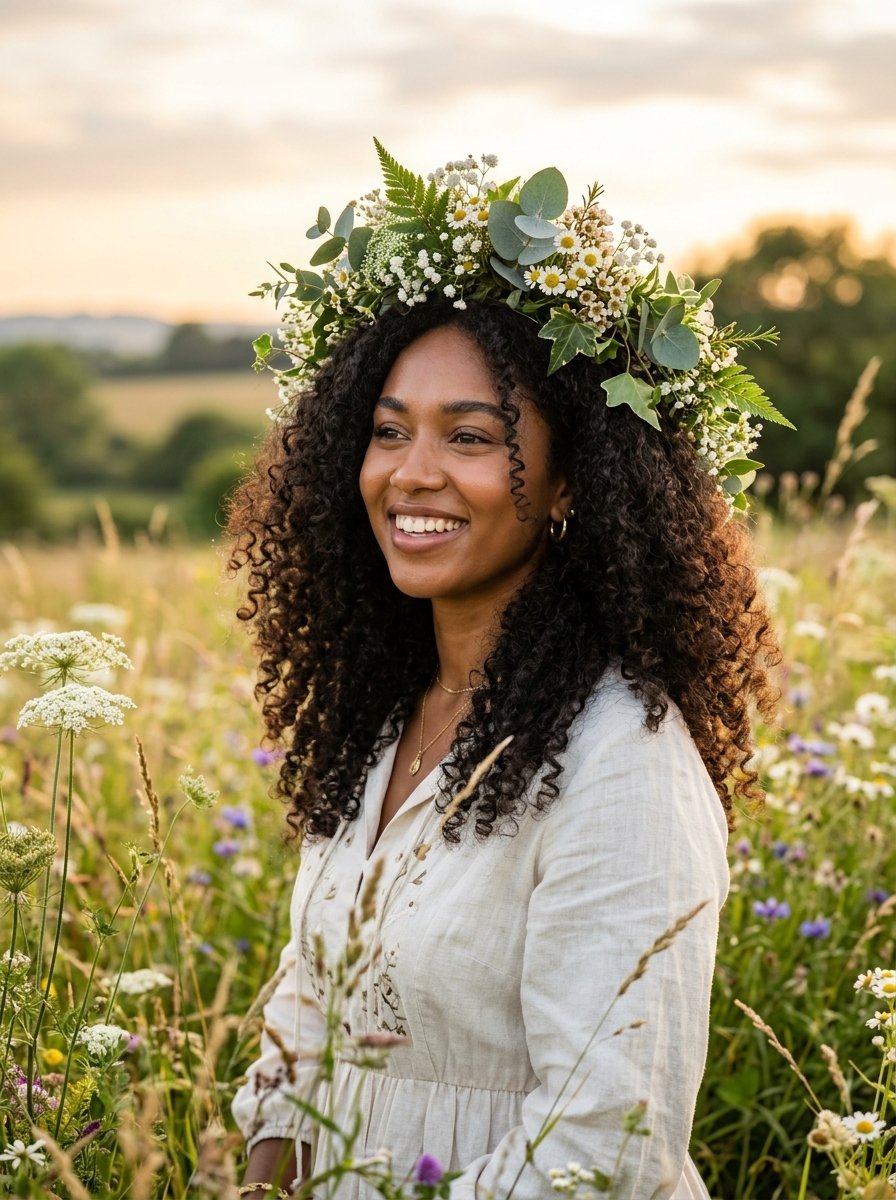
Brides with naturally curly hair should show it off. A floral halo works perfectly with big natural volume. I tell my curly clients to avoid straighteners completely. Your natural texture fits an outdoor aesthetic perfectly. The humidity will only make the curls look better.
The stylist will use a hydrating cream and a diffuser. They focus on defining the curls you already have. They might use a tiny curling iron to fix a few pieces around the crown. The goal is maximum volume and health.
The florist creates a full circle halo of flowers and greenery. You place this gently on top of the curls. Use a few heavy bobby pins to anchor the halo to your scalp. This style takes very little time in the chair. You spend most of your time drying the hair correctly without causing frizz.
12. Messy Top Knot With Face Framing Pieces

A top knot works beautifully for a casual outdoor wedding. It keeps everything off your neck on a hot summer day. I styled a bride who got married on a boat with this look. The wind blew hard but her hair looked intentional and chic.
Your stylist will gather the hair high on the crown. They twist it loosely and pin it into a messy bun. The secret lies in the face framing pieces. You leave down two thick sections of hair right at the front. You curl these pieces softly away from the face.
You can wrap a piece of raw silk ribbon around the base of the knot. This gives it a beautifully unfinished texture. The style takes about forty five minutes. It costs less than a traditional updo. You will feel incredibly comfortable and cool all day long.
13. Hidden Bobby Pin Twist
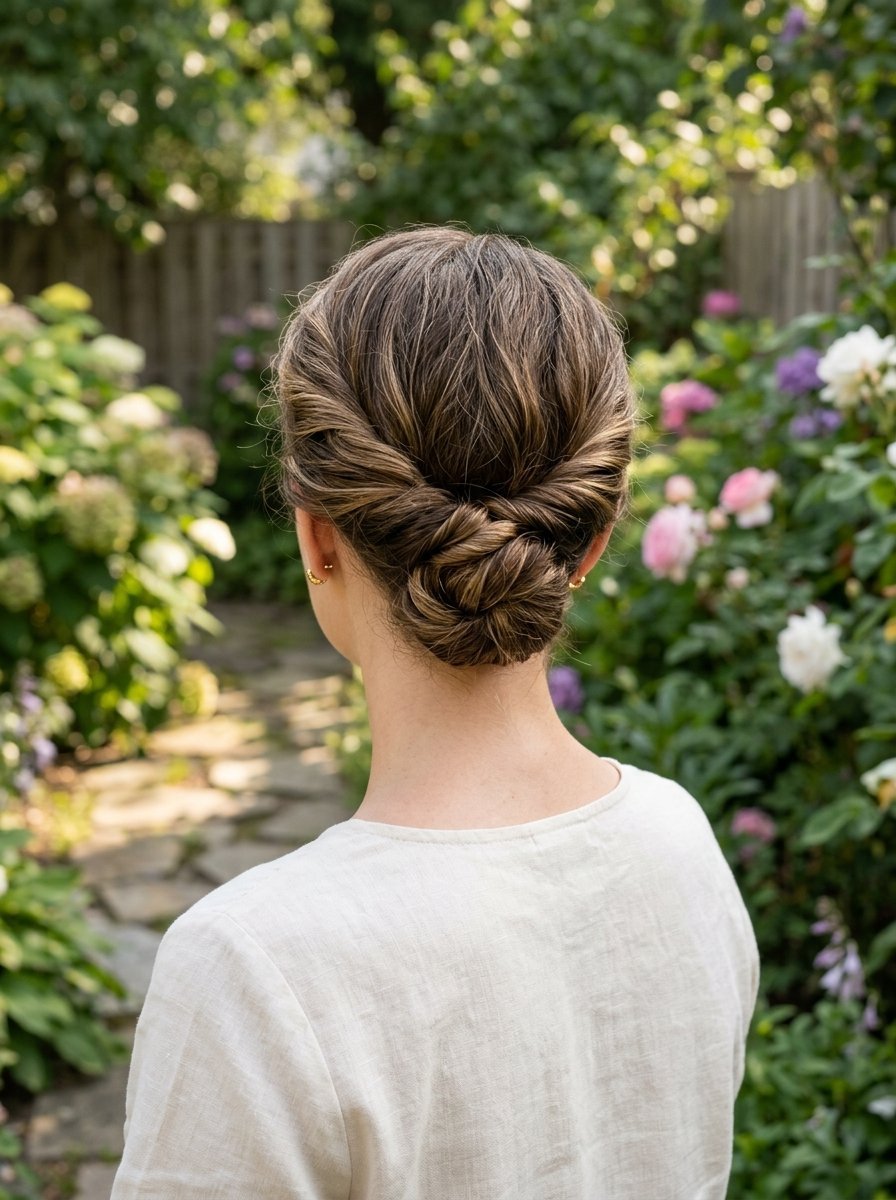
This style looks like magic when done correctly. The hair twists softly and holds itself up without visible pins. I use this for brides who want a minimalist bohemian look. It works perfectly with a simple slip dress in a garden setting.
The stylist divides the hair into two sections. They twist the sections inward and cross them over each other. They use large heavy duty pins pushed vertically into the twist. The hair covers the pins completely. It looks like the hair is just floating securely on the back of your head.
You do not need any accessories for this look. The clean lines of the twist do all the visual work. It takes about an hour and requires thick hair. Fine hair has trouble hiding the large vertical pins. It feels incredibly secure once locked in place.
14. Ribbon Tied Low Ponytail

A ribbon changes a simple ponytail into a bridal statement. I love using velvet or silk ribbons for fall outdoor weddings. The wind catches the tails of the ribbon and creates beautiful movement in photos. It looks effortless but highly styled.
Your stylist needs to create volume at the crown before tying the hair back. They tease the roots and smooth the top layer over. They gather the hair low at the neck and tie it with a strong clear elastic. They use a curling wand to add soft waves to the tail.
You tie the ribbon over the elastic and let the ends hang down. A long ribbon that matches your wedding colors looks incredible. The styling takes about forty minutes. It costs less than most bridal styles. You can easily adjust the ribbon yourself if it comes loose during the reception.
15. Bubble Braid With Pearl Accents

A bubble braid gives you the look of a braid without the woven texture. It feels playful and completely modern. I styled a young bride with this look for a festival themed wedding. It matched the high energy of the day perfectly.
The stylist places a series of clear elastics down a ponytail. They pull the hair between each elastic outward to create a round bubble. They do this all the way down to the ends. It requires thick hair to make the bubbles look full and round.
You can glue small flat backed pearls to the hair between each bubble. Eyelash glue works perfectly for this and washes out easily. The style takes about an hour to complete. It holds up in high wind better than almost any other style. The elastics keep everything firmly in place.
16. Woven Faux Hawk Braid
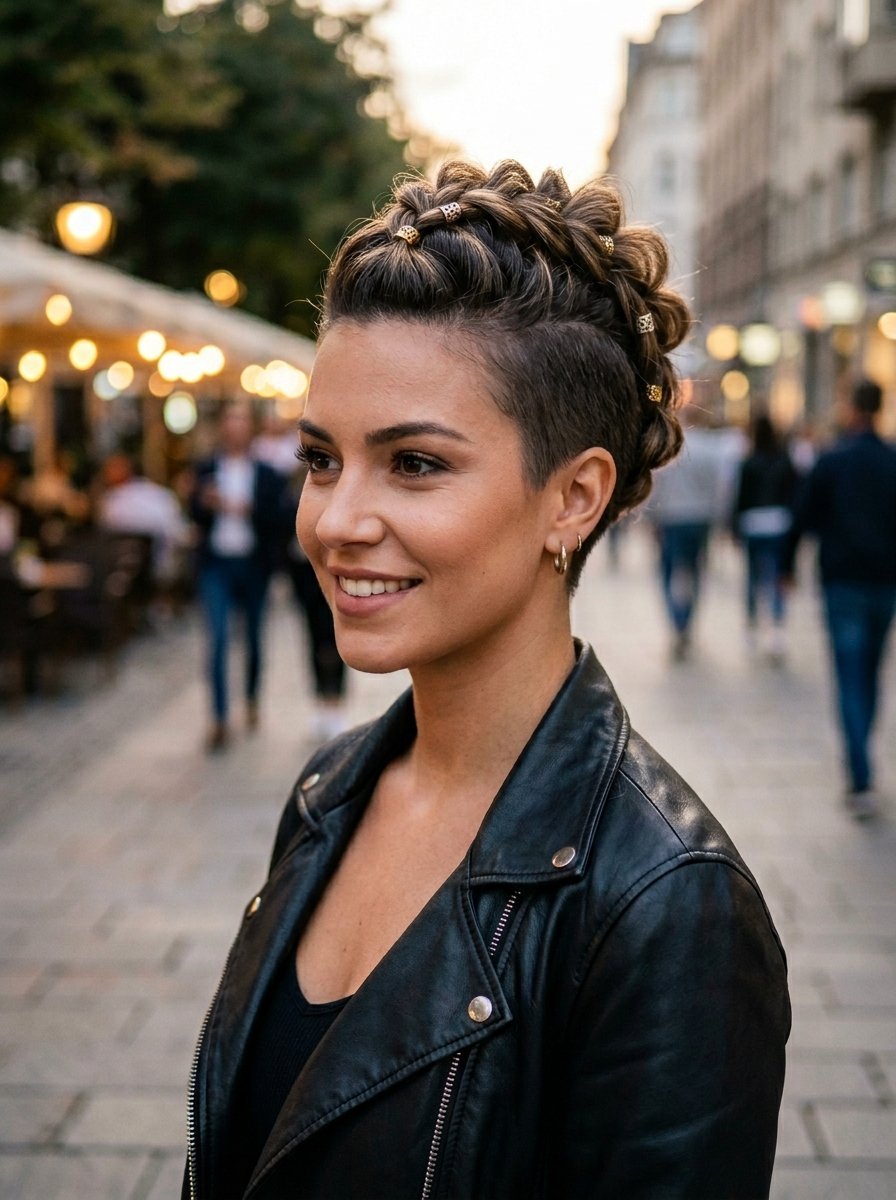
This style brings a little edge to a bohemian wedding. A faux hawk braid sits high on the head and creates massive volume. I recommend this for brides wanting something entirely different. It looks amazing with leather jackets thrown over wedding dresses in the evening.
The stylist creates a thick Dutch braid straight down the center of the head. They pull the sides tight to the scalp. They pan the center braid out as far as it will go. This creates the illusion of a mohawk made entirely of soft hair. The end gets tucked under and pinned.
You can add small metallic cuffs to the edges of the braid. This style requires serious grip powder and holding spray. It takes about ninety minutes to build the structure. You will not have to worry about the wind messing this up. It stays solid as a rock all night.
17. Sleek Base With Tousled Ends
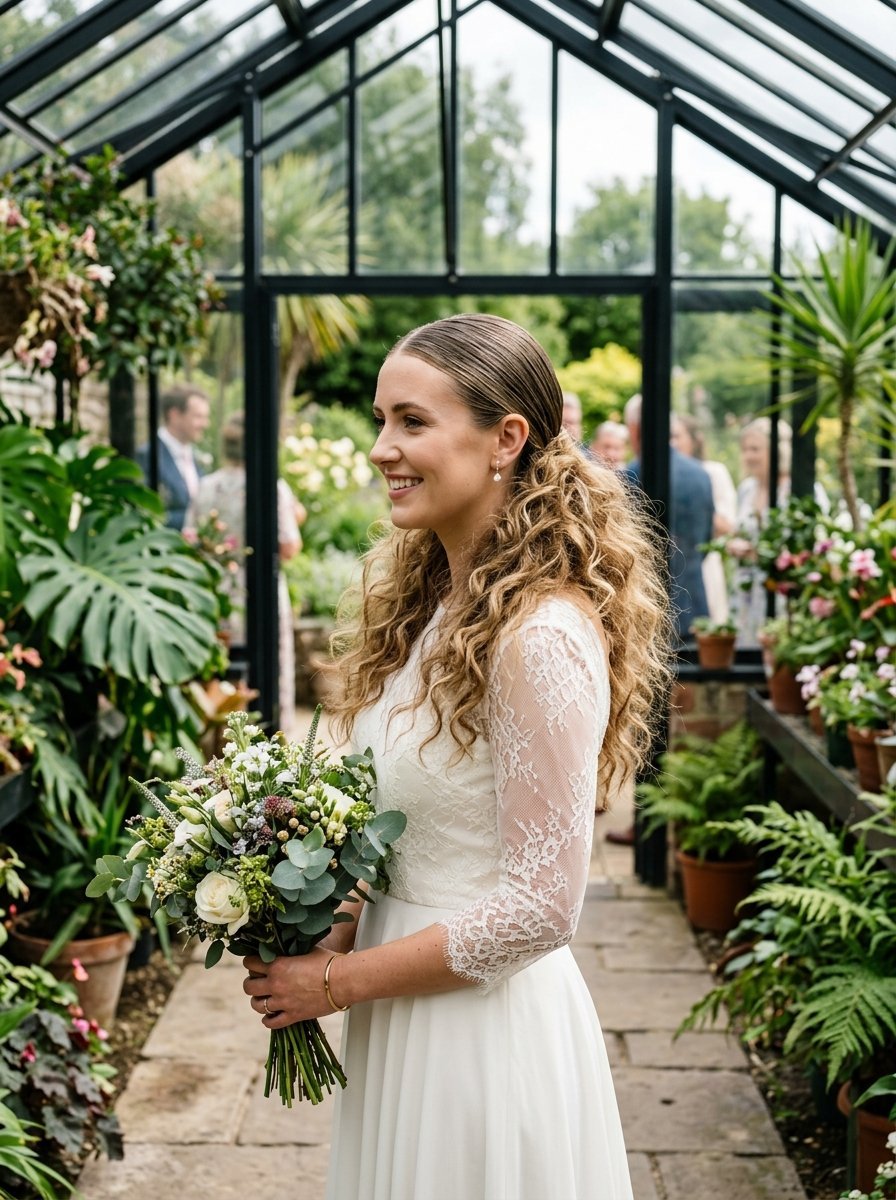
Mixing textures creates a highly editorial bohemian look. The top of the hair stays perfectly smooth while the ends go wild. I styled a bride in a modern glass greenhouse with this look. The contrast looked incredible in the natural lighting.
The stylist uses a strong gel and a boar bristle brush on the roots. They slick the hair back behind the ears and pin it flat. The rest of the hair gets heavily textured. They use a wand to create messy random curls. They spray salt spray through the ends and rough it up with their hands.
This style needs no accessories. The contrast between sleek and messy provides the interest. It takes about an hour to get the root tension right. You need to wash your hair thoroughly the next day to remove the heavy gel from the roots.
18. Center Part With Baby Braids
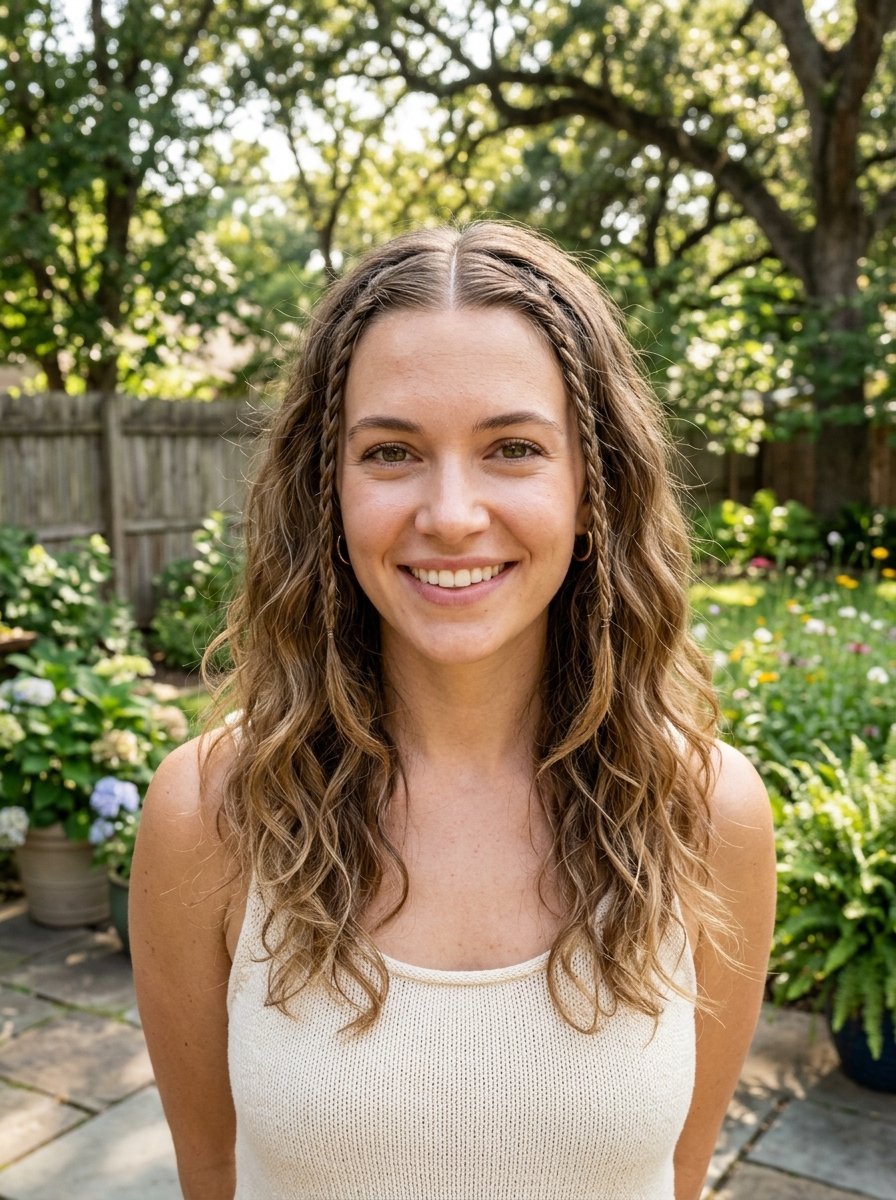
Baby braids bring a nostalgic vintage feel to bridal hair. They frame the face perfectly and add subtle detail. I love seeing this at casual backyard weddings. It looks sweet and requires very little maintenance throughout the day.
The stylist creates a sharp clean center part. They take two tiny sections of hair right at the front hairline. They braid these tightly all the way down to the ends. They tie them with tiny clear elastics. The rest of the hair gets styled into loose messy waves.
You can leave the look exactly like this. You could also weave tiny bits of colorful thread into the baby braids. The styling takes about forty five minutes. It ranks as one of the most affordable styling options. You get a distinct look without the heavy feeling of an updo.
19. Asymmetrical Floral Updo
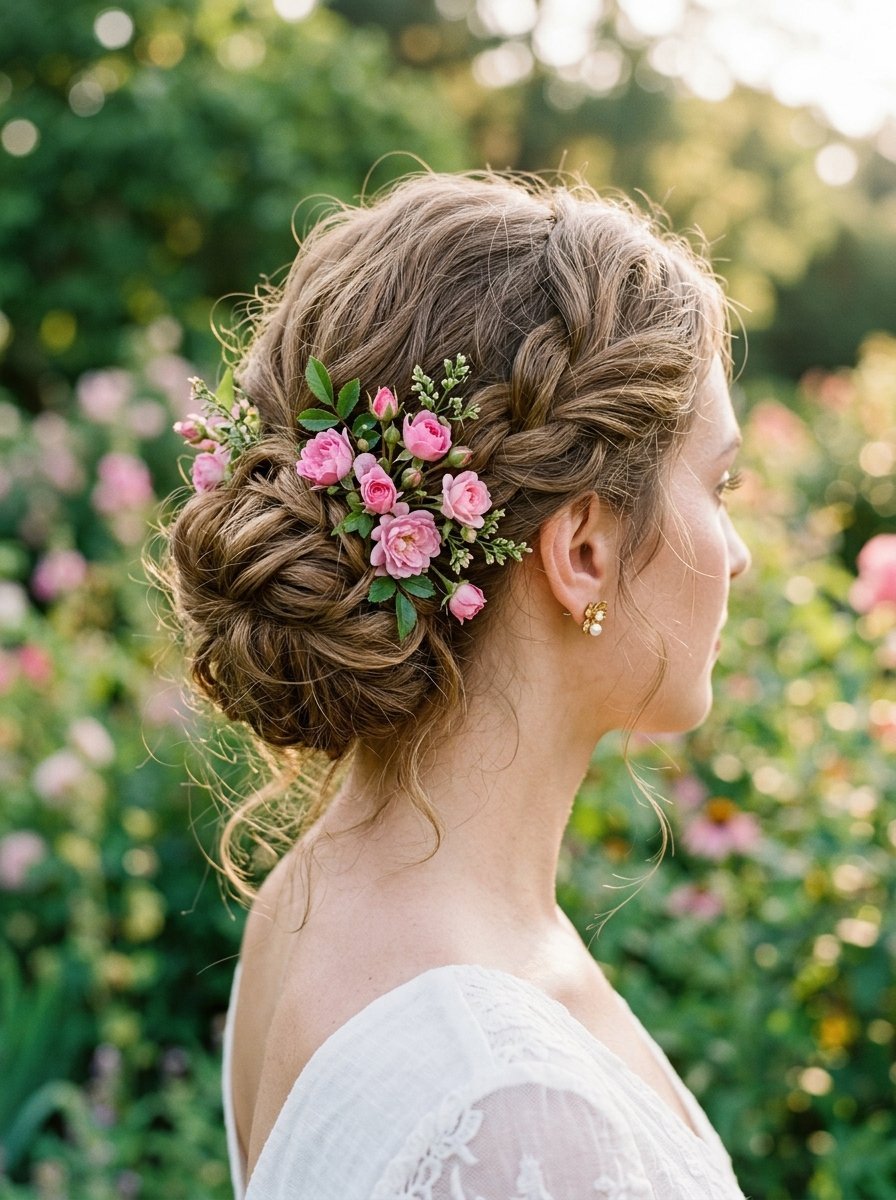
Balance does not always mean symmetry. An asymmetrical updo sits heavy on one side of the neck. It looks artistic and deeply romantic. I styled a bride with a one shoulder dress using this look. We placed the hair on the bare shoulder to balance the dress.
The stylist sweeps all the hair over to one side. They curl and pin the pieces into a loose cluster behind one ear. They leave out wispy pieces on the opposite side to soften the jawline. The pins need to cross over each other tightly to hold the off center weight.
You place your flowers exclusively on the heavy side. A cluster of small wild roses looks gorgeous tucked into the pins. It takes about an hour and fifteen minutes to style. You will feel the weight on one side of your head but you adjust quickly.
20. Effortless Air Dried Waves

The ultimate bohemian statement requires almost no heat styling at all. You let your hair dry naturally and embrace what it does. I helped a bride with this look for a morning ceremony in a meadow. Her hair looked exactly like hers just perfectly healthy.
You must prepare your hair properly the night before. You wash it and use a high quality leave in conditioner. You let it air dry while you sleep on a silk pillowcase. The morning of the wedding the stylist just uses a little hair oil on the ends. They might fix a strange cowlick but otherwise they leave it alone.
You can wear a simple fresh flower crown over the natural hair. The styling time takes ten minutes on the wedding day. You pay mostly for the consultation and the prep advice. It feels incredibly freeing to walk down the aisle looking exactly like your natural self.
Frequently Asked Questions
How do I make my hair last outside?
You need dry texture spray and strong holding pins. The wind will pull at clean soft hair. Texture spray gives the hair grip. You also need a stylist who understands how to cross pins to lock them together.
Should I wash my hair the morning of the wedding?
You should wash your hair the night before. Freshly washed hair slips out of braids and pins easily. Second day hair holds a curl much better. It gives the stylist a better base to work with.
What flowers work best in bridal hair?
You want hardy flowers that survive without water. Wax flowers baby breath and thistle work beautifully. Avoid delicate blooms like hydrangeas. They wilt and turn brown after an hour in the sun.
Do I need extensions for a boho braid?
You usually need clip in extensions for those massive thick braids you see online. A stylist can make your hair look thicker by panning the braid. However real massive volume usually comes from adding extra hair.
What happens if it rains on my wedding day?
You need a backup plan. A low bun or an updo handles humidity and light rain better than loose curls. Speak with your stylist beforehand about switching to a secure bun if the weather turns bad.
Final Thoughts
Your outdoor wedding will bring beautiful natural elements to your day. The wind and the light will make your photos look incredible. Choose a hairstyle that feels like you. Pick something that moves easily and does not cause you pain. The twenty styles we reviewed offer something for every hair type and setting. Trust your stylist and let the weather add its own touch to your look. What kind of hair accessories do you plan to wear on your wedding day?

Sarah Mitchell — Founder & Editor-in-Chief
Sarah Mitchell is the founder and editorial voice behind Hair Level Up. A licensed cosmetologist with more than 15 years of experience, she has styled A-list celebrities for editorial shoots and red carpets, with work featured in Vogue, Elle, and Harper’s Bazaar. Early in her career, she trained under the legendary hairstylist Oribe in New York, an apprenticeship that still shapes her editorial eye today. Sarah founded Hair Level Up in 2020 after one bad haircut convinced her that women deserved a destination that felt like a magazine, taught like a stylist, and inspired like an art gallery. She oversees every story from concept to publication, guided by a simple belief: a good story teaches you something, but a great one makes you feel beautiful while it does.