The Bride’s Guide to Choosing a Hairstyle With a Veil
You sit in the salon chair on your wedding morning feeling a rush of pure excitement. Your stylist finishes pinning the last curl into place perfectly. She grabs your expensive tulle veil and shoves the metal comb straight into your fresh updo. A sharp pain hits your scalp instantly. You look in the mirror and your beautiful volume has completely disappeared. The heavy fabric pulls your strands flat against your forehead. A random bobby pin pops out and falls onto your lap. This exact nightmare happens to brides every single weekend across the country. I see women spend thousands on dresses and totally ignore the mechanics of their veil. A terrible styling choice ruins your entire morning and kills your confidence. You need an exact plan before anyone touches your head.
You will get a clear schedule for planning your entire salon timeline right here. I share exact prices for trials and styling products based on my years behind the chair. You will see true stories of brides who made huge mistakes and how we fixed them fast. We detail exact tricks for heavy fabrics and windy outdoor venues. You get specific shopping advice for extensions and hairpins. I lay out exact instructions for taking the veil off without ruining your curls. You will walk down the aisle feeling fully confident and pain free. Your photographs will look flawless from the first look to the last dance.
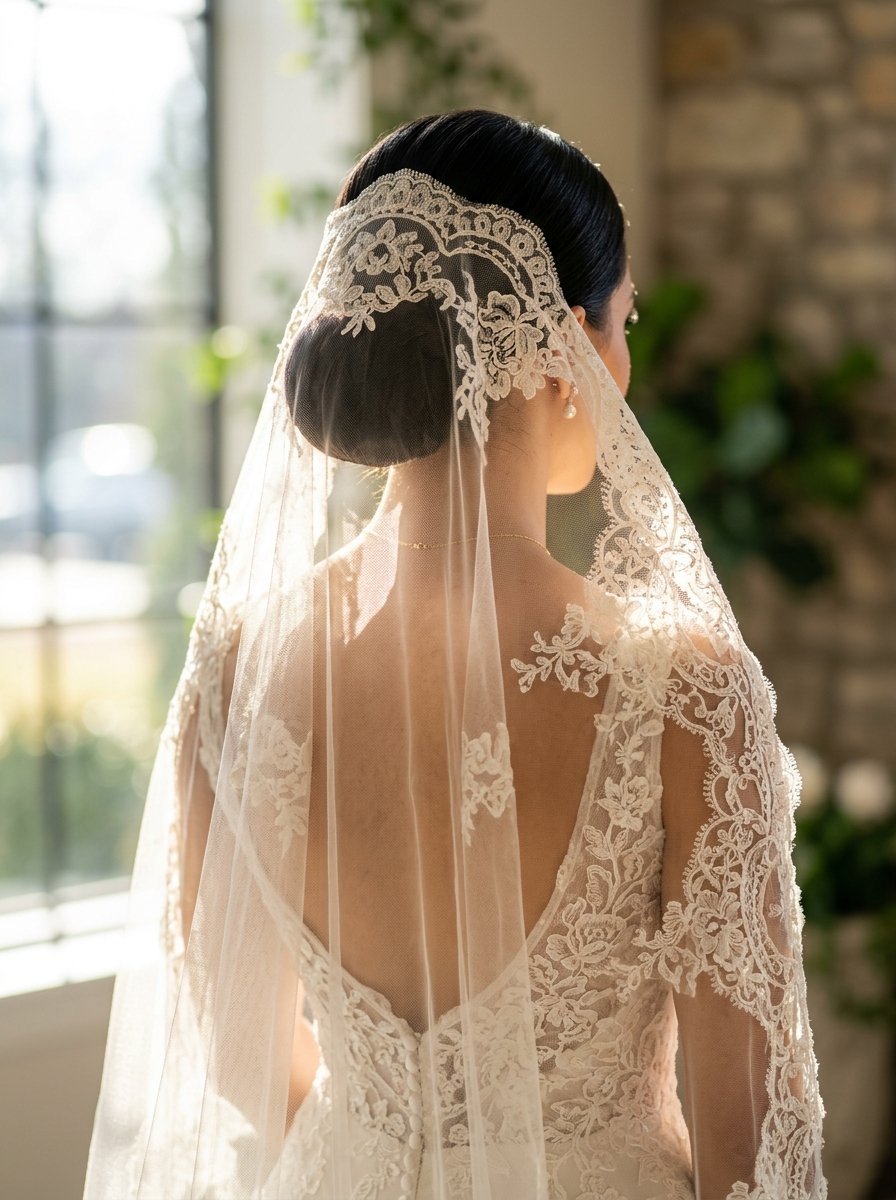
Decoding the Mantilla Veil
A mantilla veil features thick lace stitched completely around the outer edge. It rests totally flat on top of your head without any gathered fabric at the comb. This design changes your styling options completely. You cannot just shove a mantilla comb into a high messy bun.
Mantilla Veil With Updo
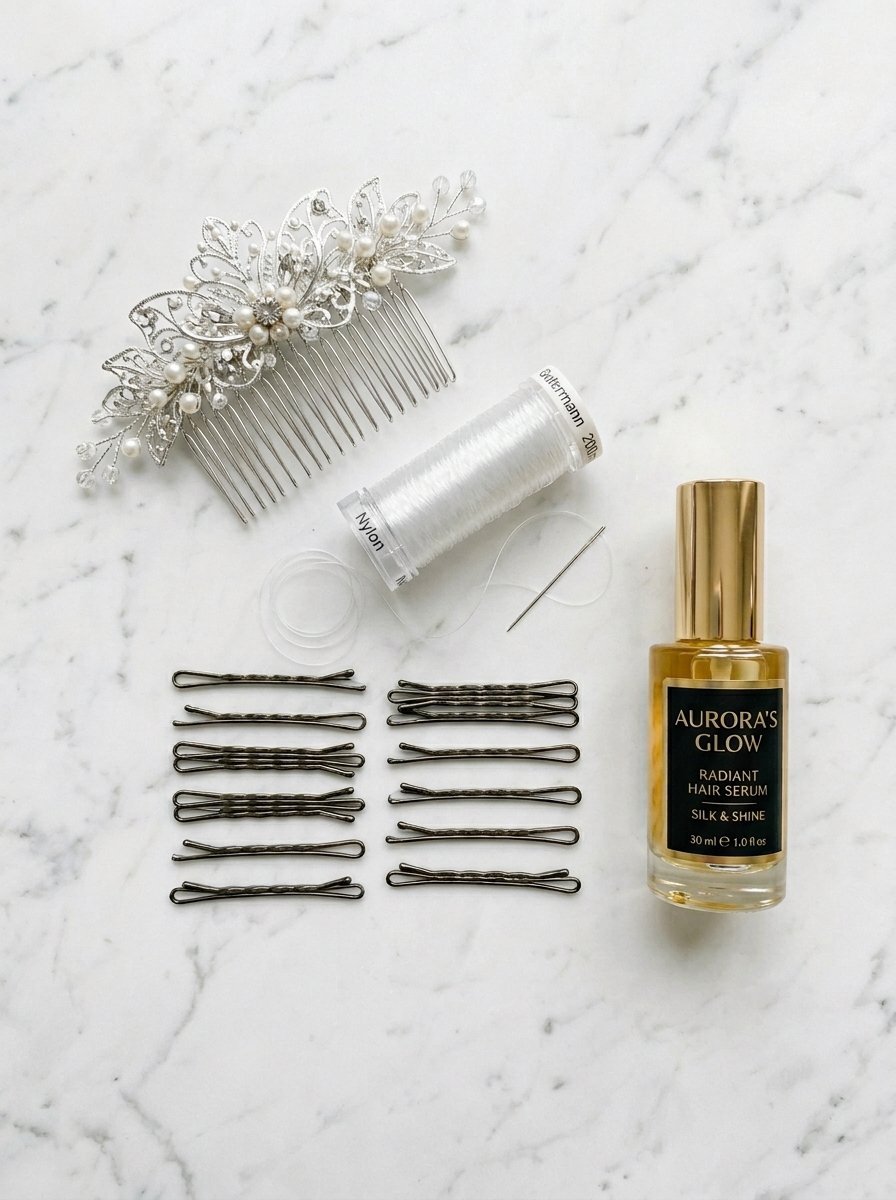
You must place your bun extremely low on your neck for this style to work. The fabric needs to drape over the crown of your head perfectly smooth. I worked with a bride named Chloe last May who demanded a high top knot. We placed the mantilla over the high bun and it bunched up like a crumpled paper bag. We moved her bun down to the nape of her neck immediately. The heavy lace fell beautifully down her shoulders. You need a strong anchor track of flat bobby pins directly on your scalp. Your stylist sews the lace lightly into this track using clear nylon thread. This keeps the lace border perfectly framing your cheekbones all day long.
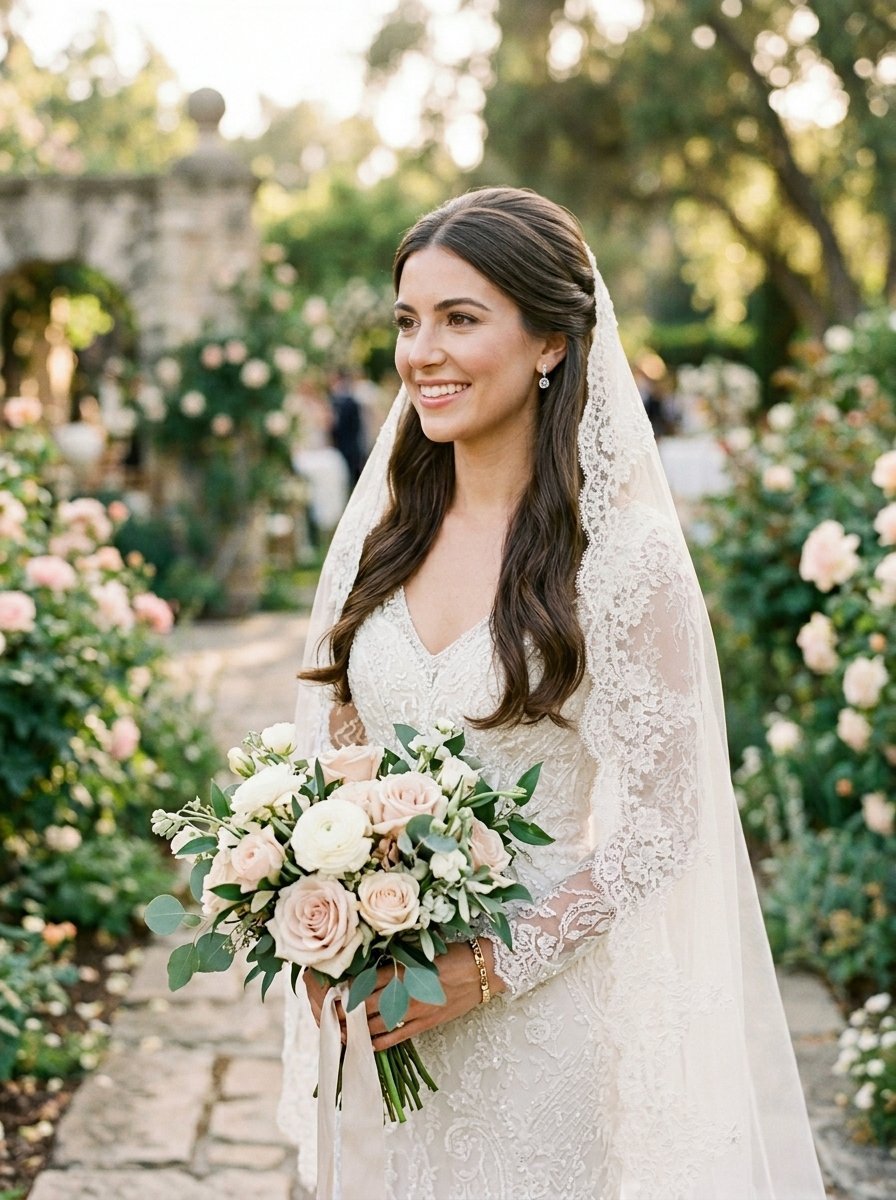
Mantilla Veil Half Up Half Down
This choice creates a gorgeous romantic aesthetic for church weddings. You take two thick pieces of hair from the very front of your face. You twist these sections backward and pin them tightly together at the back of your head. This twisted section gives the heavy veil a natural shelf to rest upon safely. The lace stays perfectly placed without sliding backward. I prefer using ribbed pins from Sally Beauty for this exact style. Smooth pins simply slide right out of the twisted hair under the heavy fabric weight.
Best Hairstyles For Mantilla Veil
You want incredibly sleek and smooth strands under this specific veil type. The heavy lace border snags easily on loose curls and textured flyaways. I always tell brides to buy a heavy shine serum a month before the wedding. Color Wow Dream Coat works miracles on frizzy strands. It makes your head look like polished glass under the venue lights. A sleek low ponytail also pairs beautifully with a mantilla edge. The clean lines of the ponytail let the intricate lace do all the talking.
Planning Wedding Hair For Long Hair With Veil
Heavy long hair plus a long heavy veil equals a massive headache. Your neck holds up literal pounds of material all afternoon. You must build a secure foundation hidden underneath the pretty curls.
Classic Chignon Anchors
A low chignon gives you the thickest foundation possible for a metal comb. The stylist twists your long hair into a dense knot and pins it tight against your lower scalp. The metal comb bites directly into this thick knot of hair. I did this for my own sister at her summer wedding. Her cathedral length veil weighed three pounds. The chignon held the weight flawlessly for six hours. She felt zero pulling or pain. You can buy a pack of large metal U pins online for ten dollars to secure a chignon deeply.
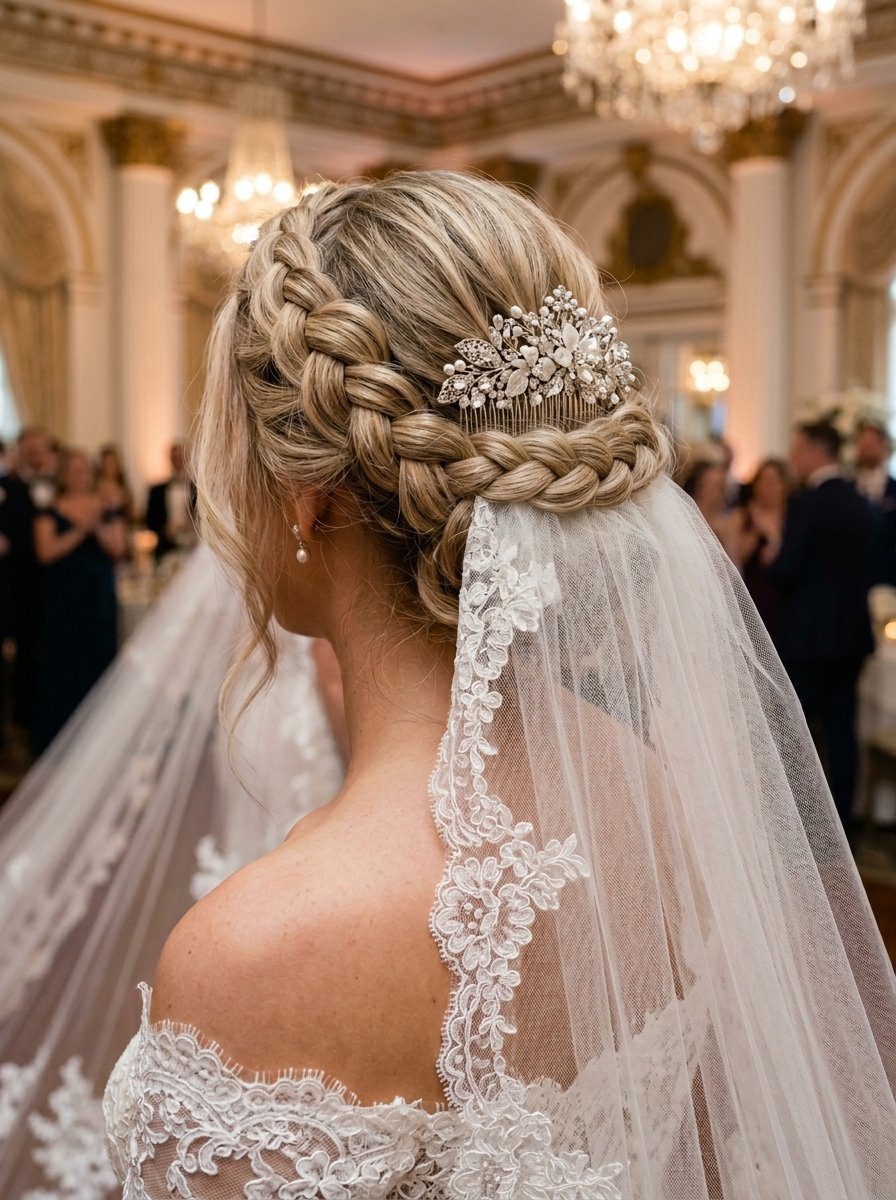
Braided Crowns for Heavy Veils
Braids give you an unbelievable grip base. You split your long hair down the middle and create two thick braids. You wrap these braids around the back of your head and pin them flat. The veil comb slides directly downward behind the braided crossover. The teeth of the comb get trapped inside the tight braided sections. This works amazingly well for extremely thick hair that normally spits out bobby pins.
Bridal Hair With Veil Down
Wearing your hair completely down looks incredibly soft and magical. You face a huge risk of the fabric flattening your volume. You must heavily tease the crown of your head before placing the comb. Spray the teased roots with Kenra Volume Spray 25. Let the spray dry completely into a hard shell. You push two bobby pins horizontally into this stiff teased root area. The metal comb slides down into these locked bobby pins. Your volume stays massive all night long.
Styling Short Bridal Hair With Veil
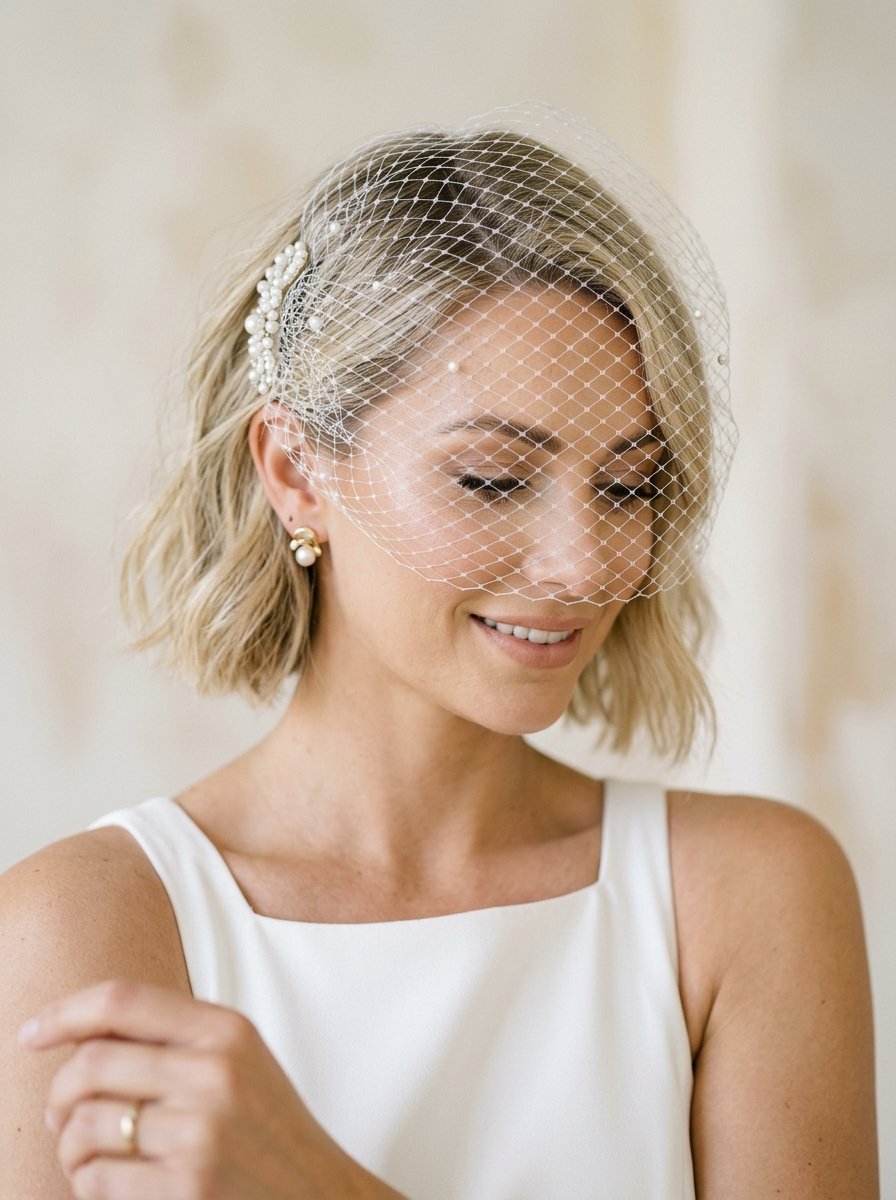
Women with bob haircuts panic about veil placement constantly. They think they lack the length needed to hold a metal comb. You just need a tiny bit of trickery to make it work.
The Hidden Bobby Pin Base
You cannot just push a comb into loose short hair. The comb will fall onto the floor within ten steps. You must create an artificial anchor flat against your scalp. Take a tiny section of hair at the crown of your head. Tease it aggressively with a fine tooth comb. Spray it with a dry holding spray like Tresemme Extra Hold. Place two ribbed bobby pins in a tight X shape directly over that teased spot. The comb slides downward and locks right into that rigid X shape. The short hair around it hides the pins completely.
Textured Bob Pairings
Short hair looks amazing when you add heavy beach waves. Use a one inch curling iron to bend the hair back and forth. You want a messy chopped vibe. A short birdcage veil pairs perfectly with this textured bob. The netting falls just over your eyes and clips into the side of your head. You skip the heavy tulle entirely. This saves you from scalp pain and keeps your style feeling very fresh.
Picking the Right Comb Placement
Where you place the comb completely alters your entire facial profile. A high placement gives you height while a low placement gives you elegance. You must test these spots visually during your trial run.
Top of the Head Drama
Placing the comb very high on your crown creates a massive retro aesthetic. The fabric poofs upward before falling down your shoulders. This placement adds two inches of visible height to your frame. I recommend this for brides wearing giant ballgowns. The massive hair volume balances out the massive skirt perfectly. You must use extra hold hairspray around your hairline to keep baby hairs completely flat.
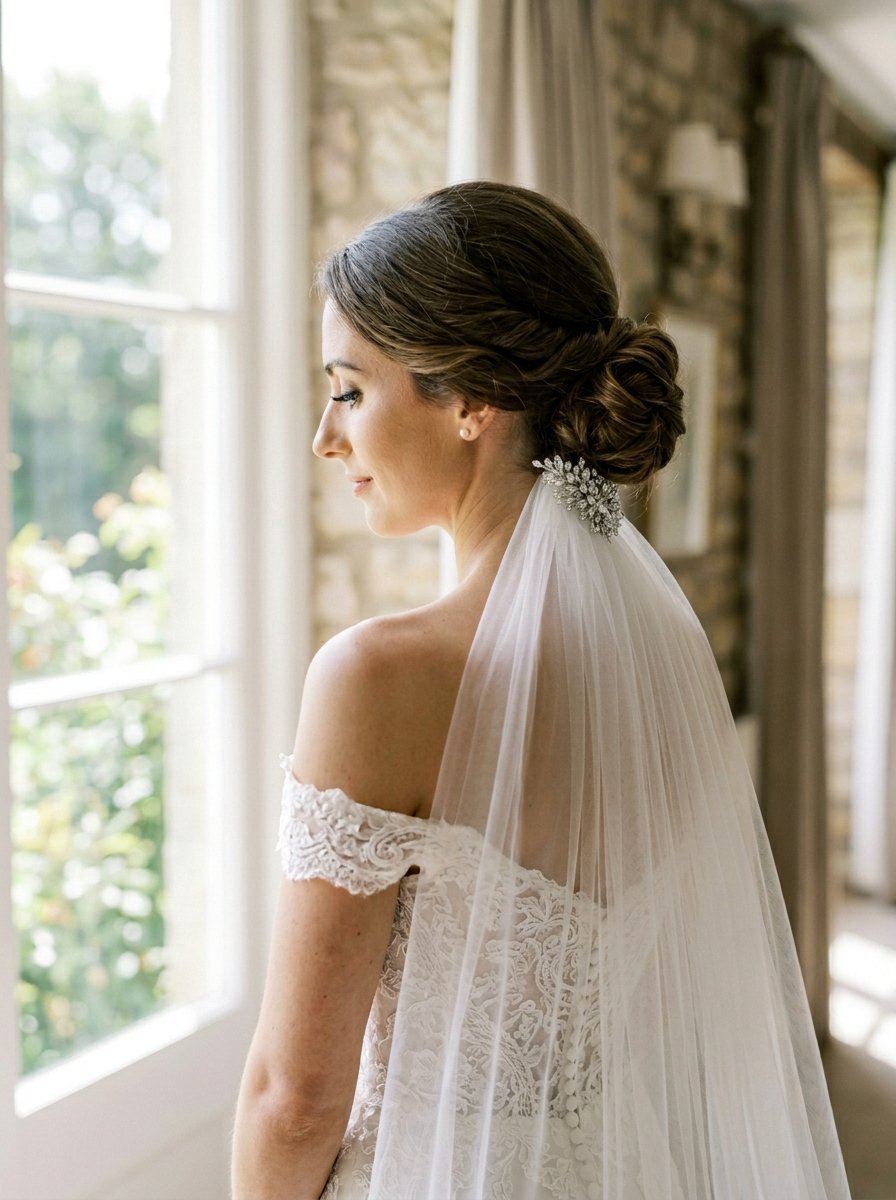
Below the Bun Elegance
This is the most requested placement in modern wedding salons. The comb slides upward directly underneath your low bun. The fabric flows out from the bottom of the hairstyle. Your guests get a perfect view of your intricate braided bun. The fabric never covers the expensive hair details. I find this placement the most comfortable for brides. The heavy fabric rests completely on your back instead of hanging off your scalp.
Side Swept Comb Installations
Side placement works flawlessly for deep side parts and vintage waves. You place a small comb above your left or right ear. The fabric falls asymmetrically over one shoulder. You must counterbalance the weight on the opposite side of your head. I tell brides to wear a heavy crystal earring on the side without the veil. This tricks the eye and makes your face look perfectly symmetrical in photographs.
Securing Veil Hairstyles for Outdoor Venues
Outdoor weddings look magical on Pinterest but they destroy hairstyles in minutes. Mother nature hates loose curls and delicate tulle. You must armor your hair against the elements.
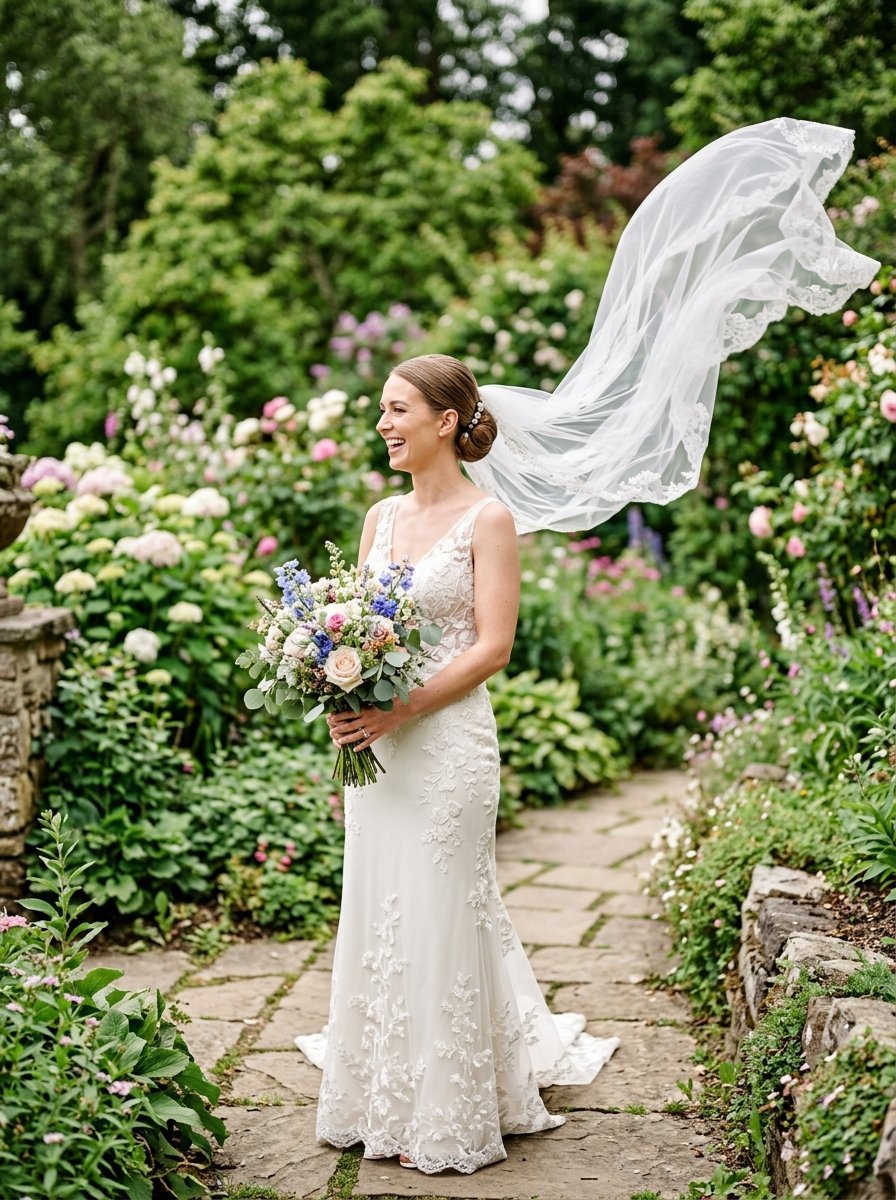
Fighting Heavy Winds
A strong gust of wind turns your veil into a violent kite. The fabric will pull your entire updo backward. You must secure the sides of the fabric to your dress if you expect high winds. I use tiny clear plastic snaps. The seamstress sews one side of the snap to the veil edge. She sews the other side to the shoulder strap of your dress. The fabric stays totally locked down during the ceremony. Your hair takes zero pulling damage.
Humidity Proofing Your Strands
Humid air turns sleek hair into a frizzy cloud. Your veil traps the heat against your neck and makes you sweat instantly. You need a total moisture block. I coat the hair in Oribe Impermeable Anti Humidity Spray before applying any heat. This creates a literal shield over the hair shaft. I did a beach wedding in Florida last August. The humidity hit ninety percent. The bride had dark thick hair. The Oribe spray kept her strands perfectly sleek the entire afternoon.
Creating the Perfect Reception Transition
You want to take the heavy tulle off your head before dinner starts. You want to dance without people stepping on your expensive lace. You must remove the comb carefully so you do not rip your curls apart.
Removing the Veil Safely
Never pull the comb straight backward. The teeth will drag your perfectly placed hair out of the bun. You must push the comb slightly downward first to unhook the teeth from the bobby pins. Then you slowly pull it straight upward toward the ceiling. Tell your maid of honor to place her free hand firmly on your bun. She holds the bun down while she pulls the comb up. I practice this specific motion with the bridesmaids during the morning prep session.
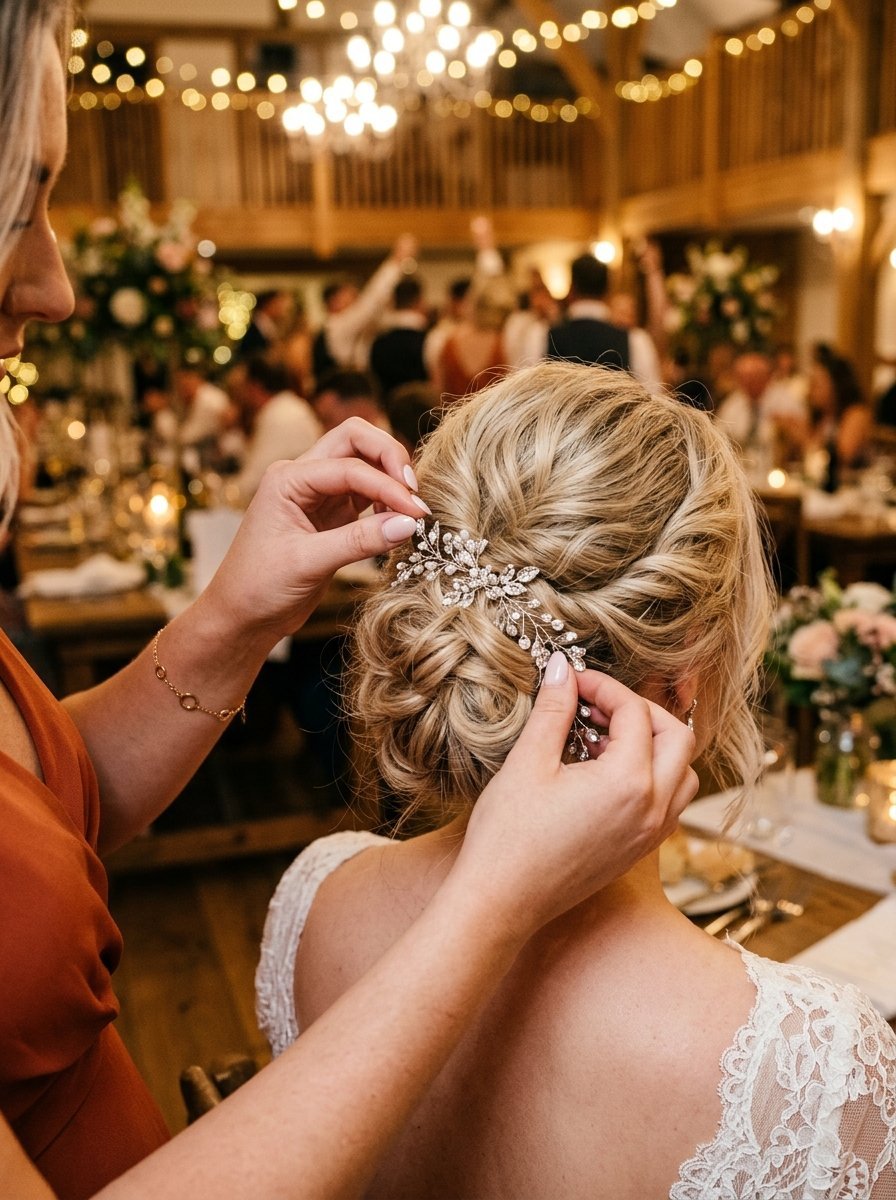
Replacing the Veil With Hair Jewelry
Your hair looks a bit plain once the massive fabric comes off. You should have a backup accessory ready for the reception. A sparkling crystal comb or a pearl vine fills the empty space beautifully. You slide the metal jewelry directly into the exact spot where the veil sat. This hides any tiny messy hairs the comb pulled loose. You can buy stunning handmade pearl vines on Etsy for around forty dollars.
Comparing Costs and Timelines for Veil Stylists
You must budget properly for your salon needs. Brides constantly get shocked by the hidden fees attached to bridal hair. You need a realistic cash plan months in advance.
Trial Run Budgets
You absolutely must pay for a trial run. Trying to figure out your veil placement on the wedding morning is a terrible idea. A proper trial run usually costs between 150 dollars and 300 dollars. The stylist spends two hours testing different pin placements and curl sizes. Bring your actual veil to this appointment. Bring the exact earrings you plan to wear. I charge 200 dollars for a full trial in my studio. It saves the bride massive morning stress and stops the tears before they start.
Extension Sourcing and Coloring
If you have thin hair you need clip in extensions. The metal comb needs thick hair to grab onto safely. Good human hair extensions cost around 200 dollars online. Luxy Hair makes fantastic thick sets that last for years. You must take these extensions to your local colorist. Have them dye the extra hair to match your exact shade perfectly. This usually costs another 100 dollars. Do this four weeks before the big day.
Real Brides and Their Veil Success Stories
Hearing what other women went through helps you plan much better. These true stories show exactly what works and what fails miserable in a real salon setting.
Sarahs Cathedral Veil Disaster Fixed
Sarah brought a ten foot long heavy cathedral veil to her hotel room. She also wanted a very loose messy low bun. Her hair was incredibly thin and fine. I told her the heavy fabric would rip the loose bun completely out of her head. She insisted we try it. I placed the comb and the entire bun slid down her neck instantly. We totally shifted the plan. I sewed three small hair tracks into the bottom of her hair. We made a tight chignon instead. The style held perfectly until midnight. She thanked me endlessly the next day.
Emilys Mantilla Dream Realized
Emily purchased an antique mantilla lace veil from a vintage shop. She wanted a true Spanish style placement flat across her dark hair. Her hair kept slipping and sliding under the old heavy lace. We used a massive amount of dry shampoo spray at her roots to create fake grit. We stitched the lace directly to tiny clear rubber bands hidden in her hair. She looked like a classic painting. Her photographer completely freaked out over how good she looked.
Frequently Asked Questions About Veil Hairstyles

When should I buy my veil?
You should buy your veil exactly when you buy your dress. The bridal shop lets you test different fabrics with your gown. You want the colors to match perfectly. Ordering a veil online takes up to eight weeks for shipping.
Does a heavy veil ruin curls?
A heavy tulle fabric absolutely flattens top curls within an hour. The physical weight crushes the hair shaft. You must tell your stylist to over curl the hair dramatically. When the curls drop under the weight they will settle perfectly.
Do I bring my veil to the hair trial?
You must bring your veil to the trial run appointment. The stylist needs to feel the physical weight of the comb. She needs to test if the teeth are metal or plastic. Plastic teeth require far more bobby pins to stay secure.
Can I wear a blusher veil with an updo?
A blusher veil falls entirely over your face as you walk down the aisle. You can absolutely wear this with an updo. The stylist places the comb at the top of your crown. Your father simply flips the blusher backward over the bun when he gives you away.
How do I pack my veil for destination weddings?
Never put your expensive tulle in your checked luggage. Airlines lose bags constantly. Fold the fabric gently into a large garment bag. Carry it onto the airplane yourself. You can steam out the wrinkles in your hotel bathroom using the hot shower steam.
Who takes my veil off at the reception?
Your maid of honor handles this task right after the formal pictures end. Ask your stylist to show her the exact removal trick during your morning prep. She must hold the bun flat while she pulls the comb gently upward.
Final Thoughts on Choosing Your Veil Hairstyle
You possess all the facts needed to rock your veil perfectly right now. You know exactly how a mantilla requires a low placement and a smooth finish. You know the exact tricks for anchoring heavy combs in thin hair using bobby pin crosses. You understand the true costs of trial runs and real human hair extensions. Do not let a heavy comb ruin your massive morning investment.
Start looking for your favorite inspiration pictures immediately. Order your extensions a month early and get them color matched by a true professional. Book your trial run and bring every single accessory you plan to wear. Drink plenty of water and keep your ends trimmed every six weeks. Your hair will look full and healthy. The fabric will flow down your back perfectly. You will open your photo gallery months from now and stare at absolute perfection.

Sarah Mitchell — Founder & Editor-in-Chief
Sarah Mitchell is the founder and editorial voice behind Hair Level Up. A licensed cosmetologist with more than 15 years of experience, she has styled A-list celebrities for editorial shoots and red carpets, with work featured in Vogue, Elle, and Harper’s Bazaar. Early in her career, she trained under the legendary hairstylist Oribe in New York, an apprenticeship that still shapes her editorial eye today. Sarah founded Hair Level Up in 2020 after one bad haircut convinced her that women deserved a destination that felt like a magazine, taught like a stylist, and inspired like an art gallery. She oversees every story from concept to publication, guided by a simple belief: a good story teaches you something, but a great one makes you feel beautiful while it does.