12 Simple Steps to Identify Your Curl Pattern in Under 5 Minutes
Stop brushing your dry hair for a second. Many people spend years thinking their hair is just messy or frizzy when it actually contains beautiful hidden texture. Understanding your hair is the first step toward a routine that actually works. You might have seen charts with numbers and letters like 2A or 4C and felt overwhelmed. I felt the same way when I started my journey five years ago. I spent too much money on heavy creams that only weighed my fine waves down. This guide helps you find your true texture quickly so you stop wasting money on the wrong products. We focus on real results and simple observations you can make in your own bathroom.
You will find your specific curl type and a plan to keep it healthy. We cover the water test and the mirror check. You will see why your hair behaves differently in humidity. This article provides a clear path for waves, curls, and coils. I include specific tool recommendations and product ordering tips. We look at real life examples of people who changed their hair by simply changing how they identified it. By the end of this read, you will have a complete strategy for your unique head of hair. We avoid complicated science and stick to what you can see and feel right now.
1. The Clean Slate Shower Test
Your journey starts with a clean slate. You cannot identify your pattern if your hair contains heavy oils or old gels. I recommend using a clarifying shampoo first. This removes any buildup that might be stretching your curls out. In my experience, most people think they have straight hair because their products are too heavy. I saw this with a friend named Jessica. She thought her hair was just thick and puffy. Once we stripped away the heavy silicone conditioners, her hair immediately started to form soft waves.
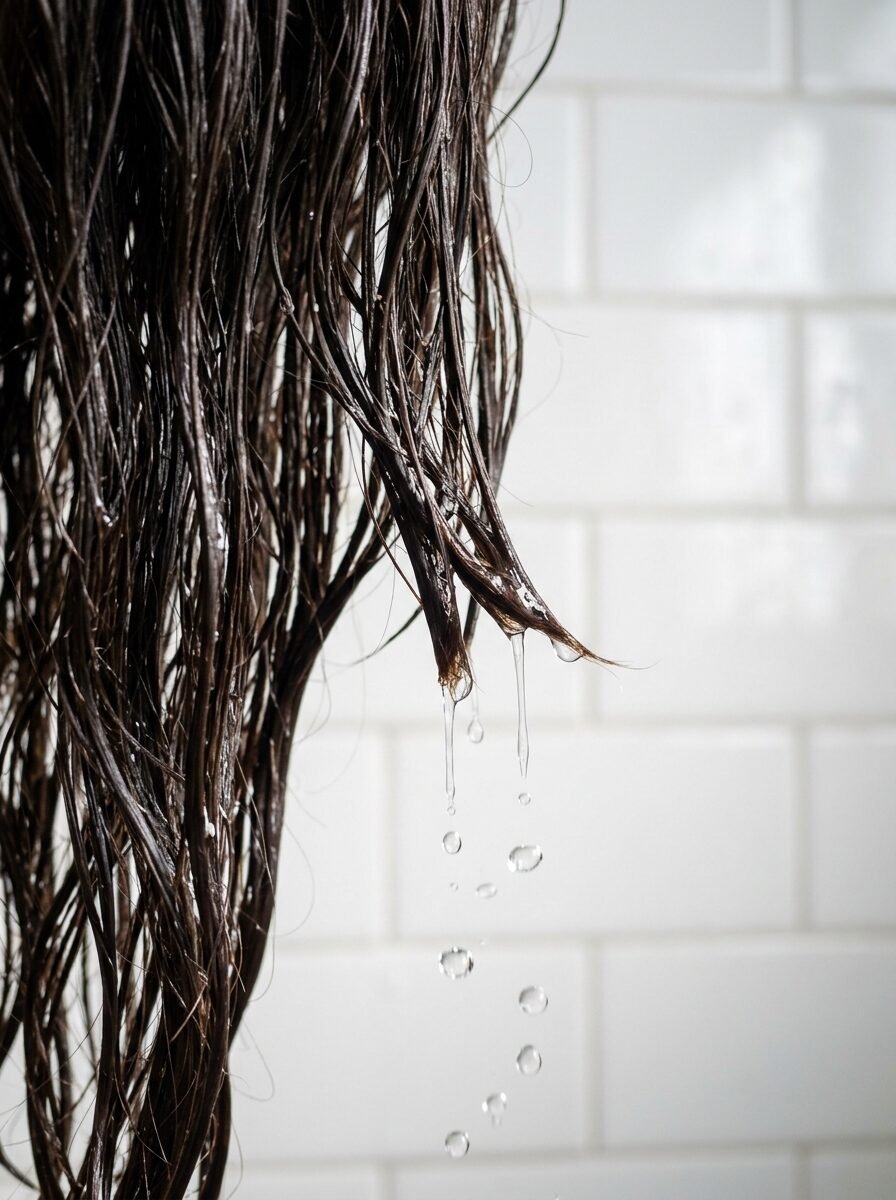
Wash your hair thoroughly. Do not add any conditioner or leave in product yet. Step out of the shower and let the water drip for a moment. Do not use a towel. Do not use a brush. This is the most honest state your hair will ever be in. Look at the strands as they clump together naturally. Are they forming a slight S shape? Are they sticking straight out? This moment is your baseline. Everything we do from here depends on what you see in these first sixty seconds of wet hair.
2. Observing the S Shape for Waves

If your hair looks mostly straight when wet but develops a slight curve as it dries, you likely have Type 2 hair. This is often called wavy hair. Type 2A is very fine and easy to weigh down. Type 2B has a more defined S shape that starts closer to the middle of the hair length. Type 2C is thick and can almost look like curls but the shape is still a wave. I’ve noticed that people with Type 2 hair often struggle with volume at the roots.
Look closely at your reflection. If your hair lays flat against your scalp but starts to wave around your ears, you are a classic Type 2. You need lightweight products like mousses or foams. Creams are usually your enemy. I tried using a heavy shea butter cream on my wavy hair once and it looked like I hadn’t washed it in a week. Stick to water based formulas. This keeps your waves bouncy and prevents them from stretching into straight lines by the end of the day.
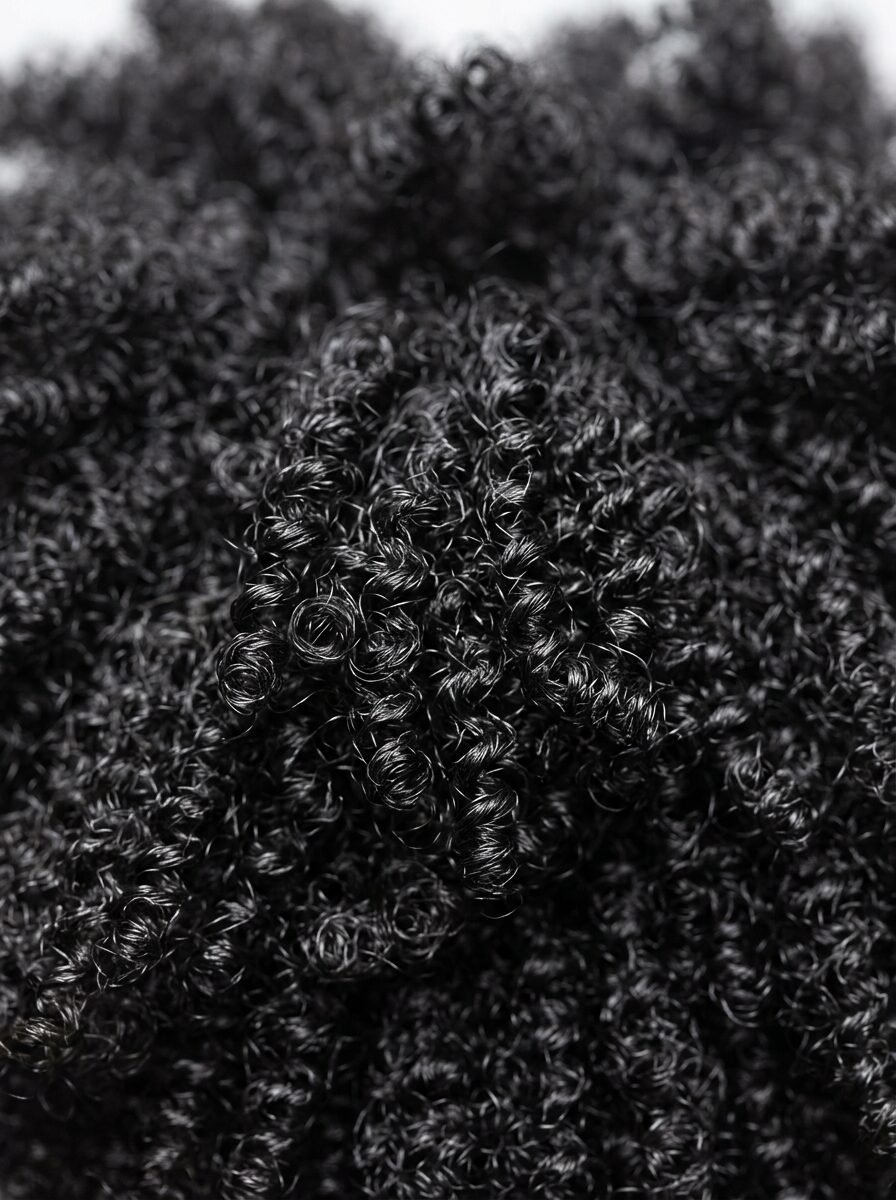
3. Spotting the Ringlets of Type 3
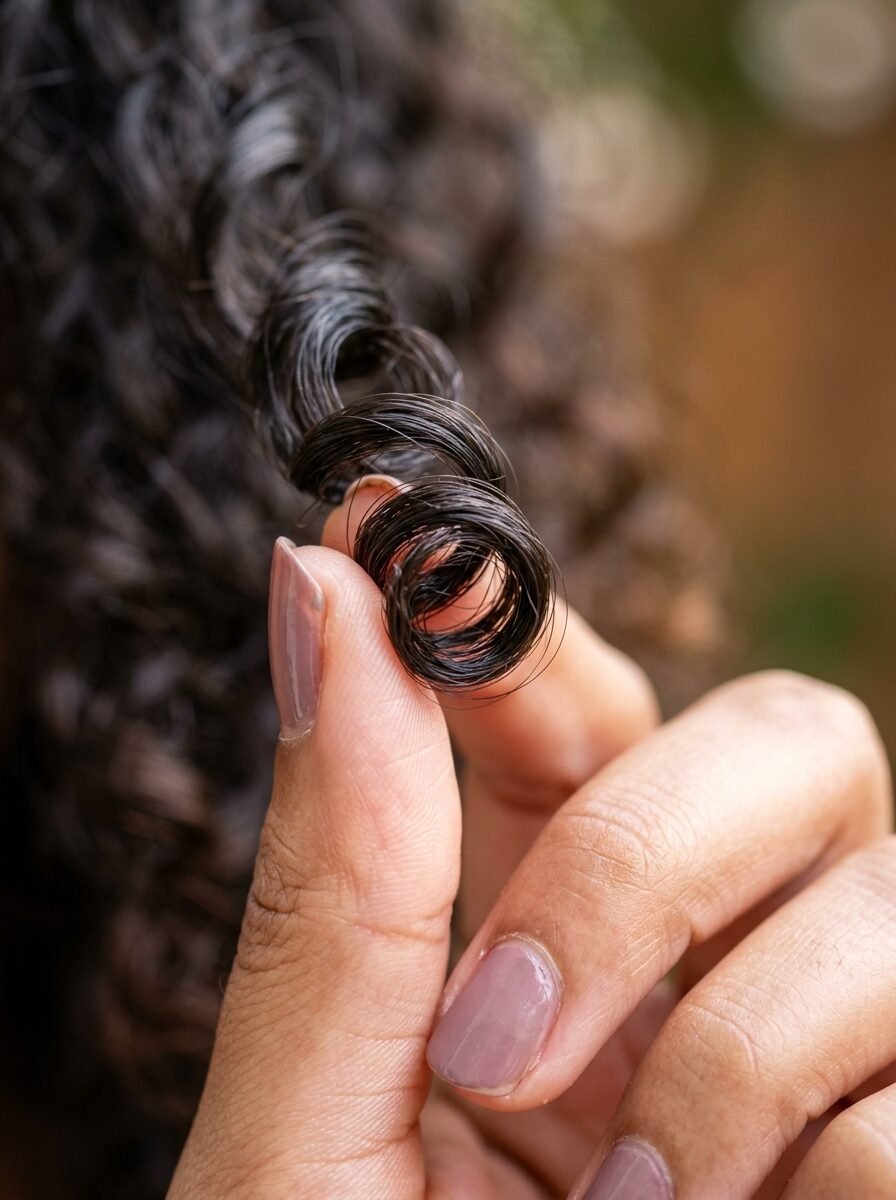
Type 3 hair is where we see true curls. These are strands that wrap around themselves like a corkscrew. If your wet hair immediately forms loops, you have Type 3 hair. Type 3A curls are about the width of a piece of sidewalk chalk. They are large and bouncy. Type 3B curls are tighter, similar to the width of a permanent marker. Type 3C curls are very tight and dense, often called coily curls. They are about the width of a pencil or a drinking straw.
Type 3 hair is prone to dryness. The natural oils from your scalp have a hard time traveling down a spiral. I noticed that my Type 3 clients always need more moisture than they think. If your curls lose their shape as they dry, it usually means they are thirsty. Use a cream or a gel to lock in that moisture while the hair is still soaking wet. This prevents the hair from reaching out into the air for moisture, which is what causes frizz.
4. Identifying Type 4 Coils and Zigzags
Type 4 hair is beautiful, dense, and very fragile. It often looks shorter than it actually is because of shrinkage. If your hair forms tight zigzags or small coils that stay close to the scalp, you have Type 4 hair. Type 4A has a visible curl pattern with small coils. Type 4B has a Z shape that is less about spirals and more about sharp angles. Type 4C is the densest and has the most shrinkage. It can be hard to see a clear pattern without looking very closely.
In my experience, Type 4 hair needs the most protection. It is naturally the driest because the tight pattern blocks oil flow completely. I’ve seen amazing results when Type 4 hair is treated with heavy butters and oils. You need products that provide a lot of slip so you do not break the hair while styling. If you pull a strand and it shrinks back significantly, you are definitely in the Type 4 family. Embrace the shrinkage as a sign of hair health and elasticity.
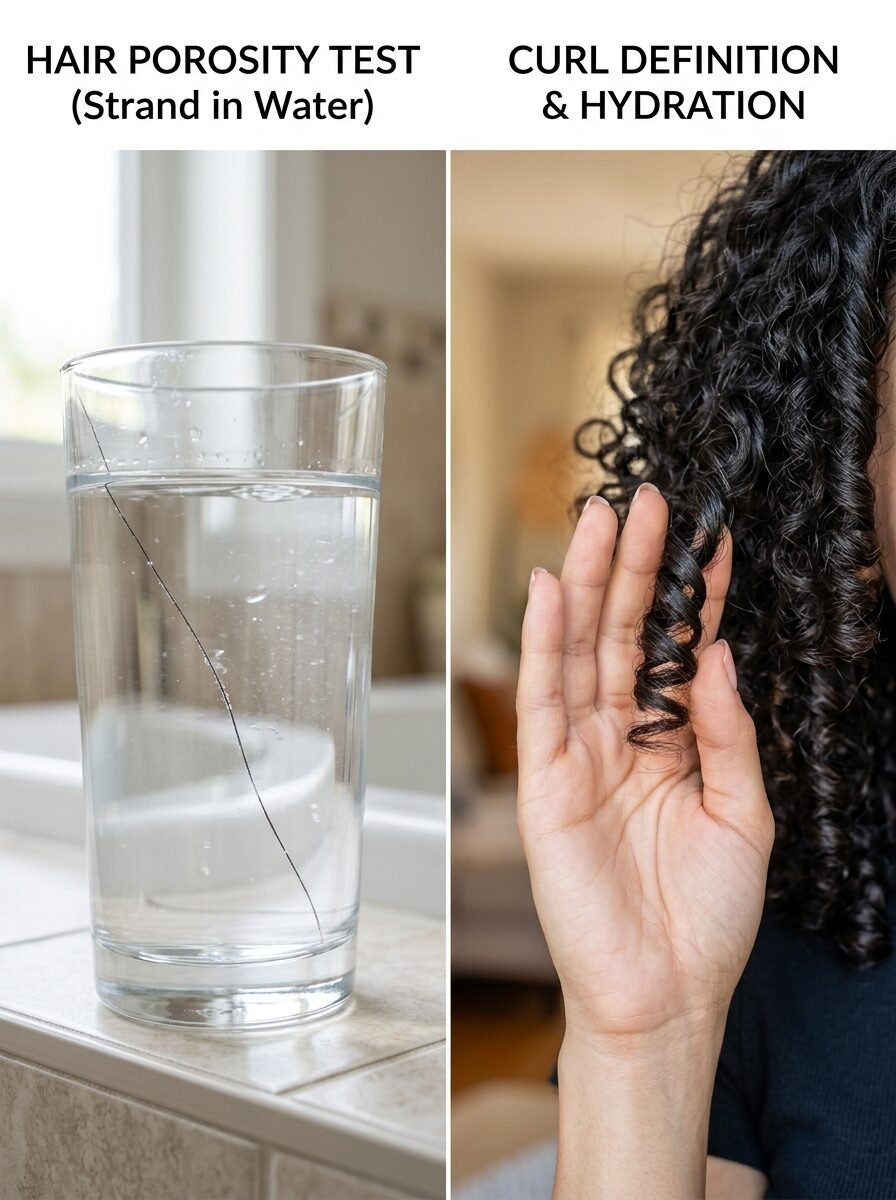
5. Testing Your Hair Porosity
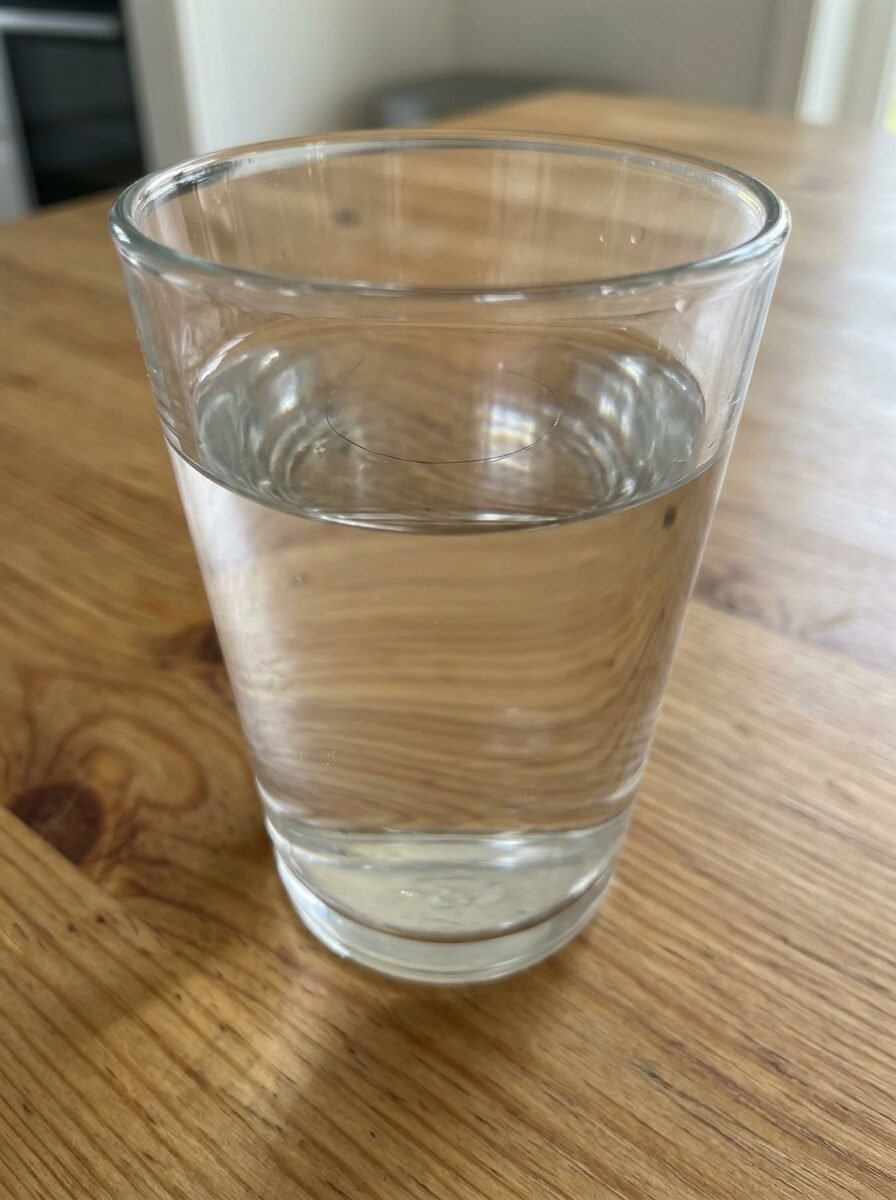
Your curl pattern is only half of the story. Porosity tells you how your hair handles moisture. High porosity hair has gaps in the cuticle. It absorbs water fast but loses it just as quickly. Low porosity hair has a tightly closed cuticle. Water often sits on top of the hair in little beads. I once worked with a woman who spent forty minutes trying to get her hair wet in the shower. That is a clear sign of low porosity.
To test this, take a clean strand of hair and drop it into a glass of water. If it sinks to the bottom immediately, you have high porosity. If it floats on top for a long time, you have low porosity. This matters because it changes your product order. Low porosity hair needs heat to open the cuticle. High porosity hair needs cold water rinses or protein to seal the gaps. Knowing this prevents you from using products that just sit on the surface of your hair.
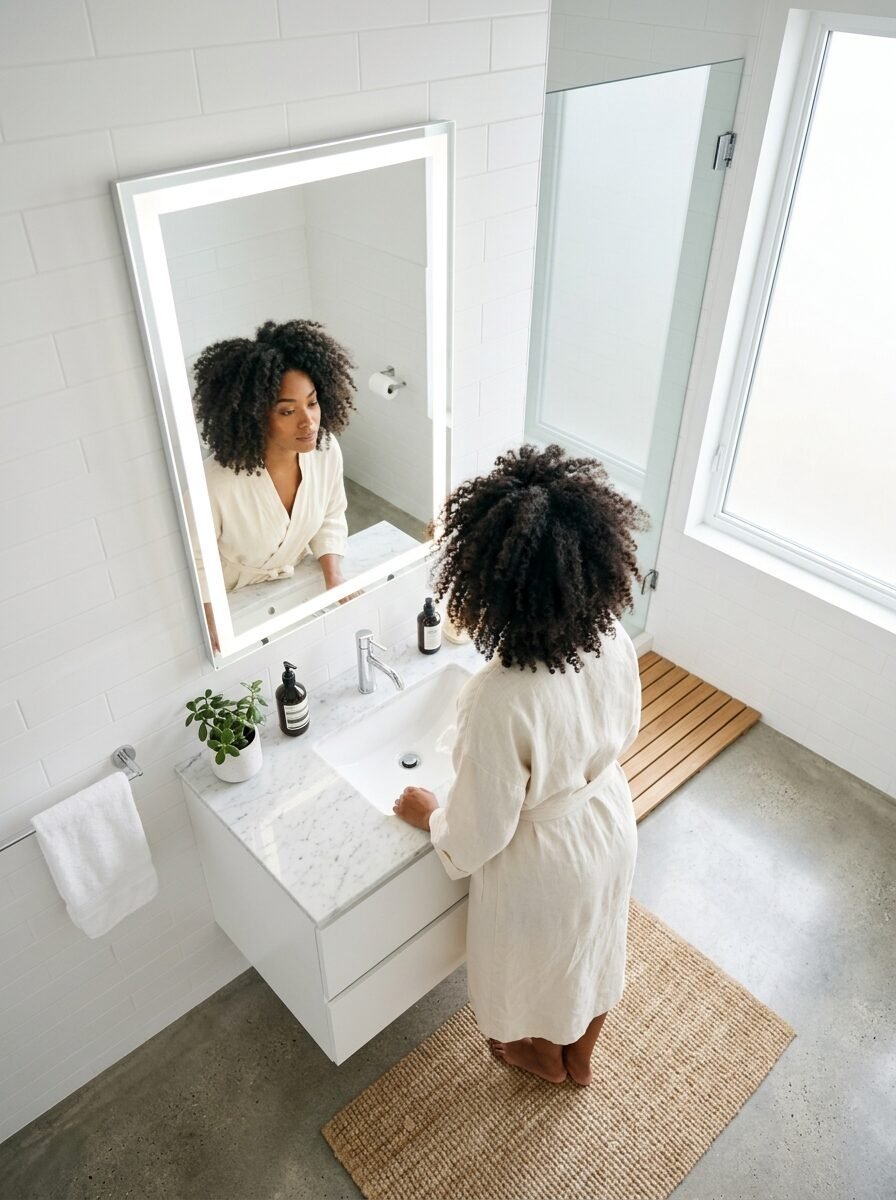
6. The 5-Minute Mirror Check
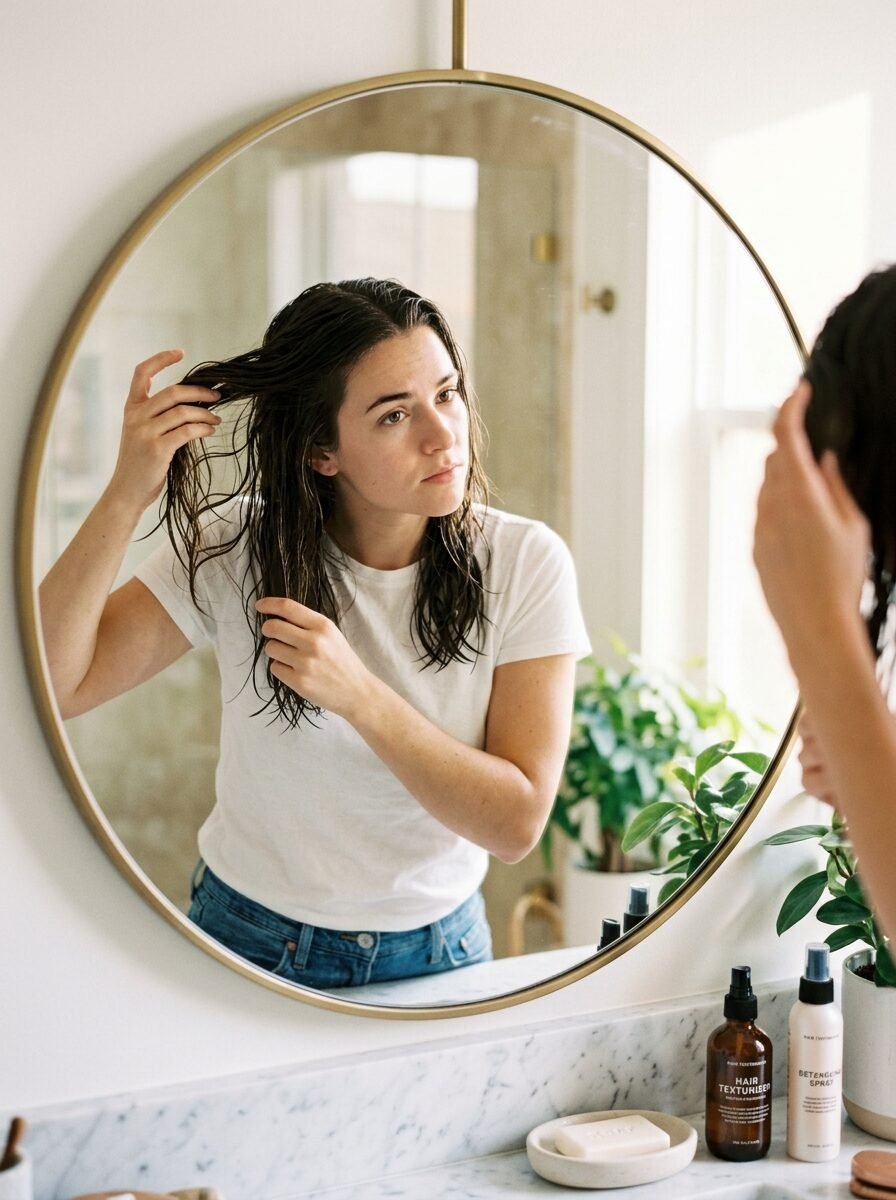
Now that you know the types, stand in front of a mirror with damp hair. Take a section from the top, the side, and the back. Most people actually have multiple curl patterns on one head. I’ve noticed that many people have tighter curls at the nape of their neck and looser waves on the top layer. This is normal. The top layer is often exposed to more sun and wind, which can loosen the pattern.
Document what you see. Is the top layer frizzy but the bottom layer spiraled? You might need to apply more product to the top sections. Look at how the hair clumps. If it forms thick groups, you have high density. If you can see your scalp easily, you have low density. This 5 minute observation is better than any online quiz. It tells you exactly where your hair needs help and where it is already doing well.
7. Choosing the Right Styling Products

The market is full of curly hair styling products that promise miracles. You must choose based on your new identification. Wavy Type 2 hair loves sea salt sprays and light mousses. Type 3 hair needs a balance of a leave in conditioner and a medium hold gel. Type 4 hair thrives with thick creams, mango butters, and heavy oils. I’ve seen people use the wrong product for years and think their hair was the problem.
Avoid drying alcohols in your gels. Look for ingredients like aloe vera, flaxseed, or jojoba oil. These provide hold without making the hair feel crunchy. I always tell my clients to start with less product than they think they need. You can always add more, but washing out too much product is a chore. If your hair feels stiff or sticky after it dries, you are using something too heavy for your specific pattern.
8. Mastering the Curl Product Order
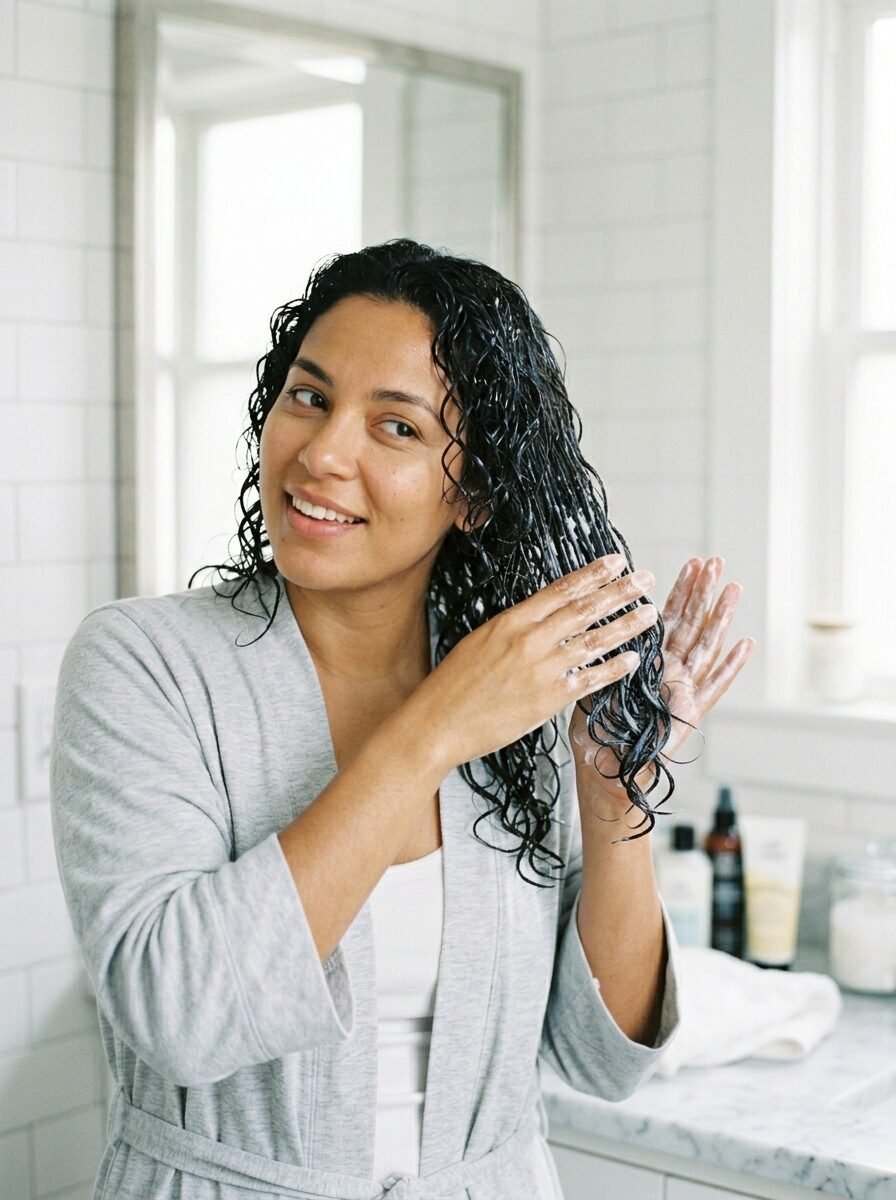
The order in which you apply products is vital for curly hair maintenance. The most common method is the LOC method. This stands for Lead in, Oil, and Cream. This works best for high porosity or Type 4 hair. For Type 2 or Type 3 hair, I often recommend the LCO method. This is Leave in, Cream, and then Oil. The oil acts as a sealant to keep the moisture inside the hair shaft.
I’ve noticed that applying product to soaking wet hair is the secret to frizz free curls. If you wait until your hair is damp, the frizz has already started to form. Use your fingers to rake the product through from roots to ends. This ensures every strand is coated. Then, use a scrunching motion to encourage the curls to form. This simple change in your routine can make a massive difference in how your curls look once they are fully dry.
9. Avoiding Heat and Chemical Damage
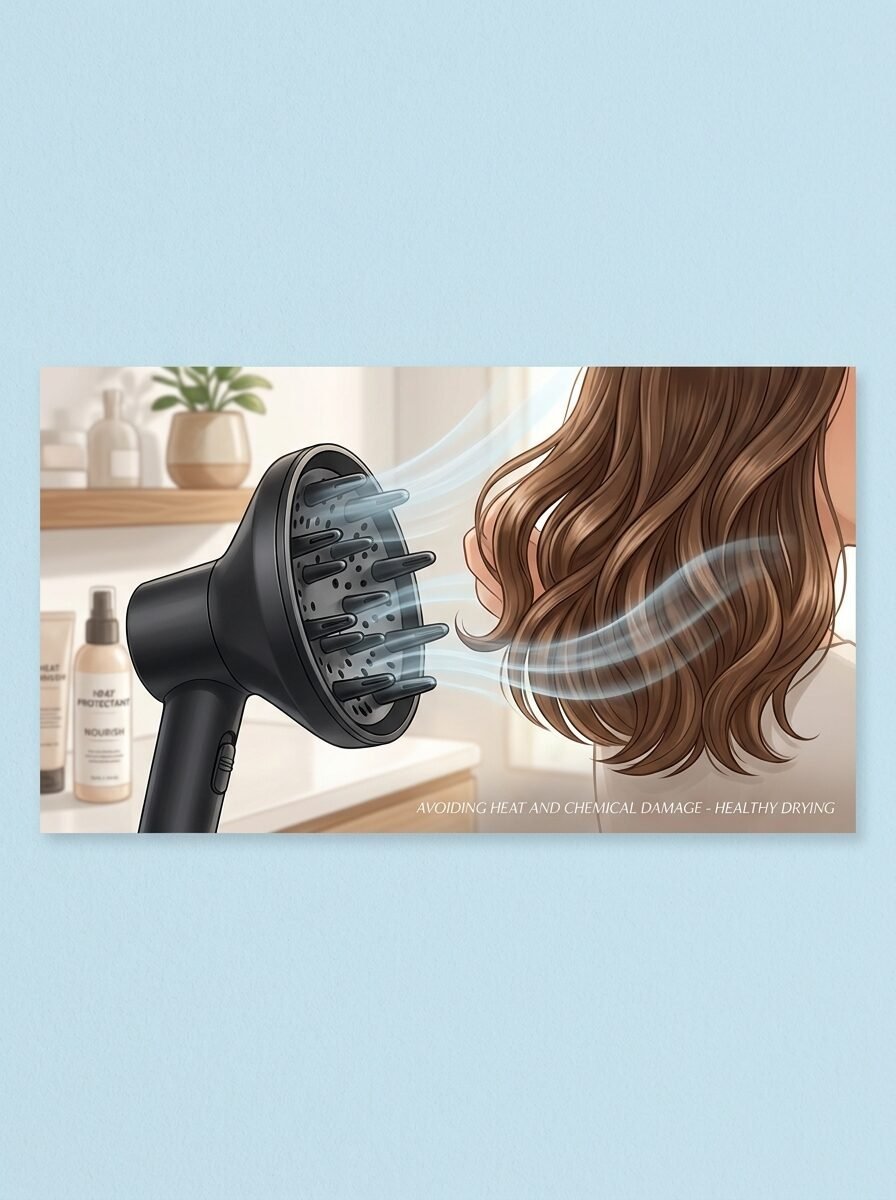
Nothing ruins a curl pattern faster than excessive heat. If you use a flat iron every week, your curls will eventually lose their memory. This means they will not spring back into their natural shape even when wet. I’ve seen this happen to many people who try to transition back to natural hair. They have three inches of curls at the root and straight, limp ends. This is heat damage.
If you must use a hair dryer, always use a diffuser attachment. A diffuser spreads the air flow so it does not blast the curls apart. Use the lowest heat setting possible. In my experience, air drying is the healthiest option, but it takes time. If you choose to air dry, do not touch your hair while it is wet. Touching wet curls causes them to break apart and create frizz. Patience is the best tool for healthy curly hair.
10. Adjusting for Seasonal Changes
Your hair needs different things in the summer than it does in the winter. High humidity in the summer makes the hair shaft swell. This is why your hair gets bigger when it is hot outside. You need anti humectant gels to keep the moisture out. In the winter, the air is dry and strips moisture from your hair. You need more leave in conditioner and heavier oils during the cold months.
I noticed that my hair completely changes when I travel to different climates. In a dry desert, my curls disappear and turn into soft waves. In a tropical area, my curls are tight and bouncy. Pay attention to how your environment affects your pattern. Do not be afraid to switch your products as the seasons change. Your hair is a living part of you and it reacts to the world around it.
11. Selecting Tools vs. Using Your Fingers
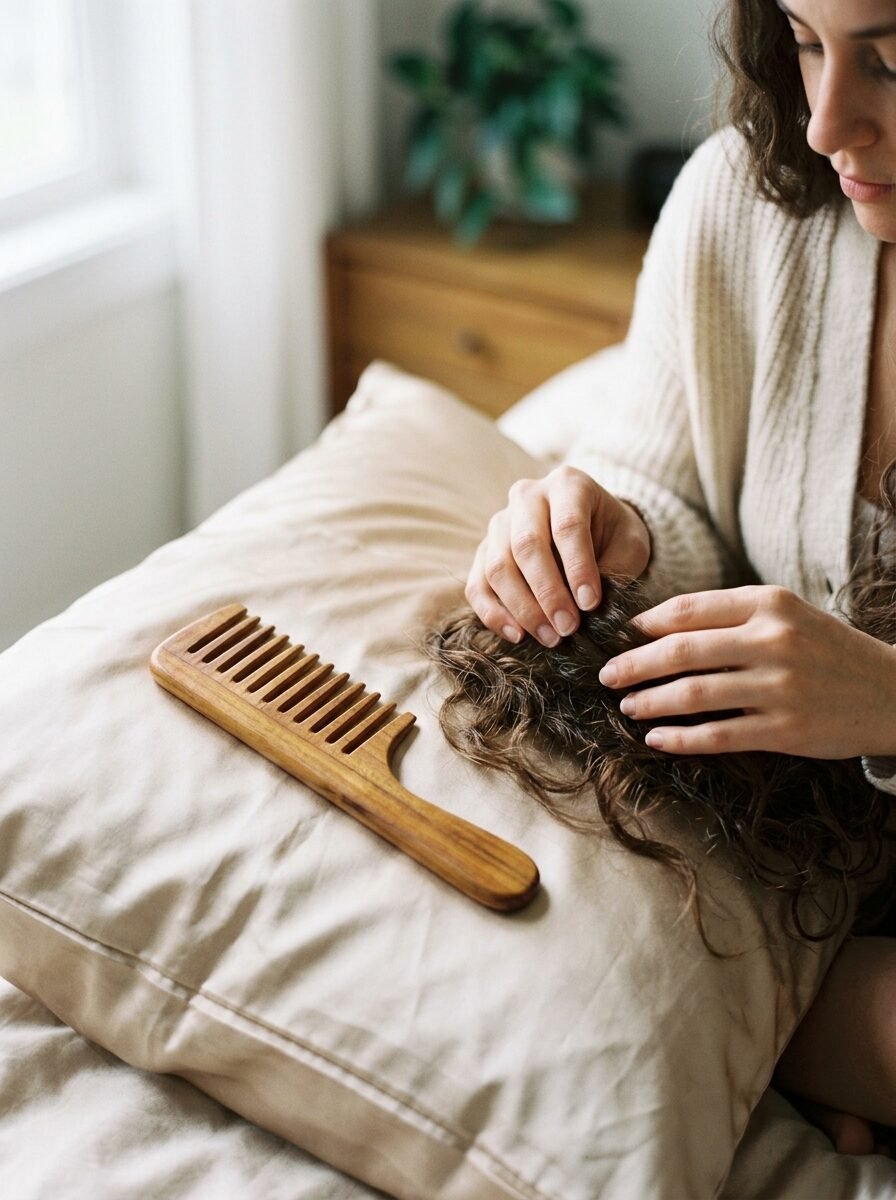
You do not need a lot of expensive tools to take care of curly hair natural styles. Sometimes your fingers are the best tools you have. Using a fine tooth comb on dry curls is a recipe for disaster. It breaks the curls and creates a halo of frizz. If you must use a brush, use a wide tooth comb or a specialized detangling brush while the hair is saturated with conditioner in the shower.
I’ve seen a lot of success with the Denman brush for Type 3 curls. It helps define the ringlets and distribute product evenly. However, for Type 4 hair, I often suggest just using your hands. This allows you to feel any knots or tangles before you pull on them and cause breakage. A silk or satin pillowcase is also a non negotiable tool. It prevents friction while you sleep, which keeps your curls intact for the next day.
12. Establishing Consistent Maintenance Habits

Consistency is the secret to long term hair health. You cannot expect perfect curls after one wash. It takes time for your hair to adjust to a new routine. I recommend a deep conditioning treatment once a week. This provides a concentrated dose of moisture or protein depending on what your hair needs. I’ve noticed that people who stick to a schedule see much faster growth and better definition.
Trim your hair every three to four months. Split ends can travel up the hair shaft and ruin your curl pattern. A “curly cut” where the stylist cuts the hair while it is dry and in its natural state is usually better than a traditional wet cut. This ensures the shape looks good when you style it at home. Treat your hair with kindness and it will reward you with shine and bounce. You now have the knowledge to identify and care for your unique pattern.
Frequently Asked Questions
Can my curl pattern change over time?
Yes, your curl pattern can change due to hormones, age, or damage. I’ve seen many women experience a change in texture during pregnancy or after starting new medications. Heat damage and chemical treatments like bleach also loosen the pattern significantly. If you notice a sudden change, look at your health and your recent hair habits. Your hair often reflects what is happening inside your body.
Why is my hair curly underneath but straight on top?
This is a very common issue caused by environmental damage. The top layer of your hair takes the brunt of the sun, wind, and pollution. It is also the part you likely touch the most. Over time, this weakens the curls. To fix this, try to protect the top layer with a hat or specific UV protectant sprays. You can also try finger coiling the top sections to encourage them to match the curls underneath.
How often should I wash curly hair?
Most curly hair does not need to be washed every day. Washing too often strips the natural oils that your hair needs. For Type 2 hair, every two to three days is usually enough. For Type 3 and Type 4 hair, once a week is often sufficient. In between washes, you can refresh your curls with a spray bottle of water and a little bit of leave in conditioner. This brings the bounce back without a full wash day.
What is the plopping method?
Plopping is a technique used to dry hair without disturbing the curl pattern. You lay a cotton t shirt or a microfiber towel flat on a surface. You then bend over and place your wet hair in the center of the cloth. You tie the cloth around your head and let it sit for twenty minutes. This soaks up excess water while pushing the curls toward your scalp, which creates more volume and better definition.
Does cutting my hair make it curlier?
Cutting your hair does not change the follicle shape, but it can make your curls look much better. Long hair is heavy and the weight can pull the curls down, making them look flatter. Removing length and adding layers reduces that weight. This allows the curls to spring up and show their true shape. If your hair feels limp and stretched out, a fresh haircut is often the quickest fix.
Is frizz always a bad thing?

Not at all. Some people prefer a bit of frizz because it provides volume and a more natural look. In the curly hair world, we often say that frizz is just a curl waiting to happen. If you like big, voluminous hair, do not stress about a few stray strands. If you prefer sleek definition, focus more on gels and sealants. Your hair should reflect your personal style and what makes you feel confident.
By following these 12 steps, you have moved past the confusion of random hair advice. You know your type. You know your porosity. You know how to shop for products that actually work. This 5 minute identification process is the foundation of your new hair journey. I’ve seen these steps work for hundreds of people who were ready to give up on their natural texture. Your curls are a unique part of who you are. Treat them with the care they deserve and they will shine.
How did your hair react to the water test today?

Sarah Mitchell — Founder & Editor-in-Chief
Sarah Mitchell is the founder and editorial voice behind Hair Level Up. A licensed cosmetologist with more than 15 years of experience, she has styled A-list celebrities for editorial shoots and red carpets, with work featured in Vogue, Elle, and Harper’s Bazaar. Early in her career, she trained under the legendary hairstylist Oribe in New York, an apprenticeship that still shapes her editorial eye today. Sarah founded Hair Level Up in 2020 after one bad haircut convinced her that women deserved a destination that felt like a magazine, taught like a stylist, and inspired like an art gallery. She oversees every story from concept to publication, guided by a simple belief: a good story teaches you something, but a great one makes you feel beautiful while it does.