The Step-by-Step LOC Method for Maximum Curl Definition
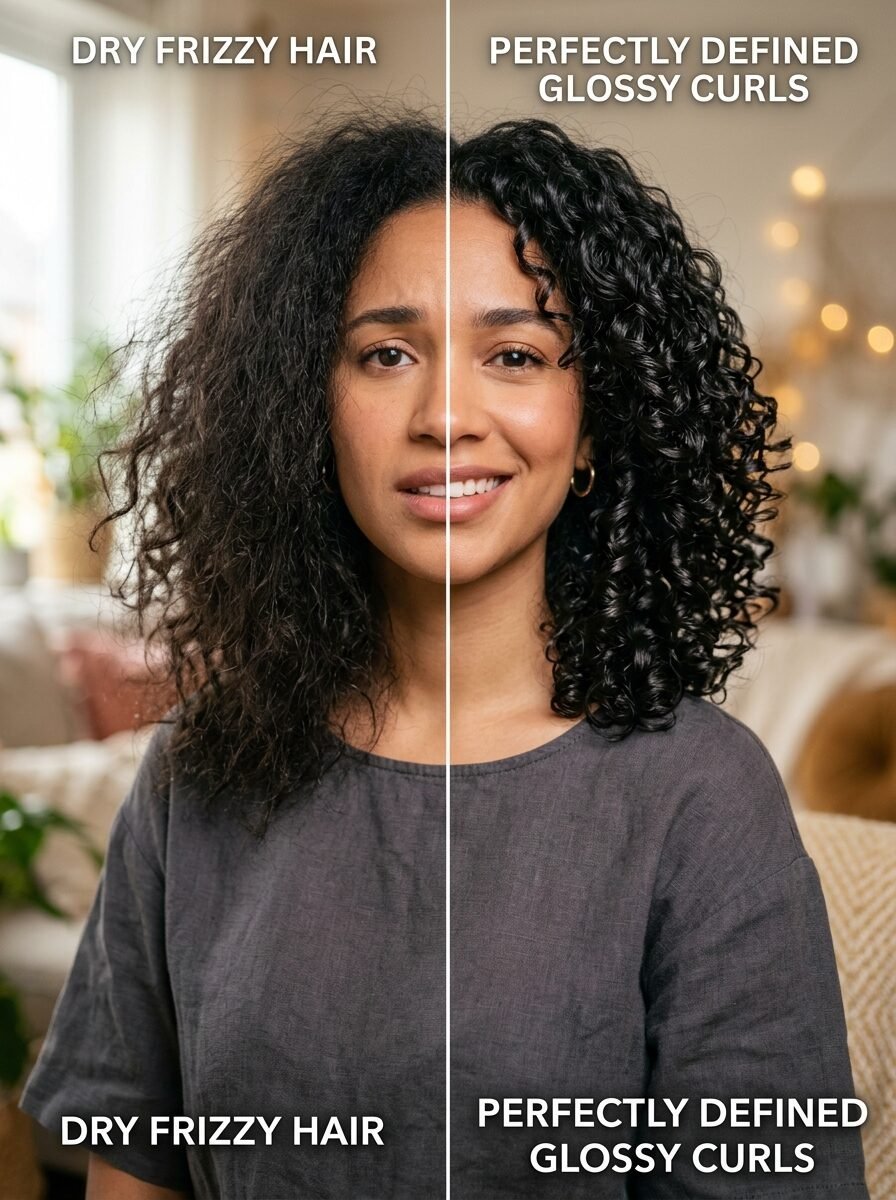
The morning air in Miami felt like a wet blanket. I stood in front of the mirror and stared at a cloud of frizz that used to be my hair. I had spent two hours the night before applying every expensive lotion I owned. By 8:00 AM, my curls were gone. They were replaced by a dry, tangled mess that felt like straw. I felt defeated. I almost grabbed the flat iron to give up for good. That was the day I stopped guessing. I realized that putting moisture into hair is not the same as keeping it there. Your hair is like a thirsty plant in a desert. If you water it but don’t shade it, the sun steals that water in minutes. You need a way to trap that life. This is where the LOC method changed my life. It is not just a routine. It is a shield.
You will get a clear plan to stop the dryness once and for all. This guide covers the exact steps to layer your products so moisture stays inside your hair for days, not hours. I share how to pick the right oils for your hair type and how to avoid the heavy, greasy feel that ruins your look. You will see real examples of how this works for different curl patterns. I also look at the costs and the specific brands that actually do what they say. By the end, you will know how to turn your bathroom into a professional curl studio. This is the long-term fix for anyone tired of brittle strands and wasted money on products that just sit on top of your head.
1. What Is The LOC Method Exactly
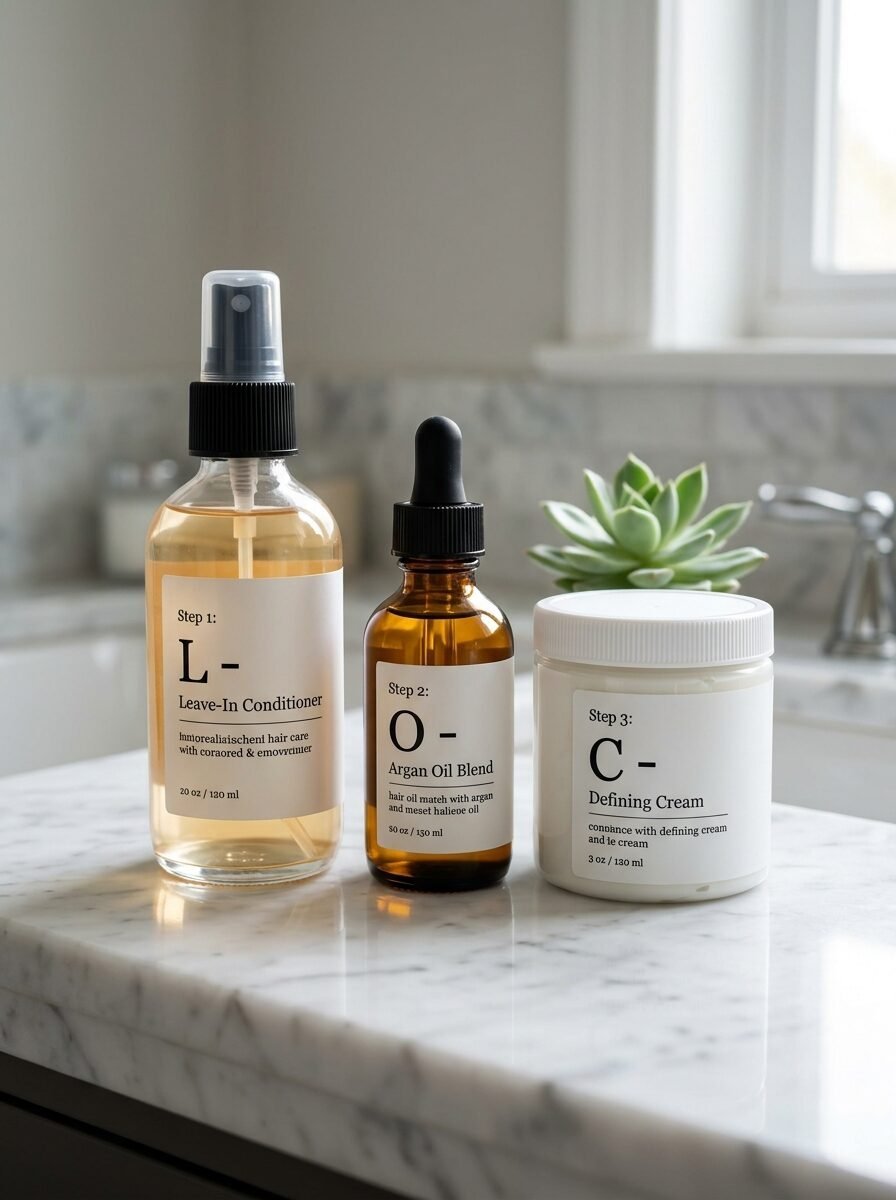
The LOC method stands for Leave-in, Oil, and Cream. It is a layering way to style hair. Think of it like dressing for winter. You put on a base layer to stay warm, a sweater to hold the heat, and a coat to block the wind. For your hair, the leave-in is the water. The oil is the seal. The cream is the shaper. This order matters because of physics. Water evaporates. Oil and water do not mix. If you put oil on first, the water can never get in. If you put the cream on first, it might block the oil. This specific path ensures each layer does its job without fighting the others.
In my experience, many people skip the oil or do it last. I tried that for a year. My hair looked okay for an hour, but then it turned into a puffball. When I switched to the correct order, my curls stayed defined for four days. I didn’t have to re-wet my hair every morning. That saved me thirty minutes every day. That is five hours a week back in my life. Most people with type 3 or type 4 hair find this is the only way to stop the “mid-day crunch” that happens when hair dries out too fast.
2. Knowing Your Hair Porosity First
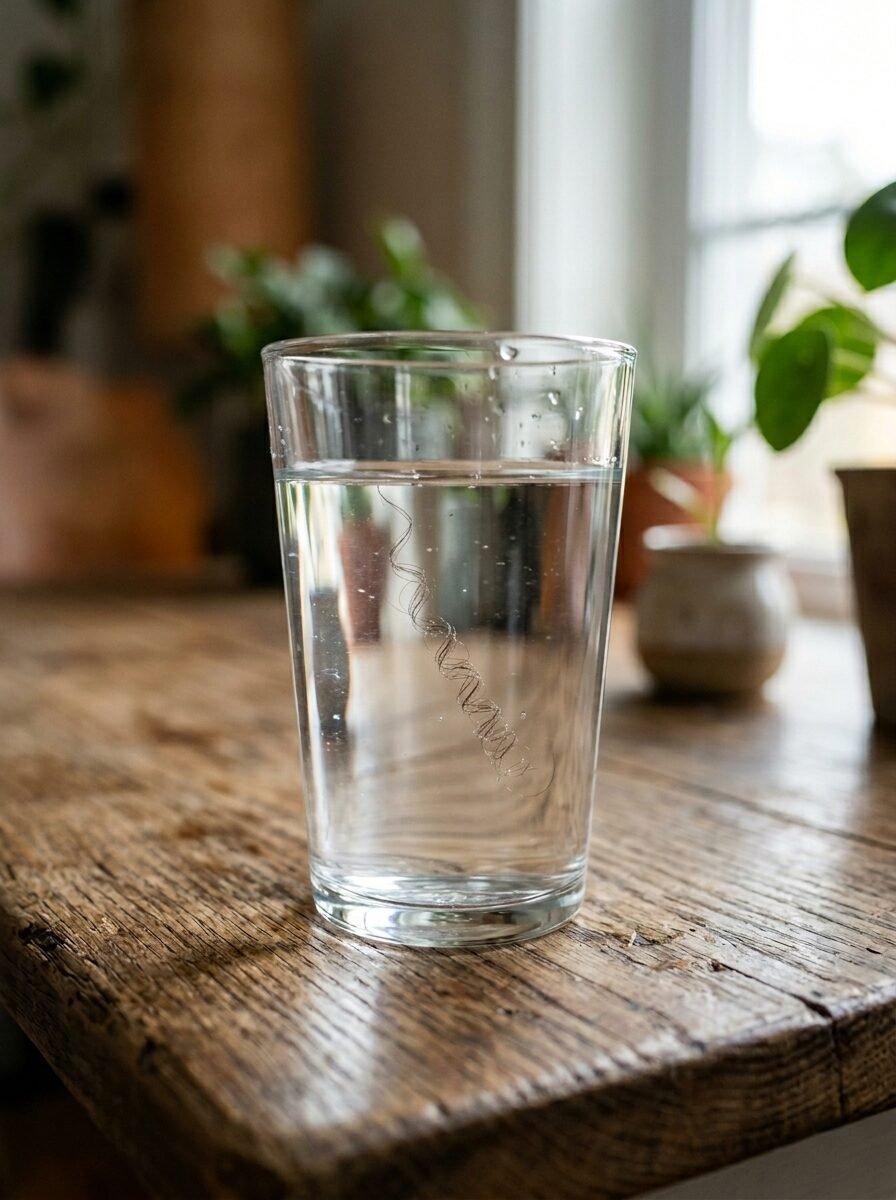
You cannot win if you don’t know who you are fighting. Hair porosity is how well your hair holds onto water. High porosity hair has holes in the outer layer. It drinks water fast but loses it even faster. Low porosity hair has a tight outer layer. It acts like a raincoat. Water just beads up and rolls off. If you have low porosity hair and use heavy oils, you will look like a fry cook. If you have high porosity hair and use thin liquids, you will stay dry.
I once worked with a friend named Maya. She has low porosity curls. She was using thick shea butter and heavy castor oil. Her hair never felt soft. It just felt sticky. We switched her to a light leave-in and jojoba oil. The change was instant. Her curls finally had bounce. She wasn’t carrying around five pounds of product anymore. You can test this at home with a glass of water. Drop a clean strand of hair in. If it sinks fast, you have high porosity. If it floats, you have low porosity. This test tells you which products to buy so you don’t waste fifty dollars on the wrong stuff.
3. The L Layer Selecting Your Leave In
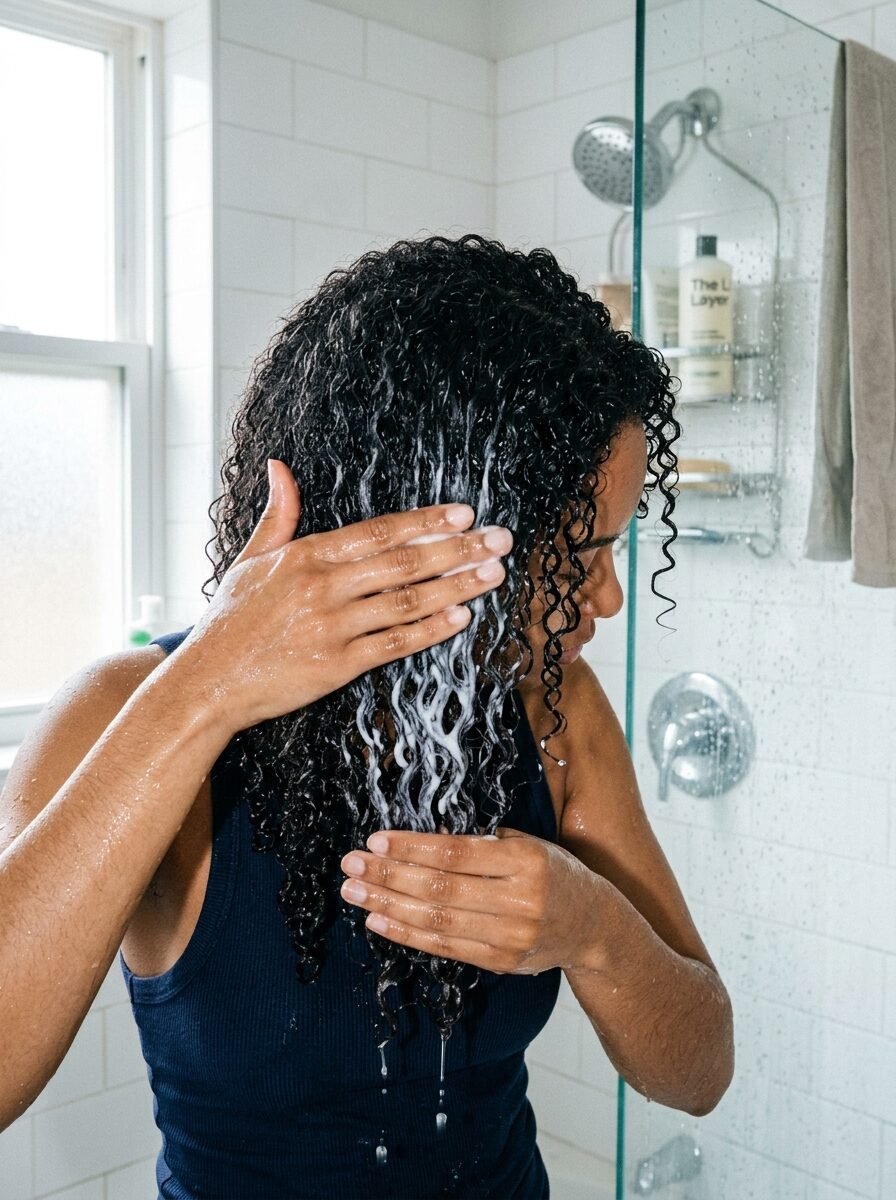
The “L” is the most important part. It provides the actual hydration. Without water, the oil and cream have nothing to seal. You want a product where water is the first word on the label. For thin hair, a spray works best. For thick, coily hair, a creamy leave-in is better. You must apply this to soaking wet hair. Do not towel dry first. You want to trap the water from your shower.
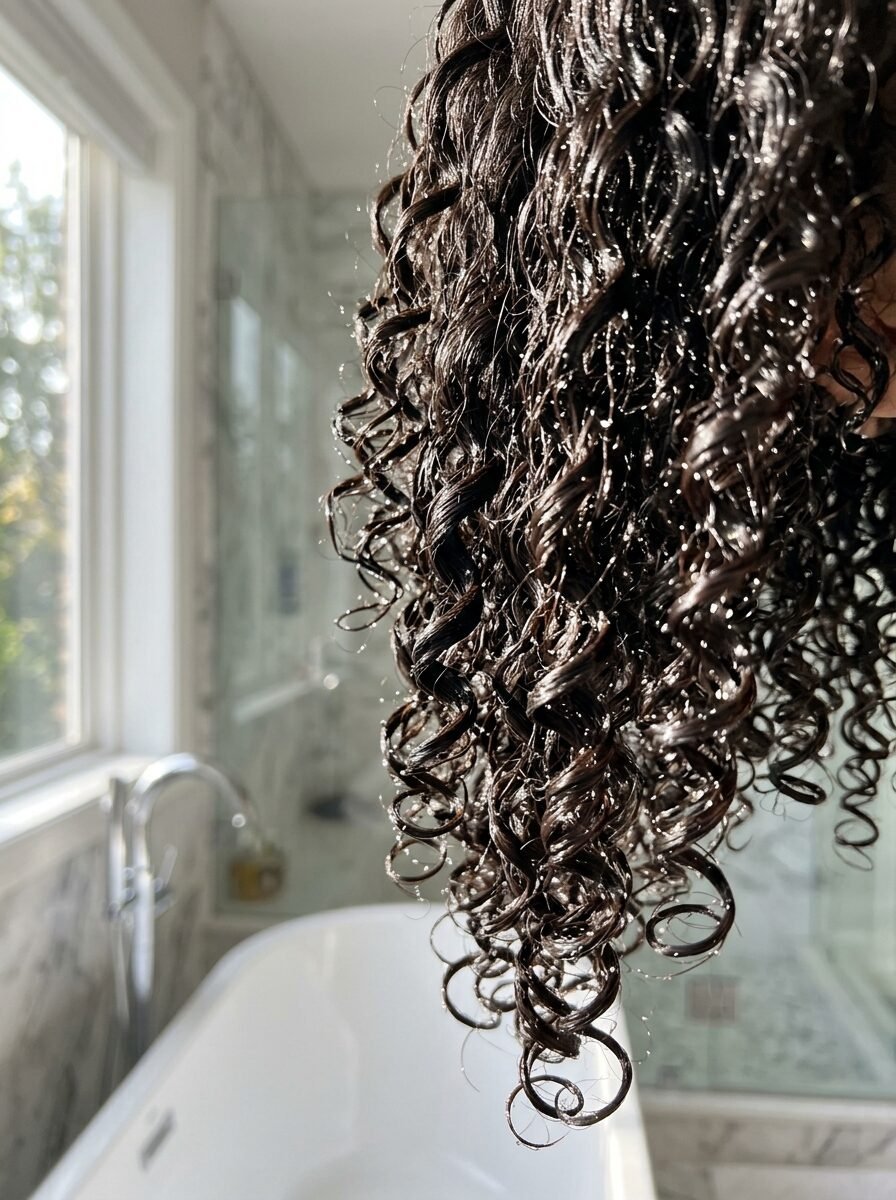
I’ve noticed that people who apply leave-in to damp hair get half the results. I tried applying my Pattern Beauty leave-in while standing in the shower. The steam helped my hair take in the moisture. My curls clumped together better. When I waited until I was dressed, my hair was already starting to frizz. You want to see those “seaweed” curls. They should look shiny and slippery. If they look dull or feel rough, you need more water or a better product. Brands like As I Am or Mielle have great options that don’t feel like glue.
4. The O Layer Choosing The Right Oil
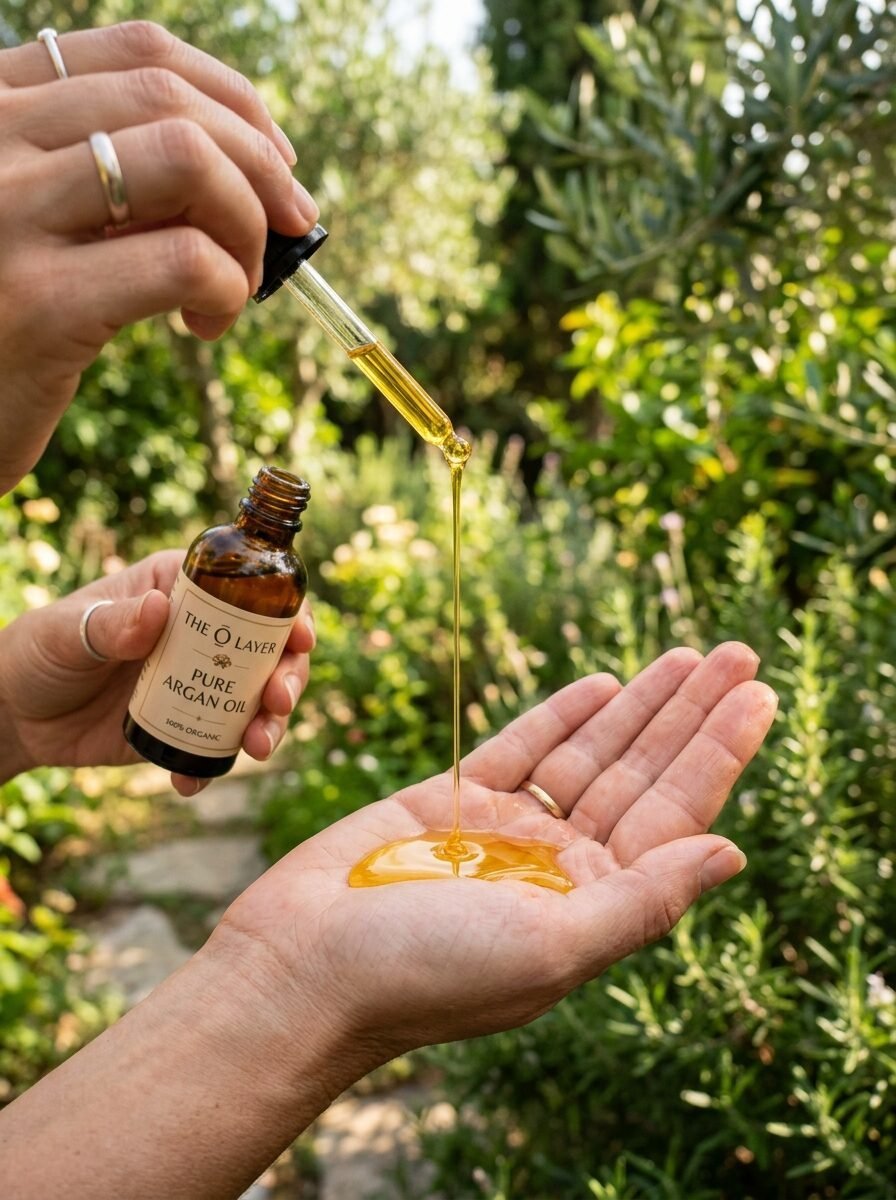
The “O” is the sealer. It fills the gaps in your hair layer. It stops the water from leaving. But not all oils are the same. Some oils go inside the hair, and some stay on the outside. Coconut oil and avocado oil can go deep. Jojoba and almond oil stay on the surface. If your hair is very dry, you might want an oil that does both.
Last summer, I went to a beach in South Carolina. The salt and sun were brutal. I used a mix of olive oil and argan oil. The olive oil kept my hair from snapping, and the argan oil gave it a glow. I’ve seen this work for dozens of people. If you have fine hair, stay away from heavy oils like castor oil. It will pull your curls down. Use a light oil like grapeseed. It costs about eight dollars at the store and works better than some forty-dollar “luxury” blends. Always use a small amount. A dime-sized drop is often enough for a whole section of hair.
5. The C Layer Defining With Cream
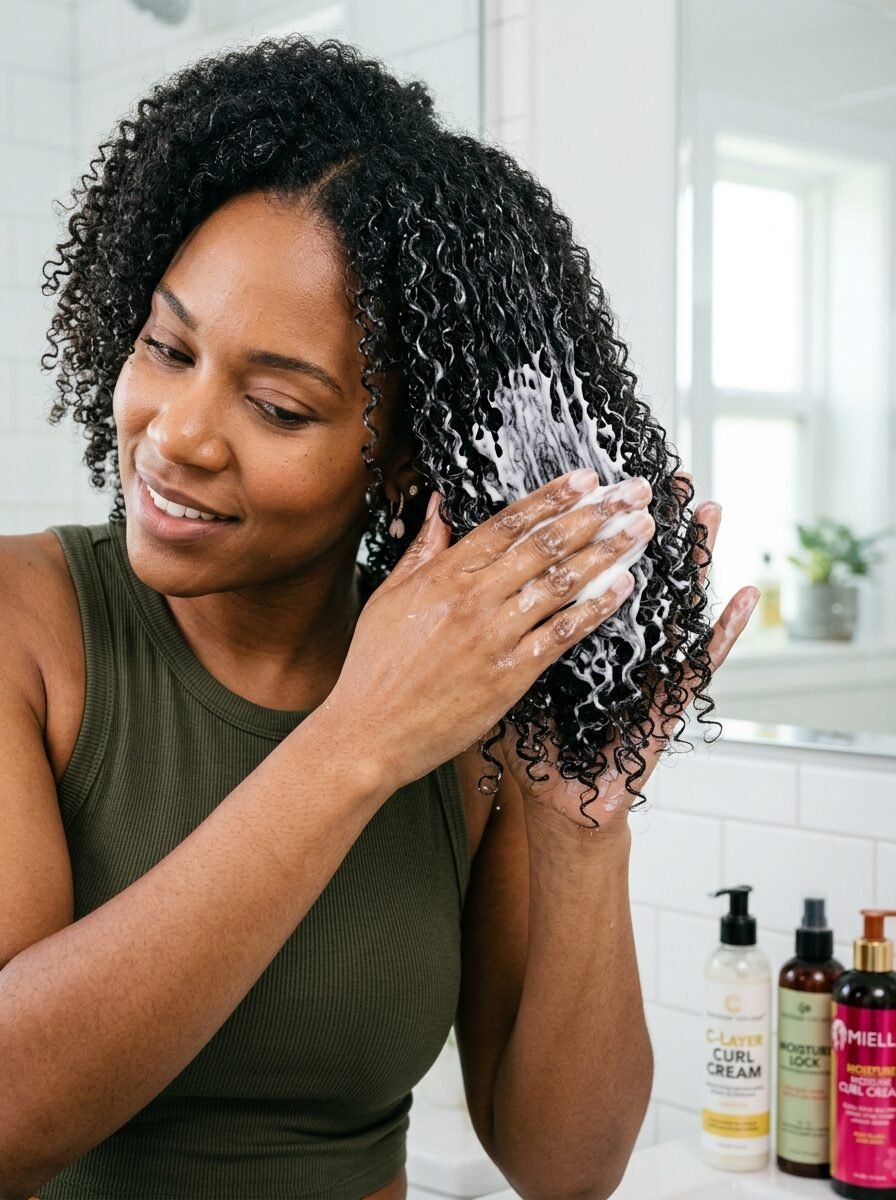
The “C” is for the cream. This gives your curls their shape. It also adds one last layer of protection. This is where you get the “hold.” Without the cream, your curls might be soft but they won’t stay in place. They will turn into a soft blur. The cream helps the curls “clump” together. This creates those beautiful spirals people love to see on Pinterest.
I’ve tried using just oil and water, and my hair looked like a fuzzy cloud. When I added the Camille Rose Curlaide Moisture Butter, everything changed. The curls stayed tight and shiny. You want to use a “praying hands” motion to put the cream on. Smooth it from the top to the bottom. Don’t scrunch too hard yet. You want to keep the hair smooth. If you see white flakes, your cream and oil don’t like each other. You should test a tiny bit of each on your hand first. If they turn into a chunky mess, don’t put them in your hair.
6. Step By Step Guide To Application
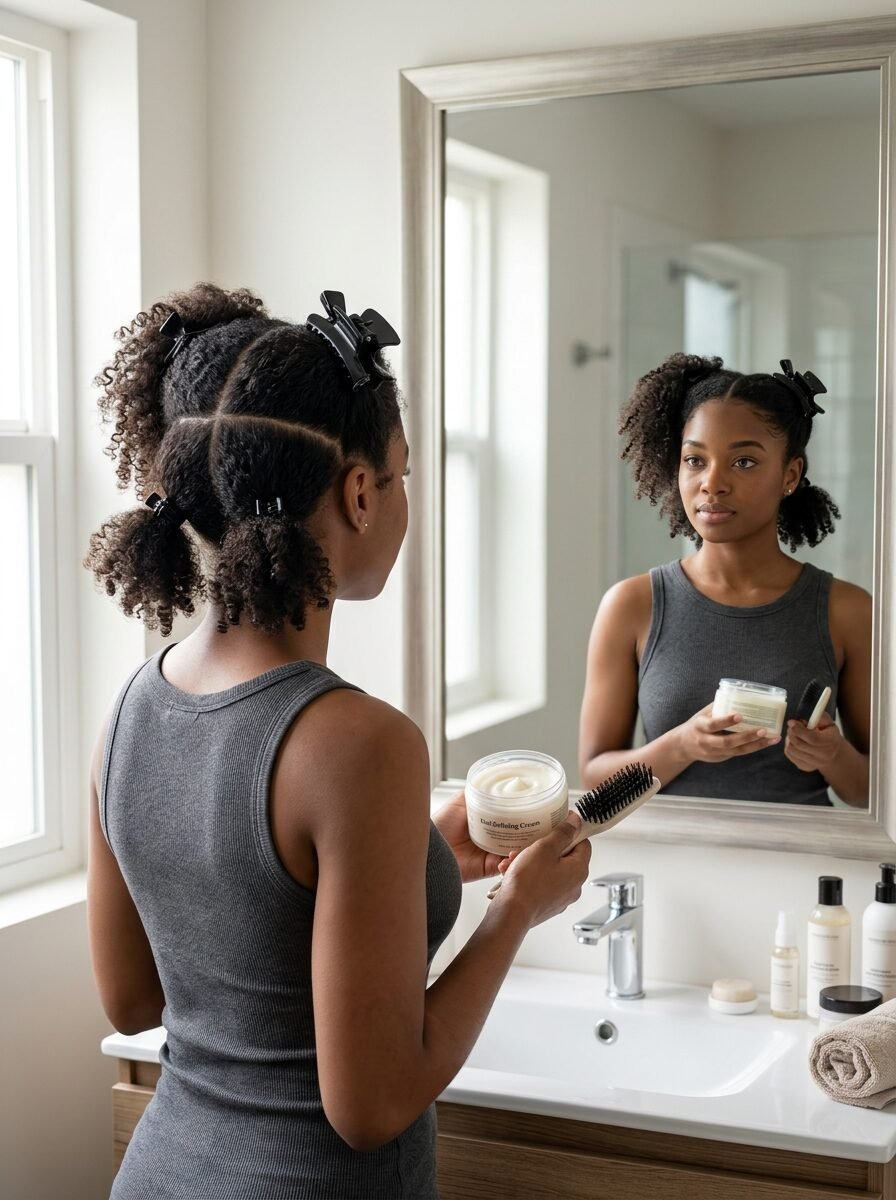
First, wash your hair with a good shampoo. You need a clean base. If you have old product on your hair, the LOC method will just create a big mess. Second, while your hair is dripping wet, put on your leave-in. Divide your hair into four parts. This makes sure every strand gets some love. Use a wide-tooth comb to spread it out. Third, take your oil. Warm it in your hands. Rub it over the same sections. Fourth, apply your cream. Smooth it down.
I’ve seen people try to do this in thirty seconds. It does not work. You need to spend about ten minutes. I once rushed it before a date. I missed the back of my head. By dinner, the front looked great and the back looked like a bird’s nest. Take your time. Once the products are in, do not touch your hair. This is the hardest part. If you touch it while it is drying, you will create frizz. Let it air dry or use a diffuser on low heat.
7. Common Failures And How To Fix Them
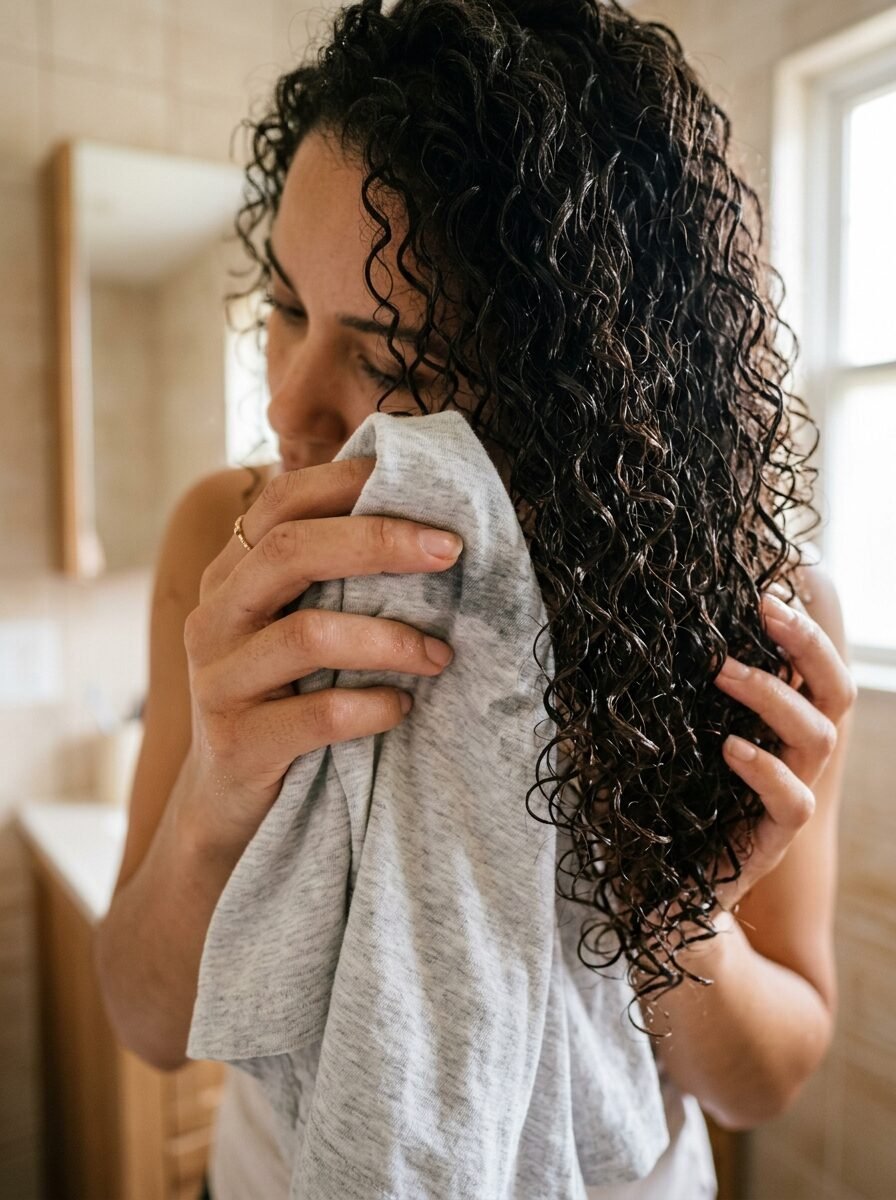
The biggest problem is “heavy hair.” This happens when you use too much. If your hair feels like a wet rag, you overdid it. You can fix this by blotting your hair with a cotton t-shirt. Do not use a towel. Towels are too rough. Another problem is product buildup. After a week of the LOC method, your hair might feel sticky. This is normal. You must use a clarifying shampoo once every two weeks. This resets your hair.
I’ve noticed that many beginners forget to clean their brushes too. If your brush is full of old cream and oil, it puts dirt back into your clean hair. I saw a case where a woman thought her hair was falling out. It wasn’t. She just had so much buildup that her curls were snapping under the weight. We did a deep clean, and her hair bounced back in one day. Keep things clean. If your scalp itches, you might be getting too much oil near the skin. Keep the oil two inches away from your scalp.
8. Product Comparison And Cost Analysis
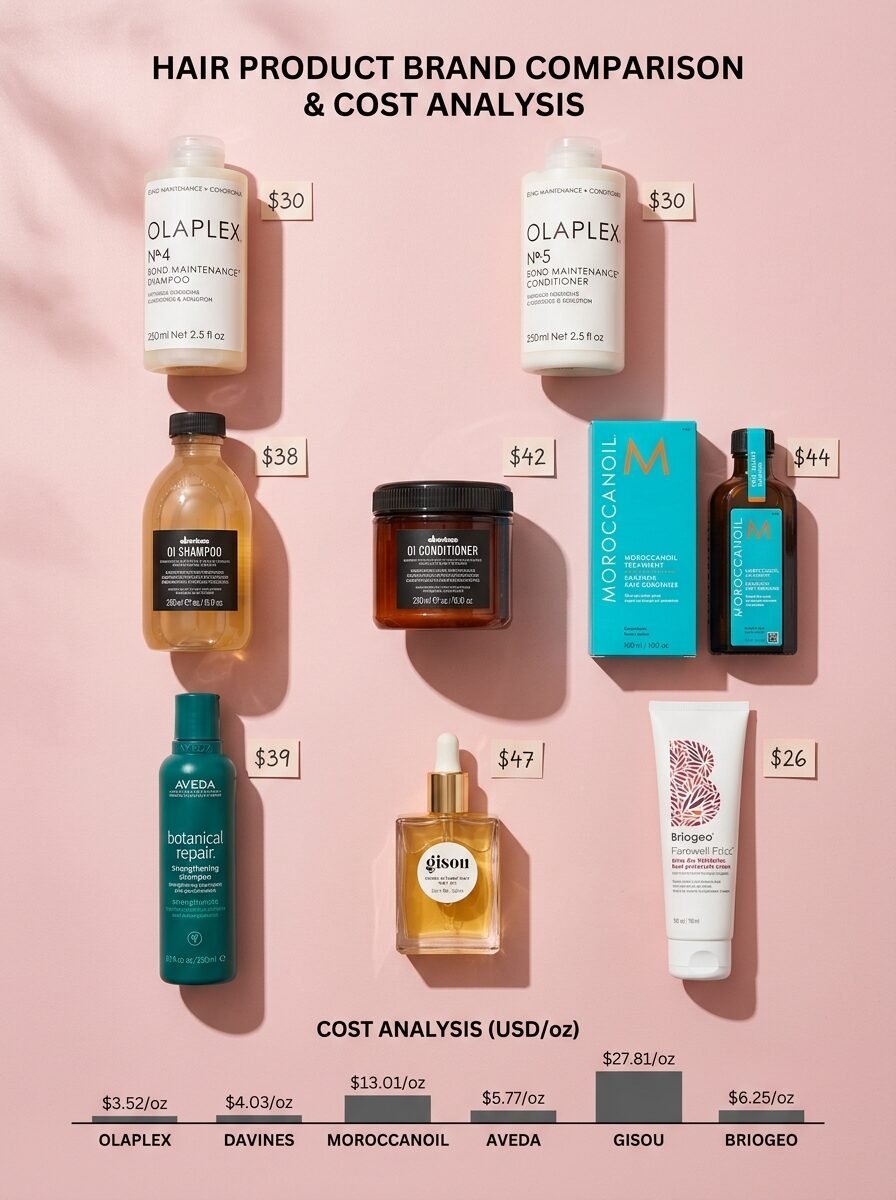
| Product Type | Budget Option ($) | Mid-Range ($) | Premium ($) |
| Leave-In | Cantu Shea Butter ($6) | Mielle Pomegranate ($13) | Briogeo Farewell Frizz ($28) |
| Oil | Grapeseed Oil ($7) | Argan Oil ($15) | Olaplex No. 7 ($30) |
| Cream | Shea Moisture Curl Smoothie ($10) | Camille Rose Butter ($18) | Pattern Beauty Styling Cream ($25) |
You do not need to spend a hundred dollars to have great hair. In my experience, the budget options work just as well if you have the right way of doing things. I used Cantu for three years before I ever bought a premium bottle. The key is how you put it on, not how much you paid. A bottle of oil should last you six months. A cream might last two months. If you spend forty dollars today, it will last you a long time. This is much cheaper than going to a salon every week for a treatment.
9. Regional Variations And Weather Tips

Weather changes everything. If you live in a dry place like Arizona, you need more water in your leave-in. Your hair is fighting the dry air every second. If you live in a humid place like Houston, you need more oil. The oil stops the wet air from getting into your hair and blowing it up. I lived in Chicago for a winter, and the cold air was like a vacuum for moisture. I had to add a fourth step, which was a light hairspray to keep the shield tight.
I’ve seen people follow the same routine in summer and winter. That is a mistake. Your hair needs change with the seasons. In the summer, use lighter creams. In the winter, use heavier butters. If you are going on a plane, put extra oil in your hair. The air on planes is very dry. I always do a full LOC routine before a flight. When I land, my curls still look fresh. Most people look like they had an electric shock after a long flight. This little trick keeps you looking good in your travel photos.
Frequently Asked Questions
Can I do this on straight hair?
No. This is too heavy for straight hair. It will make it look greasy and flat. This is for hair that has a natural curl or wave. If your hair is fine, use very thin sprays instead of thick creams.
How often should I do the LOC method?
Do it every time you wash your hair. For most people, that is once or twice a week. Do not do it every day. You will get too much buildup. If your curls look dry on day three, just spray them with a little water and a tiny bit of oil.
What is the difference between LOC and LCO?
LCO stands for Leave-in, Cream, and then Oil. Some people with low porosity hair prefer this. They find the cream goes in better before the oil seals it. I’ve tried both. For my high porosity hair, LOC is the winner. If your hair is low porosity, try switching the oil and cream. See which one stays soft longer.
Will this help my hair grow?
It helps you keep the hair you have. Hair grows from the scalp. But hair breaks at the ends. If your hair is dry, it breaks. If it stays moisturized, it stays long. So, yes, it helps you see more length over time because you aren’t losing the ends.
Can I use a hair dryer?
Yes, but use a diffuser. A regular dryer blows the curls apart and creates frizz. A diffuser spreads the air out. It keeps the curl shape. Use the low heat setting. High heat can melt the oils and make your hair smell funny.
Is coconut oil good for everyone?
No. Some people find coconut oil makes their hair feel like wire. It has a lot of protein. If your hair is already strong, too much protein makes it brittle. If coconut oil makes your hair feel stiff, try jojoba oil instead.
Final Thoughts On Curl Care

Looking back, the time I spent learning this was worth every second. I no longer feel stressed when I see rain in the forecast. I know my curls are locked in. You might not get it perfect the first time. That is okay. I made a lot of mistakes. I once used so much oil that I left a spot on the back of my couch. I learned to use less. I learned to listen to what my hair was telling me. If it feels stiff, use less cream. If it feels dry, use more leave-in. Your hair is unique. Use this guide as a map, but find your own path.
The biggest win is the confidence you feel. When your hair looks good, you feel good. You stop hiding in hats. You stop pulling your hair back into a tight bun every day. You let it be free. Start with the basics. Pick up a leave-in, a light oil, and a shaping cream this weekend. Give it a try on your next wash day. You will see a difference in how your curls clump and how long they last. Once you see that shine, you will never go back to your old ways.

Sarah Mitchell — Founder & Editor-in-Chief
Sarah Mitchell is the founder and editorial voice behind Hair Level Up. A licensed cosmetologist with more than 15 years of experience, she has styled A-list celebrities for editorial shoots and red carpets, with work featured in Vogue, Elle, and Harper’s Bazaar. Early in her career, she trained under the legendary hairstylist Oribe in New York, an apprenticeship that still shapes her editorial eye today. Sarah founded Hair Level Up in 2020 after one bad haircut convinced her that women deserved a destination that felt like a magazine, taught like a stylist, and inspired like an art gallery. She oversees every story from concept to publication, guided by a simple belief: a good story teaches you something, but a great one makes you feel beautiful while it does.