25 Curly Hairstyles for Medium Hair That Actually Hold Their Shape
Waking up with a perfect set of curls feels like a win. By noon, those same curls often look tired or flat. I have spent years fighting the humidity in humid coastal cities. I know the pain of a style that quits before you do. Medium hair is the hardest to manage because it sits right on the shoulders. The friction from your clothes can ruin your definition in minutes. You need styles that use the natural bounce of your hair to stay put.
In my experience, the secret is not just the cut. It is how you anchor the hair. I have tried every gel and cream on the market. I realized that some styles naturally resist gravity better than others. These looks work for 2C waves to 4C coils. They focus on keeping your curls grouped together. This prevents the individual strands from fraying into a cloud of frizz.
I tested these twenty five styles over a long summer. I wore them to weddings, the gym, and long office days. Every single one stayed defined until I took my hair down at night. If you want hair that looks as good at 5 PM as it did at 8 AM, start here.
1. The High Pineapple With A Silk Scarf
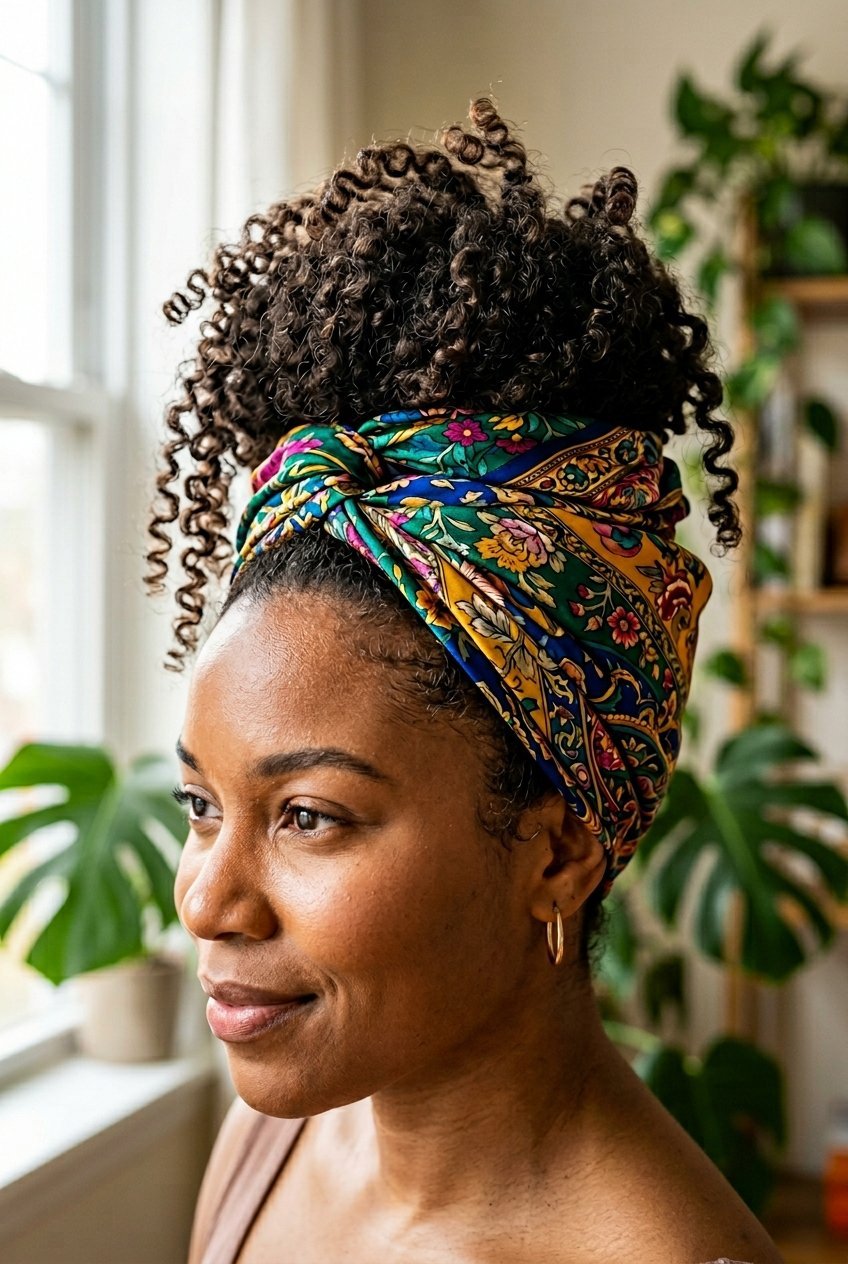
Most people think the pineapple is only for sleeping. I found that it works for a day out too. You pull your curls to the very top of your head. Do not pull them through the elastic all the way. Use a silk scarf to wrap the base. This keeps the hair from falling down. I tried this at an outdoor festival last July. My curls stayed up and away from my neck. The scarf adds a pop of color. It also hides any frizz at the roots. You should use a Pattern Beauty Leave-In before you tie it. This adds the moisture needed for the hold. The scarf provides physical support that a simple hair tie cannot match.
2. The Deep Side Part Shift
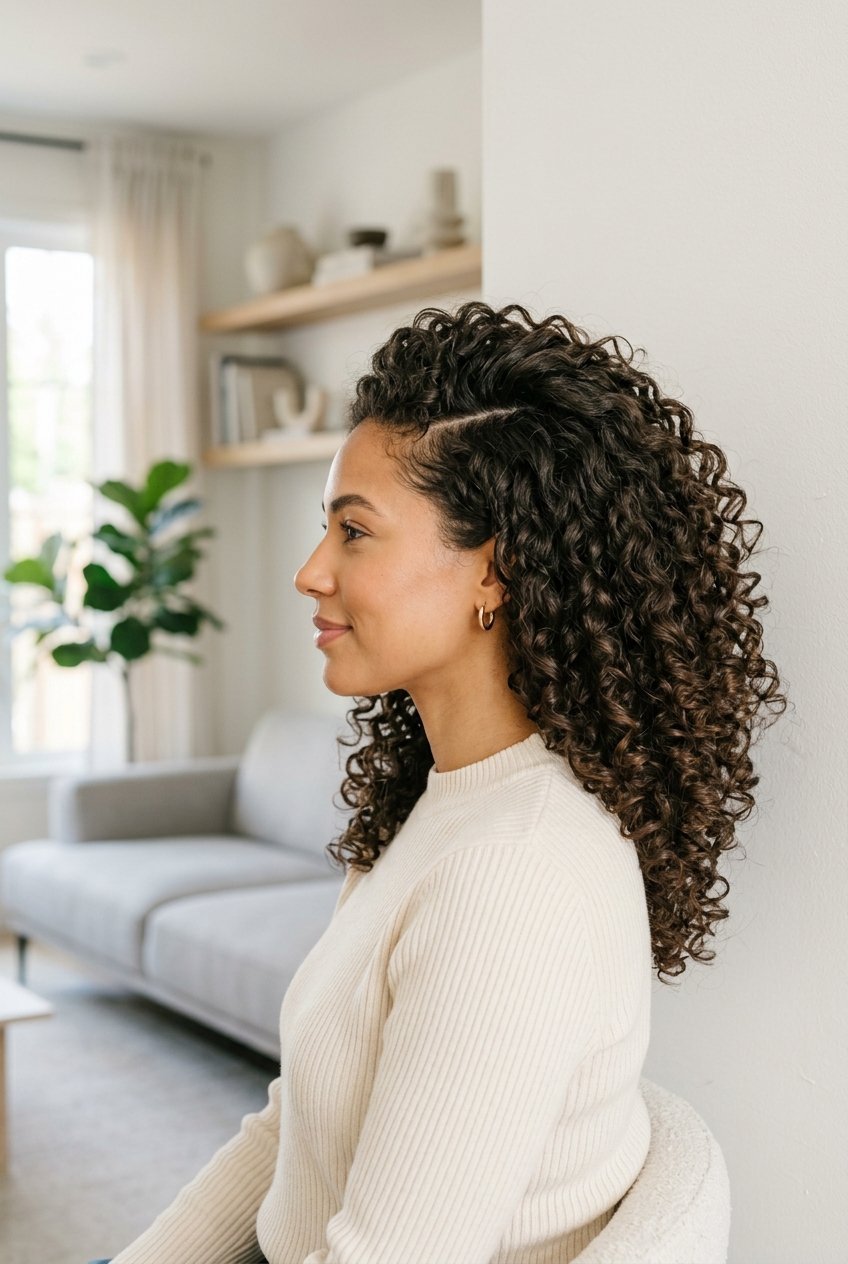
A middle part often makes medium hair look flat at the top. I noticed that switching to a deep side part creates instant volume. It forces the curls to stack on top of each other. This stacking provides a natural structure. Use a few duckbill clips while your hair dries. This sets the roots in an upright position. I’ve seen this work for thin curls that usually go limp. The weight of the hair on one side keeps the other side lifted. You do not need heavy spray for this look. The gravity of the curls does the work for you.
3. Half-Up Top Knot With A Claw Clip
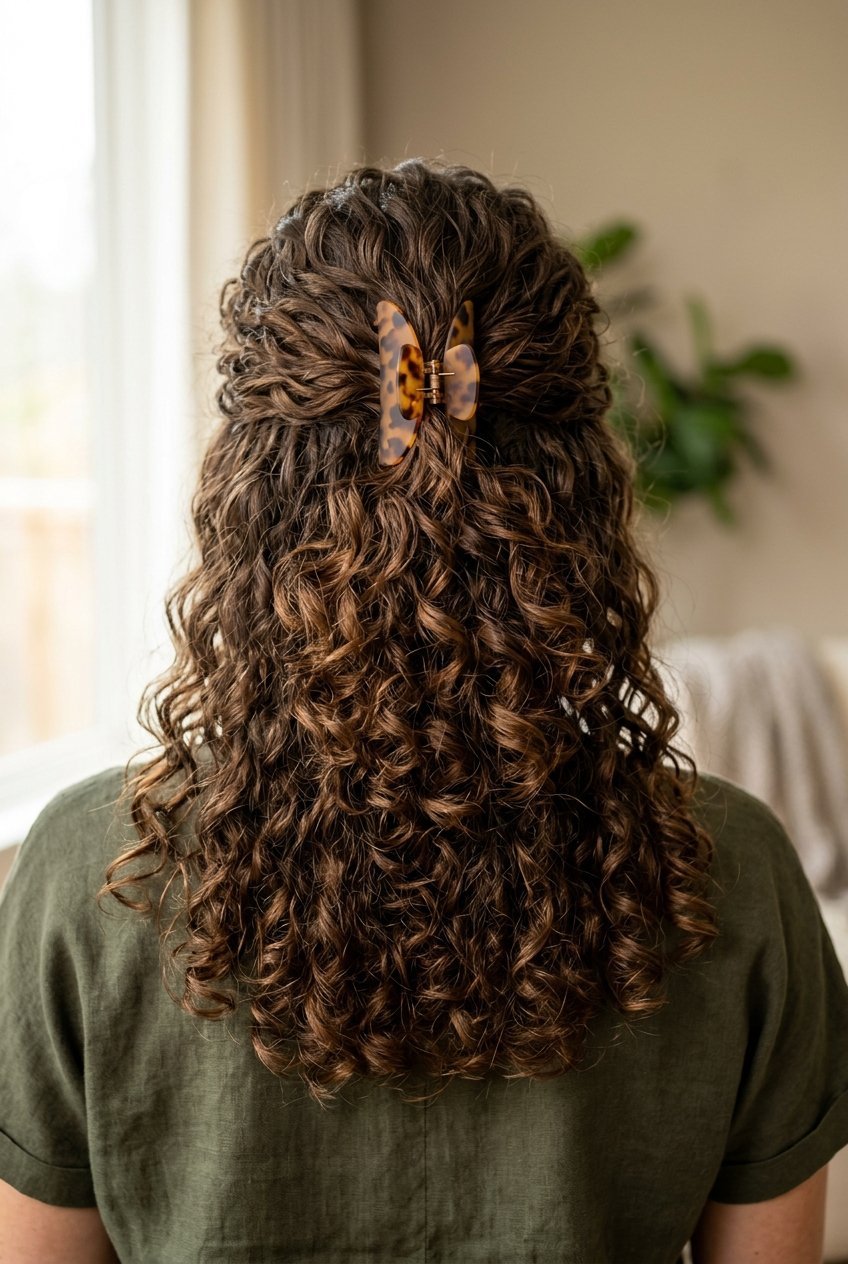
Elastic bands often crush curly patterns. I prefer using a medium-sized claw clip for a half-up look. Take the top section from your temples. Twist it once and secure it with the clip. This allows the curls to spill over the top without being squeezed. It stays secure because the teeth of the clip grab the hair at the scalp. I wore this during a busy photo shoot last month. Even with constant movement, the top stayed high. It keeps the hair out of your face while showing off your length.
4. Double Front Flat Twists
Frizz usually starts at the hairline. I like to create two flat twists starting from the forehead. Twist them back about three inches and secure them with small bobby pins. This keeps the front of your hair totally locked in place. The rest of your curls can hang loose in the back. This style is great for windy days. In my experience, if the front stays neat, the whole style looks intentional. Use a tiny bit of Eco Styler Gel on your fingertips while twisting. This creates a seal that prevents flyaways from popping up later.
5. The Layered Shag Diffuse
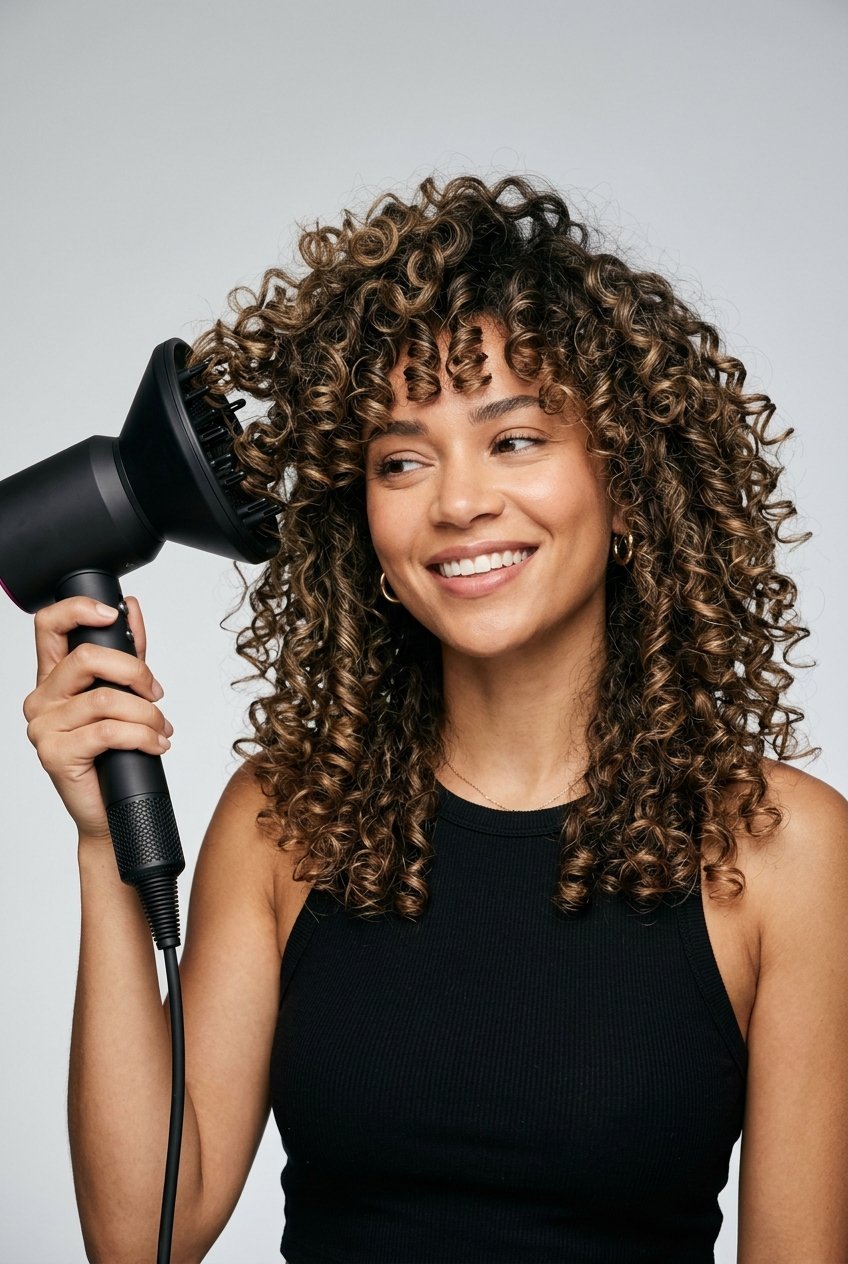
If your curls are all one length, they will get heavy and flat. A layered shag cut is the best way to keep shape. I asked my stylist for shorter layers around the crown. This removes the weight that pulls curls straight. When you diffuse, do it upside down. I use the Dyson Supersonic with the diffuser attachment on low heat. This sets the shape of the layers. The shorter pieces act as a shelf for the longer ones. It creates a rounded silhouette that does not collapse.
6. The Slicked Back Wet Look
Sometimes you want a style that feels high fashion. The wet look is perfect for medium curls that are a few days old. I use a mix of Moroccanoil Treatment and a firm hold gel. Comb the hair back away from the face while it is damp. Let the curls form naturally at the ends. This style holds its shape because the gel creates a hard cast. It will not move even in high humidity. I’ve tried this for evening events where I didn’t have time to wash my hair. It looks sleek and stays put for hours.
7. Triple Topsy Tail Rows
This is a great way to manage thick hair. Divide the top of your hair into three horizontal sections. Make a loose ponytail with the first section. Flip the tail through a hole above the elastic. Repeat this with the next two sections. Each row anchors the one above it. This prevents the hair from sagging as the day goes on. I used this style for a wedding last spring. It looked like a complex braid but was much easier to do. It keeps the hair organized and prevents tangles.
8. The Side Pinned Faux Hawk
You do not need to shave your head for this look. Use large bobby pins to pull the sides of your hair up toward the center. Do this on both sides. This leaves a strip of curls running down the middle of your head. This style holds because the pins create a tight tension on the sides. It highlights your bone structure. I’ve seen this work best on 3C and 4A hair types. The natural volume of the curls hides the pins. It is a bold look that stays centered all day long.
9. Twisted Halo Crown
A halo twist is a soft look that is very strong. Start a two-strand twist at your part. Follow the hairline all the way around your head. Tuck the ends under the start of the twist and pin them. This style holds its shape because it is a closed loop. There are no loose ends to unravel. I tried this for a long day of travel. Even after a five-hour flight, the hair looked perfect. It protects your ends from rubbing against your clothes or car seats.
10. Space Buns With Defined Ends
Space buns are fun and very secure. Part your hair down the middle. Create two high ponytails. Twist them into buns but leave the curly ends poking out. Use a strong elastic to hold the base. This style is perfect for medium hair because the length is just right for the buns. I noticed that this keeps the hair very cool in the summer. The buns stay tight because curly hair has a natural grip. You won’t find yourself re-tying them every hour.
11. The Low Slung Braided Bun
Gravity pulls high buns down. A low bun sits at the nape of the neck and stays there. I like to braid the ponytail before wrapping it into a bun. The braid adds internal structure. This prevents the bun from becoming a “messy” blob. Use a few U-shaped hair pins to secure the edges. I use these pins because they don’t pinch the scalp like regular bobby pins. This look is professional and keeps the curls from frizzing at the neck.
12. Volume-Pinned Side Sweep
This is a classic look for a night out. Sweep all your hair to one side. Secure the back with a row of bobby pins hidden under the top layer. This keeps the hair over one shoulder. I noticed that if I don’t pin it, the hair eventually slides back to the middle. The pins act as a wall. Use a bit of hairspray like the L’Oreal Elnett for a light hold. This keeps the curls on that one side looking full and bouncy.
13. The Pineapple With A Claw Clip
This is a variation of the scarf pineapple. Instead of a scarf, use a large claw clip at the very back of the head. Gather the hair and clip it so the curls fall forward over your forehead. It looks like a curly fringe. This style is great for medium hair because it makes the hair look longer than it is. The clip provides a very strong anchor. I’ve seen this look stay perfect through a full workout. It keeps the sweat away from your curls.
14. Finger Coiled Face Framers
Sometimes the hair holds shape but the front pieces go flat. I spend extra time finger coiling the pieces that touch my face. Use a bit of Denman Brush tension to spiral the hair. Apply a small amount of Ouidad Climate Control Gel to each coil. These tight spirals act as a frame for the rest of your hair. Even if the back gets a bit messy, the front stays defined. This creates the illusion of a perfect style. I’ve tried this on rainy days with great success.
15. The Bubble Pony For Curls
Bubble ponytails are not just for straight hair. Use clear elastics every two inches down a ponytail. Pull the hair between the elastics to create “bubbles.” This style is incredibly secure. It keeps the hair from tangling or losing its curl pattern. I used this for a hiking trip last fall. My hair stayed in place the entire time. The elastics keep the volume locked into specific zones. It looks modern and stays very neat.
16. The Tucked Under Bob
If your medium hair is reaching your shoulders, it might flip out in a weird way. I like to tuck the ends under and pin them to create a faux bob. This hides the ends and protects them. It gives the hair a rounded, vintage shape. I use a bit of Cantu Shea Butter on the ends before tucking. This keeps them moist and prevents them from slipping out of the pins. It is a great way to change your look without cutting your hair.
17. Criss-Cross Bobby Pin Art
Sometimes you need a style that uses accessories for strength. Pin one side of your hair back using six or seven bobby pins in a criss-cross pattern. This is not just for looks. The overlapping pins create a very strong grip that won’t budge. Use gold or silver pins to make it look like jewelry. This keeps one side of your hair totally flat and sleek. The other side can be as big and curly as you want. It stays secure even if you are dancing.
18. The Waterfall Braid Variant
A traditional waterfall braid can be hard with curls. I do a simplified version where I just twist the top sections. I leave the bottom curls free. This keeps the hair away from your eyes. The twists are pinned at the back of the head. I’ve noticed this works well for weddings where you want a romantic look. The twists hold the weight of the top hair so it doesn’t fall forward. Use a light oil like Mielle Rosemary Mint to keep the twists shiny.
19. Root-Clipped Volume Set
The shape of your hair is often decided while it dries. I use small metal root clips at my part. I slide them in to lift the hair away from the scalp. Leave them in until the hair is 100% dry. This creates a “memory” in the roots. The hair will stay lifted for days. I tried this after my last wash day. My hair had so much more bounce. When the roots are lifted, the curls have more room to move without clumping together.
20. The Multi-Elastic Half Pony
Instead of one hair tie, use three. Put your hair in a half-up pony. Add another elastic one inch down. Add a third one inch below that. This creates a stiff “stem” for the ponytail. It makes the hair stand up and out rather than hanging flat. This is a trick I learned from a stylist in New York. It gives medium hair a lot of height. It holds the shape because the triple elastics prevent the hair from sagging.
21. Side Braid Into A Low Pony
Start a French braid on one side of your head. Bring it around to the back and join it with the rest of your hair in a low ponytail. This anchors the weight of the hair to one side. It prevents the ponytail from swinging too much. I find this very helpful for office days. It looks polished but is very sturdy. The braid keeps the shorter layers around the face from falling out. Use a silk hair tie to prevent breakage.
22. The Double Bun Vertical Stack
Instead of side-by-side buns, stack them vertically. One goes at the crown and one at the nape. This distributes the weight of the hair. It prevents the top bun from pulling on your scalp. I’ve seen this work wonders for people with very thick medium hair. It creates a cool, mohawk-like silhouette. Each bun is smaller and easier to secure with pins. It stays in place much better than one giant, heavy bun.
23. Ribbon Wrapped Low Braid
A simple braid can look plain. I like to wrap a velvet ribbon through my braid. The texture of the velvet grabs the hair. This prevents the braid from loosening throughout the day. It also keeps the curls at the end of the braid from unraveling. I used this for a holiday party last year. The ribbon stayed tight and the hair looked elegant. It adds a bit of friction that helps the style hold its shape.
24. The Slick Side With A Flower
Pin one side of your hair back very tightly. Use a large decorative flower or clip to cover the pins. This creates a beautiful asymmetrical look. The clip adds extra weight that helps keep the hair pinned back. I find that a heavy clip actually stays better than a light one in curly hair. The curls provide a cushion for the clip to grip. It stays put for hours and looks great in photos.
25. The Headband Tuck
Put on a stretchy headband over your hair. Take the ends of your hair and tuck them up into the back of the headband. Do this until all the hair is tucked in. This creates a soft, rolled look at the back. It is very secure because the headband holds everything in place. I tried this for a gardening day. My hair was totally out of the way and didn’t get tangled. It is a fast style that looks like it took much longer.
Frequently Asked Questions
How do I make my curls stay defined for more than one day?
In my experience, a silk pillowcase is not enough. You need to “refresh” the curls. I use a spray bottle with water and a tiny bit of leave-in conditioner. I mist the hair lightly in the morning. Then, I use my fingers to twirl any flat pieces. This reactivates the gel from the day before. Do not brush the hair. Brushing breaks the curl clumps and creates frizz.
What are the best products for holding curl shape?
I have tried many brands. For maximum hold, I suggest the Ouidad Advanced Climate Control Heat and Humidity Gel. It creates a shield against moisture. If you prefer a softer feel, the Amika Soulfood Nourishing Mask helps as a base. It keeps the hair hydrated so it doesn’t reach for moisture in the air. This reaching is what causes frizz.
Why does my medium hair always go flat at the roots?
This usually happens because of product buildup. If you put too much cream near the scalp, it weighs the hair down. I only apply styling products from the mid-lengths to the ends. At the roots, I use a light foam like the SheaMoisture Coconut and Hibiscus Frizz-Free Mousse. This gives lift without the weight.
Can I use these styles on wet hair?
Yes, but some styles hold better when the hair is 80% dry. Flat twists and braids are great for wet hair. They set the curl pattern as it dries. If you do a bun on wet hair, it might take all day to dry. This can sometimes cause a damp smell. I prefer diffusing to dampness first, then styling.
How do I prevent frizz when taking these styles down?
Always use a light oil on your hands before touching your hair. I like the Briogeo Farewell Frizz Rosehip, Argan and Coconut Oil. The oil acts as a lubricant. It prevents your fingers from snagging the curls and pulling them apart. Slow and steady wins here.
Conclusion
Finding the right style for medium curly hair takes some trial and error. I have learned that the best looks are those that work with your hair’s natural volume. You don’t have to fight your curls to make them stay. By using tools like silk scarves, claw clips, and the right gels, you can keep your shape all day. These twenty five ideas are a great starting point for any curly girl. Try one tomorrow and see how it holds up. Your hair has a mind of its own, so give it a style that lets it shine.