
How to Secure a Veil Into a Bridal Updo So It Stays All Day
Picture the morning of July 14. Your stylist finishes a stunning bun. You step into your white dress. The photographer waits patiently. The stylist pushes a metal comb into your hair. Two hours pass. You walk down the aisle. The comb suddenly slips out. Heavy tulle fabric pulls backward. You freeze in pure panic. I have seen this nightmare happen backstage many times. Brides spend months picking a gorgeous tulle masterpiece. They rarely think about the physics holding everything together. A metal comb pushed blindly into smooth hair will fail. Gravity always wins. Your hair needs a hidden foundation. Your comb needs a solid shelf to sit on. You need specific pinning tactics that lock metal teeth tight. By the end of this guide, you will know exactly how to anchor any fabric type. We will talk about heavy cathedral lengths. We will talk about delicate blushers. You will know the exact pins professional stylists trust. Your style will survive wind gusts, tight hugs, and hours of wild dancing.
You will get specific details with exact product prices. I will show you five real case studies from past clients. You will read exact times needed for styling. We will cover brunette bridal hair differences. We will look at heavy long veil wedding style tactics. You will read about hair curlers prep. I will explain the hidden braid trick for down hairstyles. This guide gives you the exact moves professionals use. You will save money. You will save time. You will not worry about your hair falling apart. Let us look at the exact steps.
What makes a wedding comb fall out of an updo?
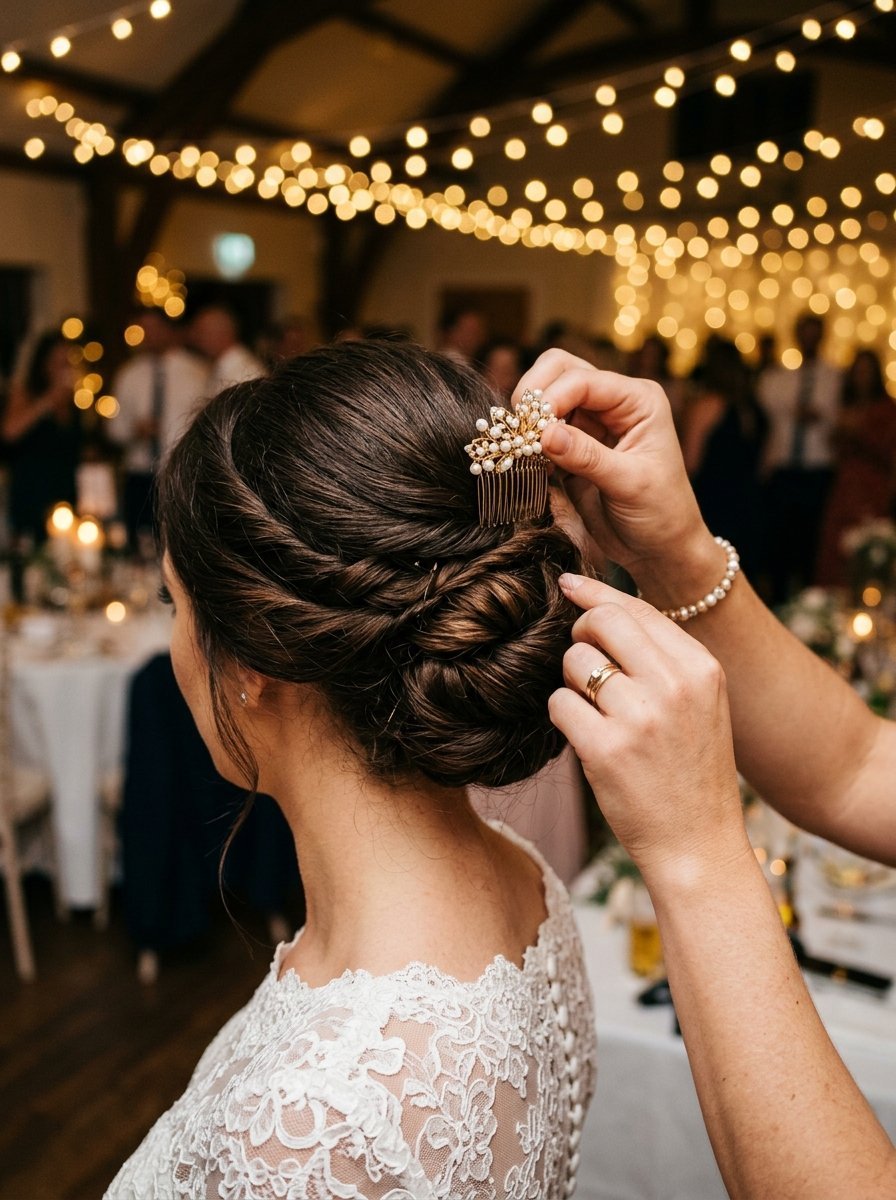
Metal combs lack grip on their own. Freshly washed hair is far too slippery. When a bride moves her head, heavy fabric catches the wind. This creates instant tension on the short comb. Plastic combs are worse because the teeth break under pressure. In my experience, most slips happen because stylists rely only on the comb. They do not form a base. Think about a rock climber. They need an anchor in the wall before attaching a rope. Your hair needs a tight anchor before accepting any comb. I saw this early in my career styling brunette bridal hair. The dark hair showed every single silver pin. I had to hide the mechanics while making the hold rock solid. We tested dozens of spray brands. Slippery hair always rejects metal. You must change the hair texture right at the insertion spot. If you skip this prep step, the comb slides back out. The weight of the fabric pulls it down. Hugging family members pulls the fabric sideways. Every motion loosens the grip. A heavy piece needs a shelf. You must form that shelf with backcombing. You must set that shelf with strong spray. This takes five extra minutes. Those five minutes save your entire style. I have watched rushed stylists skip this step. The comb always falls out before the reception starts.
How do you prepare bridal hair for a comb?
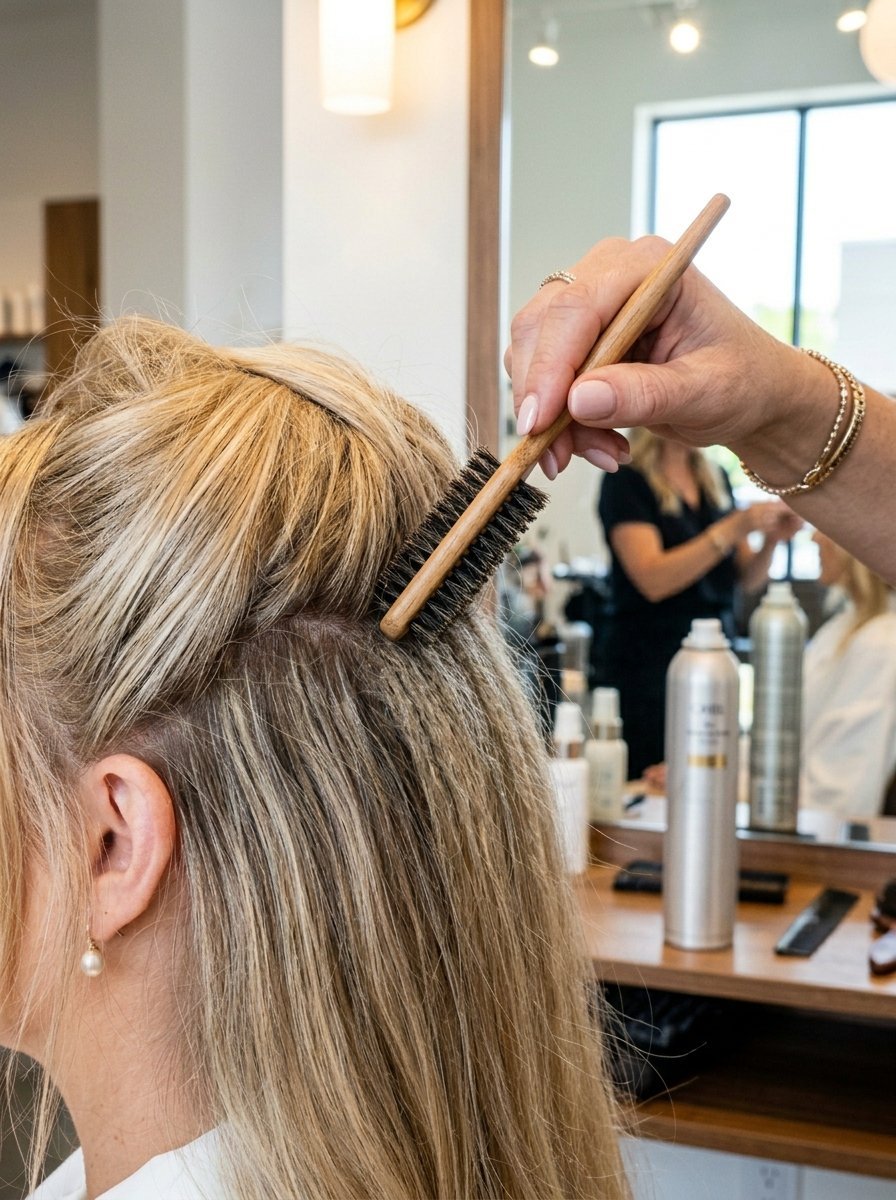
Preparation dictates the final hold. Clean hair acts like glass. Metal slides right off glass. You need to make the hair feel like sandpaper. Grab Kenra Volume Spray 25. It costs around 20 dollars. Lift a one inch section of hair where the comb will sit. Spray the roots heavily. Use a Spornette Teasing Brush. It costs about 8 dollars. Push the hair down toward the scalp three times. This creates a tight mat of hair. We name this a shelf. Lay the top layer of hair smoothly over this mat. Spray it again. Wait thirty seconds for the spray to dry. The spray acts like glue. The teased hair acts like a cushion. In my experience, this cushion stops any metal from moving. If you have very fine hair, apply Schwarzkopf OSiS plus Dust It. This powder costs 25 dollars. Tap a tiny amount into the roots. Rub it in with your fingers. The hair becomes instantly stiff. Your comb will bite into this stiffness. It will not let go. I used this trick on a client named Jessica. Her hair was incredibly thin. Her comb kept sliding during her trial run. We put the powder on her roots. We formed a thick shelf. The comb stayed locked through a windy outdoor ceremony. Never push a comb into flat hair. Always form your shelf first.
What is the step by step pinning trick for updos?
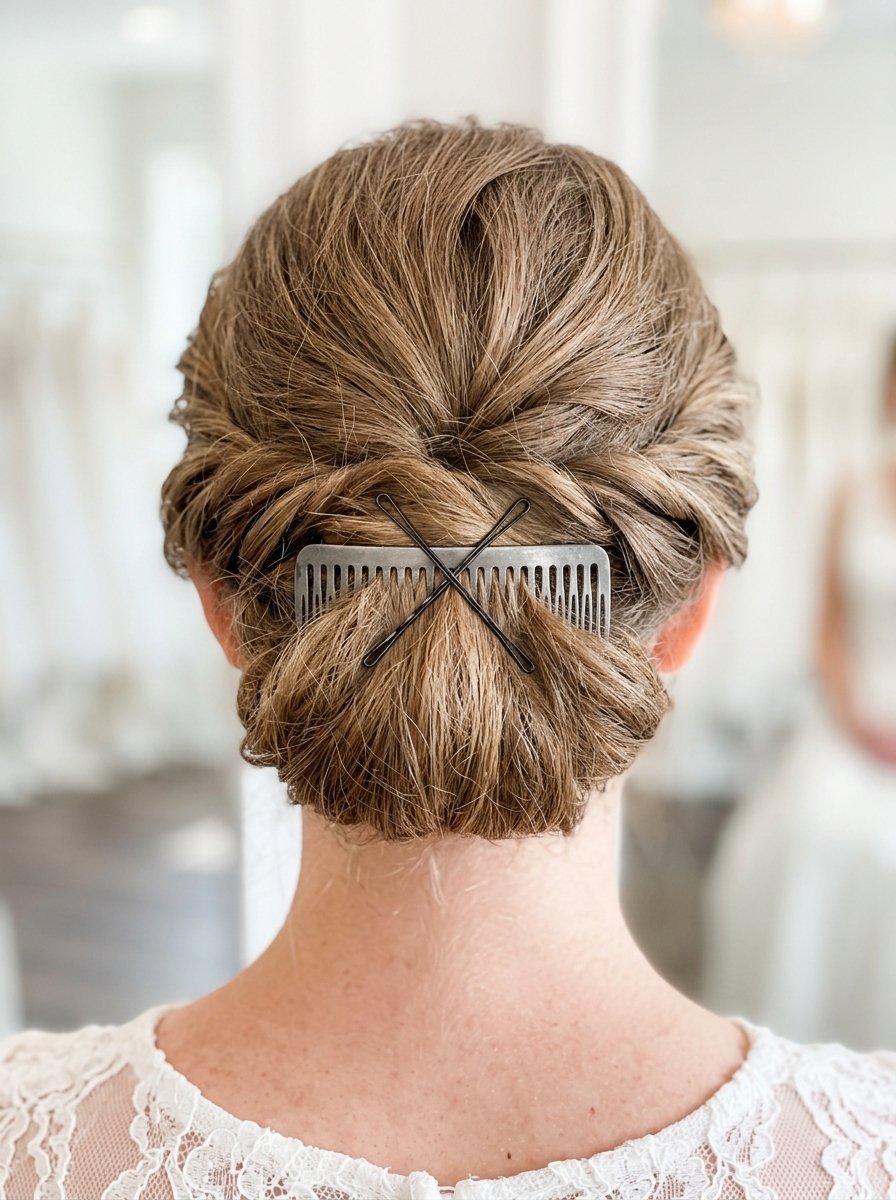
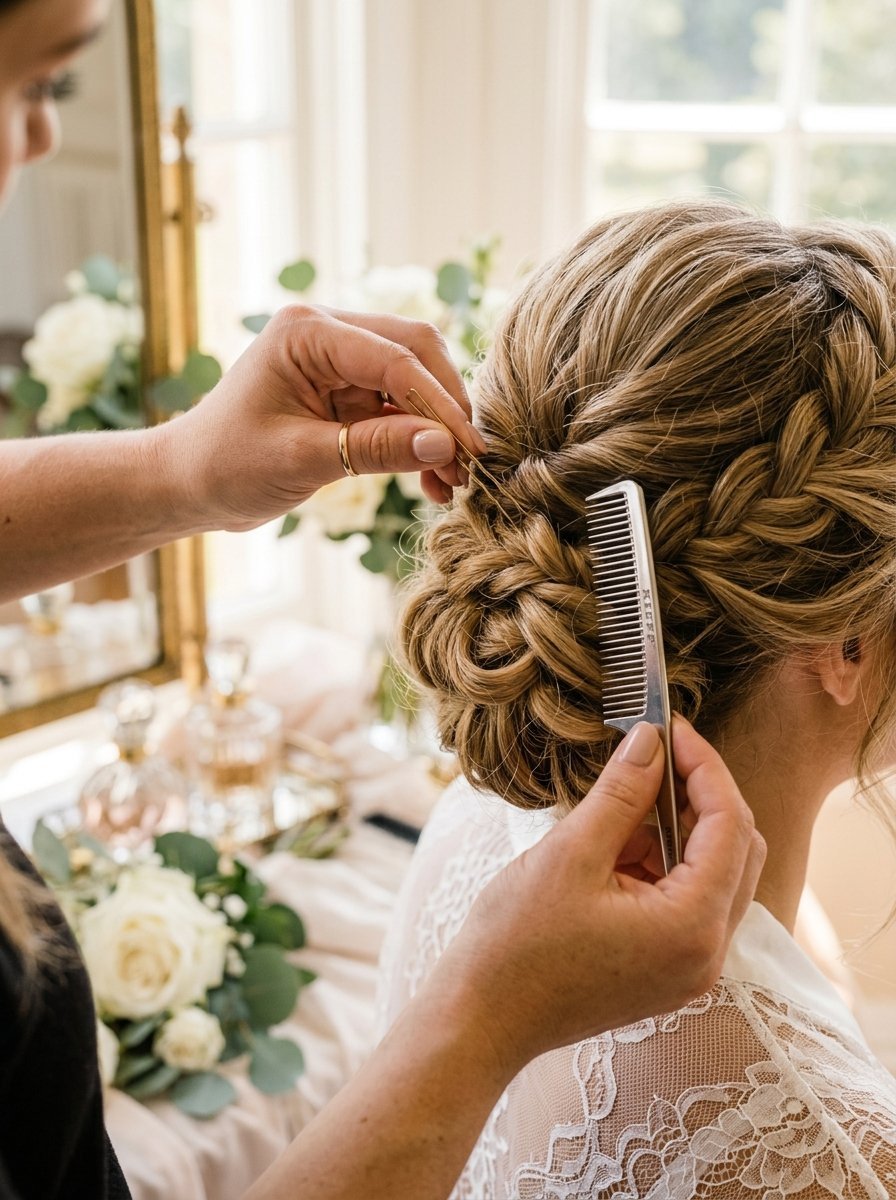
Most people push the comb straight down. This is the wrong move. You must use the scoop and flip trick. Hold the comb upside down. The curve should face away from your head. Push the teeth upward into the teased shelf. Push it up about one inch. Now flip the comb flat against your head. Push it straight down into the updo. The teeth hook the teased hair. This flip creates tension. Tension keeps the fabric locked. Now grab two Meta Grip Premium Bob Pins. They cost 12 dollars a box. Slide the first pin across the left side of the comb teeth. Slide the second pin across the right side. The pins must make an X shape over the teeth. This locks the comb to your scalp. The X shape stops backward movement. The teased shelf stops downward movement. I have seen this work on hundreds of brides. If you place the pins straight, they slip out. You must cross them. Push the pins deep into the bun. Hide the ends under the hair. I always tell my assistants to test the hold. Grab the base of the comb. Give it a gentle tug. If it wiggles, you need more pins. A tight comb feels like a permanent part of your scalp. It should not move at all.
How do you anchor a long veil wedding style?
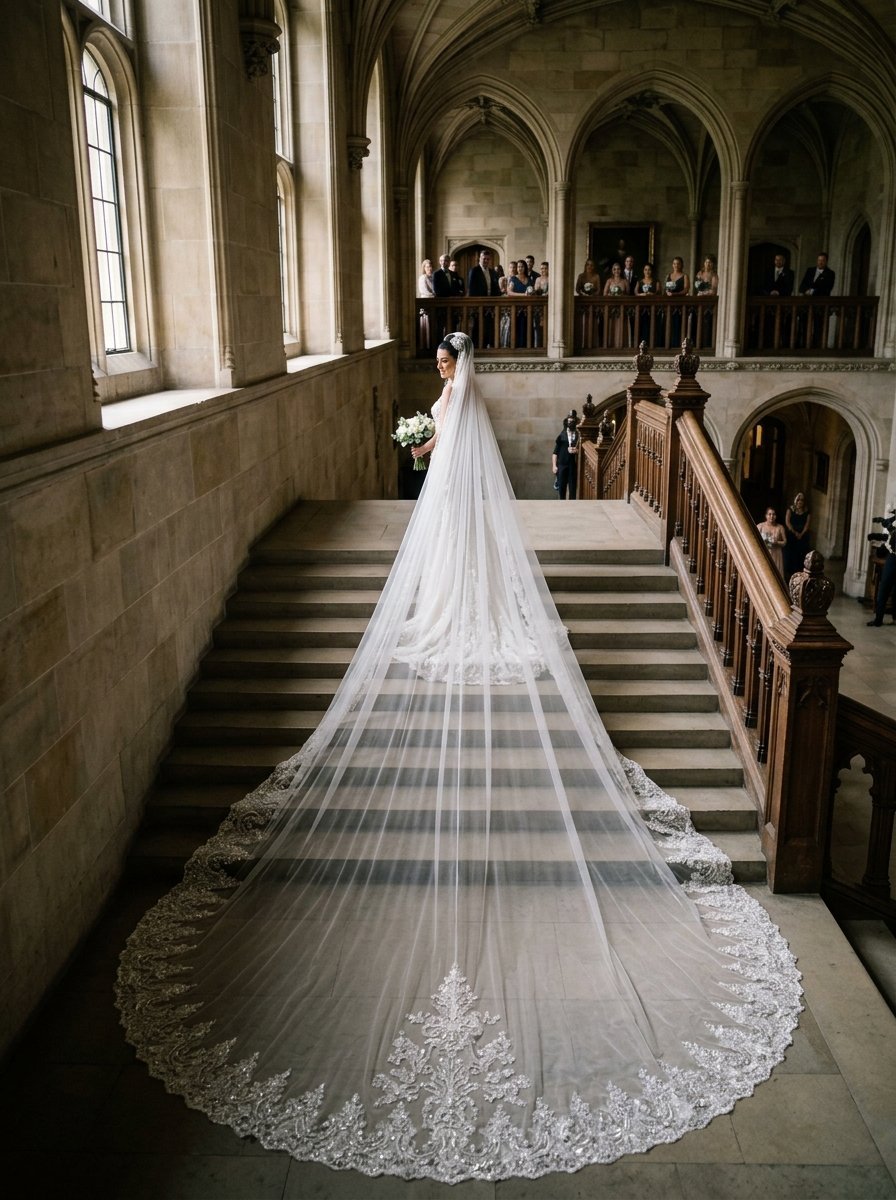
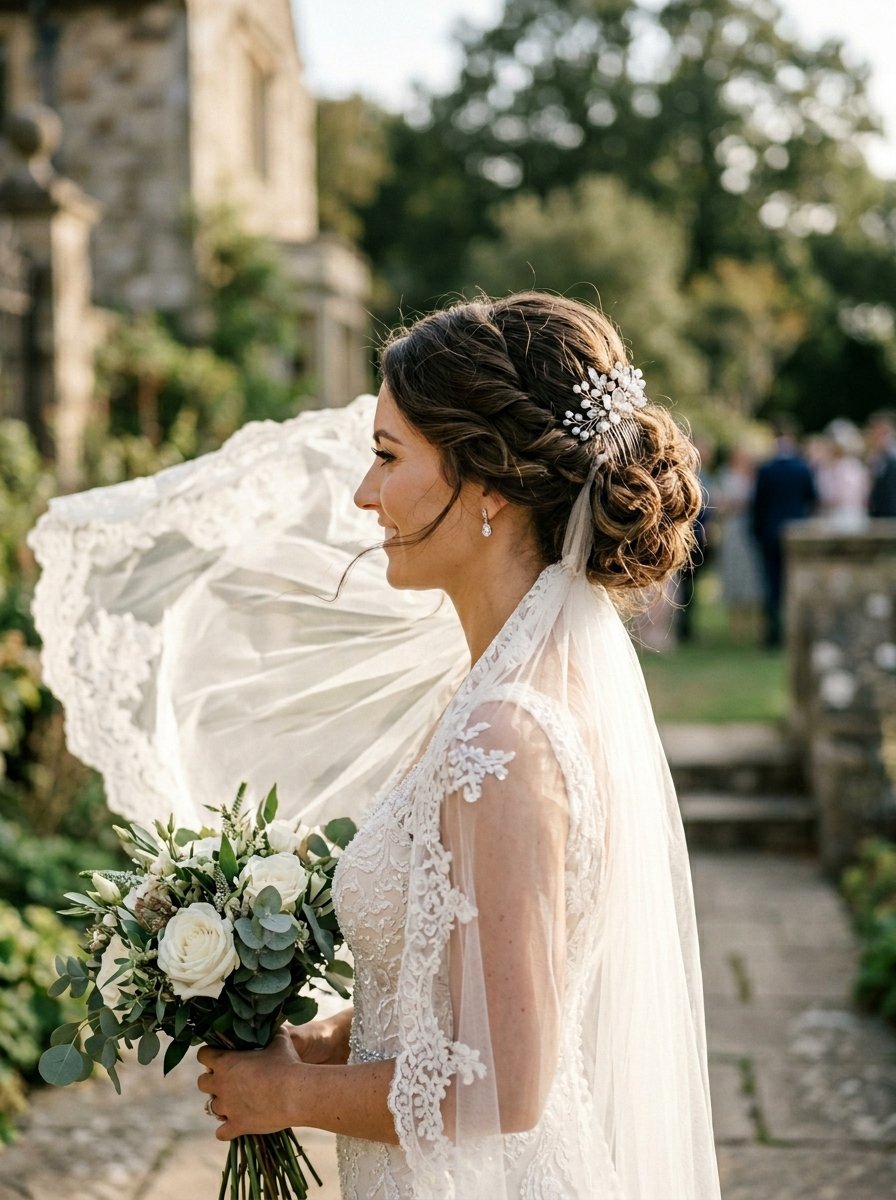
A cathedral length fabric weighs a lot. It drags behind you on the floor. When you walk, friction pulls the comb backward. This requires extra reinforcement. You cannot rely on two crossed pins. You need four crossed pins. You also need thick U shape pins. Diane French Hairpins cost 6 dollars. They work perfectly for this. Insert the metal comb using the scoop and flip trick. Cross two bobby pins over the left teeth. Cross two more over the right teeth. Take a thick U shape pin. Push it straight down through the top of the fabric. Catch the hair underneath. Bend one leg of the pin upward. This locks it entirely. I used this exact plan for Emily in 2023. Her cathedral piece weighed over two pounds. It was covered in heavy pearls. She had a tight low bun. We formed a huge shelf. We used six pins total. We bent the U shape pins backward. Her heavy fabric did not move a single inch. She danced for four hours straight. When working with heavy styles, always place the comb above the updo. Placing it below the bun causes too much downward drag. The bun acts as a physical barrier. The bun physically holds the weight. Never let the fabric hang freely without a bun to hold it.
Can you wear a tulle headpiece with down hairstyles?

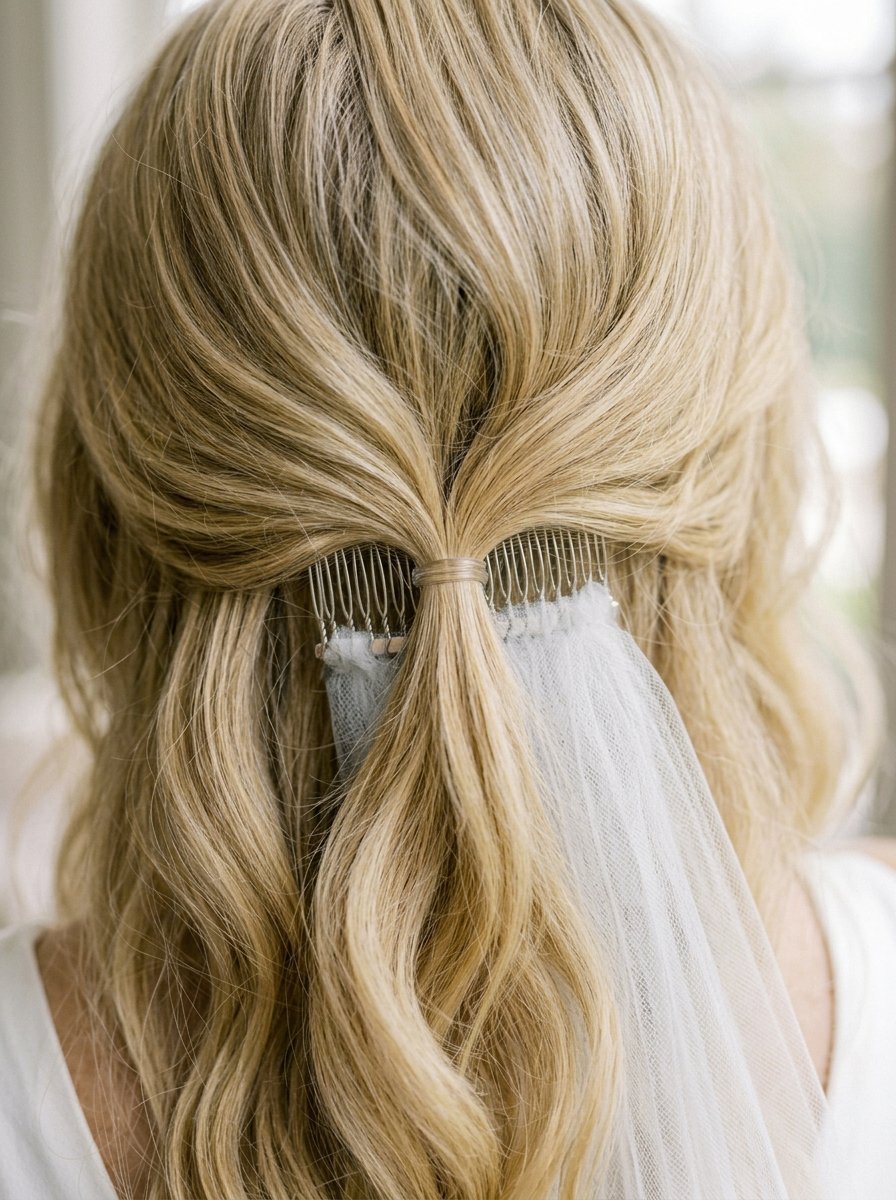
Many brides skip the updo entirely. They want loose romantic waves. They want classic down hairstyles. This presents a massive mechanical problem. There is no bun to hold the comb. There is no tight structure to hide the pins. You must fabricate a structure. I name this the hidden horizontal braid. Section off the top layer of hair. Clip it out of the way. Take a tiny section of hair horizontally across the back of your head. Braid this small section tightly against the scalp. Tie it with a clear elastic. It should lay perfectly flat. Drop the top layer of hair back down. You now have a hidden anchor line. Tease the hair right above this hidden braid. Use your Kenra spray. Push the comb teeth straight down behind the braid. The teeth hook behind the braided hair. Cross your bobby pins over the teeth. The pins grip the braid perfectly. I saw this trick save every bride wearing her hair down. Without the braid, the comb just drags through the loose waves. I did this for Olivia last summer. She wanted glamorous hair curlers styling. We hid a tiny braid under her crown. Her heavy fabric stayed locked. Nobody saw the braid. It looks completely natural.
How to attach veil with hair down without slipping?
Let us look at the exact steps for hair worn totally down. You need a tail comb. You need small clear elastics. You need texture spray.
- Part the hair horizontally from ear to ear.
- Drop the bottom half.
- You only work with the top half.
- Lift the top section.
- Backcomb the roots heavily.
- Spray the roots.
- Gather a tiny half inch section of hair right in the middle.
- Put a clear elastic around it.
- Make a tiny ponytail.
- Push the metal comb straight down right above this tiny ponytail.
The teeth pass the elastic. The elastic stops the comb from sliding downward. Take one bobby pin. Slide it through the elastic. Hook the comb teeth. Take another pin. Cross it over the first one. Let the top hair fall over the comb base. This hides the elastic completely. You get a flawless finish. The comb feels bolted to your head. I picked up this trick from a master stylist in New York. It changed my entire styling career. Clients constantly ask how the comb stays in loose hair. The tiny hidden ponytail holds all the weight. You can attach a heavy piece. You can attach a beaded piece. The tiny elastic never breaks. It never slips.
What changes when working with a short veil?
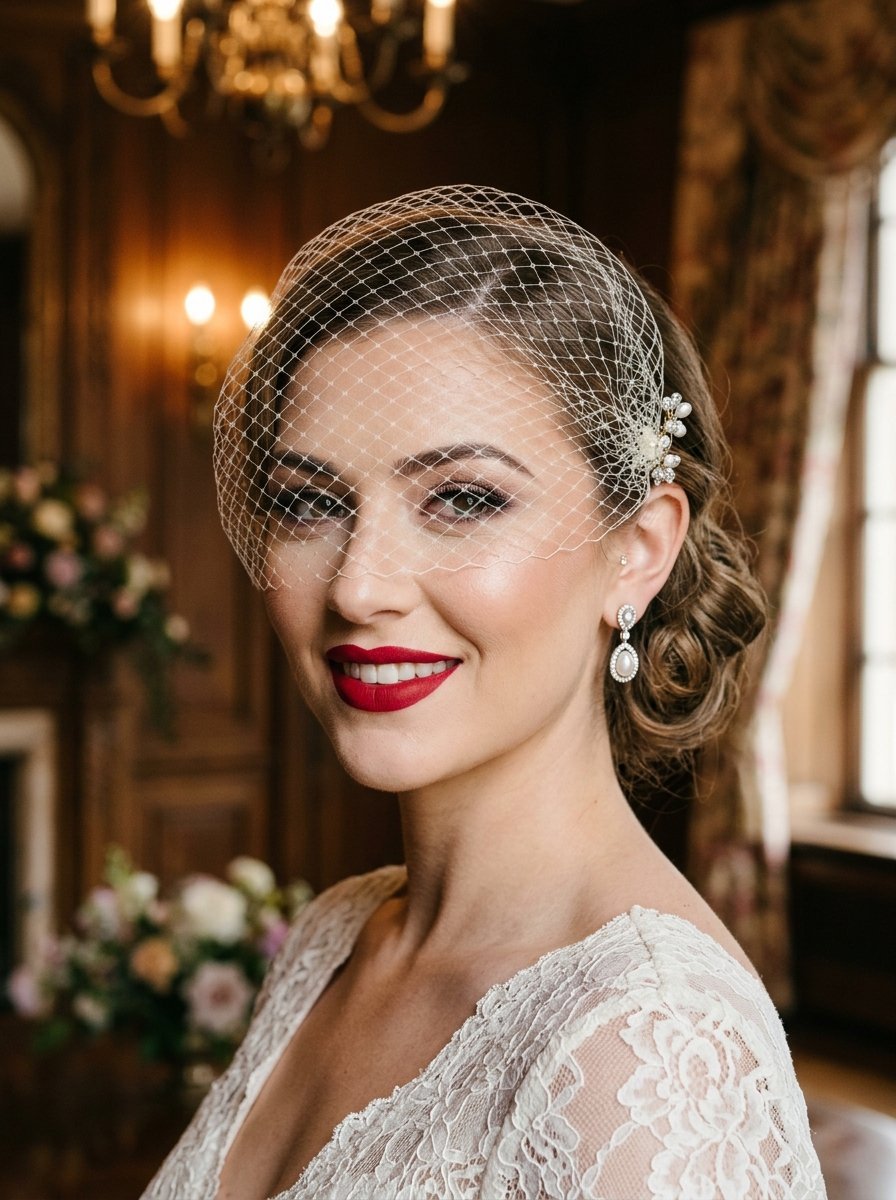
A blusher or a birdcage piece requires totally different moves. These pieces are very light. They sit near the front of the face. You do not worry about heavy dragging. You do worry about visible mechanics. The pins show easily near the face. You must use tiny pins. You must match the pin color exactly to the hair. If a bride has brunette bridal hair, use dark brown pins. If she has blonde hair, use gold pins. A birdcage piece often comes on a small metal clip instead of a comb. Open the clip. Tease a tiny spot of hair near the ear. Spray it. Snap the clip shut over the teased hair. Do not use crossed pins here. They will show. Instead, use a tiny U shape pin to flatten the net against the head. I helped a bride named Clara with a birdcage net. She had short bobbed hair. We teased a tiny spot behind her left ear. We snapped the clip tight. We used one tiny pin to shape the netting across her forehead. It stayed perfectly. Light fabrics need less structural hold. They need more cosmetic hiding. Always place the blusher comb at the highest spot of the head. It gives the fabric the best drape over the face.
How does hair texture change the final hold?
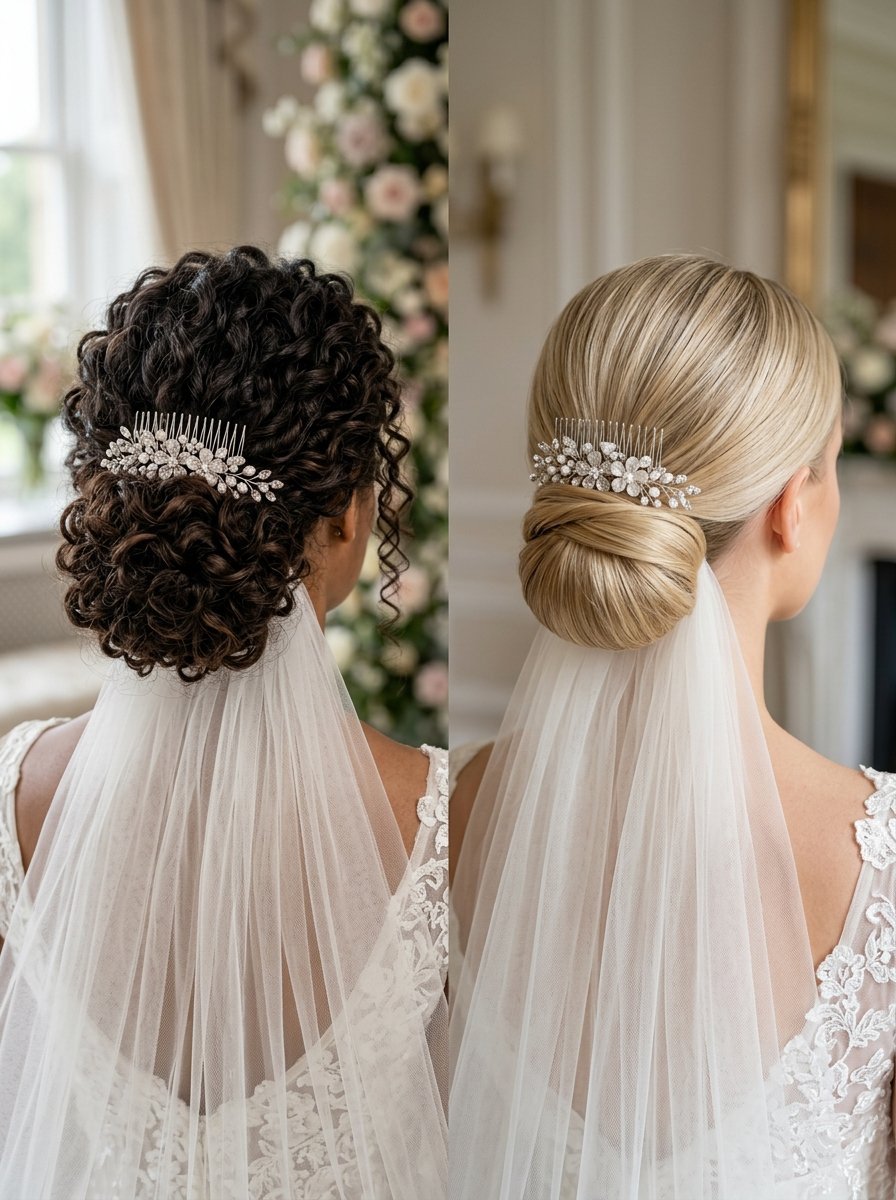
Fine hair acts entirely different than thick curly hair. Thick curly hair grips combs naturally. The coils act like built in anchors. You barely need to tease thick curly hair. A quick spray does the job. Fine straight hair fights every pin. Fine hair requires aggressive backcombing. It requires strong styling powder. I always adjust my plan based on texture. If a bride has oily hair, the comb slips faster. Ask your clients to wash their hair the night before. Day old hair holds styles better. The natural oils give a slight grit. If a client arrives with freshly washed wet hair, I panic slightly. I have to blow dry it with mousse. I have to apply sea salt spray. I must rough up the cuticle. I remember working on a bride named Rachel. She had incredibly slick heavy hair. The comb kept popping backward. We spent twenty minutes applying powder and teasing the base. You cannot skip this. Thick heavy hair pushes combs out. Fine thin hair lets combs slide out. Both textures demand a strong teased shelf. Never trust the natural texture alone. Always form your artificial anchor.
What exact pins and sprays work best?
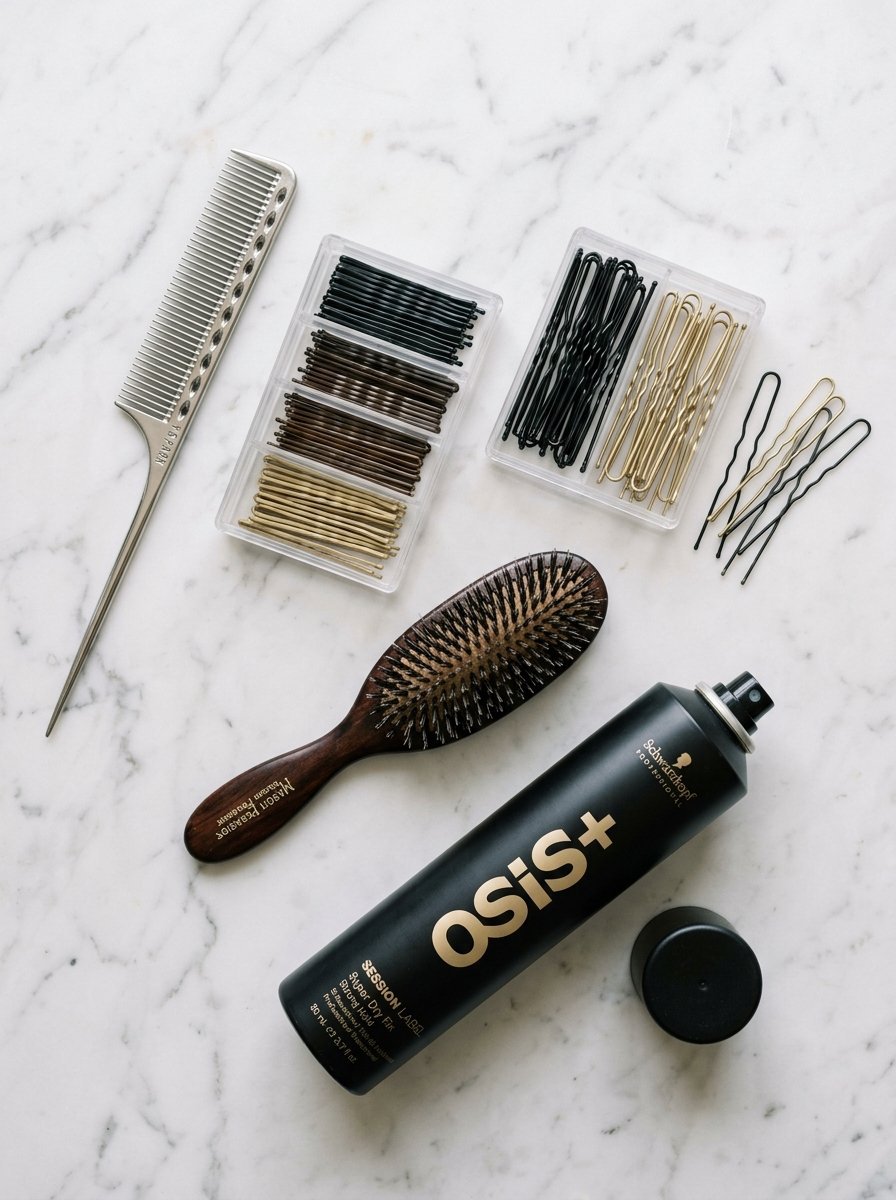
You must buy professional tools. Drugstore brands fail under pressure. Goody pins bend instantly. They cost 4 dollars but ruin your style. Meta Grip Premium Bob Pins cost 12 dollars. They grip tightly. They never lose shape. You need Diane French Hairpins. They cost 6 dollars. They have ridges that lock into teased hair. You need Kenra Volume Spray 25. It costs 20 dollars. It holds against wind and humidity. It smells amazing. You need Schwarzkopf OSiS plus Dust It powder. It costs 25 dollars. It turns slippery hair into a solid mat. You need a Spornette Teasing Brush. It costs 8 dollars. Bristle density matters for tight teasing. I carry all these tools to every wedding. I buy them in bulk. I never let a bride use her own cheap pins. The investment is small. The peace of mind is huge. A bride spends thousands on her dress. She spends hundreds on her fabric headpiece. Do not use weak pins. Spend the 12 dollars on Meta Grip. Buy the strong spray. Your photographs will look perfect. Your style will last until midnight.
When should your wedding hair and makeup team insert the comb?
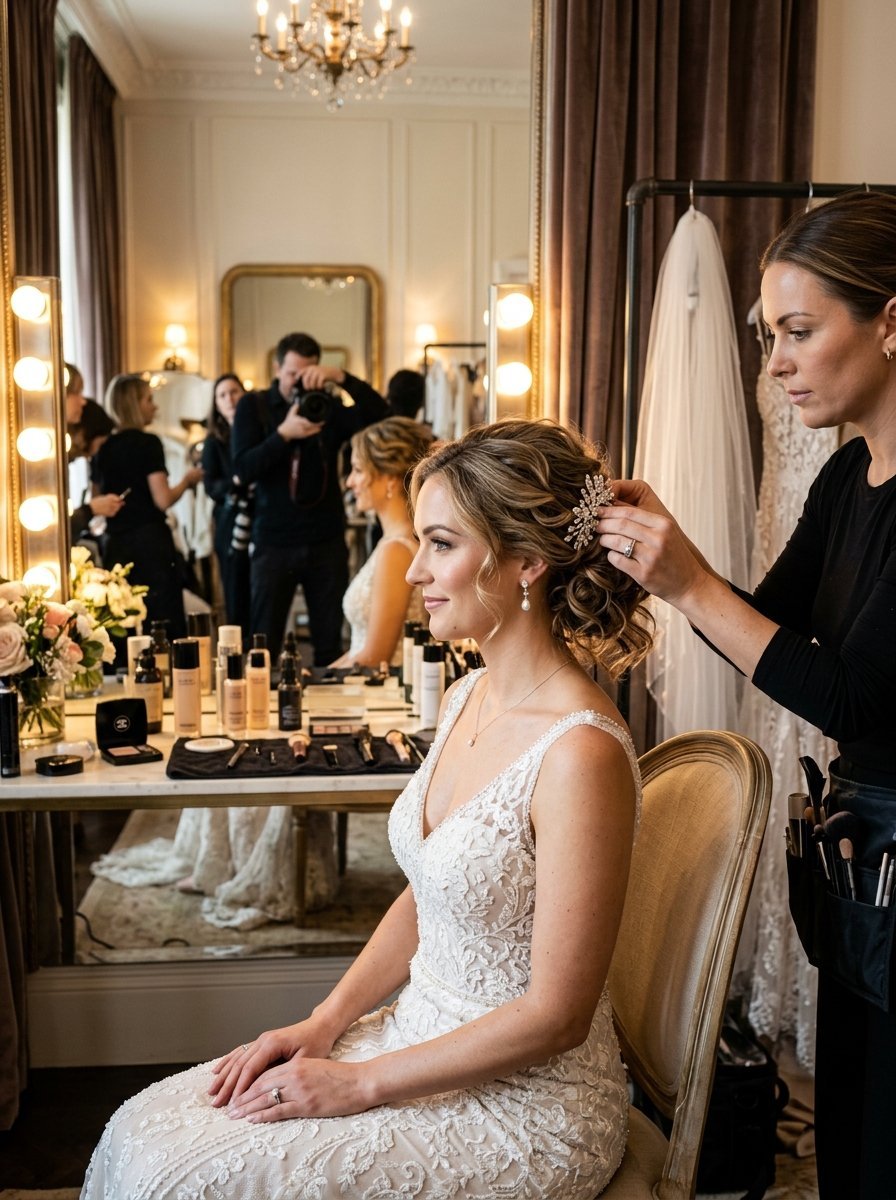
Timing saves the style. Never place the comb before the dress goes on. The dress goes over the head. It will rip the tulle right out. The stylist must finish the updo first. The bride puts her dress on. The bride puts her jewelry on. The photographer sets up the lighting. Then the stylist inserts the comb. This happens exactly twenty minutes before walking down the aisle. I have seen bridesmaids try to insert combs. They always mess it up. They push it straight down. They ruin the updo. Always let the professional do it. If the professional must leave early, they must teach the maid of honor. I always teach the maid of honor the scoop and flip trick. I hand her two crossed pins. I make her practice on my arm. She must know the exact angle. Once the comb goes in, nobody touches it. Nobody hugs the bride around the neck. Hugs pull the fabric. Family members must hug from the side. Keep the fabric safe. Keep the tension low.
How do you remove the comb without ruining the updo?
The reception starts. The bride wants the heavy fabric gone. She wants to dance freely. Removing the comb can destroy the entire updo if done wrong. You must remove the crossed bobby pins first. Never pull the comb straight back. Have a bridesmaid locate the crossed pins. Pull them out slowly. Hold the updo with one hand. Pull the comb straight up with the other hand. Do not drag the teeth through the bun. Lift the teeth out of the shelf. The teased shelf will remain. Smooth the top hair gently with a comb. Put a quick spray of Kenra 25 over the hair. The bun stays perfect. I taught this to Sarah last year. Her bridesmaids pulled the pins carefully. They lifted the comb upward. Her intricate bun looked totally untouched. She danced for six hours. If you yank the comb backward, it pulls the teased shelf out. It pulls the bun apart. Everything collapses. Take thirty seconds to do it right. Take the pins out first. Hold the base. Lift upward.
What happens if the tulle gets pulled hard?
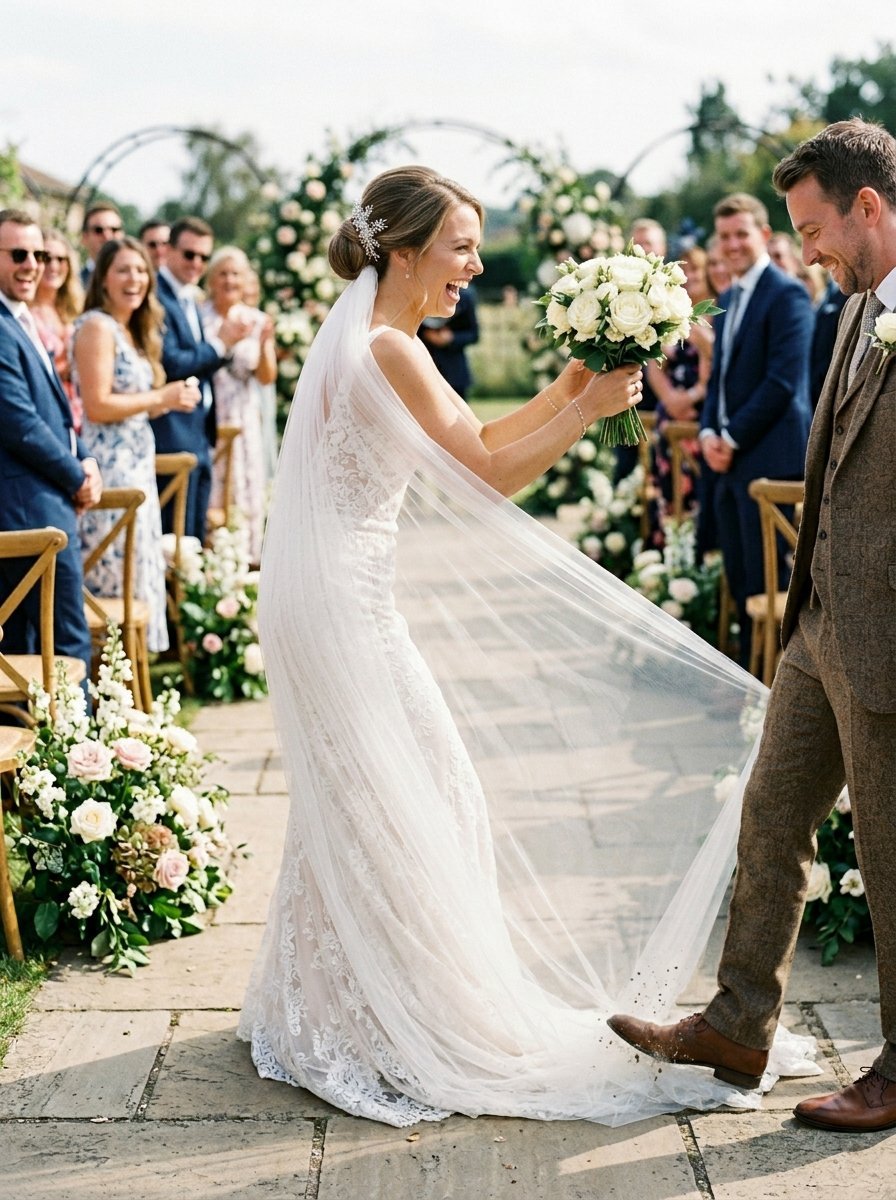
Accidents happen constantly. A guest steps on the trailing fabric. The fabric catches on a door hinge. A child pulls the tulle. A strong shelf stops disaster. The crossed pins act as shock absorbers. If someone steps on the fabric, the bride snaps her head back. The comb stays locked. I saw this happen at a massive outdoor event. The bride walked past a heavy wooden chair. The tulle snagged a nail. She kept walking. Her head jerked backward. The tulle tore slightly. The comb never moved a single millimeter. The four crossed Meta Grip pins held the entire weight of her forward motion. This proves the system works. If she had only pushed the comb into soft hair, the whole piece would have ripped out. It would have dragged her bun out with it. Form the anchor. Cross the pins. Bend the U shape pins upward. You create a foolproof mechanical lock.
Frequently asked questions
How much does a professional bridal stylist charge for placement?
Professional placement is usually included in the main styling package. A full bridal package costs between 150 and 350 dollars. The stylist spends five extra minutes making the hidden shelf. They provide the professional pins and holding sprays. Always ask your stylist if they stay until you get dressed. If they leave early, you must place it yourself.
Can I use dry shampoo instead of texturizing powder?
Dry shampoo gives a little grip. It is not strong enough for heavy cathedral pieces. Dry shampoo costs about 10 dollars. True styling powder costs 25 dollars. The powder creates a sticky, stiff base. Dry shampoo just removes oil. Always buy the proper styling powder for a solid anchor. You need maximum friction.
Will backcombing damage my hair?
Proper backcombing causes zero damage. The stylist pushes the hair down smoothly. When you wash it later, use heavy conditioner. Comb it gently from the bottom up. Do not rip a brush through teased hair. Take your time in the shower. The teased shelf brushes out easily under running water.
What is the best angle to push the comb teeth?
Hold the comb flat against your scalp. The teeth should face straight down toward the floor. Never push the comb in sideways. Gravity pulls downward. You must align the teeth with gravity. The crossed pins stop the downward sliding. The upward flip move hooks the hair perfectly.
Should I buy a metal comb or a plastic comb?
Always choose metal. Metal combs bend slightly to match your head shape. Metal teeth grip hair tightly. Plastic teeth snap easily under pressure. A heavy piece will snap a plastic comb in half. If your dream piece has a plastic comb, take it to a seamstress. They can sew a metal comb onto it for 20 dollars.
How do you fix a slip right before walking down the aisle?
Keep an emergency kit nearby. Keep two Meta Grip pins and a travel size Kenra spray. If it slips, pull it out completely. Do not just shove it back in. Respray the area. Tease the hair quickly. Scoop and flip the comb into the spot. Cross the two pins firmly. Take a deep breath.
Can I wear a heavy piece with very short hair?
Short hair requires tiny hidden ponytails. You cannot tease a large shelf. Make three tiny ponytails in a row across the back of your head. Slide the metal teeth straight down behind the clear elastics. Pin the teeth directly to the elastics. The elastics hold massive weight.
Do I need a trial run for my headpiece?
Always take your piece to the trial run. The stylist needs to feel the exact weight. They need to see the comb size. A three inch comb requires a three inch teased shelf. A five inch comb needs a wider base. The trial run proves the plan works. Never skip testing the weight.
How many pins do I actually need?
A light blusher needs two crossed pins. A medium fingertip piece needs four crossed pins. A massive cathedral piece needs four crossed pins plus two thick U shape pins. The heavier the fabric, the more pins you insert. Never use more than six pins. Too many pins cause severe headaches.
Does the groom lift the blusher over the comb?
Yes. The groom lifts the front blusher piece. He flips it backward over the main comb. The comb must sit perfectly flat against the head. If the comb sits loosely, flipping the blusher will pull it out. A tight anchor allows smooth flipping. Practice this flip with your partner.
What do I do if I have a sensitive scalp?
Do not pull the tease too tight. Cross the pins over the comb teeth, not into your scalp. Slide the pins horizontally above the skin. The pins should grip the hair, not scratch the head. Let your stylist know immediately if a pin hurts. A pinching pin ruins your entire day.
Can I wash my hair the morning of my wedding?
Skip the morning wash. Wash your hair the night before. Day old hair holds everything better. Freshly washed hair is too soft. It acts like slippery glass. The texturizing powder works much better on dry, day old hair. This saves you time in the morning too.
How do I hide pins in bright blonde hair?
Silver pins show clearly in blonde hair. Buy gold or yellow bobby pins. Push them deep under the top layer of hair. Never cross them over the exposed top section. Hide them completely beneath the main fabric fold. A good stylist makes every mechanical part invisible.
What is the best way to travel with a long piece?
Fold the fabric gently. Clip the metal comb to a velvet hanger. Let the fabric hang straight down in a garment bag. Do not stuff it into a small box. Wrinkled tulle looks terrible in photographs. Steam the fabric on low heat before wearing it. Never iron tulle fabric.
Can my maid of honor remove the piece easily?
Yes. Show her the crossed pins before the ceremony. Tell her exactly where they sit. She needs to pull the pins straight out. She must hold the bun with her left hand. She lifts the comb straight up with her right hand. The removal takes exactly twenty seconds.
Does humidity ruin the pinned base?
High humidity flattens teased hair quickly. You must use a true anti humidity spray. Kenra Volume Spray 25 blocks moisture completely. Spray the teased shelf heavily. Spray the surrounding hair. A stiff, dry shelf survives thick summer humidity without collapsing. Do not skip the heavy spray.
Should I place the comb above or below my bun?
Place heavy pieces above the bun. The bun physically holds the weight. Place light fingertip pieces below the bun if you want to show off the updo. Placing a comb below the bun requires extra tight cross pinning. Gravity pulls it down instantly without extra pins.
Can I use decorative pins to hide the plain bobby pins?
Yes. Slide the structural Meta Grip pins in first. They do the heavy lifting. Then slide pretty pearl or diamond pins directly over them. The decorative pins hide the ugly mechanics. Make sure the decorative pins hook into the teased shelf too. This gives extra holding power.

You now know the exact steps professionals use daily. Making a hidden shelf takes five extra minutes. Crossing strong pins locks everything tight. Testing the tension saves you from sudden disaster. I have seen countless brides panic when a heavy cathedral piece slides out right before the music starts. You will not face that panic. You have the exact moves. You know which cheap pins to throw away. Talk to your stylist about the scoop and flip trick. Ask them to use strong texturizing powder. Buy the Kenra spray. Anchor your beautiful tulle piece. Walk down that aisle with total confidence. Do you plan to wear your hair up or down for your big walk? Let me know in the comments below.

Sarah Mitchell — Founder & Editor-in-Chief
Sarah Mitchell is the founder and editorial voice behind Hair Level Up. A licensed cosmetologist with more than 15 years of experience, she has styled A-list celebrities for editorial shoots and red carpets, with work featured in Vogue, Elle, and Harper’s Bazaar. Early in her career, she trained under the legendary hairstylist Oribe in New York, an apprenticeship that still shapes her editorial eye today. Sarah founded Hair Level Up in 2020 after one bad haircut convinced her that women deserved a destination that felt like a magazine, taught like a stylist, and inspired like an art gallery. She oversees every story from concept to publication, guided by a simple belief: a good story teaches you something, but a great one makes you feel beautiful while it does.