25 Easy Braided Hairstyles You Can Do in Under 10 Minutes
Mornings usually start with a race against the clock. You want to look put together, but the snooze button won’t stop calling your name. I have spent years testing every possible way to style hair without wasting half the morning in front of a mirror. Braids are the perfect solution because they hide frizz, secure messy strands, and look like you spent way more effort than you actually did. These twenty five styles focus on speed and simplicity. You do not need a degree in cosmetology to master them. Most only require a few hair ties and a bit of patience. I noticed that once you learn the basic rhythm of your fingers, your speed doubles. These are the styles I rely on when I have ten minutes before a meeting or a brunch date.
This guide provides a roadmap for anyone who feels intimidated by complex hair tutorials. We are stripping away the confusing jargon and focusing on movements that make sense. You will find styles for long hair, short bobs, and every texture in between. I included my personal observations on which elastics hold best and how to prep your hair so the braids stay crisp all day. We also look at the specific tools that actually make a difference versus the ones that just clutter your vanity. By the end of this, you will have a full rotation of looks that keep your hair out of your face and your confidence high.
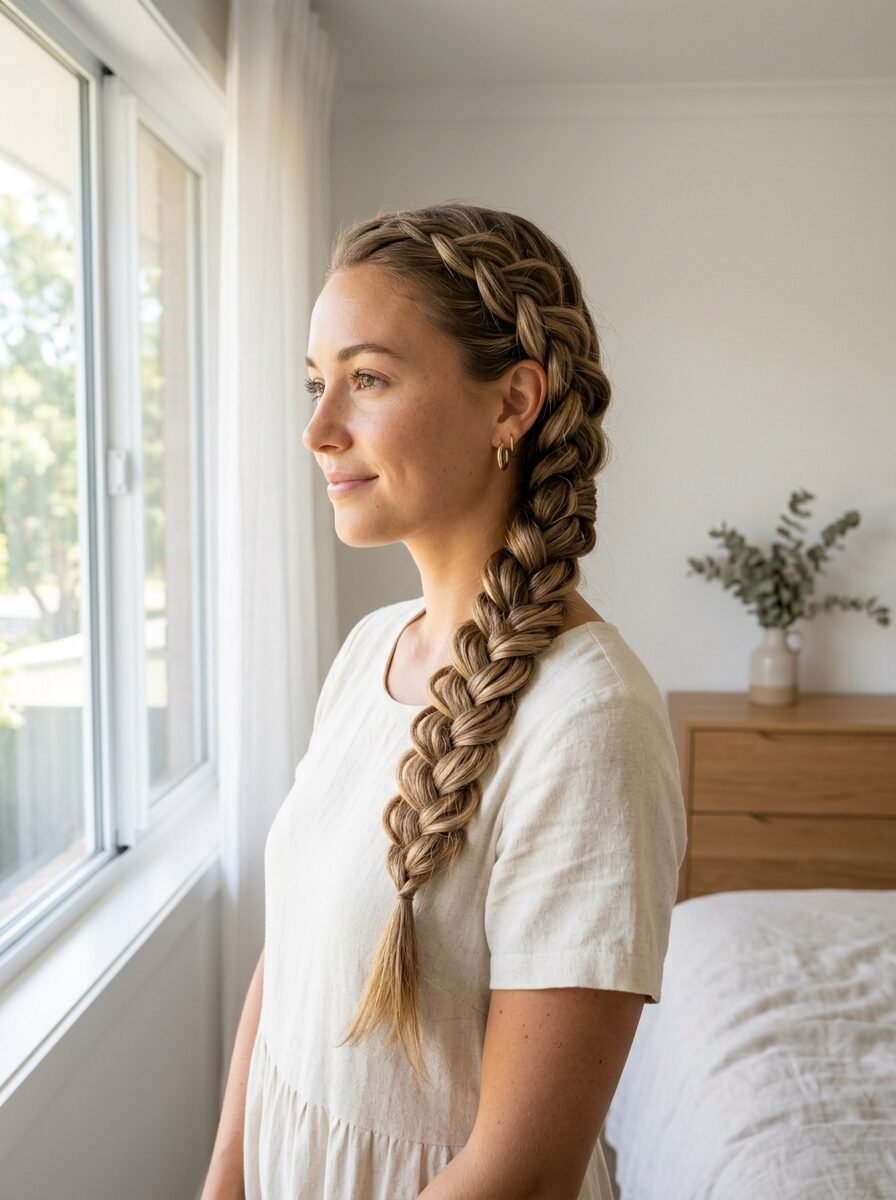
1. The Classic Three Strand Side Braid
This is the foundation of almost every other style on this list. I start with this one because it is the most reliable way to handle a bad hair day. You simply pull all your hair over one shoulder and divide it into three even sections. Cross the right over the middle, then the left over the middle. I’ve seen this work best when you don’t pull too tight. If it looks too perfect, it can feel a bit stiff. Once you reach the bottom, secure it with a small clear elastic. To give it more volume, gently pull at the outer edges of the loops. This technique is often called pancaking. In my experience, doing this makes even thin hair look twice as thick. It takes about two minutes.
2. The Messy Pull Through Braid
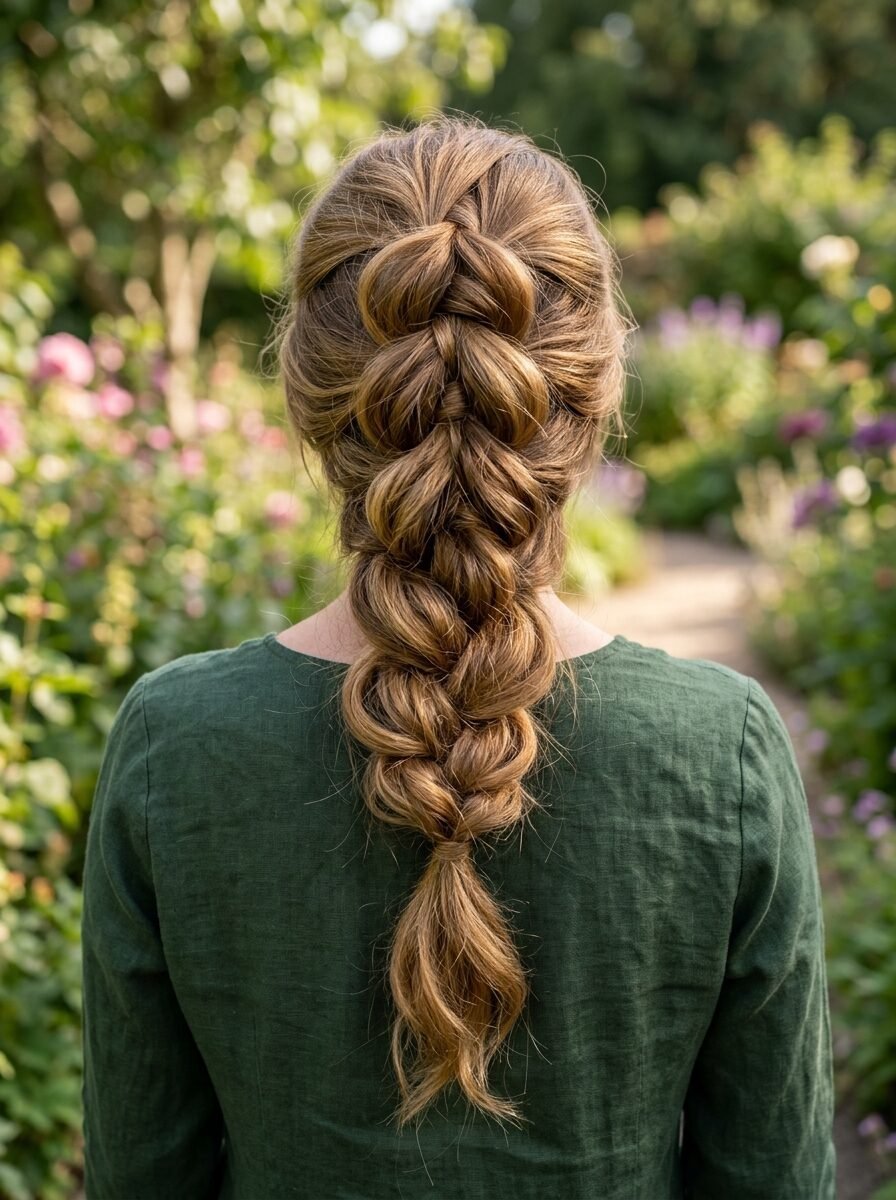
If you struggle with actual braiding, the pull through method is a total lifesaver. You are technically just making a series of ponytails. Start by tying the top section of your hair into a small pony. Create a second ponytail right underneath it. Split the first ponytail in half, wrap it around the second one, and pin it out of the way. Add more hair to those split ends and tie them into a new ponytail. Continue this until you reach your neck. I tried this for a wedding last year when I was in a rush. It stayed secure through hours of dancing. It looks incredibly intricate but requires zero actual weaving. It creates a 3D effect that catches the light beautifully.
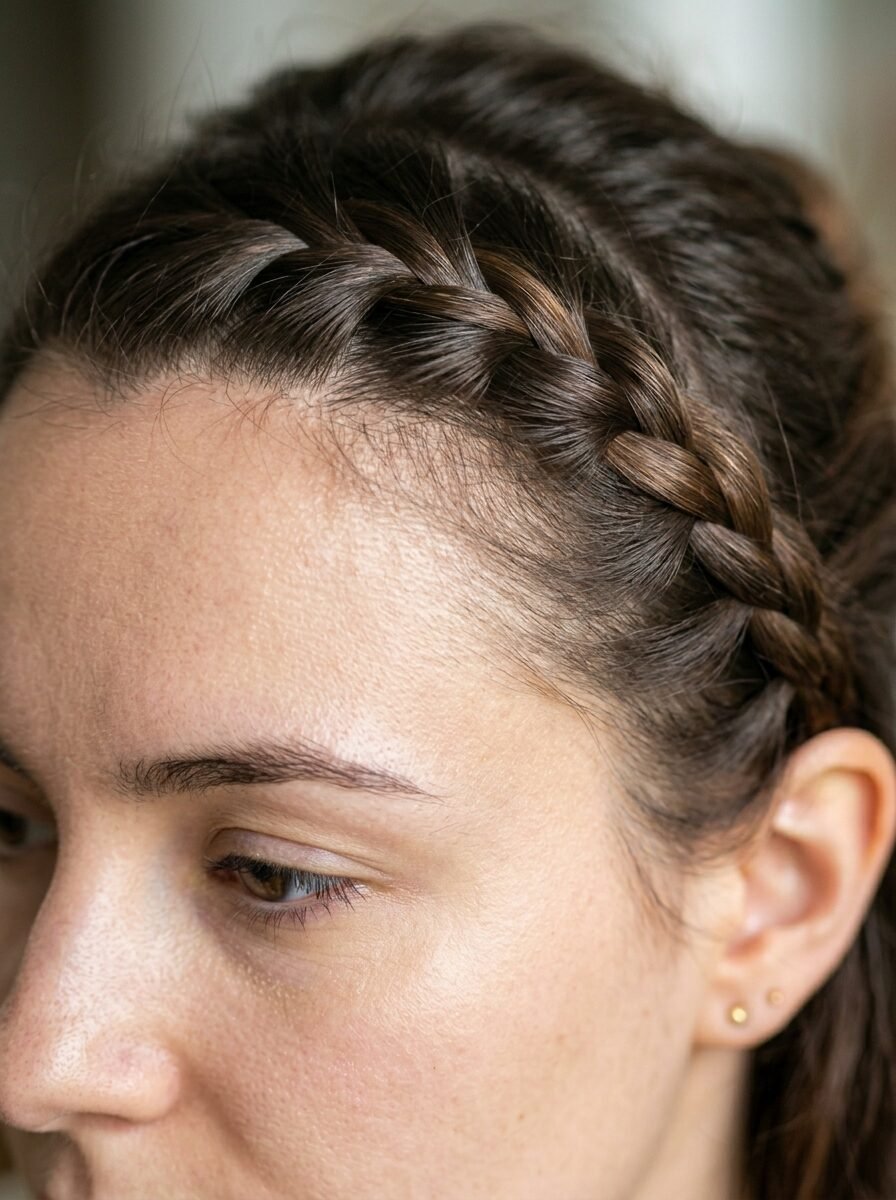
3. Dutch Braid Headband
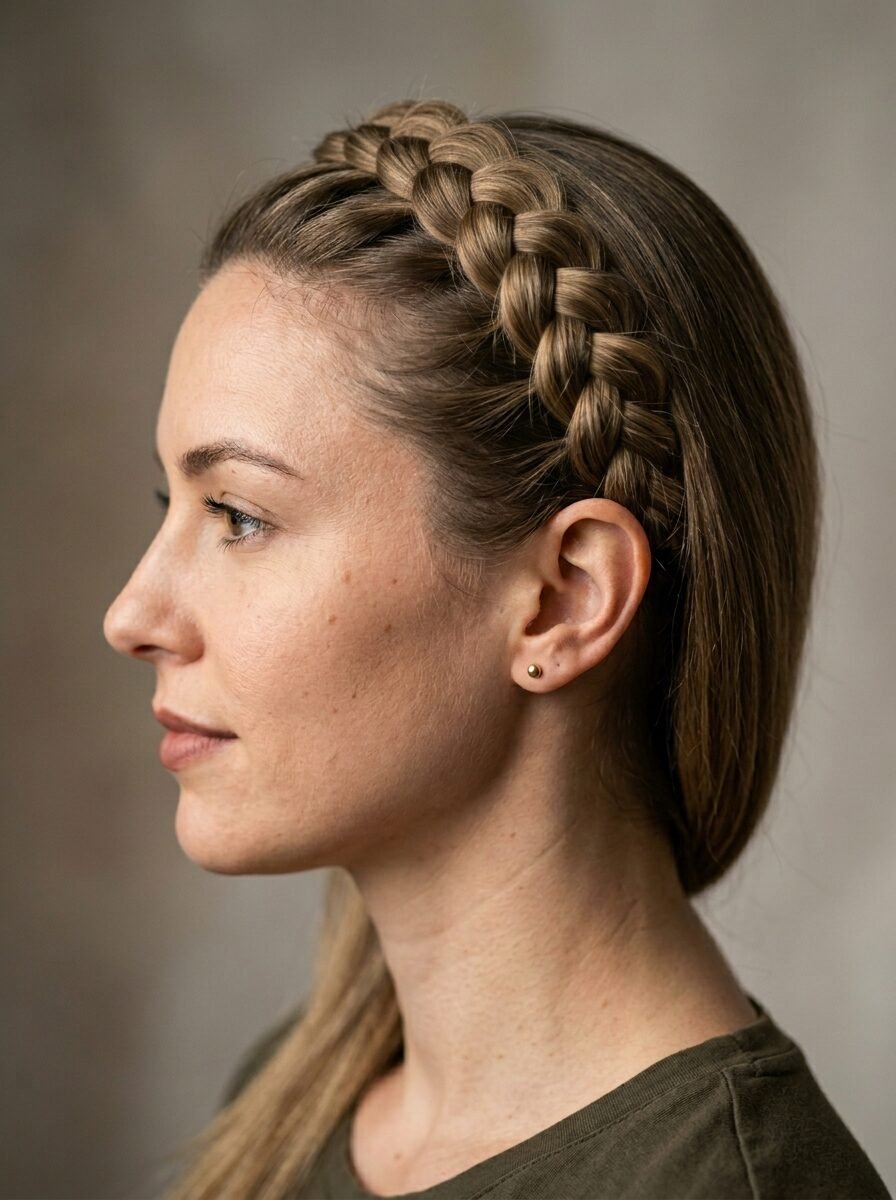
A Dutch braid is just a French braid flipped inside out. Instead of crossing sections over the top, you cross them underneath. This makes the braid sit on top of your hair like a 3D crown. I like to start this right at my part and work my way down toward my ear. It keeps bangs out of your eyes during a workout or a windy day. I noticed that using a tiny bit of hair wax on your fingertips helps keep the flyaways down while you work. Secure it behind your ear with a bobby pin. You can leave the rest of your hair down for a relaxed look. This style usually takes me about six minutes from start to finish.
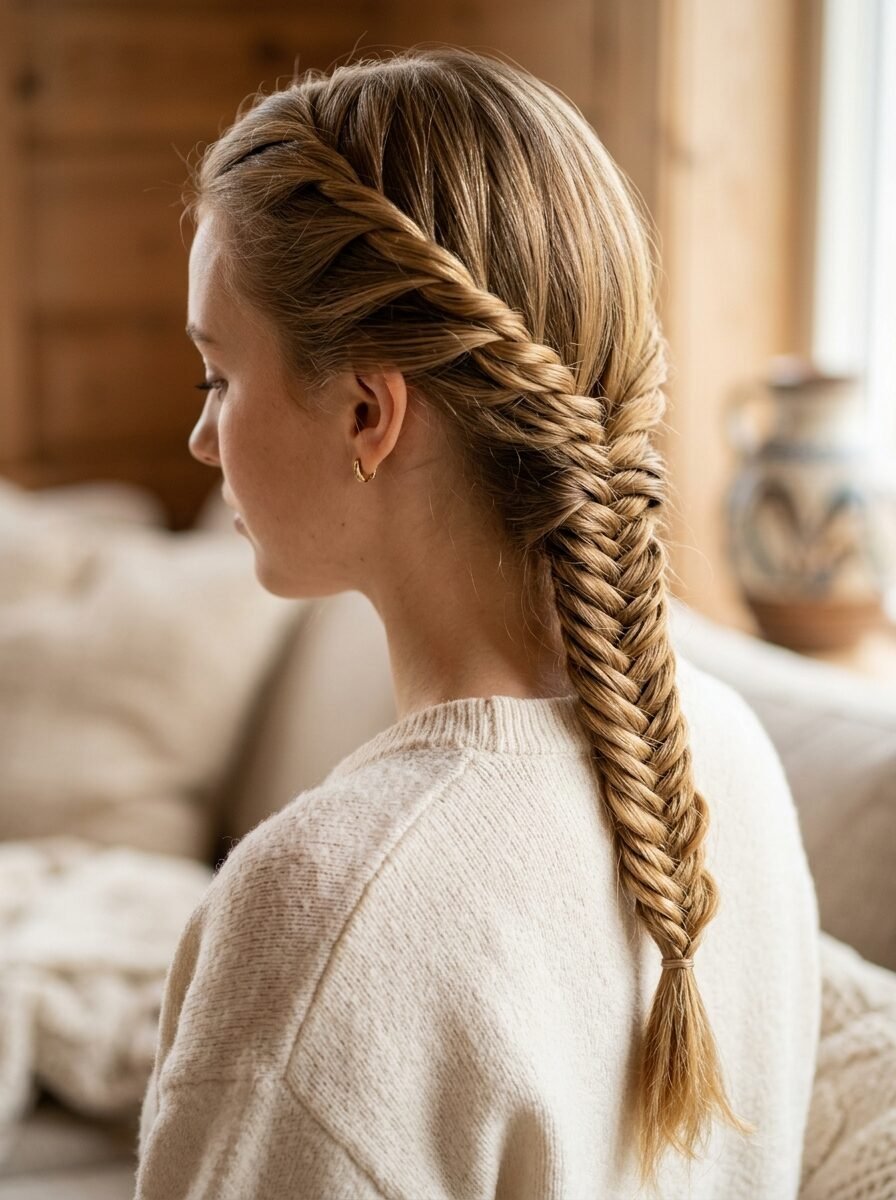
4. The Fishtail Accent
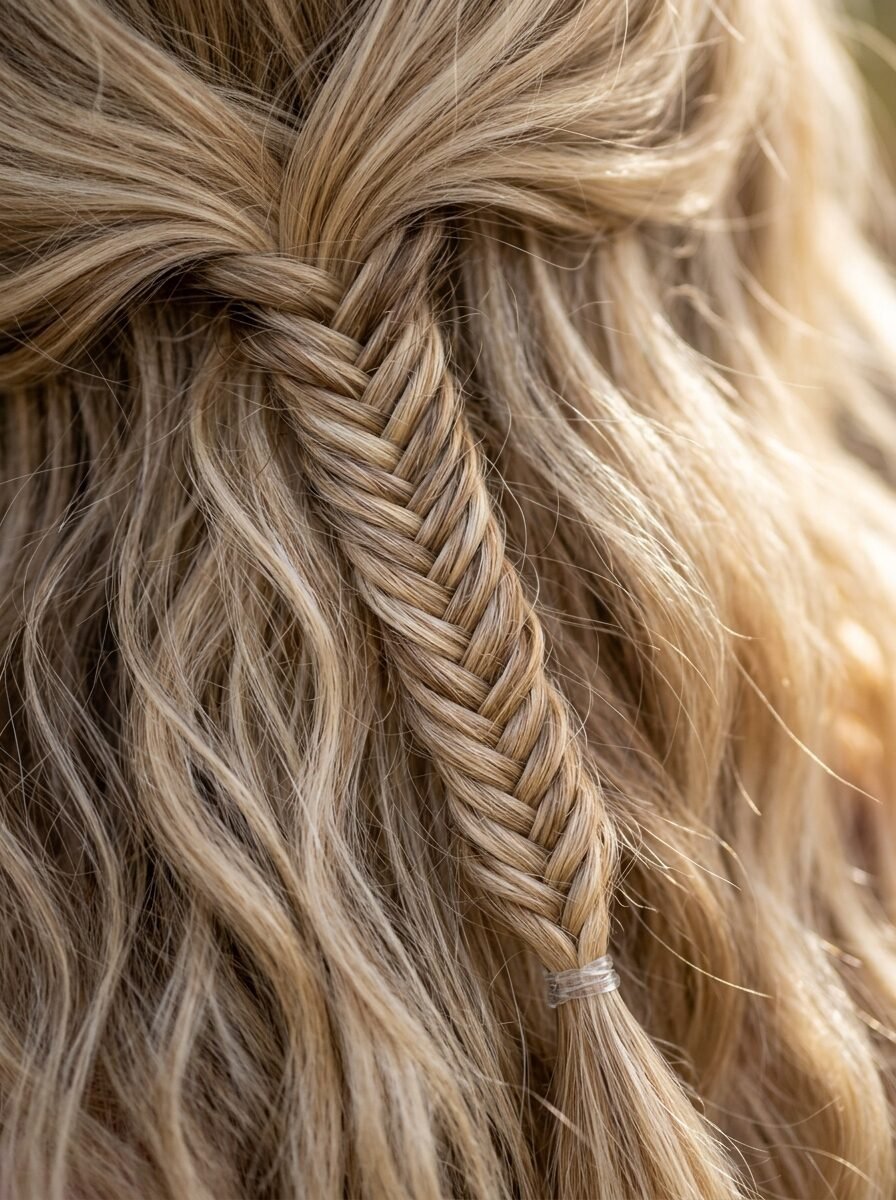
Fishtail braids look like they take hours, but the accent version is a quick win. You only use a small section of hair near your temple. Divide that section into two parts. Take a tiny piece from the outside of the right part and pass it to the left. Then take a tiny piece from the outside of the left and pass it to the right. Repeat this until you hit the ends. I’ve tried doing this with large sections, but the braid loses its detail. Keep the sections small for that classic mermaid look. It adds a subtle touch of detail to loose waves. I often do this while waiting for my coffee to brew.
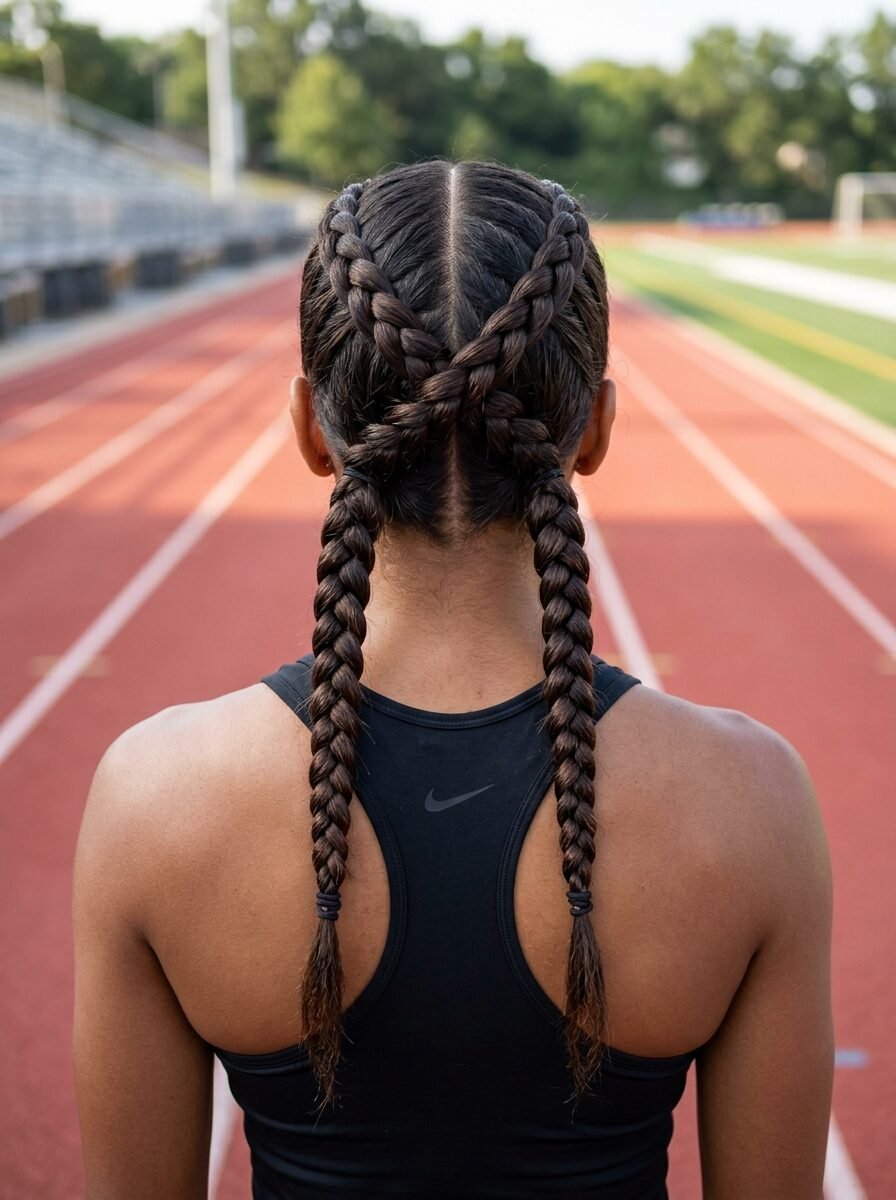
5. Double Dutch Low Buns
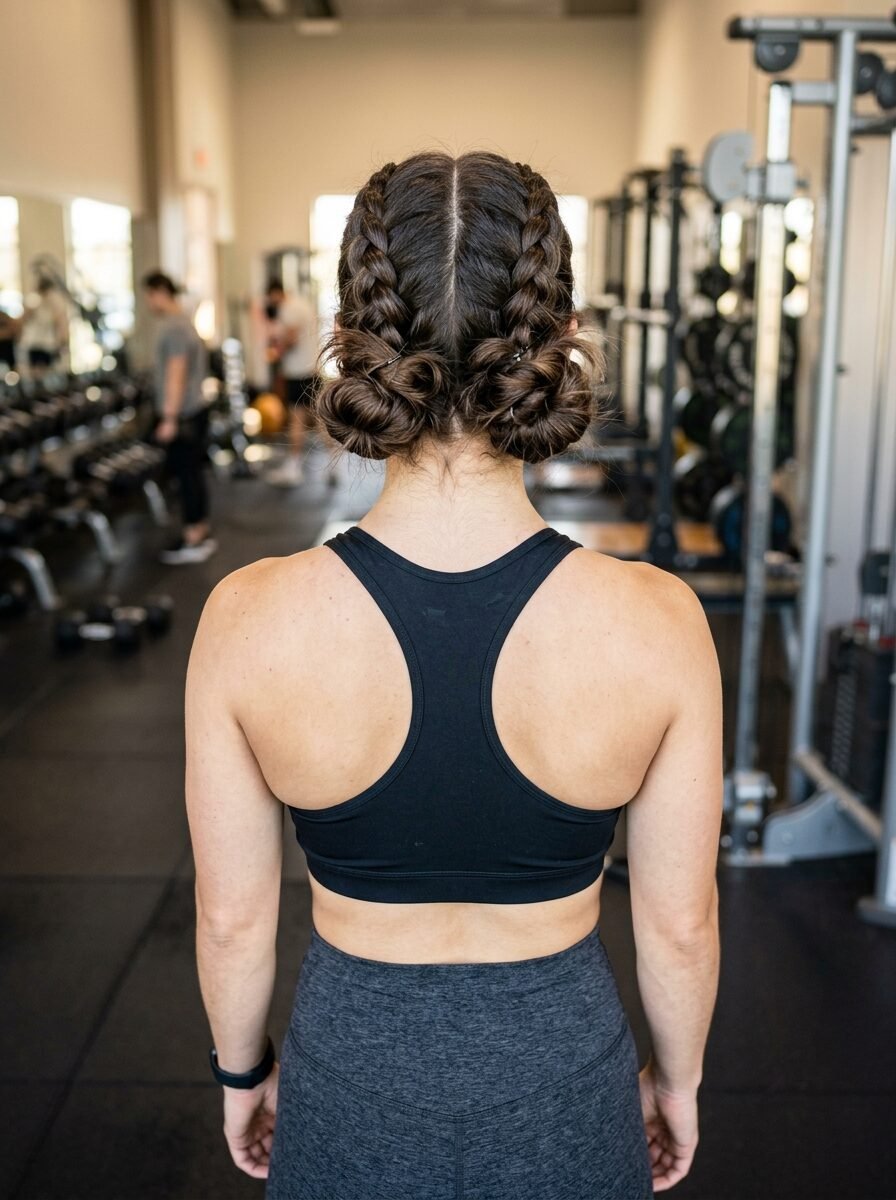
This is my go-to for gym days or humid weather. Part your hair down the middle into two sections. Perform a Dutch braid on each side starting from the forehead and moving toward the nape of your neck. Once you run out of hair to add, tie each side into a ponytail. Twist those tails into messy buns and secure them with extra pins. I’ve seen this style hold up through heavy rain and long hikes. It keeps your neck cool and looks very trendy. If you have layers that poke out, just use a light mist of hairspray to tuck them back in. It is a solid eight-minute routine.
6. The French Braid Ponytail
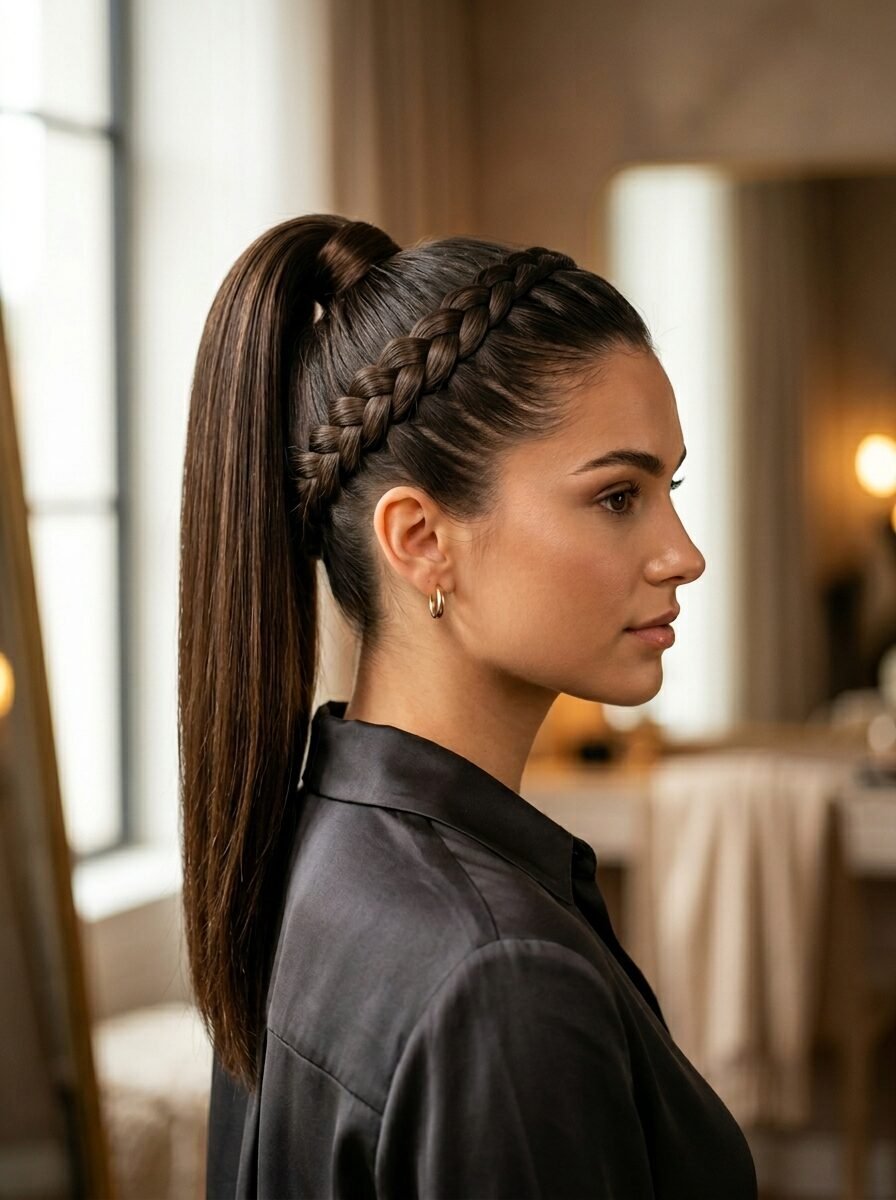
This combines a classic French braid with a high ponytail. Start a French braid at the crown of your head, but stop once you reach the middle of the back of your head. Gather all the remaining hair, including the braid ends, into a high ponytail. This gives the top of your head some texture and height. I noticed this is great for third-day hair because the braid hides any oiliness at the roots. You can wrap a small piece of hair around the elastic to hide it. It looks professional enough for the office but casual enough for the grocery store. It takes about five minutes once you get the hang of the French braid rhythm.
7. Bubble Braid Pigtails
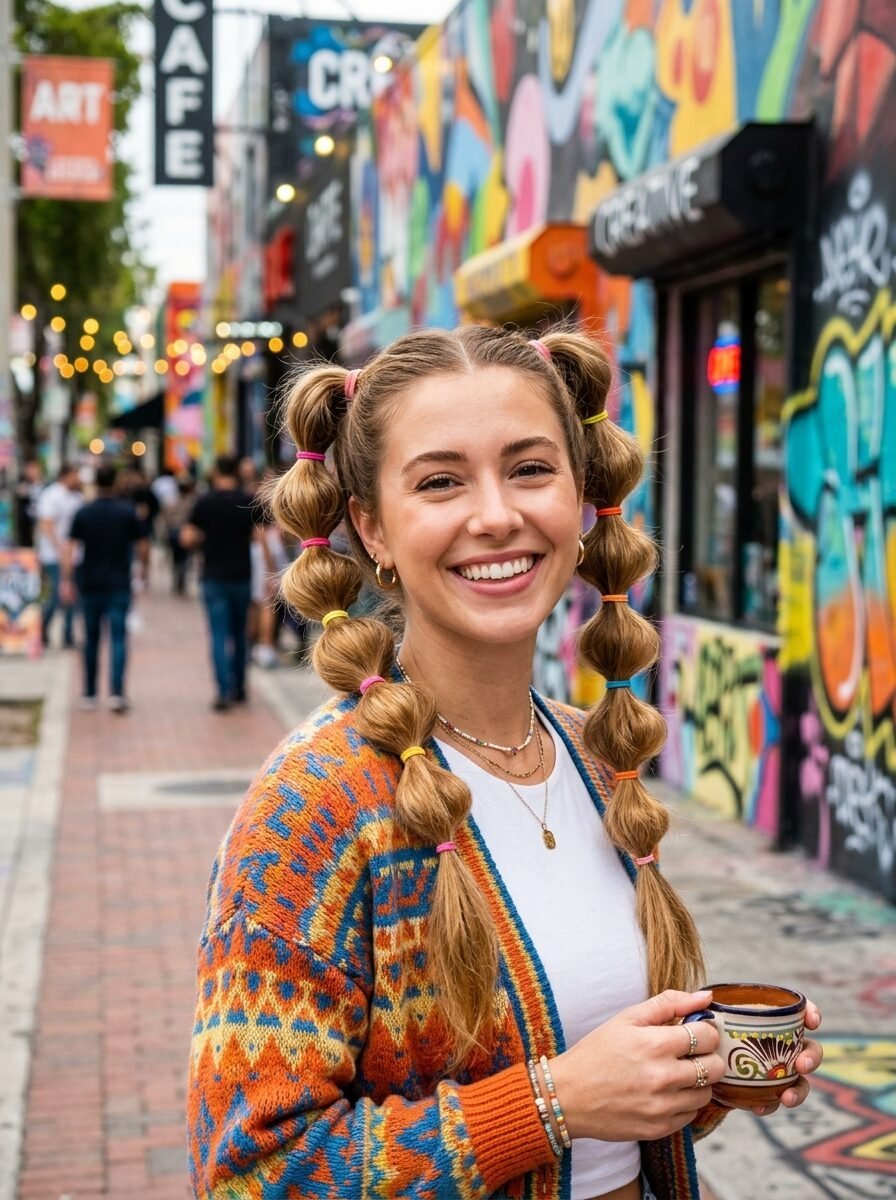
Bubble braids are not technically braids, but they fit the aesthetic perfectly. Tie your hair into two high pigtails. Place elastics every two inches down the length of the hair. After placing each elastic, use your fingers to puff out the hair between the ties. This creates the bubble effect. I tried this for a music festival and received more compliments than I did on much harder styles. It is playful and keeps your hair from tangling. Make sure to use elastics that match your hair color for a more polished look. This is a three-minute style that works on almost any hair length.
8. Rope Twist Side Braid
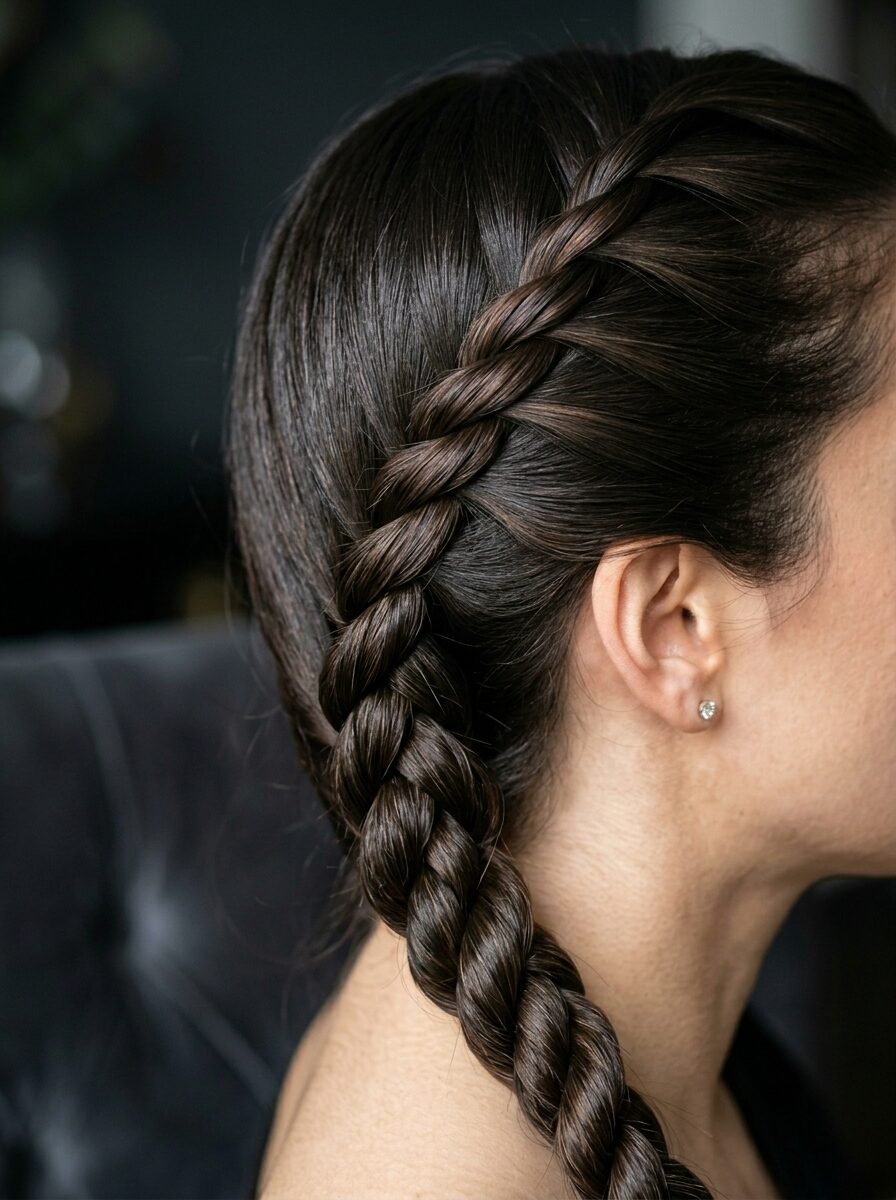
The rope twist is excellent if you find three strands too confusing. Take two sections of hair and twist them both to the right. Then, wrap the two sections around each other to the left. Crossing them in the opposite direction of the twist is what keeps the rope from unraveling. I’ve seen people make the mistake of twisting and wrapping in the same direction, which just leads to a mess. This style looks very sleek and modern. It works best on damp hair or hair with a bit of leave-in conditioner. It is one of the fastest styles on this list, often taking less than ninety seconds.
9. Half Up Braided Crown
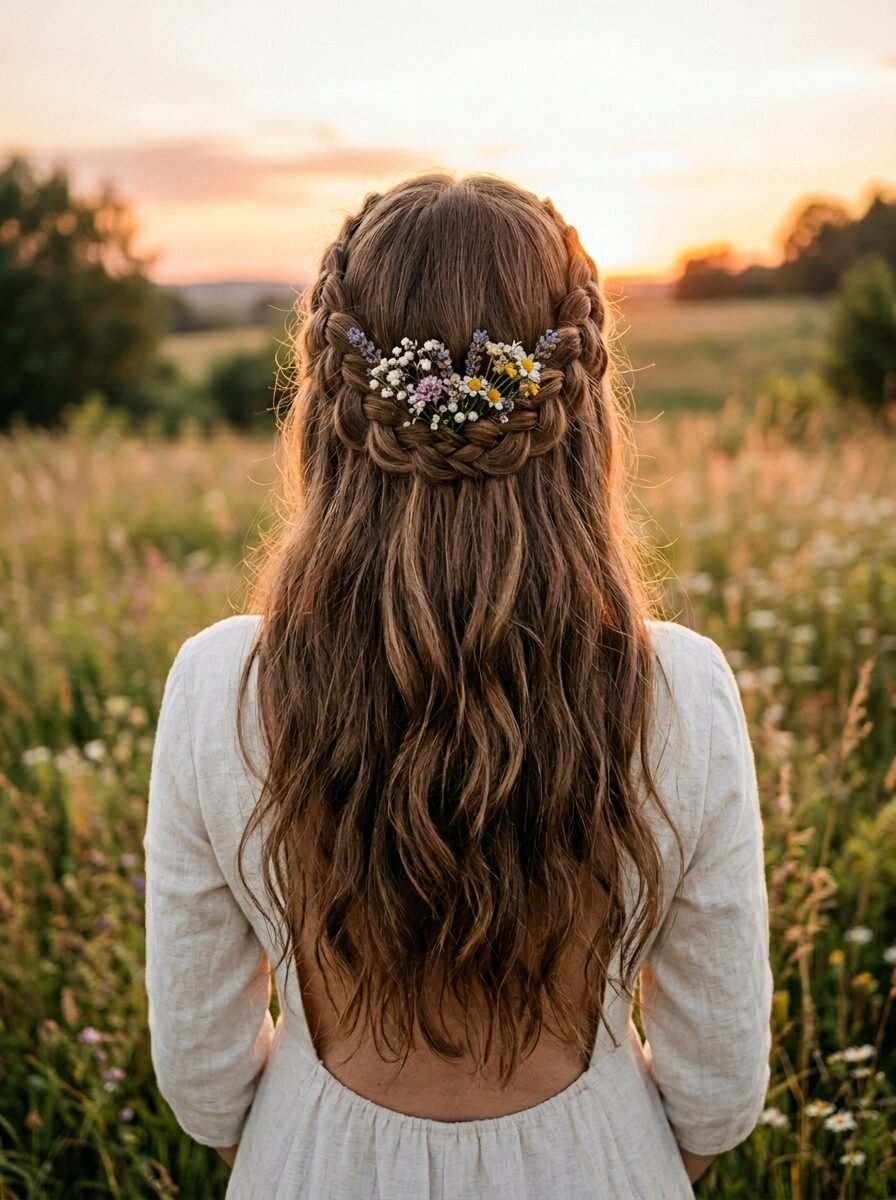
For this look, take two small sections of hair from each side of your face. Braid each one into a simple three-strand braid. Pull them to the back of your head and tie them together with a small elastic. This creates a natural crown that keeps your hair out of your face while letting the back hang loose. I often do this when I want to show off my length but don’t want hair falling into my eyes while I work. You can tuck the ends under the braids and pin them if you want a more seamless look. It feels very bohemian and soft.
10. Twisted Fishtail Braid
This is a variation of the fishtail that adds a twist at the start. Take two sections from the front, twist them away from your face, and join them in the back. From that point, start your fishtail braid. This adds more volume to the sides of your head. I noticed that if you start the fishtail too high, it can feel heavy. Starting it at the base of the neck is much more comfortable. This style looks great with a chunky sweater or a summer dress. It takes about seven minutes because the fishtail requires a bit more focus.
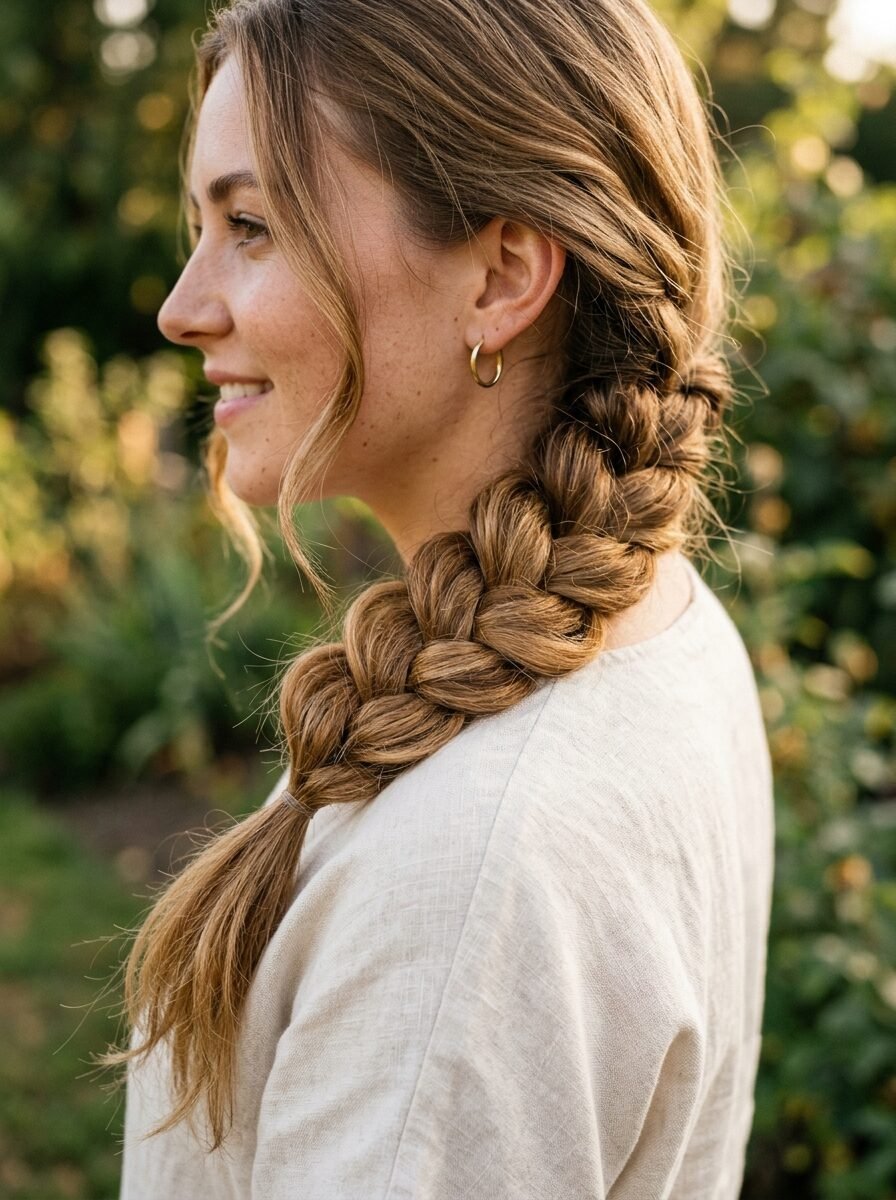
11. Loose Bohemian Side Braid
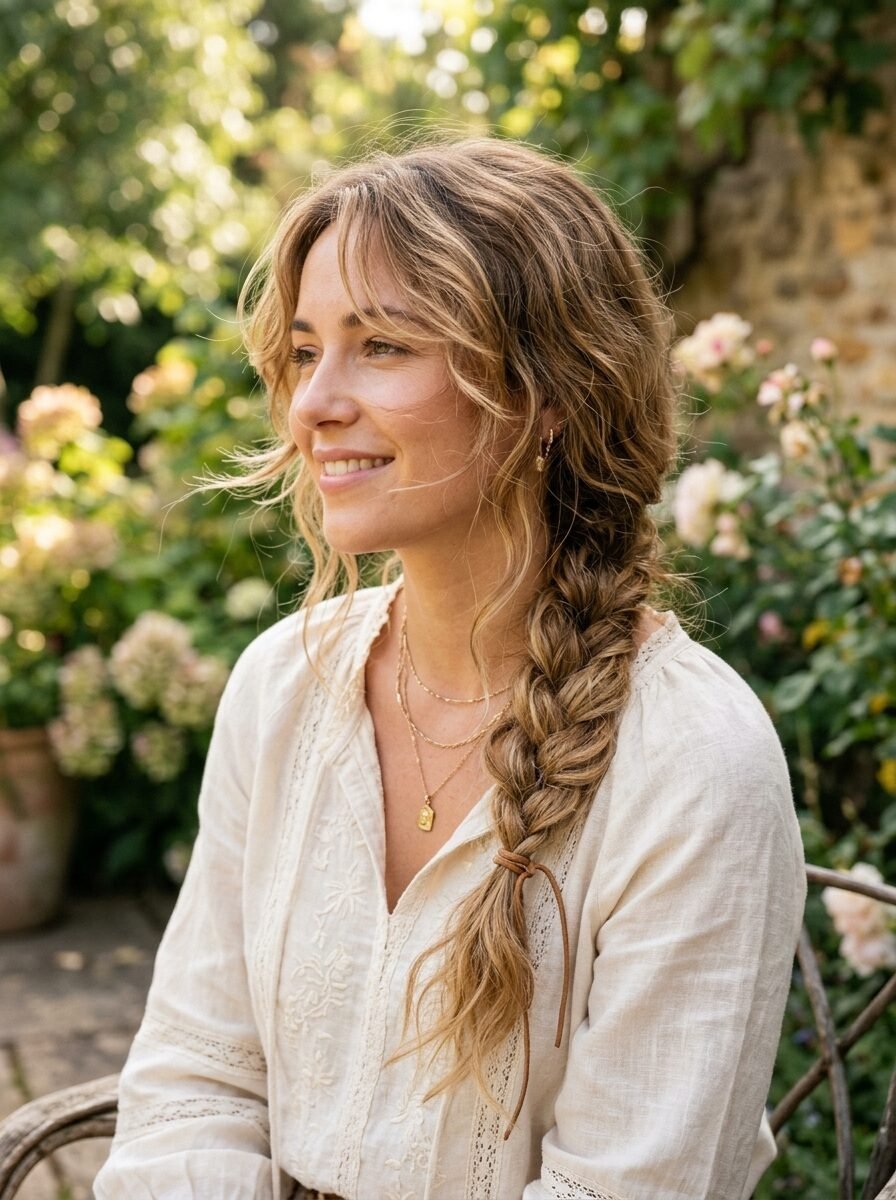
The key to the boho look is intentional messiness. Start a loose three-strand braid on the side of your head. Do not pull it tight at any point. Once finished, pull several pieces out around your face to frame it. I’ve tried this with curled hair, and the texture is incredible. It looks like you just came from the beach. Use a clear elastic and then cover it with a ribbon or a decorative clip. I see this look often on Pinterest because it photographs so well. It is very forgiving if you make a mistake.
12. Braided Top Knot
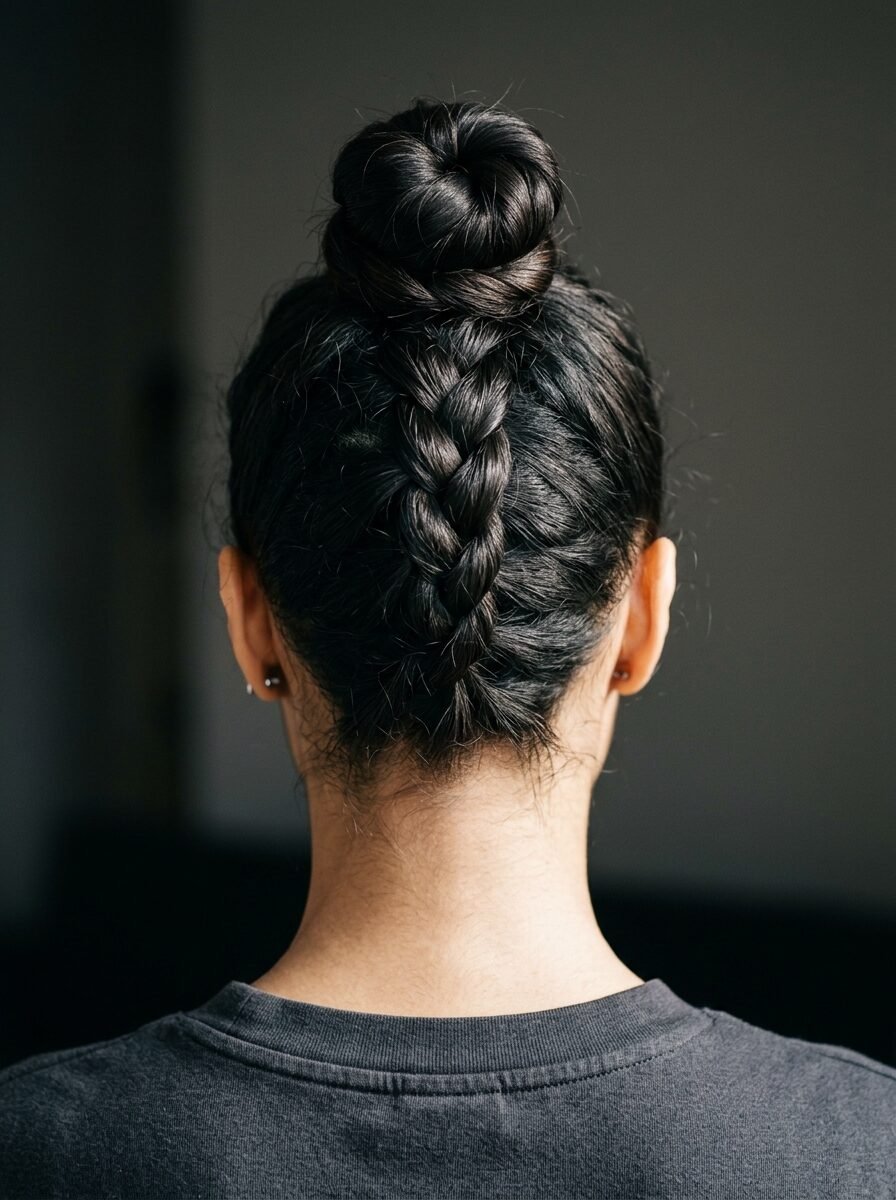
Flip your head upside down and start a French braid from the nape of your neck moving toward the crown. Once you reach the top, gather all your hair and tie it into a bun. This adds a surprise element to a standard top knot. I noticed this is the best way to keep those short hairs at the back of your neck from falling out. It takes a little practice to braid upside down, but your arms get used to it quickly. It is a very secure style for yoga or running errands. It usually takes about five minutes.
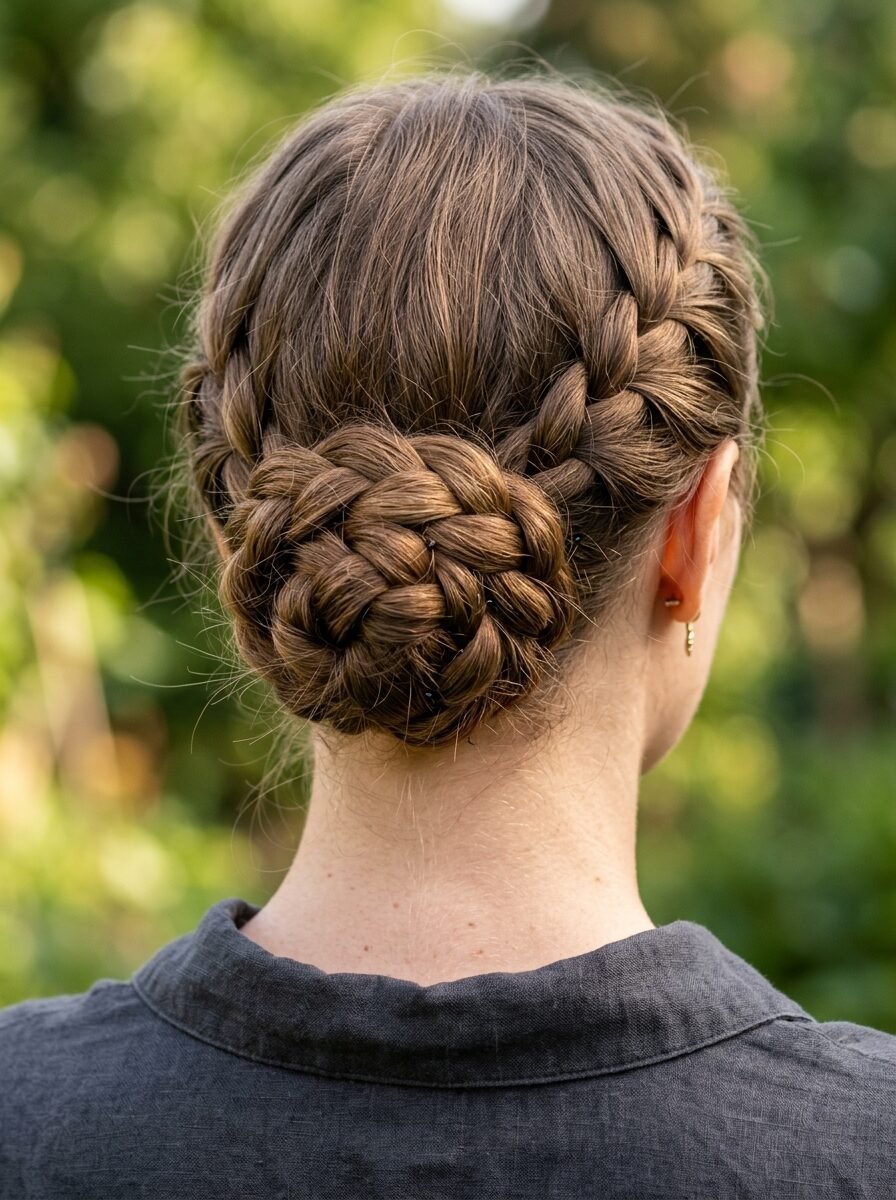
13. Reverse French Braid Bun
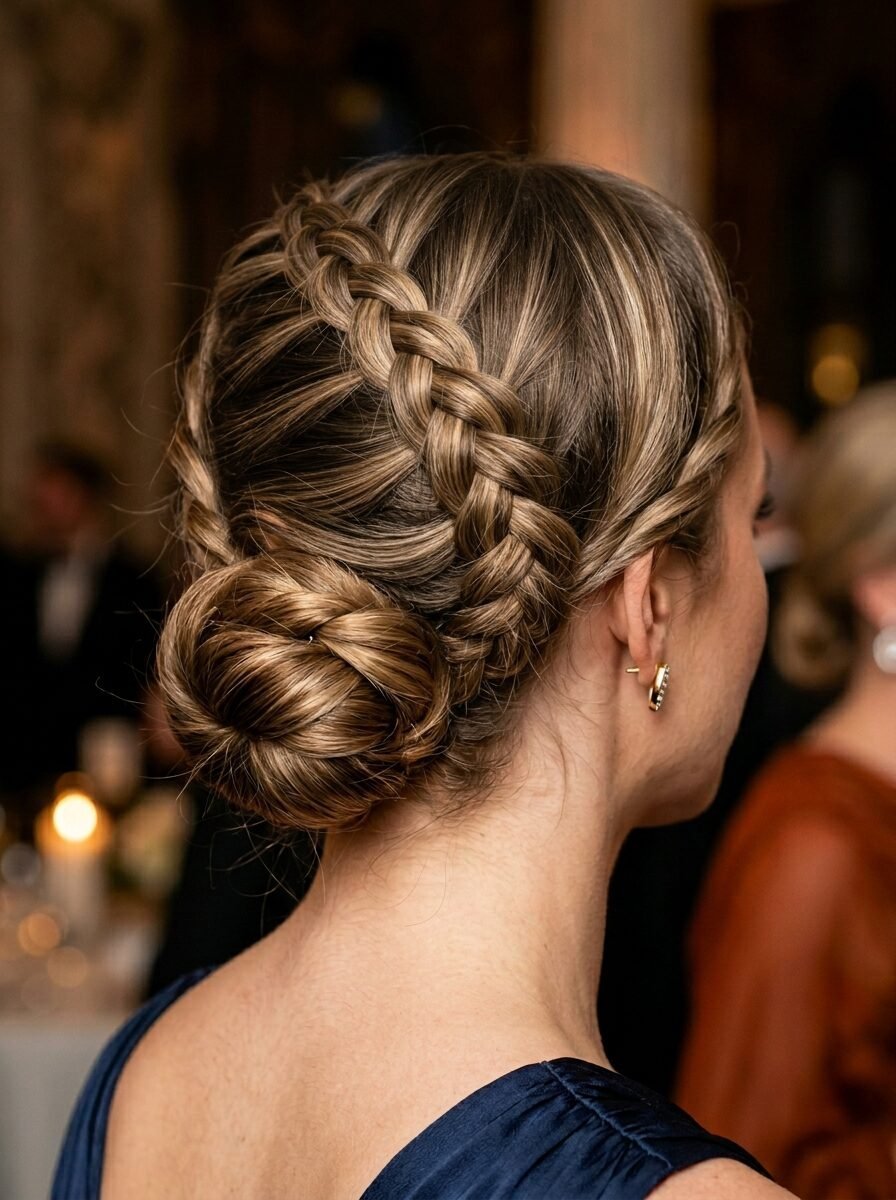
This is similar to the top knot but uses a Dutch braid for more texture. The braid sits on the back of your head like a spine. I’ve seen this look very elegant for evening events. You can make the bun as neat or as messy as you like. If you have very thick hair, use two hair ties to ensure the bun doesn’t sag. I like to use a few U-shaped hairpins to lock the bun in place. It feels much more secure than standard bobby pins. This is a six-minute style that looks very high-end.
14. The Infinity Braid
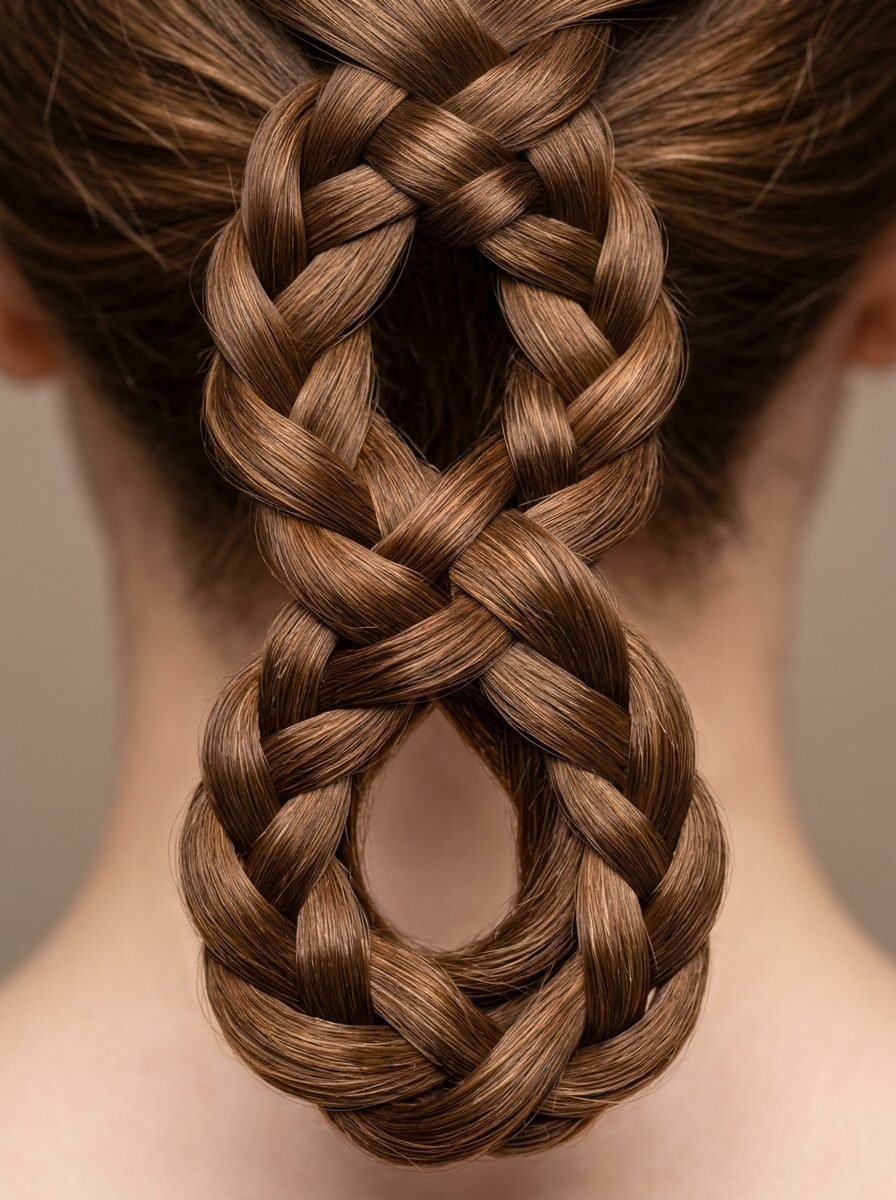
The infinity braid uses a figure-eight pattern. You have two main sections of hair and a third, much thinner strand that you wrap around them in an eight shape. I noticed that this braid stays very flat, which is great if you are wearing a hat. It has a unique texture that looks like woven fabric. I tried this for the first time while watching a movie, and it became a fast favorite. It is slightly more advanced but still falls under the ten-minute mark once you understand the pattern.
15. Three Minute Braided Bangs
If you are growing out your bangs, this is your best friend. Create a small French braid along your hairline. This keeps the short hairs tucked away without needing a dozen clips. I’ve seen this work on even the shortest layers. You can end the braid at your temple or continue it behind your ear. It is a practical solution for rainy days when bangs tend to frizz. I use a light-hold gel to make sure the tiny hairs stay inside the braid.
16. Wrap Around Braid Ponytail
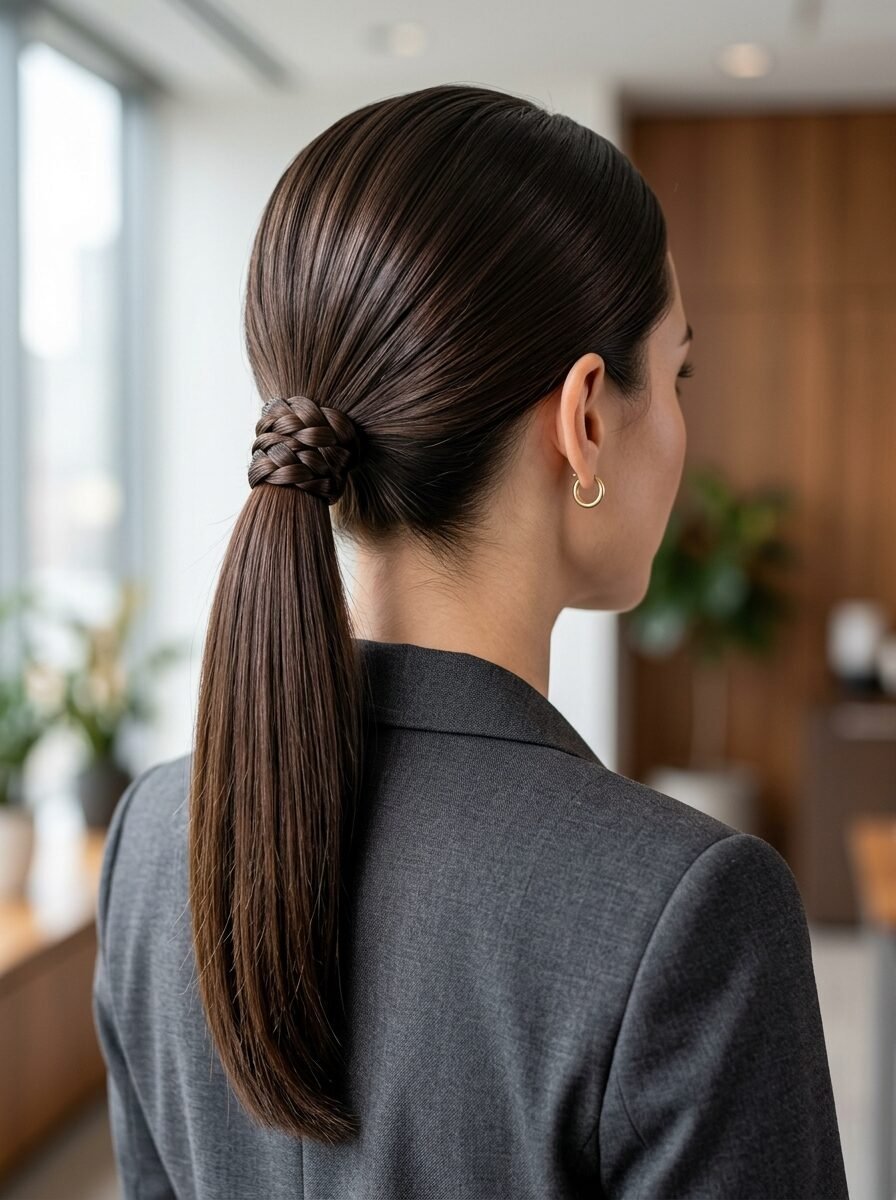
Start by leaving a small section of hair out at the front. Put the rest of your hair into a mid-level ponytail. Braid the small section you left out and wrap it around the base of the ponytail. This hides the elastic and adds a decorative touch. I noticed that this small detail makes a basic ponytail look like it was done in a salon. It is a great trick for professional settings. You only need one extra bobby pin to secure the end of the braid under the ponytail.
17. Four Strand Statement Braid
Most people stop at three strands, but adding a fourth isn’t much harder. It creates a flat, wide braid that looks like a decorative ribbon. I’ve tried this with a piece of actual ribbon as one of the strands, and the result was stunning. It is a bit like weaving a basket. Take the far-right strand, go over the one next to it, then under the next. Then take the new far-right strand and repeat. It takes about eight minutes because you have to keep track of the strands.
18. Waterfall Braid (Simplified)
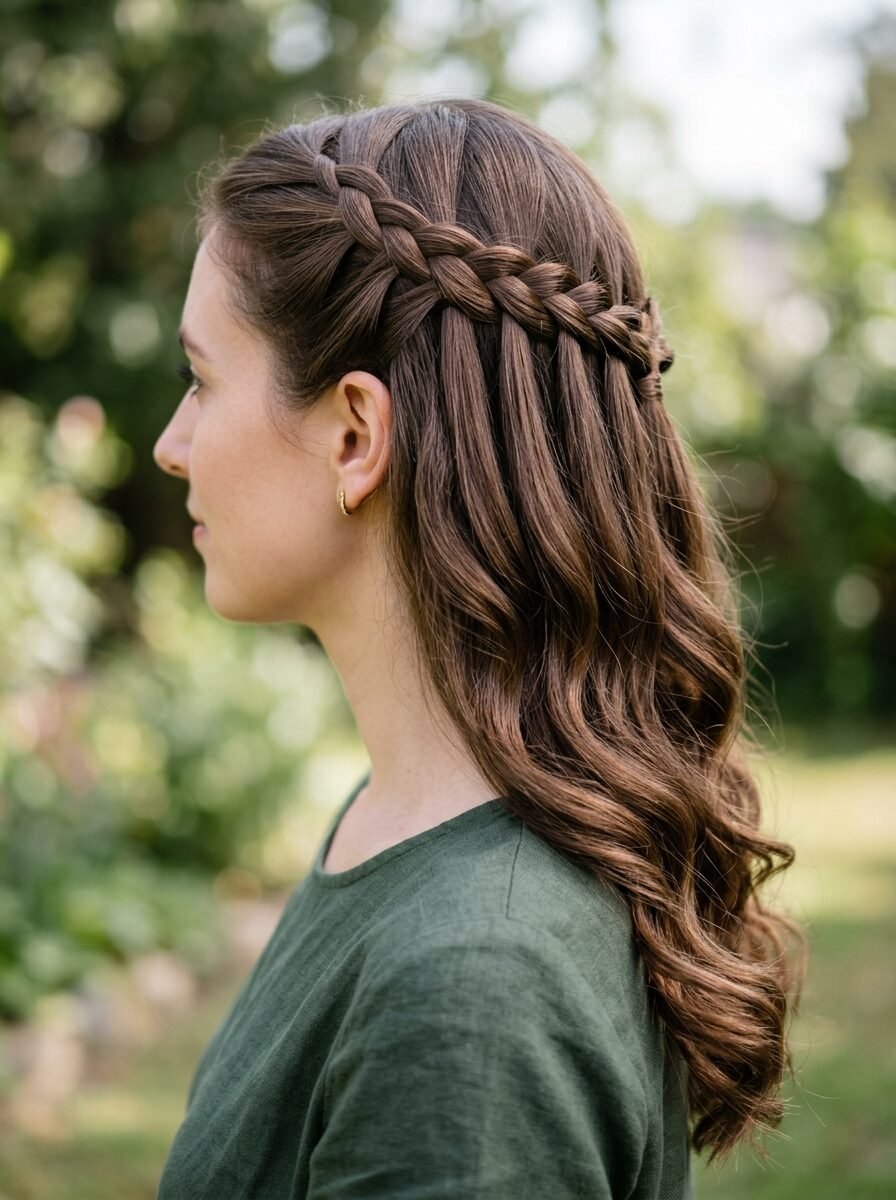
The waterfall braid involves letting a piece of hair drop through the braid to create a cascading effect. To keep it under ten minutes, only do it on one side as an accent. I noticed that this works best on straight or slightly wavy hair so the “waterfall” pieces are visible. It is a very romantic style that is popular for weddings. If you get confused, just remember to drop the bottom strand and pick up a new one right next to it. It takes about six minutes.
19. Scarf Intertwined Braid
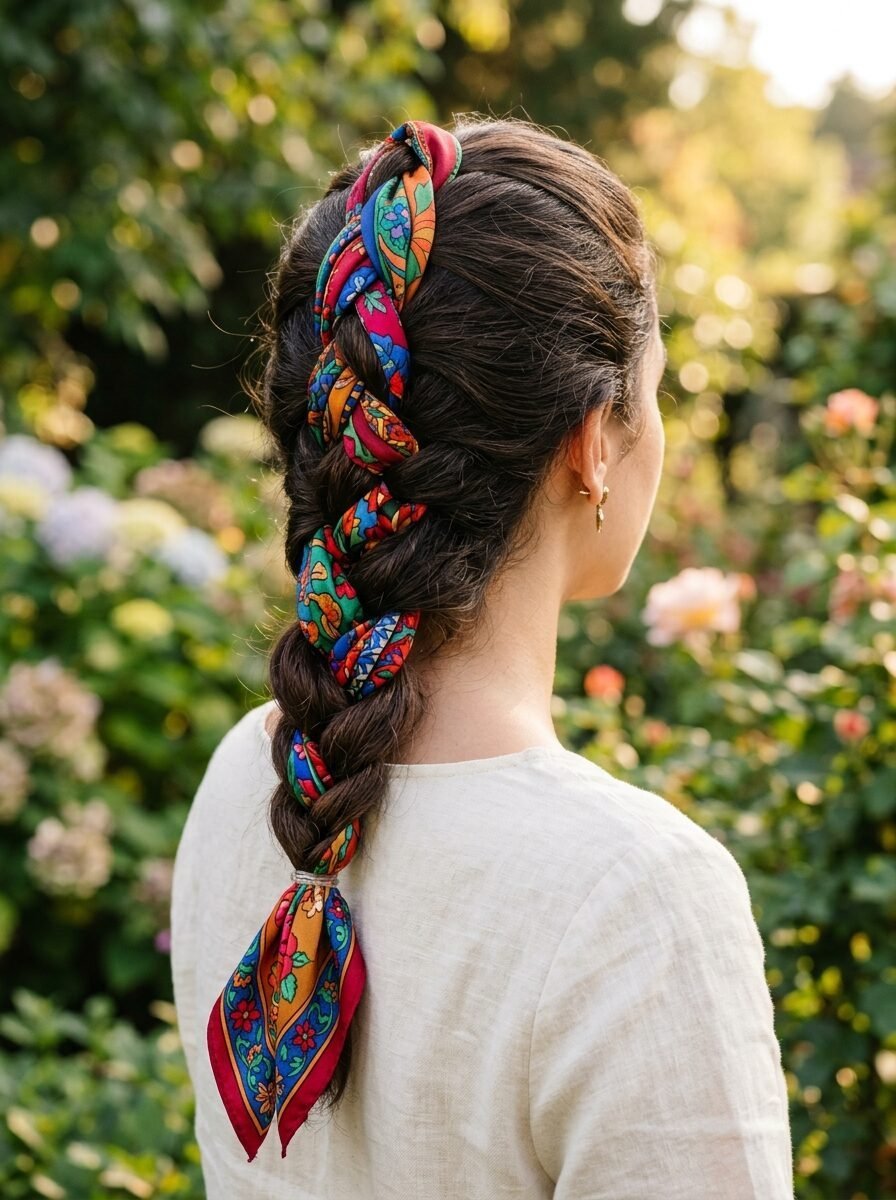
This is one of my favorite ways to add color to an outfit. Tie a silk scarf to the base of your ponytail. Use the two ends of the scarf as two of your three braiding strands. The fabric adds immediate volume and grip. I’ve seen this work wonders for people with very fine hair that usually slips out of braids. It looks very European and chic. Plus, it protects your hair from the friction of a regular hair tie. It is a two-minute style with high impact.
20. Sleek High Braid
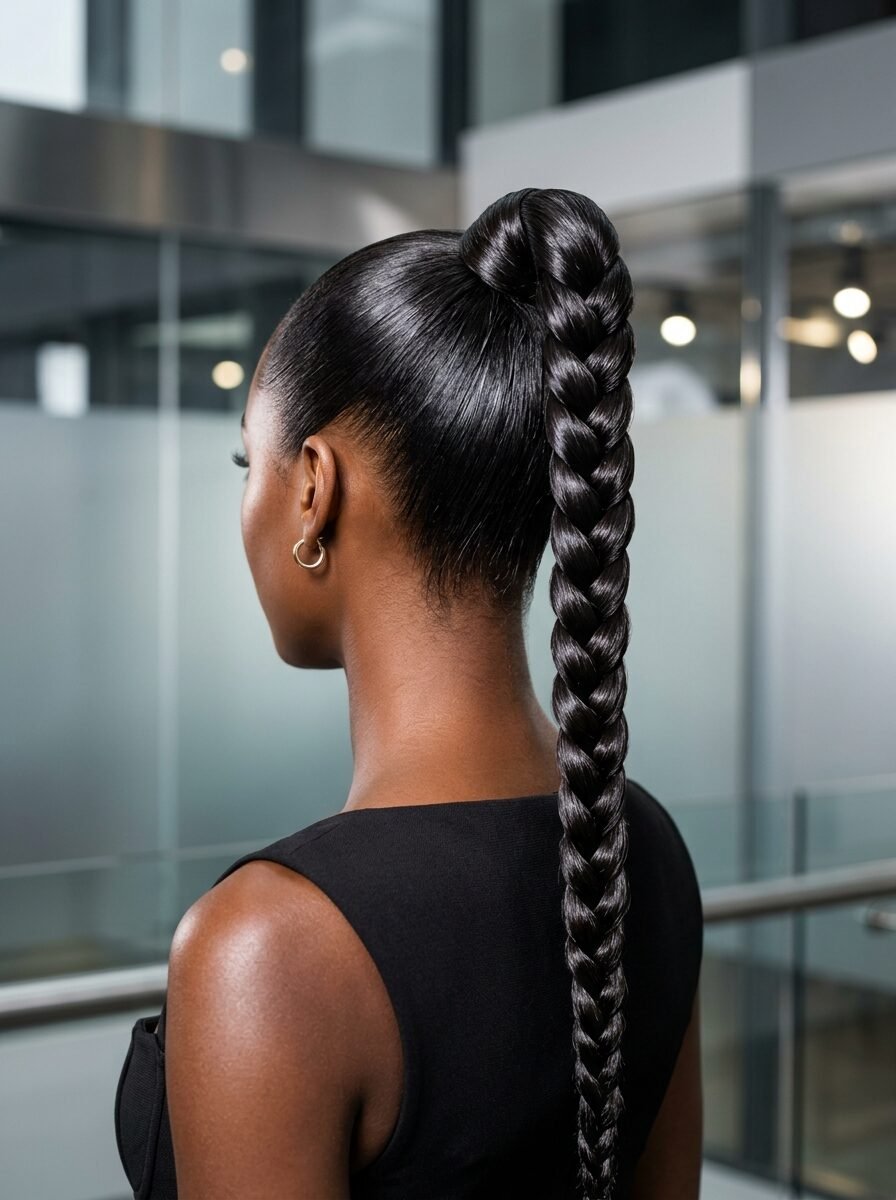
For a modern, “clean girl” aesthetic, brush your hair into a very high, tight ponytail. Use a bit of shine pomade to smooth the roots. Braid the ponytail tightly all the way to the end. I noticed this style looks best when the braid is very structured and not messy at all. It is a powerful look that stays out of your way. I tried this for a long day of travel, and my hair looked exactly the same at the end of a ten-hour flight.
21. Tucked French Braid
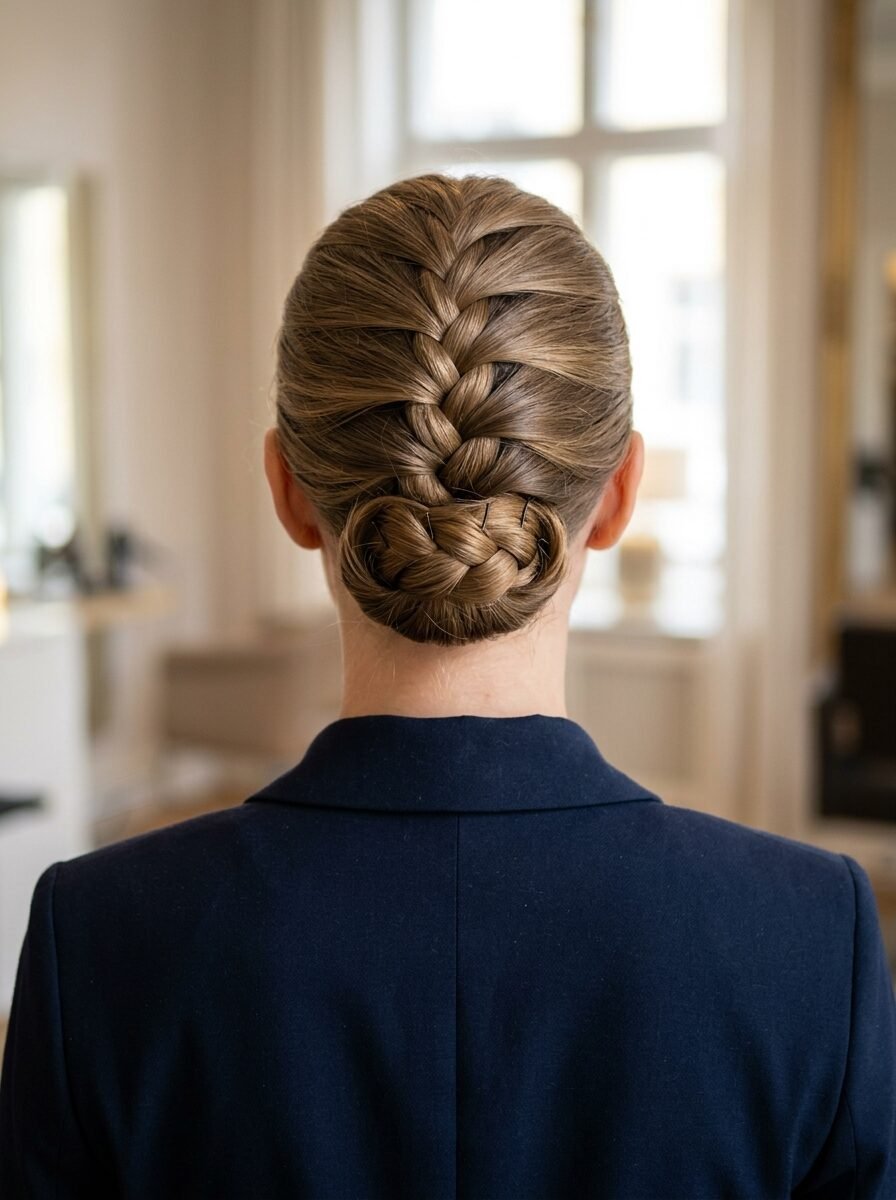
Start a regular French braid down the center of your head. When you reach the ends, fold the braid up and tuck it into the base at the nape of your neck. Secure it with several bobby pins. This creates a faux-updo that looks very sophisticated. I’ve seen this used for formal dinners when there wasn’t time for a stylist. It hides the ends of your hair, which is great if you have split ends. It takes about seven minutes.
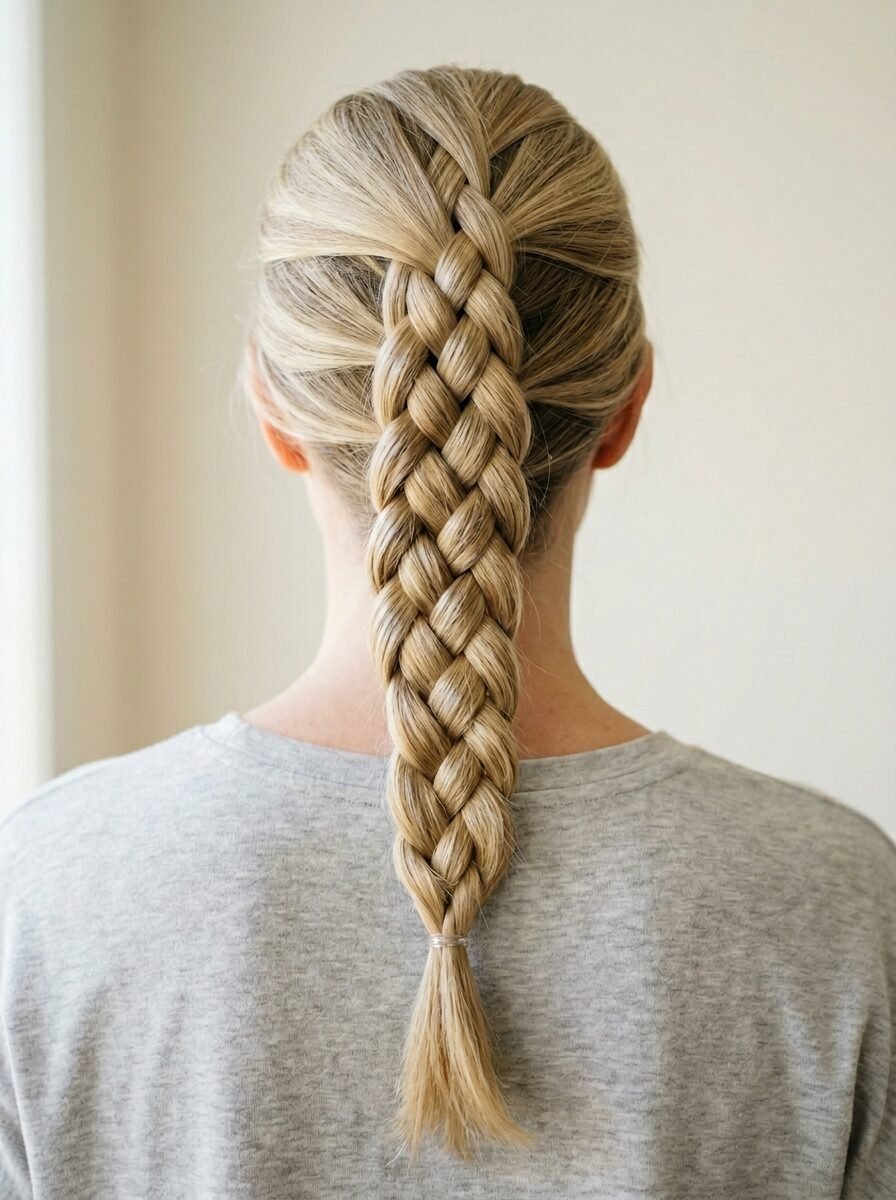
22. Five Strand Beginner Braid
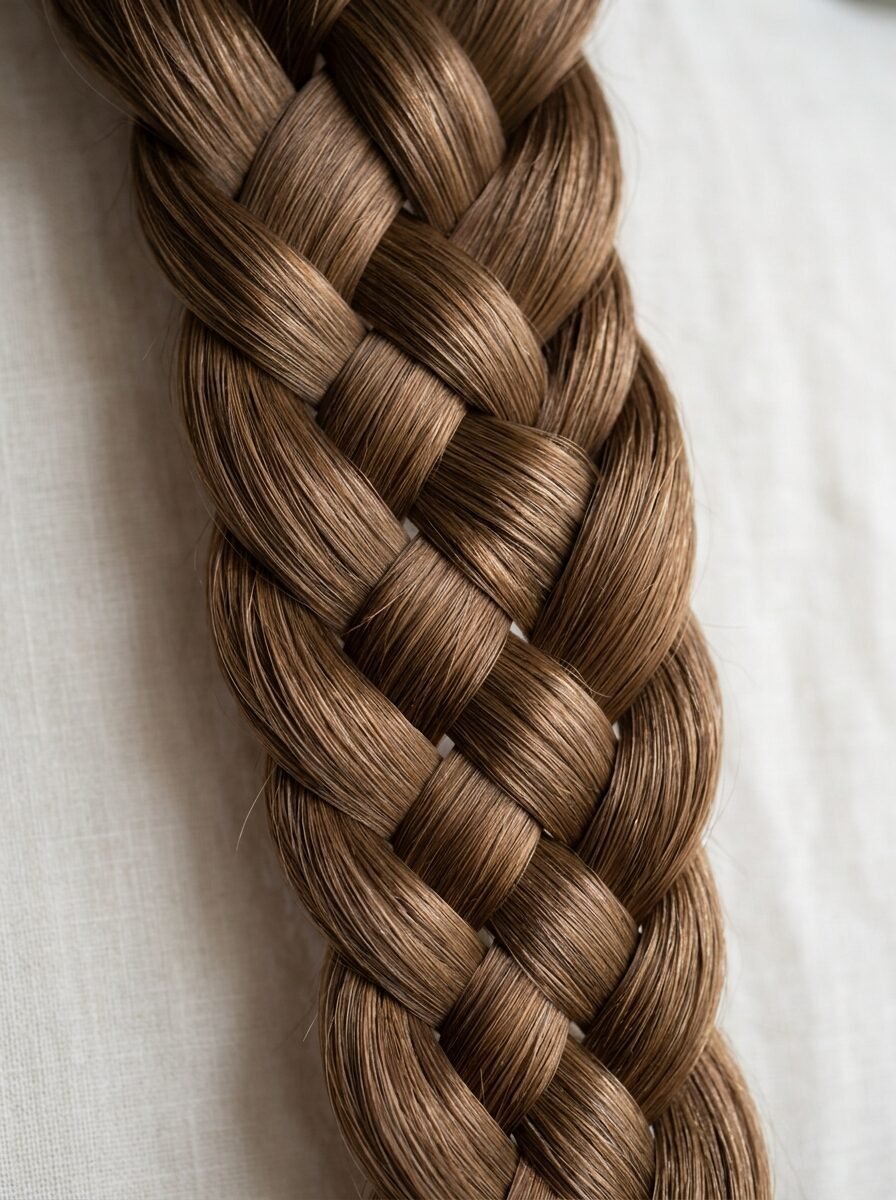
This sounds intimidating, but it is just a repetitive weave. Think of it as over-under-over-under. I noticed that if you keep your hands low and close to your neck, the strands are easier to manage. It creates a very wide, impressive braid. I tried this on a friend with waist-length hair, and it looked like a work of art. It takes about nine minutes and requires your full attention.
23. Criss Cross Braided Pigtails
Divide your hair into four quadrants. Braid the top two sections. Cross the left braid over to the bottom right section and the right braid over to the bottom left. Incorporate them into two low pigtails. I noticed this is a favorite for active kids or athletes. It keeps every single hair secure. It is a fun twist on a classic style and takes about eight minutes.
24. Braided Low Tucked Bun
Make a low ponytail and braid it. Instead of just wrapping it into a bun, loop the braid through the space above the hair tie. Pin the ends underneath. This creates a textured bun that won’t budge. I’ve seen this work for heavy, thick hair that usually breaks hair ties. It distributes the weight of the hair more evenly across your head. It takes about five minutes.
25. The 60 Second Accent Braid
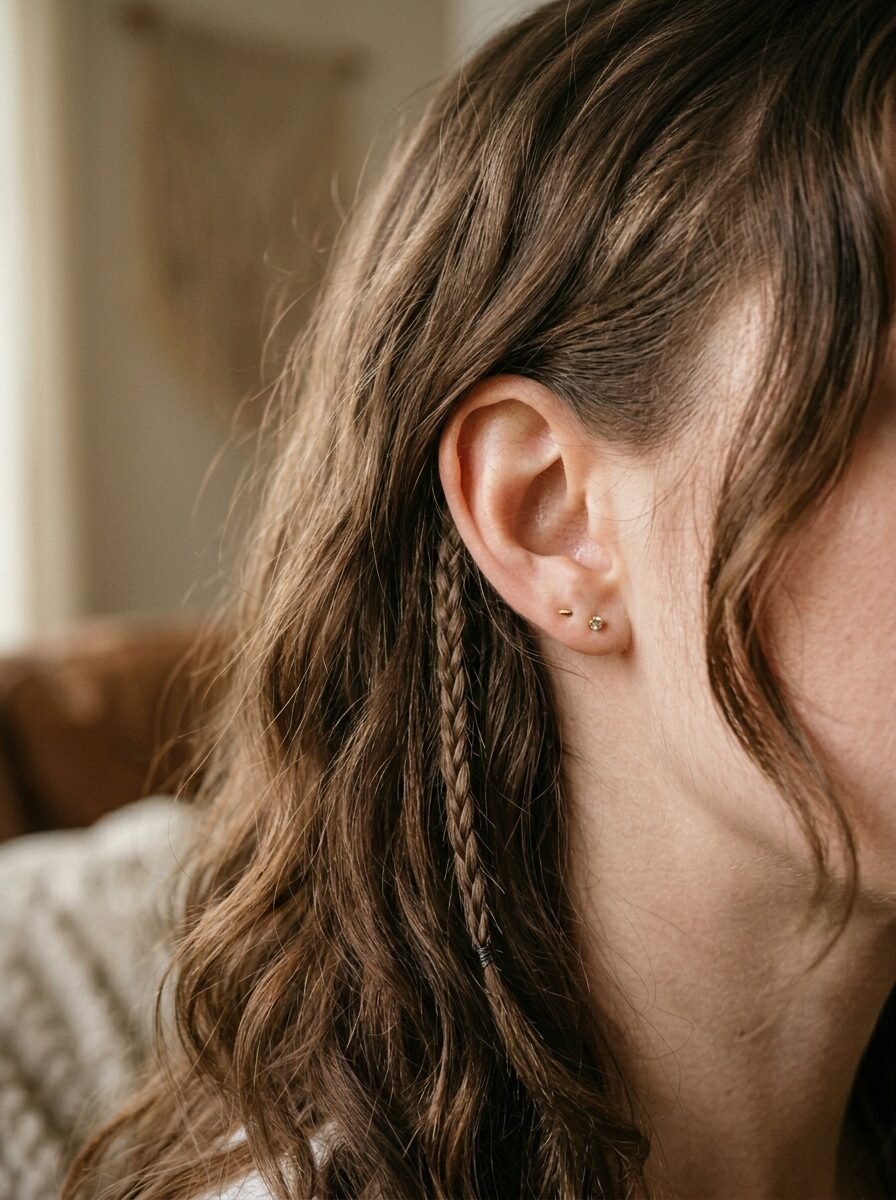
Sometimes you only have one minute. Take a tiny sliver of hair from underneath the top layer near your ear. Braid it very tightly and secure it with a small elastic. It peeks out from your hair like a hidden detail. I noticed this adds a bit of “cool factor” to a simple hair-down look. I do this almost every day when I don’t have time for anything else.
Tools For Successful Braiding
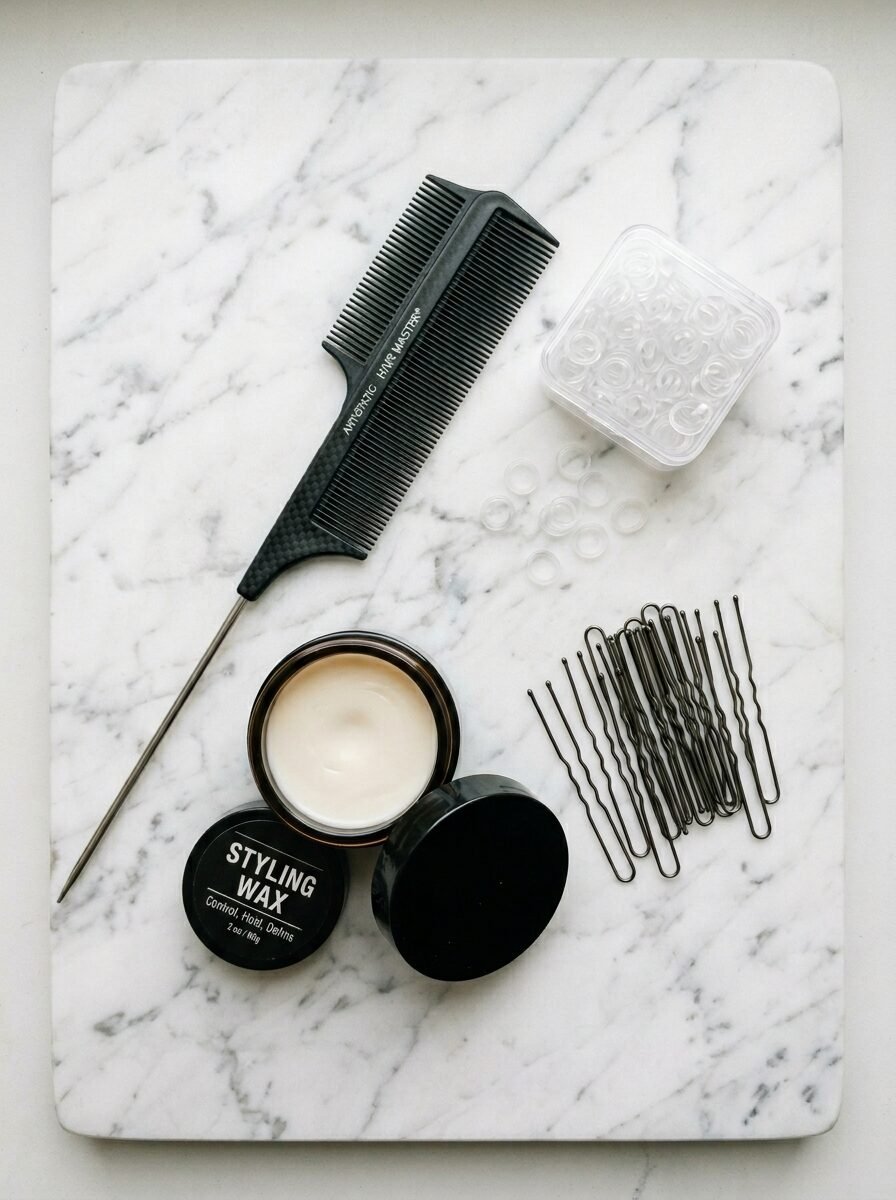
Having the right tools makes a significant difference in how your braids turn out. I have wasted money on clips that slip and elastics that snap, so I want to share what actually works. First, a high-quality rat-tail comb is needed for clean parts. A clean part makes any braid look ten times more professional. I also recommend keeping a tin of light hair wax or pomade nearby. Rubbing a tiny bit on your fingers before you start helps grip the hair and prevents those annoying little hairs from sticking out.
For elastics, clear poly-bands are my favorite for accents, but I prefer nylon ties for larger braids because they don’t snag. I’ve seen many people struggle because their hair is too clean and “slippery.” This is where dry shampoo or a texture spray becomes your best friend. Spritzing it on your roots and lengths gives the hair the “grit” it needs to stay in place. Lastly, invest in U-shaped hairpins rather than just standard bobby pins for buns. They hold more hair and are much easier to hide within the style.
| Tool Name | Best For | Why It Works |
| Rat-Tail Comb | Precision Parting | Creates sharp, professional lines. |
| Clear Poly-Bands | Small Accent Braids | Nearly invisible and holds tight. |
| Texture Spray | Slippery or Clean Hair | Adds grip so braids don’t slide out. |
| U-Shaped Pins | Securing Buns | Locks heavy styles in place without discomfort. |
| Boar Bristle Brush | Sleek Styles | Smooths flyaways for a polished look. |
Frequently Asked Questions
How do I stop my braids from looking frizzy?
Frizz often happens when the hair is too dry or when you pull too hard while braiding. I’ve noticed that applying a small amount of hair oil or a smoothing cream before you start helps a lot. Also, try not to braid while your hair is soaking wet, as hair is more prone to breakage then. Damp hair is okay, but dry hair with a bit of product is usually the sweet spot for a clean finish.
Can I braid my hair if it is very thin?
Absolutely. In fact, braids can make thin hair look much fuller. The secret is the pancaking technique I mentioned earlier. Once your braid is secured, gently pull at the loops to widen them. I tried this on my own hair when it was thinning, and it made a massive difference. Using a volumizing powder at the roots before you braid also helps create the illusion of more hair.
My hair is too short for most braids. What should I do?
Short hair is perfect for accent braids and crown braids. Focus on the sections near your face. I’ve seen beautiful Dutch braids on pixie cuts and bobs. You might not be able to do a long side braid, but a braided headband or a “waterfall” fringe works perfectly. Use smaller sections and more bobby pins to keep the shorter pieces in place.
How do I make my braids stay in all day?
Preparation is key. If you start with a bit of texture spray or even day-old hair, the braid has something to hold onto. I noticed that finishing with a light-hold hairspray also locks everything down. If you are doing a style for a long event, use two elastics at the end of the braid instead of one for extra security.
Is braiding bad for your hair?
If you braid too tightly every single day, it can cause tension on your scalp. However, loose or moderately tight braids are actually a great protective style. They prevent tangles and reduce the friction your hair experiences against your clothes. I’ve seen my hair health improve when I switched from tight ponytails to loose braids because it stopped the breakage around my hairline.
Wrapping Up Your Styling Journey

Learning to braid is a skill that pays off every single morning. It turns a chaotic start into a moment of creativity. I have found that the more I practice, the more I enjoy the rhythm of it. You don’t need to be perfect. Sometimes the “mistakes” lead to a messy, lived-in look that people pay stylists to recreate. Start with the three-strand side braid and work your way up. I noticed that my confidence grew as I mastered each new twist.
Don’t be afraid to add your own personality to these styles. Use ribbons, clips, or colorful elastics to make them your own. I’ve seen these twenty five styles work for every occasion, from job interviews to lazy Sundays on the couch. Which of these looks are you going to try first tomorrow morning? Leave a comment below and share your results. I would love to hear which ones became your new favorites.

Sarah Mitchell — Founder & Editor-in-Chief
Sarah Mitchell is the founder and editorial voice behind Hair Level Up. A licensed cosmetologist with more than 15 years of experience, she has styled A-list celebrities for editorial shoots and red carpets, with work featured in Vogue, Elle, and Harper’s Bazaar. Early in her career, she trained under the legendary hairstylist Oribe in New York, an apprenticeship that still shapes her editorial eye today. Sarah founded Hair Level Up in 2020 after one bad haircut convinced her that women deserved a destination that felt like a magazine, taught like a stylist, and inspired like an art gallery. She oversees every story from concept to publication, guided by a simple belief: a good story teaches you something, but a great one makes you feel beautiful while it does.