How to Diffuse Curly Hair for Volume Even With Fine Strands
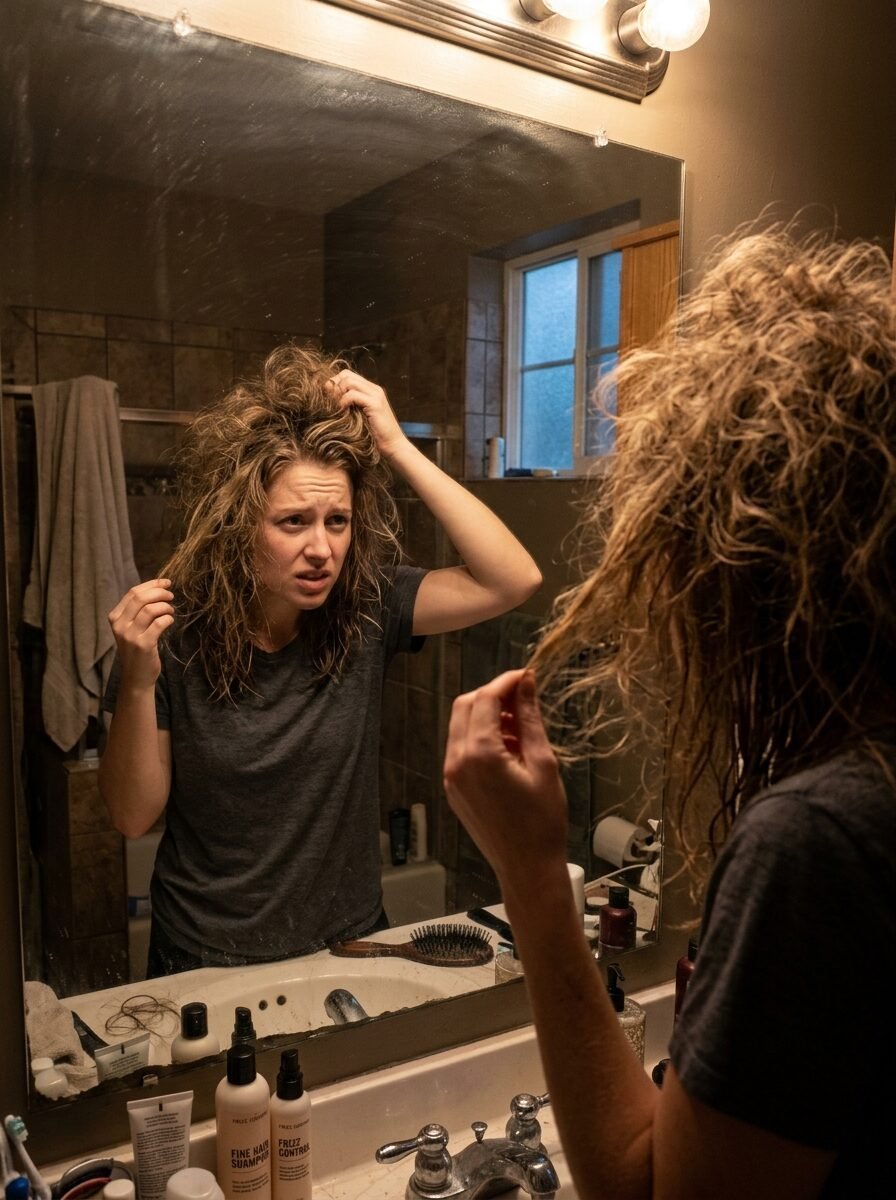
You stand in front of the mirror with soaking wet hair. Water drips down your back. Your fine curls look like sad, limp noodles. You spent thirty minutes applying expensive gels. You followed every TikTok tutorial perfectly. Yet, as your hair air dries, gravity takes over. The weight of the water pulls your roots flat. By noon, your curls look like stringy waves. I know this frustration well because I lived it for years. I used to think my fine hair just couldn’t hold volume. I thought the big, bouncy curls I saw on Pinterest were only for people with thick hair. Everything changed when I learned the right way to use a blow dryer.
The secret isn’t just the tool. The secret is the physics of how you dry your hair. Fine hair is delicate. It lacks the internal structure to fight gravity when it is wet. If you let it air dry, you are asking the impossible. You are asking tiny, thin strands to support the weight of water for three hours. By the time it dries, the curl pattern is stretched out. Diffusing solves this by shrinking the hair quickly. It locks the curl in place before gravity wins. In my early days, I used to just point the dryer at my head and hope for the best. My hair ended up looking like a lion’s mane of frizz. This guide will show you how to avoid my mistakes. You will learn how to get lift at the root and definition at the ends.
This guide provides a roadmap for turning flat, fine hair into voluminous curls. We will cover the specific tools you need. You will learn the difference between hover drying and pixie pulsing. I will explain why your current products might be heavy and how to fix that. We will look at real world examples of fine hair transformations. You will see how a simple change in head position makes a massive difference. We will even talk about what to do if you are traveling without your gear. Expect to spend about twenty minutes on this process once you master it. The result is hair that stays bouncy for three days instead of three hours. You will find recommendations for dryers that won’t fry your delicate strands. We will also address the most common reasons why fine hair gets frizzy during the drying process. By the end, you will have the confidence to dry your hair like a pro.
Why Diffusing Changes Everything For Fine Hair
Fine hair has a tiny diameter. This means it can only hold so much product before it collapses. When your hair is wet, it is at its most vulnerable. The water bonds are broken. The hair is heavy. For those of us with fine strands, air drying is often the enemy of volume. I remember a vacation in 2022 where I forgot my diffuser. I tried to air dry in a humid climate. My hair looked like flat, greasy strings by dinner time. That was the moment I realized diffusing isn’t optional for me. It is a structural necessity.
Diffusing uses a tool to disperse air. This prevents a concentrated stream of heat from blowing your curls apart. For fine hair, the goal is to set the cast of your gel or mousse as fast as possible. Think of it like building a house. The gel is the frame. The heat is the sun that dries the cement. If the cement takes too long to dry, the frame leans. When you use a diffuser, you support the weight of the hair. This allows the curls to dry in their most compact, bouncy shape.
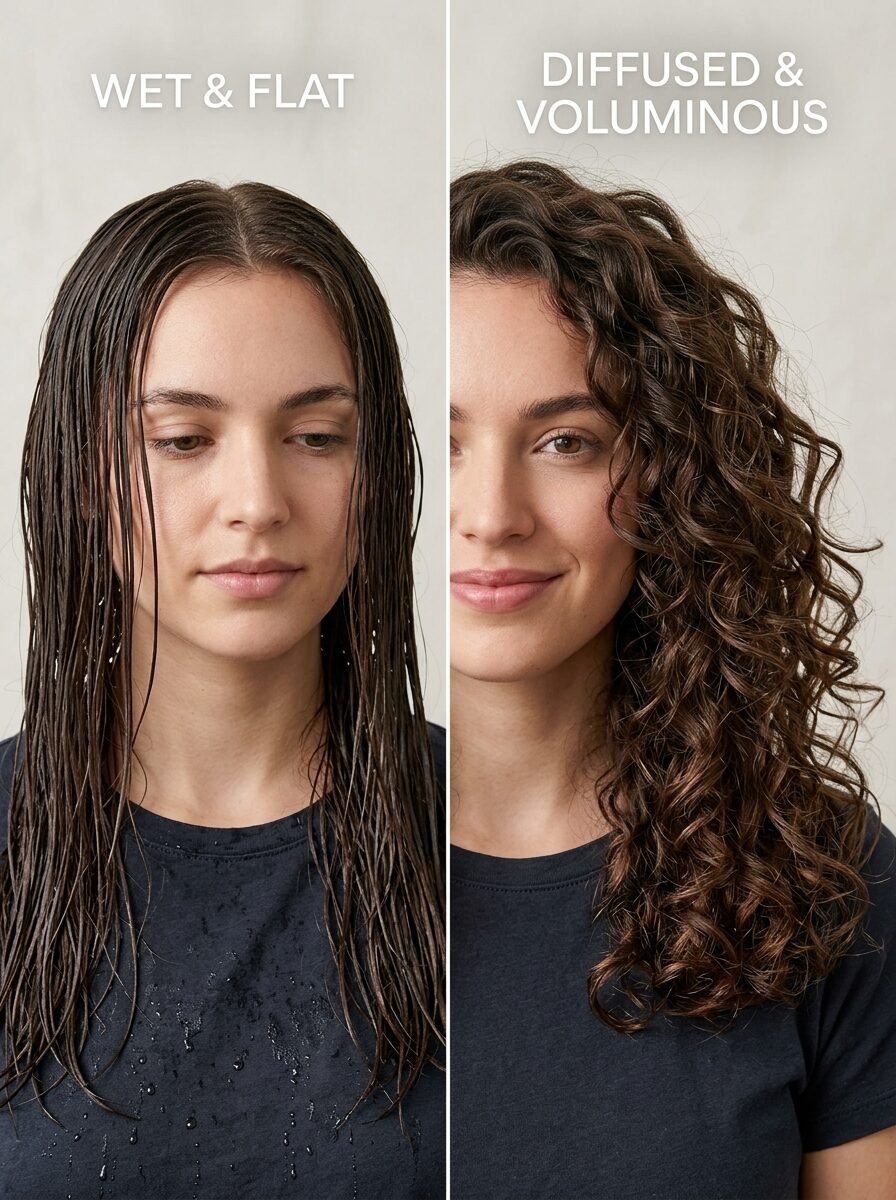
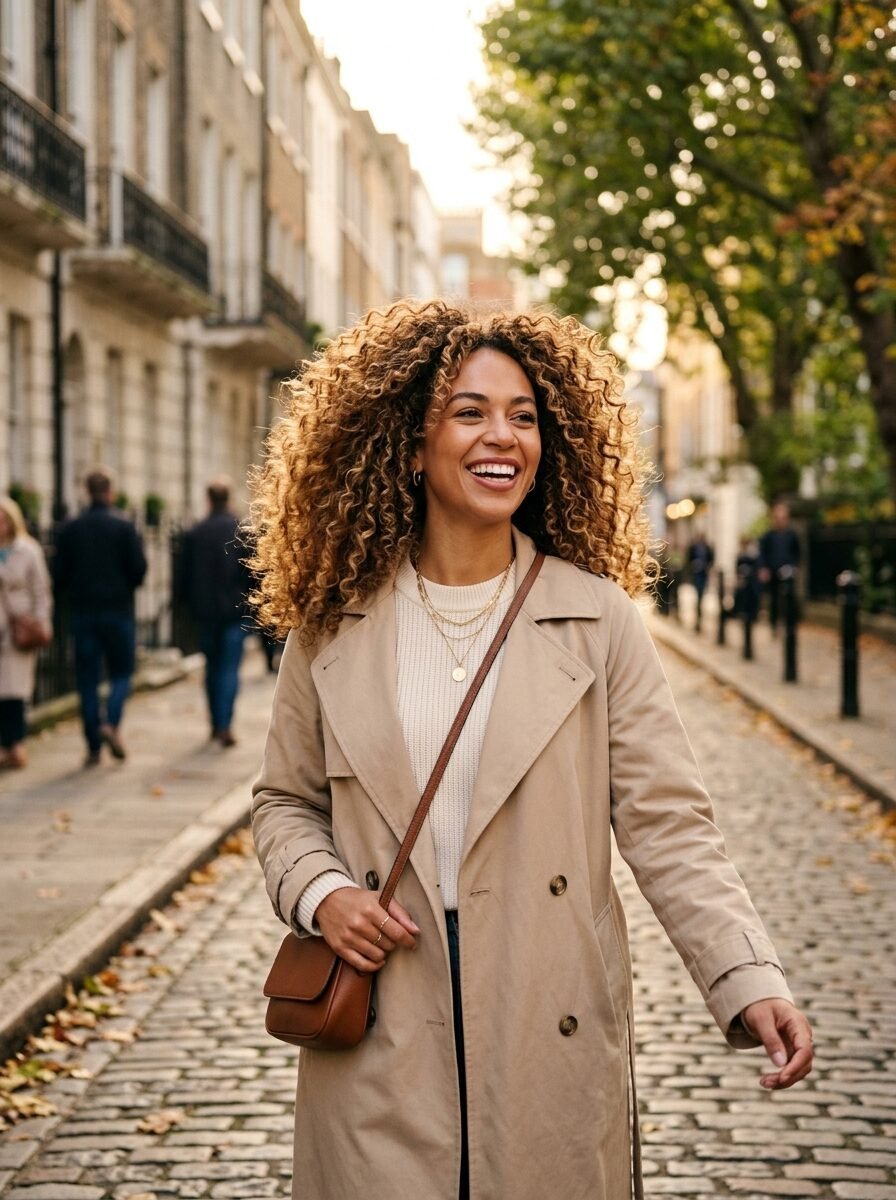
I have seen people with 3A curls look like they have 2A waves just because they air dried. The difference is the lift at the scalp. When you use the right technique, you are physically pushing the hair up toward the ceiling. This creates a bend at the root that stays there once the hair is dry. In my experience, this is the only way to get true “Pinterest hair” if your strands are thin. It makes your hair look twice as thick as it actually is.
Best Way To Diffuse Curly Hair Step By Step
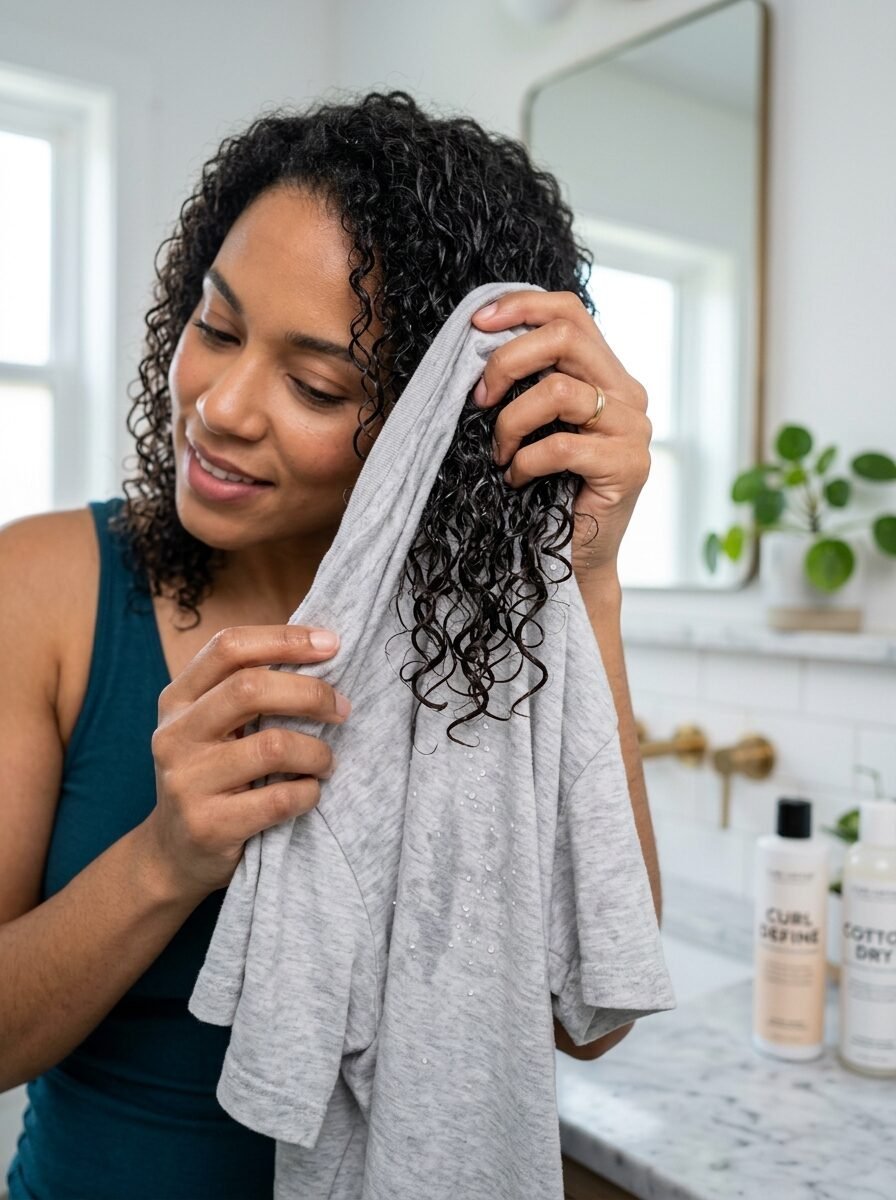
The process starts before you even turn on the dryer. You must have a strong foundation. On a Tuesday last month, I tried a new routine. I skipped my usual microfiber towel and went straight to the dryer. It was a disaster. The hair was too wet. The dryer took forty minutes. My arms were tired. My hair was frizzy. Now, I follow a strict order. First, you must squeeze out excess water. Use a cotton T-shirt or a microfiber towel. Do not rub the hair. Scrunch it gently. You want the hair to be damp, not dripping.
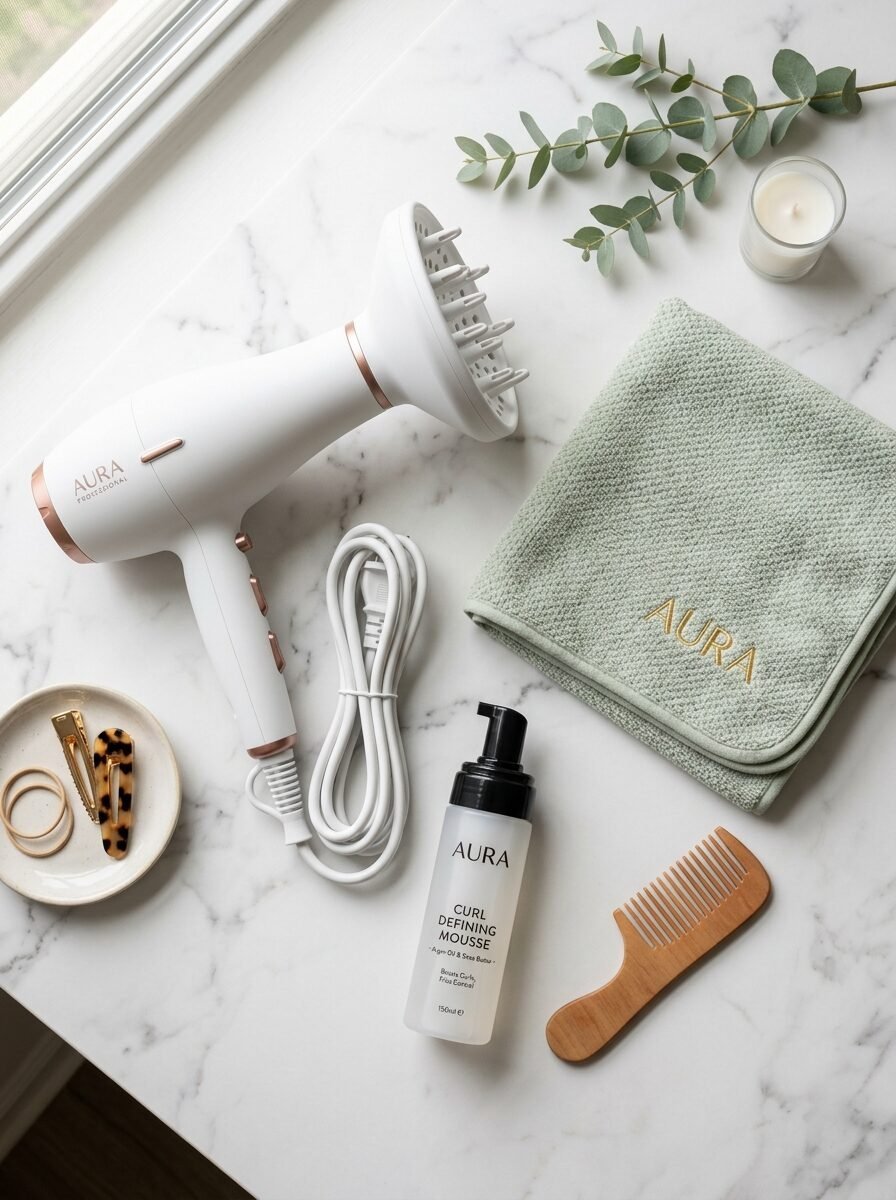
Apply your products while the hair is still very wet. For fine hair, I prefer a lightweight mousse like the Not Your Mother’s Curl Talk Mousse. It provides hold without the weight of a heavy cream. Once your product is in, do not touch your hair again with your hands. Touching wet hair causes frizz. Now, you are ready for the dryer. Set your dryer to medium heat and low airflow. High airflow will blow the curls out of their clumps.
Start with hover drying. Hold the dryer about six inches away from your head. Move it around in circles. Your goal here is to dry the “skin” of the hair. You want to create a slight crust on the outside of your curls. This is called the cast. I usually do this for five minutes. I focus on my roots first. Since fine hair dries faster at the ends, the roots need a head start. Once you feel a slight crunch when you move your head, you can start the next phase. This is where the volume happens.
How To Diffuse For Volume Using Gravity
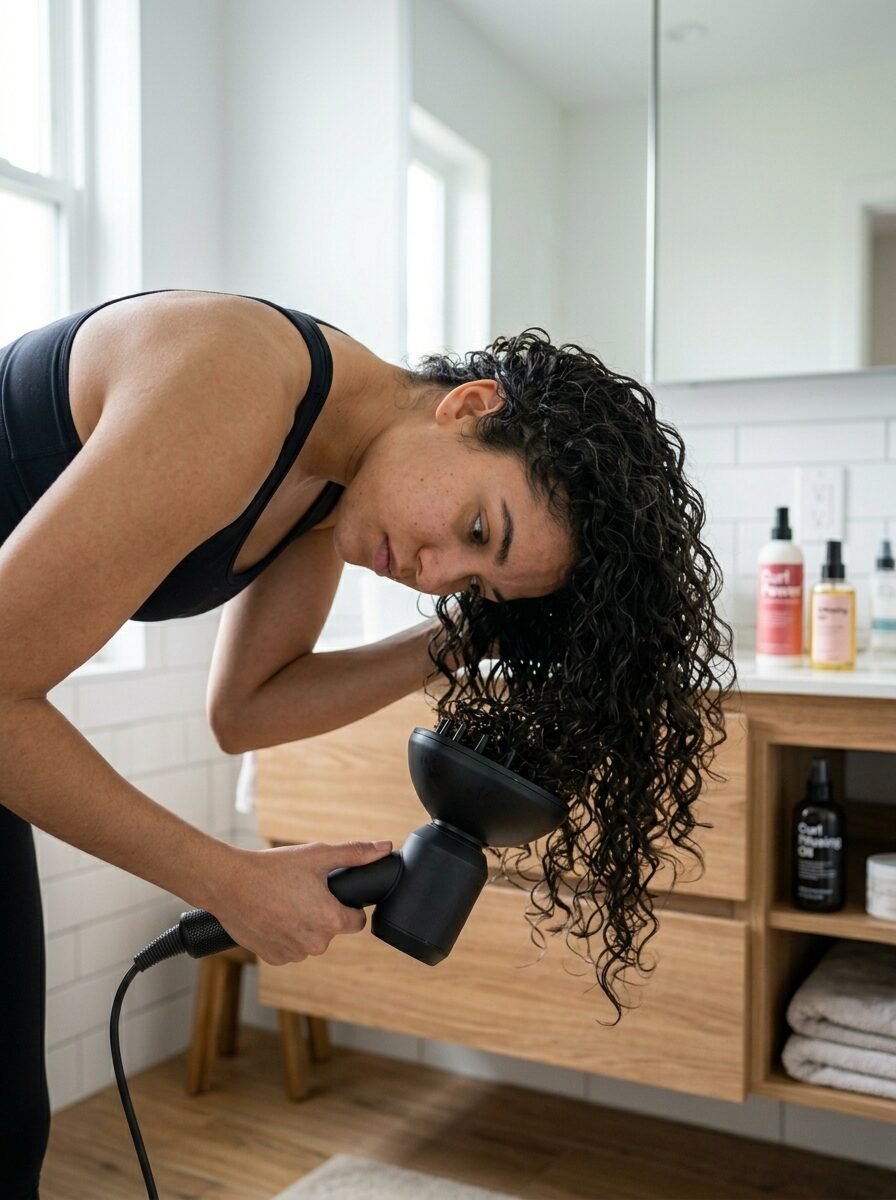
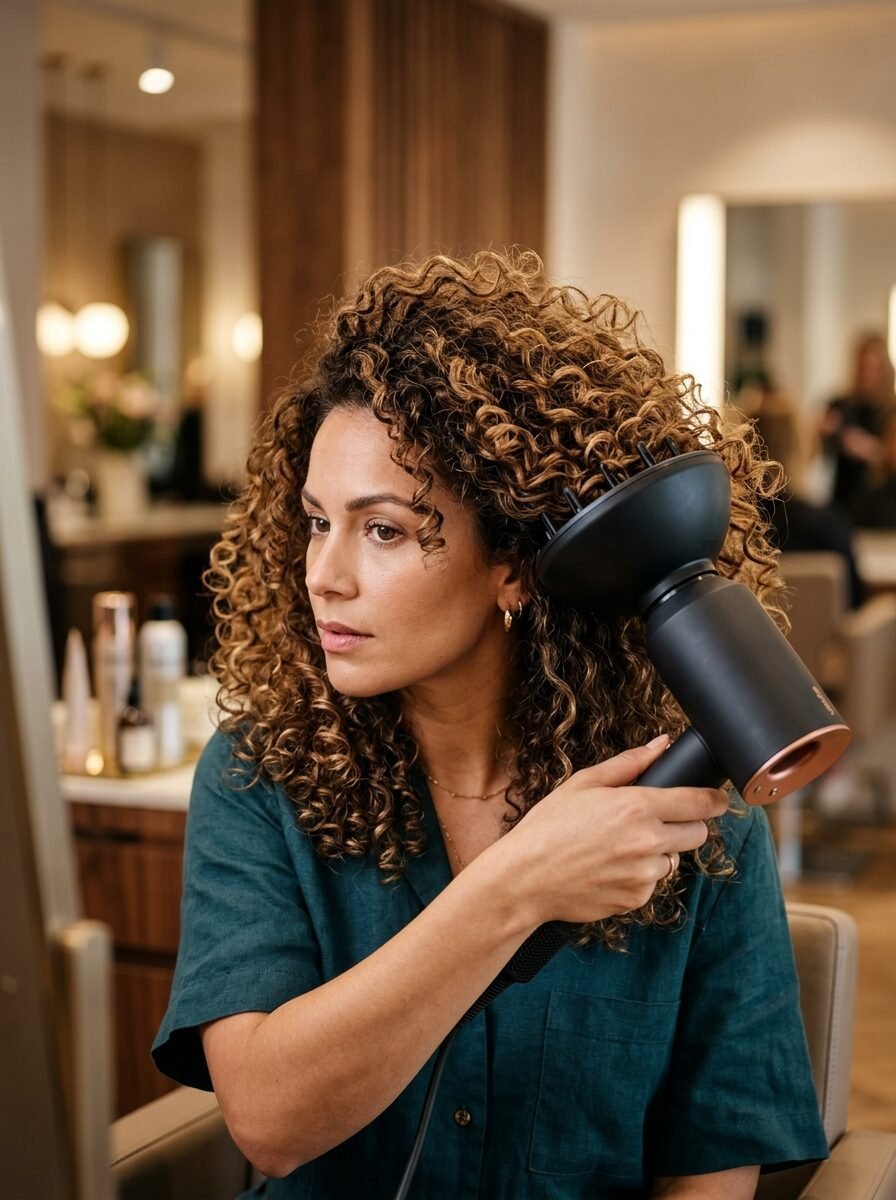
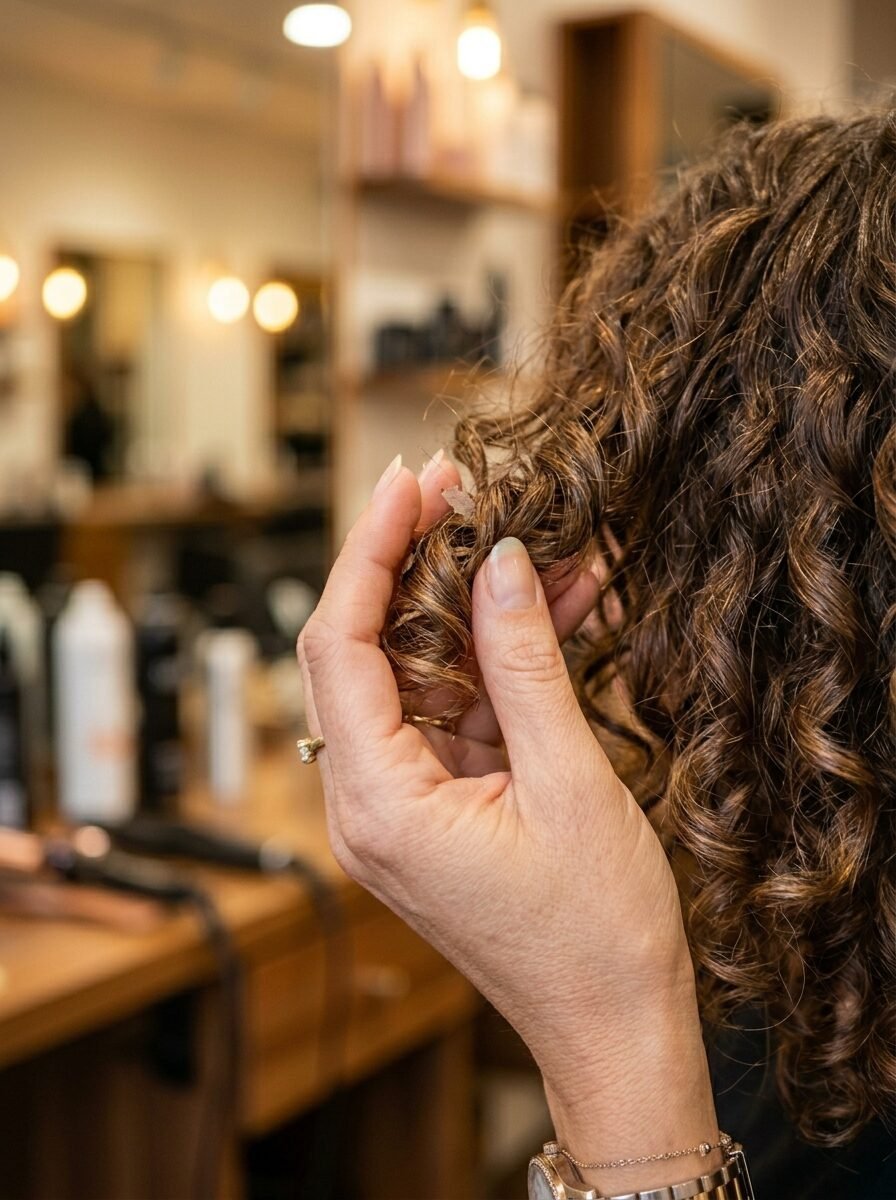
Gravity is usually your enemy, but now we make it your friend. Flip your head upside down. This is the most important step for fine hair. When you are upside down, your roots are pointing away from your scalp. If they dry in this position, they will stay lifted. I once watched a stylist do this at a salon in New York. She had me lean all the way forward. Then she used the diffuser bowl to gently push the curls toward my scalp. This is called pixie diffusing.
Turn the dryer off. Place a section of hair into the diffuser bowl. Move the bowl up until it touches your scalp. Now, turn the dryer on. Hold it for thirty seconds. Turn the dryer off before you move to the next section. This “off and on” method prevents the air from blowing the hair around while you move. It keeps the curl clumps together. I see so many people moving the dryer while it is running. That is the number one cause of “flash frizz” on fine strands.
I have tried doing this while standing sideways too. If flipping upside down makes you dizzy, just tilt your head to the left and right. The goal is to get the hair to fall away from the scalp. I noticed a big difference when I started focusing on the crown of my head. That is where most people go flat. I spend extra time there. I use the prongs of the diffuser to gently lift the hair at the root. Be careful not to poke your scalp. Just a light lift is enough to let the air reach the roots.
Best Diffuser For Wavy Hair And Fine Curls
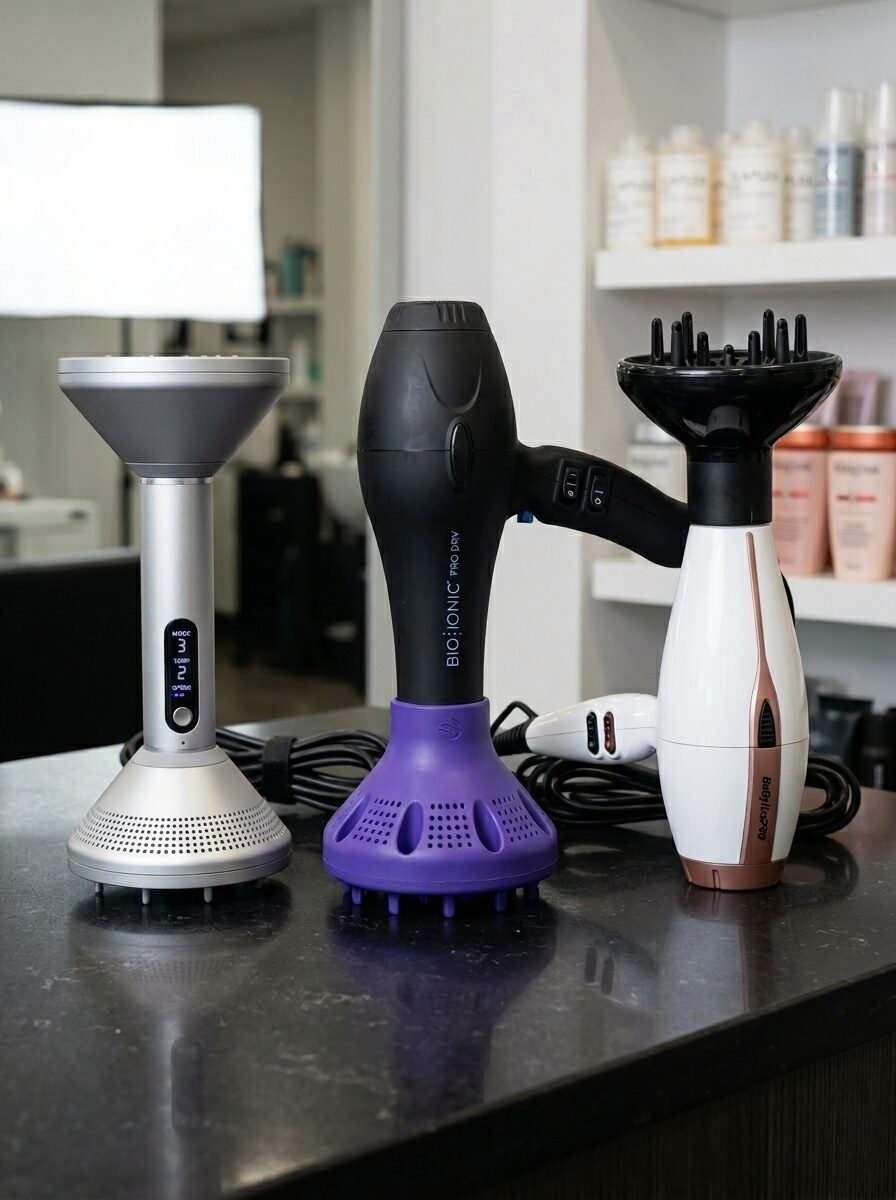
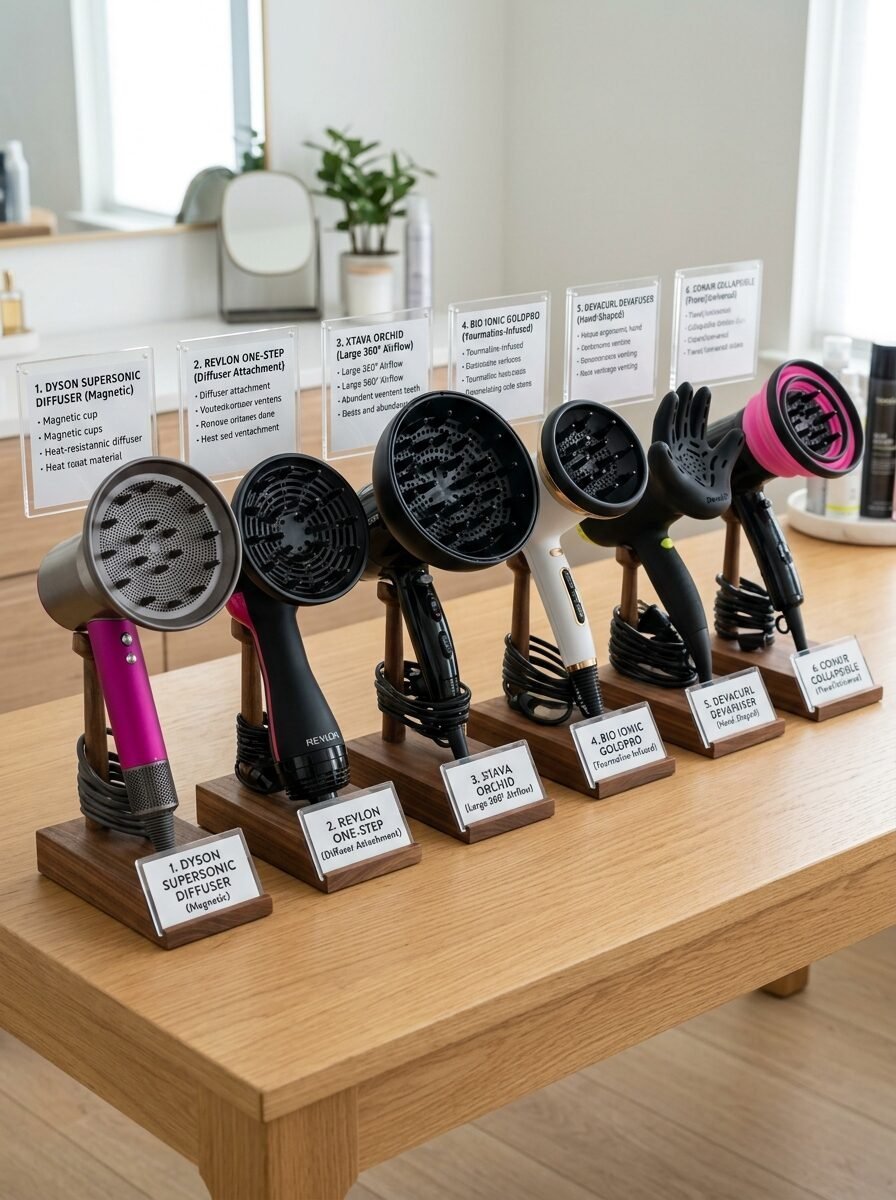
Not all diffusers are the same. I have spent a lot of money testing them. The cheap ones that come with a ten dollar dryer usually have shallow bowls. These are bad for volume. They don’t hold enough hair. If you have fine hair, you want a deep bowl. This supports the curl better. The Xtava Black Orchid is a famous choice for a reason. It is massive. It can hold a lot of hair at once. I used it for three years before upgrading. It fits on most standard dryers with an adapter.
If you want the best of the best, the Dyson Supersonic is the gold standard. I was skeptical of the price at first. Then I tried it. The heat control is incredible. It checks the temperature forty times a second. For fine hair, this is life saving. Fine hair burns easily. The Dyson keeps the heat consistent. I noticed my hair felt softer after switching. It also dries hair much faster. What used to take me twenty five minutes now takes fifteen.
For a more affordable option that still feels premium, look at the Shark HyperAIR. It has a similar digital motor. The diffuser attachment has extendable prongs. These are amazing for reaching the roots of thick hair, but for fine hair, I keep them retracted. I want the hair to sit in the bowl. Another brand I like is the Conair InfinitiPro. It is a great starter dryer. It is lightweight, which matters when you are holding your head upside down for ten minutes. My arm used to ache with my old heavy dryer. Switching to a lighter model made me more likely to actually finish the job.
Detailed Comparison Of Popular Diffusing Tools
| Tool Name | Price Range | Best For | Pros | Cons |
| Dyson Supersonic | $400 – $450 | Damage Prevention | Fast drying, light weight | Very expensive |
| Shark HyperAIR | $150 – $200 | Adjustable Airflow | Great root access, cool shot | Can be loud |
| Xtava Black Orchid | $20 – $30 | Max Volume | Huge bowl, deep prongs | Heavy, needs adapter |
| Bellissima Diffon | $90 – $130 | Travel | All in one tool, compact | Small bowl |
| Conair InfinitiPro | $35 – $50 | Beginners | Affordable, easy to find | Gets very hot |
How To Diffuse Without A Diffuser
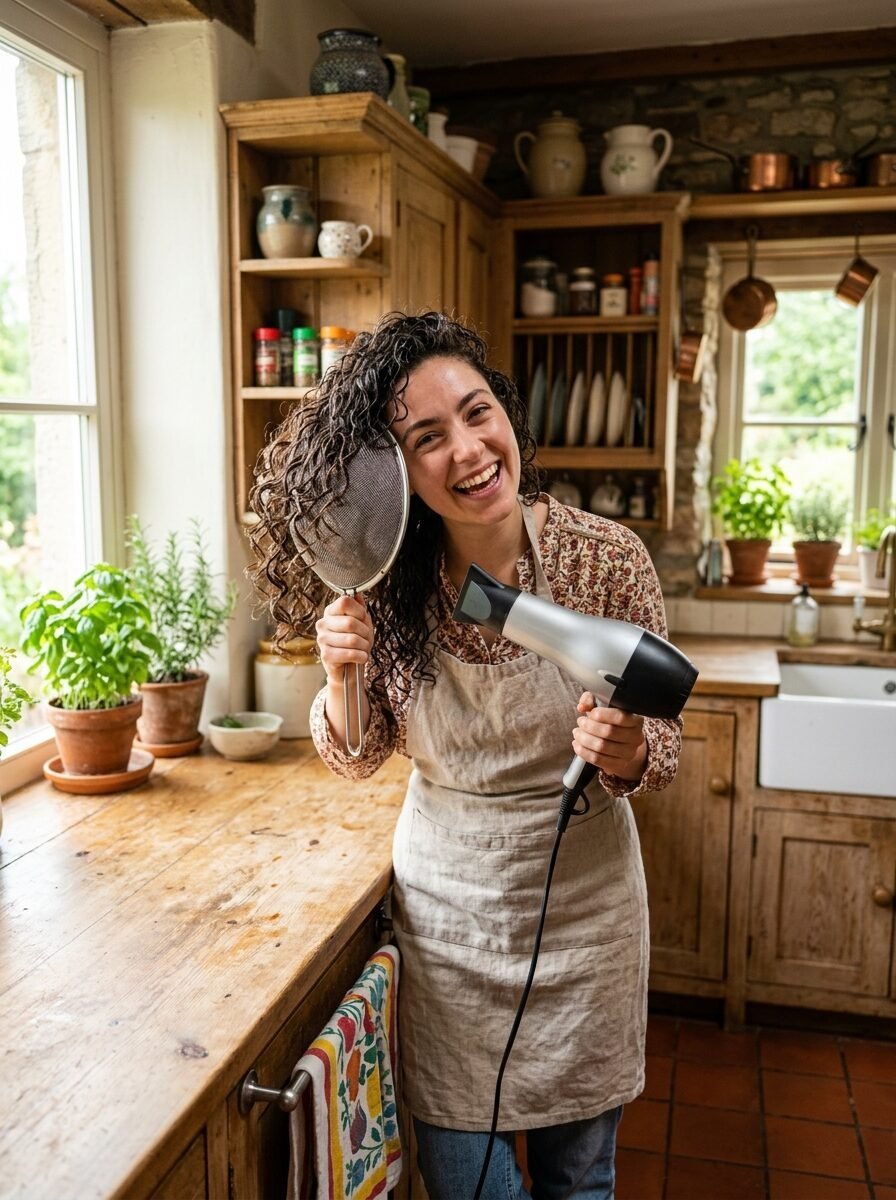
Sometimes you are stuck in a hotel or a friend’s house without your gear. I have been there. I once had to get ready for a wedding in a cabin with only a standard hair dryer. I panicked. Then I remembered the strainer trick. You can use a kitchen strainer or a colander. You put your hair in the strainer and blow the air through the holes. It works just like a diffuser. It disperses the air and holds the curls in place. I wouldn’t do it every day, but it works in a pinch.
Another way to diffuse curls without a tool is the “Sieve Method.” You can use a mesh laundry bag. Wrap the bag over the nozzle of the dryer. Secure it with a rubber band. This breaks up the air stream. It isn’t as good for volume because it doesn’t hold the hair up. To get volume, you will need to use your hands more. I tried this once and had to be very careful. You have to cup the hair in your palm and blow air through your fingers. It takes longer, but it prevents the “blown out” look.
If you have no tools at all, you have to rely on “plopping.” Wrap your hair in a T-shirt for forty minutes. This absorbs the water without gravity pulling the curls. Then, sit in front of a fan. It is a slow version of diffusing. I did this during a power outage last summer. My hair didn’t have as much volume as usual, but the curls were defined. It is all about managing the transition from wet to dry.
Common Mistakes People With Fine Hair Make
The biggest mistake is using too much heat. I see people turn their dryer to the highest setting to save time. This is a mistake. High heat dries the outside of the hair too fast. It leaves the inside damp. This leads to frizz later in the day. It also damages the cuticle. Fine hair can’t handle that. I always stay on the medium or low heat setting. It might take five minutes longer, but the curls look much healthier.
Another mistake is moving the dryer too much. People shake the dryer like they are in a commercial. This is fine for straight hair, but it destroys curls. Curls need stillness to form. Every time you move the dryer, you are pushing the hair fibers apart. This creates a halo of frizz. Keep the dryer still. Count to thirty. Then move it. This patience is what separates a good hair day from a bad one. In my experience, the less you move, the better the result.
I also see people forget the “Cool Shot” button. Most dryers have a blue button. This blows cold air. Once a section is dry, hit it with the cool shot for ten seconds. This “sets” the shape. It is like hairspray made of air. It seals the cuticle and adds shine. I notice a huge difference in how long my volume lasts when I use the cool shot. It keeps the root lift locked in.
Real Life Case Studies Of Fine Hair Success
Let’s look at my friend Sarah. She has classic 2C waves. Her hair is very fine and thin. She used to air dry every day. Her hair looked flat on top and slightly frizzy on the bottom. We spent a Saturday morning working on her technique. We switched her from a heavy cream to a light foam. Then we used the pixie diffusing method. For the first time in her life, she had volume at the roots. She told me she felt like a different person. Her curls lasted until Monday.
I also worked with a client named Mike. He has short, curly hair that is fine. He hated how his hair looked “mushy” when it dried. We tried the hover drying technique. By not touching his hair until it was 100% dry, we kept the curl clumps intact. He was amazed at how much thicker his hair looked. This is the power of the cast. When curls are defined, they take up more space. This makes the hair look more dense.
Finally, I remember my own failure. I tried to diffuse my hair while it was too dry. I had let it air dry for an hour first. The curls had already started to frizz. When I started diffusing, it just made the frizz worse. You cannot fix a bad air dry with a diffuser. You have to start when the hair is wet. This lesson cost me a lot of bad hair days, but now I know. Timing is everything. Start early, stay still, and use the right heat.
Frequenty Asked Question
How long should it take to diffuse fine hair?
It usually takes between 15 and 25 minutes. This depends on how thick your hair is and how powerful your dryer is. If it takes longer than 30 minutes, you might have too much water in your hair. Try squeezing out more water with a towel before you start. I find that the “plopping” method for ten minutes before drying speeds things up.
Does diffusing cause heat damage?
It can if you use high heat every day. However, since the air is dispersed, it is much safer than a flat iron or a curling wand. Using a heat protectant is a good idea. I like the Bumble and Bumble Invisible Oil Primer. It is light enough for fine hair. Always use the medium or low setting to keep your strands safe.
Should I use gel or mousse for volume?
For fine hair, mousse is usually better. It has more air and less oil. This means it won’t weigh the hair down. If you need more hold, you can use a “hard hold” gel, but use a small amount. I have seen great results with the Jessicurl Spiralicious Gel. It is very strong but doesn’t feel heavy once you “scrunch out the crunch.”
Can I diffuse every day?
You can, but I recommend giving your hair a break. Most people with curly hair only wash and dry every 2 or 3 days. On the days you don’t wash, you can use a steamer to refresh your curls. If you must dry every day, definitely invest in a high quality dryer with good heat control.
Why is my hair still frizzy after diffusing?
You might be touching it too much. Do not touch your curls with your fingers until they are completely dry. If you feel a crunch, that is good. That is the cast. Once the hair is dry, you can gently scrunch it to make it soft. If you scrunch while it is even 5% damp, it will frizz.
What is the best way to dry roots?
Use the prongs of your diffuser. Place them at the scalp and lift slightly. This allows air to get under the hair. Also, drying your hair upside down is the best way to ensure the roots don’t dry flat against your head. I noticed a big change when I started focusing 70% of my time on the roots.
The secret to big hair isn’t a miracle product. It is the way you handle your hair while it is wet. Fine strands need support. They need the gentle lift of a diffuser bowl. They need the fast setting power of medium heat. I spent years fighting my hair because I didn’t understand this. Once I stopped air drying, my curls finally reached their potential. You don’t need a $400 dryer to see a change. You just need a deep bowl and some patience.
Start your next wash day with a different plan. Squeeze out that extra water. Flip your head over. Take your time with the hover dry. You will notice the difference immediately. Your hair will feel lighter. Your curls will look more defined. Most importantly, that volume will last all day. If you have been struggling with flat hair, this is the sign you need to try diffusing. It is the most effective way to turn fine strands into a full head of curls. I have seen it work for hundreds of people and I know it will work for you too.

Sarah Mitchell — Founder & Editor-in-Chief
Sarah Mitchell is the founder and editorial voice behind Hair Level Up. A licensed cosmetologist with more than 15 years of experience, she has styled A-list celebrities for editorial shoots and red carpets, with work featured in Vogue, Elle, and Harper’s Bazaar. Early in her career, she trained under the legendary hairstylist Oribe in New York, an apprenticeship that still shapes her editorial eye today. Sarah founded Hair Level Up in 2020 after one bad haircut convinced her that women deserved a destination that felt like a magazine, taught like a stylist, and inspired like an art gallery. She oversees every story from concept to publication, guided by a simple belief: a good story teaches you something, but a great one makes you feel beautiful while it does.