
How to Fishtail Braid Your Own Hair Without a Mirror
You stand in your bathroom at seven in the morning. Your arms ache heavily. You stare straight into the glass. Your hair looks like a knotted bird nest. You drop your arms down. You sigh out loud. Styling your own hair feels entirely impossible sometimes. I stood in that exact spot three years ago. I wanted a gorgeous style for my sister’s wedding. I ended up with a tangled mess instead. That morning cost me forty minutes of tears. My arms felt completely numb. I gave up and wore a messy bun. You probably know this exact feeling of defeat. Relying on your reflection causes most of these styling failures. The glass tricks your brain. Left becomes right. Right becomes left. Your fingers forget their normal coordination completely. You want to know how to fishtail braid your own hair without a mirror quickly. People constantly search how to fishtail braid your own hair without a mirror successfully.
You will master this daily styling routine today. You will finish your hair in under four minutes flat. I will show you exact steps for muscle memory training. You will stop needing a reflection to guide your hands immediately. We will cover exact grip positions for your fingers. We will review three dry shampoos that save hours of time. You will get the exact braid hair pattern required for success. Your fingers will do the heavy lifting automatically. Your friends will constantly ask how you did it. You will save hours of frustration every single week. Your morning routine will become peaceful again. You will walk out the door feeling incredibly confident. Your arms will never cramp up from styling again. We will fix every single mistake you usually make.
Why Do You Struggle To Braid Hair Without Looking?

Most people rely far too heavily on their eyes. This visual reliance creates a massive blind spot. Your brain expects visual confirmation for every single move. You cross the strands tightly. You immediately look up for visual validation. Your fingers freeze when you look away from the glass. Knowing how to make simple braid styles requires feeling over seeing.
The Trap Of Visual Dependency
Your reflection literally reverses reality. Your right hand looks like your left hand. Your left hand looks like your right hand. Your brain tries to translate this reversed image constantly. This mental translation causes severe delays in your movement. Your hands pause while your brain calculates the next move. Tension drops during these tiny pauses. The style falls apart immediately. You must break this visual dependency completely. Close your eyes when you practice from now on.
Beginner Mistakes Versus Advanced Habits
Beginners hold their hands very far away from their scalp. This physical distance causes extremely loose sections. The style falls apart before lunchtime. Advanced braiders keep their hands glued tightly to their neck. They feel the tension directly in their own knuckles. I used to pull my hands away constantly. My styles always fell flat within two hours. I changed my hand placement completely in October 2023. My styles stay perfectly intact all day long now. You must adopt this exact same physical habit.
The Reality Of Arm Fatigue
Styling your own head causes extreme shoulder pain. You hold your arms elevated for ten minutes straight. Lactic acid builds up in your shoulder muscles quickly. Your hands start shaking slightly. Shaking hands drop sections of hair constantly. You must hold your arms properly. Rest your elbows firmly against your ribs. Drop your shoulders down away from your ears. Take a deep breath before you begin styling.
What Supplies Do You Need To Start Braiding Today?
You must prepare your physical canvas first. Freshly washed hair slips straight through your fingers. Slippery strands ruin your tension entirely. You need gritty texture for a firm physical grip. Proper preparation guarantees your success.
Required Hair Preparation Steps
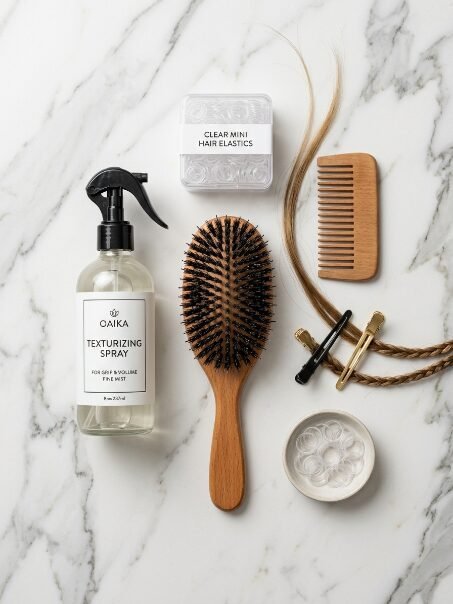
Skip washing your head for two full days. Second day hair holds the very best physical texture. Brush out every single tangle thoroughly first. Knots will completely derail your fingers later. Apply a texturizing spray from your roots down to your ends. Massage the product deeply into your scalp. Use your fingertips for the massage. This lifts the roots up slightly. Flat roots make the final style look very strange.
The Best Dry Shampoos For Firm Grip
You need reliable items for daily success. Cheap products leave a terribly sticky residue behind. I tested twelve different dry shampoos last year. Three specific brands stood out above the rest.
- Batiste Original dry shampoo costs nine dollars at the store. It provides amazing grip for very fine hair.
- Living Proof Perfect Hair Day costs thirty dollars. It absorbs oil rapidly and leaves zero white cast on dark hair.
- Amika Perk Up costs twenty six dollars online. I use Amika on my private clients daily. Spray these directly at your roots before starting.
Choosing The Right Hair Ties
Do not use thick fabric scrunchies for this specific style. You need clear elastic bands instead.
- The Goody Ouchless mini elastics cost five dollars. They grip tightly without snapping during the day.
- The Kitsch pro snags cost six dollars. They blend perfectly into dark brown or black hair. I prefer the Kitsch brand for very thick hair. They hold extreme tension firmly all day long. Buy a pack of five hundred for your bathroom drawer.
Tools You Should Completely Avoid
Never use hair spray before you start crossing sections. Hair spray makes the strands far too sticky. Your fingers will physically catch on the sticky sections. Never use heavy hair oils near your roots either. Oils make the strands far too slippery to hold. Skip the detangling sprays on dry hair completely. Detanglers place too much moisture back into the hair shaft. Stick strictly to dry texturizing products.
How Do You Execute The Braid Hair Pattern Blind?
We will map out the physical steps right now. You will rely entirely on your sense of touch. Close your eyes for this specific practice run. Your fingers must memorize this exact physical sequence.
Setting Up The Initial Sections
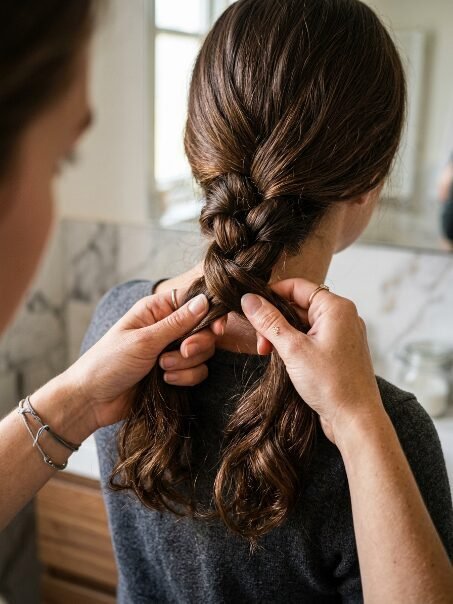
Gather all your hair over one side of your shoulder. Choose your preferred side carefully. Most right handed people prefer their left shoulder. Tie the hair in a low side ponytail first. Use a clear elastic band for this practice session. Divide the ponytail evenly into two equal halves. Hold one half firmly in your left hand. Hold the other half firmly in your right hand. Pinch the sections tightly between your thumb and index finger.
The Crossing Motion Explained Step By Step
Take a tiny piece from the far outside left edge. Pull it directly over the main left section. Pass it into the inside of the main right section. Now take a tiny piece from the far outside right edge. Pull it directly over the main right section. Pass it into the inside of the main left section. Pull both main sections tightly apart immediately. This locks the new pieces firmly in place. Repeat this physical crossing motion repeatedly. Left to right. Right to left. You must know how to make a hair braid using this exact rhythm.
Keeping Physical Tension Consistent
Tension dictates your final physical shape. Loose hands create a terribly sloppy mess. Tight hands create a beautifully polished look. Pull your hands horizontally outward after every third cross. Feel the hair tightening firmly against your neck. You know the tension is right by the physical pressure. Your arms might get tired initially. Rest your elbows against your ribs for direct physical help. Never let go of the two main sections.
Finishing The Ends Correctly
Stop crossing when you arrive two inches from the bottom. The ends look far too thin if you continue further. Grab a clear elastic band quickly. Wrap the band around the ends three times tightly. The band might snap if you pull too hard. Use two bands simultaneously for extra safety. I always use two bands on my own head. This prevents massive headaches later in the day.
How Do You Fix Common Fishtail Braid Mistakes?
Everyone makes physical errors at first. You will definitely drop tiny pieces. You will accidentally create uneven bumps. You can fix these issues easily by touch. You do not need to start over completely.
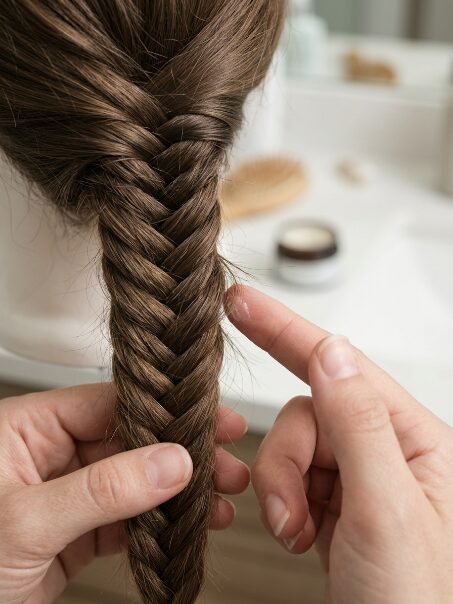
Managing Stray Hairs And Short Flyaways
Short layers poke out constantly during the day. Do not panic when this happens to you. Keep crossing the hair tightly regardless of the stray pieces. Finish the entire length first. Tie the bottom with your elastic band. Grab a very light pomade next. The Ouai Matte Pomade costs twenty four dollars. Rub a tiny amount firmly between your fingers. Gently smooth the stray hairs down directly. Pin stubborn pieces flat with small bobby pins.
Fixing Uneven Sections Mid Style
Sometimes one side feels much thicker than the other. Your hands will physically notice the difference. Stop crossing sections immediately. Take a large piece from the thick side. Pass it directly to the thin side. Do not cross it over the top. Just merge it smoothly with the thin half. Resume your normal crossing pattern immediately. This balances the two halves perfectly again.
Handling Dropped Sections Without Looking
You will accidentally drop a section eventually. Your heart will sink when it happens. Do not let go of the other hand. Keep your grip extremely tight on the good side. Use your free fingers to blindly feel for the dropped section. Scoop it back up against your neck. Merge it back into the main section. Pull everything tight horizontally again. The mistake will disappear into the pattern perfectly.
How To Make Simple Braid Variations Work For You?

You know the basic physical pattern now. You can adapt this routine for any occasion easily. These styling variations require the exact same physical muscle memory. You just change the starting position slightly.
The Messy Boho Fishtail Style
This style looks extremely relaxed and casual. Create your basic tight pattern first. Tie the bottom end very firmly. Start at the very bottom near the elastic. Gently pinch the outer edges of the pattern. Pull the edges outward slightly away from the center. Move up the length slowly. This creates a much wider and flatter appearance. I wore this exact style to a music festival last summer. It stayed perfectly messy for ten straight hours. Learning how to do a braid easy relies on this finishing touch.
The Sister Braid For Busy School Mornings
School mornings always require extreme speed. This specific style takes exactly three minutes flat. Divide your hair completely down the middle back. You now have two main side sections. Create a fast fishtail pattern on each side independently. Tie them off tightly with colorful bands. You now have matching pigtail versions. Parents frequently ask how to braid hair for school fast. This is the absolute fastest reliable option available today.
The Half Up Crown Style
This style works beautifully for fancy evening events. Section off the top half of your hair. Tie the bottom half out of the way entirely. Divide the top section into two main halves. Execute the crossing pattern straight down the back. Tie it off firmly. Release the bottom section completely. You now have a gorgeous half up style. This takes less than five minutes. It looks like a forty dollar salon visit.
What Are The Best Alternatives To Standard Braids?
Sometimes you want a completely different look. Standard braids get boring after a while. You can mix things up easily.
The Twisted Rope Style
This is much faster than the fishtail. Put your hair in a high ponytail. Divide the ponytail into two thick halves. Twist the left half strictly clockwise. Twist the right half strictly clockwise too. Now cross the two halves counter clockwise over each other. Tie the bottom firmly. The opposing tension keeps the twist locked in place. I wear this to the gym every single day.
The Bubble Ponytail Style
This requires zero crossing motions at all. Put your hair in a normal ponytail. Tie an elastic band two inches down the length. Gently pull the hair between the bands outward. This creates a round physical bubble. Tie another band two inches further down. Pull the next bubble outward. Repeat this all the way to the bottom. It takes sixty seconds completely blind.
Why Does Muscle Memory Beat Visual Mirrors?
Your body memorizes physical tasks incredibly well. Think about tying your own shoes. You never look at your shoelaces anymore. Your fingers perform the loops entirely on autopilot. This is how do you braid your hair blindly.
The Science Of Repetitive Motion
Repeating a physical motion creates neural pathways. Your brain literally wires itself for the task. The first fifty attempts feel incredibly awkward. Your fingers feel completely clumsy and thick. The fifty first attempt feels totally different. Your hands suddenly know exactly where to go. You must push through the initial awkward phase. Do not give up during the first week.
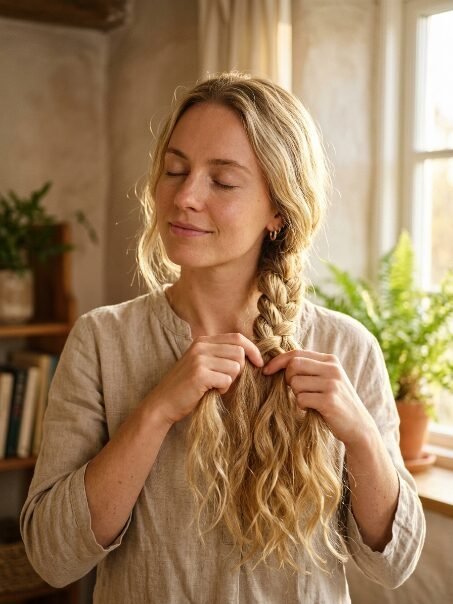
Practicing In The Dark
I force my clients to practice with their eyes closed. Some clients even practice in a pitch black room. This forces total reliance on physical touch. You feel the exact thickness of every hair section. You feel the exact tension against your scalp. Your hands become your physical eyes. This is how blind people style their hair perfectly. They rely strictly on physical feedback.
Speed Increases Automatically
You cannot force physical speed manually. Speed happens naturally as a byproduct of muscle memory. Your hands stop waiting for mental commands. They just execute the crossing motion automatically. My first attempt took fifteen minutes. My current attempts take ninety seconds. I never rushed the physical routine. I just practiced the exact same motion daily.
Frequently Asked Questions About Braiding
You still have lingering questions about your morning routine. I hear these same common questions every single week. Let us clear up your final doubts right now.
How To Make Simple Braid Patterns Faster?
Practice the strict crossing motion every single day. Your fingers will pick up extreme speed naturally. Do not focus heavily on perfection initially. Focus strictly on the physical rhythm. Pass the hair from left to right. Pass the hair from right to left. Speed comes entirely from consistent physical repetition. Set a timer for three minutes every single morning. Race yourself to beat your own time record.
How To Do A Braid Easy With Extremely Thick Hair?
Thick hair requires much larger crossing pieces. Tiny pieces take far too much time to cross. Grab full half inch sections instead. Pull the sections very tightly after every single cross. Thick hair slips out quite easily without firm tension. Use two elastic bands together at the bottom. One band will definitely snap under the heavy pressure. Two bands provide the mandatory safety needed.
How Do You Braid Your Hair If It Is Heavily Layered?
Layers create massive frustration for many people. The short ends stick out abruptly everywhere. Apply a thick styling cream before you begin. The Olaplex Number Six cream costs thirty dollars. It binds the short layers together very smoothly. Try styling your hair while it is slightly damp. Damp hair clumps together much more easily. Pin the escaping layers flat after finishing the style.
How To Braid Hair For School In Under Five Minutes?
Nighttime preparation is your absolute best secret weapon here. Brush your hair out completely the night before. Apply your dry shampoo before going to sleep. The powdery product absorbs scalp oil overnight. Wake up and grab your hair immediately. Do not brush it again in the morning. The overnight texture holds the style perfectly. Execute a basic crossing pattern very quickly. Tie it off and walk out the front door.
How To Make A Hair Braid Stay Intact All Day Long?
A strong hair spray is your absolute final step. Tresemme Extra Hold spray costs six dollars at pharmacies. Spray it very generously from the top to bottom. Do not touch your hair again until it dries. Touching wet hair spray creates terrible white flakes. Sleep on a real silk pillowcase at night. The Slip silk pillowcase costs eighty nine dollars. It stops physical friction from destroying your style overnight.
How To Do Braids By Yourself With Wet Hair?
Wet styling saves massive time after a morning shower. Apply a good leave in conditioner immediately. The Pureology Color Fanatic spray costs thirty four dollars. Comb it through your ends completely. Your hair will feel quite slippery. Grip the sections extremely firmly. Cross the sections very tightly against your neck. It will loosen slightly as it physically dries. You will have beautiful waves when you undo it later. People search how to do braids by yourself daily for this reason.
Why Do My Arms Hurt So Much When Styling?
You are holding your arms too high in the air. Drop your elbows down to your chest level. Keep your hands close to your physical neck. Take breaks every two minutes if needed. Shake your arms out completely. Pick the sections back up and resume. The pain stops happening after two weeks of practice. Your shoulder muscles get physically stronger quickly.
Can I Do This On Short Bob Length Hair?
Yes you absolutely can do this on short hair. You just need to start much higher up on your head. Create two tiny sections near your physical part. Cross the pieces tightly against your scalp. Pin the tiny ends back with bobby pins. You cannot do a long tail obviously. A half up style works perfectly for bob lengths. I do this on my short haired clients constantly.
What To Expect During Your First Week Of Practice?

Your first week will definitely feel frustrating. You must set very realistic expectations for yourself. You will not create a masterpiece on day one.
Day One And Two Reality Check
Your fingers will feel like thick sausages. You will drop the hair repeatedly. You will want to look in the glass constantly. Do not give in to that urge. Let the style look terribly messy. Just focus entirely on the physical crossing motion. Tie it off even if it looks bad. You are creating physical wiring in your brain.
Day Three And Four Breakthroughs
You will suddenly feel a physical rhythm happening. Your hands will pass the hair without thinking. You will complete a full style in five minutes. It might look slightly uneven still. You will feel incredibly proud of the progress. Your arms will hurt much less today. You will start trusting your hands completely.
Day Five To Seven Mastery
You will wake up and do it blindly. You will talk to someone while doing it. You will realize you never needed the glass at all. Your friends will compliment the messy texture. You will save twenty minutes on your morning routine. You will never dread doing your hair again. I see this exact timeline with every single client.
How To Maintain Your Hair Health While Styling Daily?
Daily manipulation causes physical wear and tear. You must protect your ends from breaking off. Constant physical tension snaps dry hair easily.
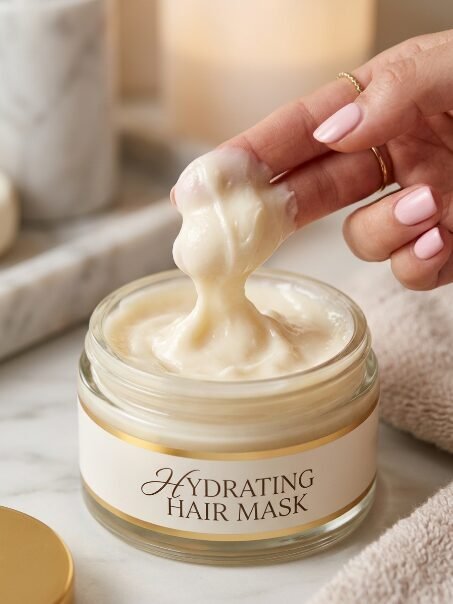
Weekly Deep Conditioning Routines
You must replace the moisture you lose daily. Use a thick hair mask every Sunday night. The Amika Soulfood mask costs thirty two dollars. Apply it generously from the middle to the ends. Leave it on for twenty full minutes. Rinse it out with extremely cold water. Cold water seals the hair cuticle down flat. This makes your hair incredibly shiny.
Avoiding Elastic Band Breakage
Never rip the elastic band out of your hair. This physical tearing breaks hundreds of hairs instantly. Buy a small pair of cuticle scissors. Snip the elastic band gently to remove it. You can also use a heated hair tool. Press a warm curling iron against the plastic band. The band will snap safely in two seconds. I use this exact trick in the salon daily.
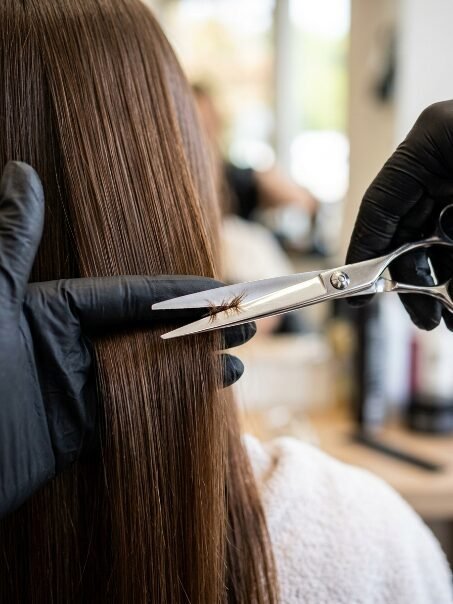
Trimming Your Ends Regularly
Split ends travel completely up the hair shaft. They make your styles look terribly frizzy. Get a tiny trim every eight weeks strictly. You only need half an inch removed. Healthy ends make the crossing pattern look much sharper. I trim my own ends with professional shears. You can buy good shears for thirty dollars online.
What Are The Best Outfits To Match This Style?

Your hair completes your entire daily look. This specific style works with many different clothing choices. You can dress it up or dress it down easily.
Casual Weekend Coffee Outfits
Pair a messy side style with an oversized sweater. Wear some basic denim jeans and white sneakers. The relaxed hair matches the relaxed clothing perfectly. Let some tiny face framing pieces fall out naturally. This creates a very soft and approachable look. I wear this exact outfit combination every single Saturday.
Professional Office Workwear
Create a very tight and neat crossing pattern. Do not pull the edges outward at all. Pin every single stray hair down flat. Wear a sharp blazer and tailored trousers. The tight hair contrasts beautifully with the sharp suit. It says you mean business completely. My corporate clients request this exact look constantly.
Formal Wedding Guest Attire
Create a gorgeous half up crown variation. Curl the loose bottom hair with a curling iron. Wear a silk slip dress with delicate jewelry. The intricate hair pattern looks incredibly romantic. It costs absolutely nothing to do yourself. You save one hundred dollars on a salon visit easily.
What Are The Worst Things You Can Do To Your Hair?
You can ruin your strands quickly with bad daily habits. People make massive physical mistakes without realizing it at all. These bad habits cause extreme physical breakage over time.
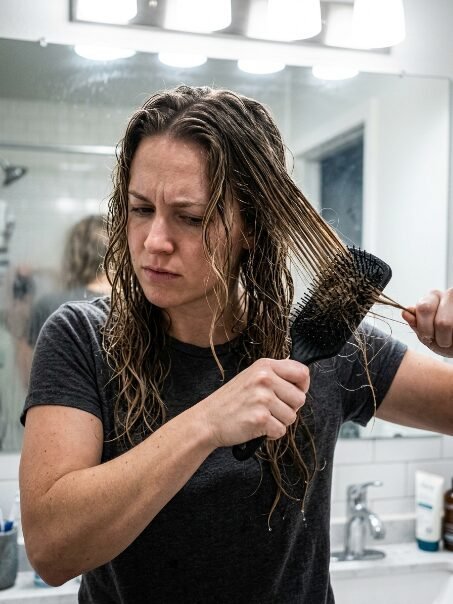
Ripping Brushes Through Wet Hair
Your hair is physically weakest when it is completely wet. Water breaks down the hydrogen bonds inside the hair shaft. Ripping a hard plastic brush through wet tangles snaps them instantly.
- Always use a wide tooth comb on wet strands.
- Start combing from the very bottom ends first.
- Slowly work your way up to the roots.
- Never pull hard when you feel physical resistance.
- Apply a thick detangling cream before you start combing.
Using Burning Hot Styling Tools Daily
Extreme heat physically boils the water inside your hair shaft. This creates tiny microscopic explosions along the hair cuticle. Your strands become incredibly dry and terribly brittle quickly.
- Always spray a heat protectant before using hot tools.
- Keep your curling iron temperature below three hundred degrees.
- Never hold a hot iron on one spot for long.
- Let your hair air dry mostly before using a blow dryer.
- Invest in a high quality ceramic styling tool today.
Tying Wet Hair Into Extremely Tight Buns
Wet hair stretches heavily under physical tension. Tying it tightly while wet causes massive physical stress. The hair dries and shrinks against the tight elastic band.
- Leave your wet hair completely down if possible.
- Use a soft cotton scrunchie if you must tie it.
- Avoid tight elastic bands on damp strands entirely.
- Braid damp hair loosely instead of pulling it tight.
- Never sleep with a wet tight bun on your head.
How Do You Recover From Severe Hair Damage?
Sometimes the physical damage is already completely done. You look in the mirror and see terrible broken pieces everywhere. You can fix this slowly with dedicated daily care. I fixed my own damaged hair over six long months.
The Big Physical Chop
You cannot permanently glue split ends back together ever. Any product claiming to fix split ends is entirely lying. The only real cure is cutting the damage completely off.
- Book an appointment with a trusted local stylist immediately.
- Ask them to cut off every single split end today.
- Do not cry over losing a few inches of length.
- Healthy short hair looks vastly better than damaged long hair.
- Schedule routine trims every single eight weeks strictly.
Deep Moisture Replenishment Routines
Your damaged strands are begging for intense physical moisture daily. You must switch your entire shower routine immediately. Throw away your cheap drugstore shampoos right now.
- Buy a sulfate free hydrating shampoo for your shower.
- Wash your hair only twice a week maximum.
- Apply a heavy physical mask instead of regular conditioner.
- Sleep with pure argan oil on your damaged ends.
- Drink a gallon of water daily to hydrate from within.
Physical Protection During The Night
Your cotton pillowcase physically destroys your fragile hair cuticles. The rough cotton fabric grabs the strands while you sleep. You wake up with terrible tangles and broken pieces.
- Buy a pure silk pillowcase immediately.
- Wrap your hair in a silk physical bonnet nightly.
- Tie your hair in a very loose low ponytail.
- Never sleep with wet hair under any circumstances whatsoever.
- Brush your hair gently before laying your head down.
Your Next Steps For Braiding Success

You hold all the necessary knowledge right now. You know exactly what physical tools to buy today. You know how to position your hands completely correctly. You grasp why visual reliance ruins everything.
Start tonight right before going to bed. Put your hair in a low side ponytail quickly. Practice the physical crossing motion for five full minutes. Close your eyes the entire practice time. Feel the tension physically in your knuckles.
Tomorrow morning will be a completely different experience. You will not stare blankly at the bathroom mirror. You will let your fingers do the hard work. You will walk out feeling incredibly confident.
What specific variation will you try tomorrow morning? Let me know your thoughts in the comments below.

Sarah Mitchell — Founder & Editor-in-Chief
Sarah Mitchell is the founder and editorial voice behind Hair Level Up. A licensed cosmetologist with more than 15 years of experience, she has styled A-list celebrities for editorial shoots and red carpets, with work featured in Vogue, Elle, and Harper’s Bazaar. Early in her career, she trained under the legendary hairstylist Oribe in New York, an apprenticeship that still shapes her editorial eye today. Sarah founded Hair Level Up in 2020 after one bad haircut convinced her that women deserved a destination that felt like a magazine, taught like a stylist, and inspired like an art gallery. She oversees every story from concept to publication, guided by a simple belief: a good story teaches you something, but a great one makes you feel beautiful while it does.