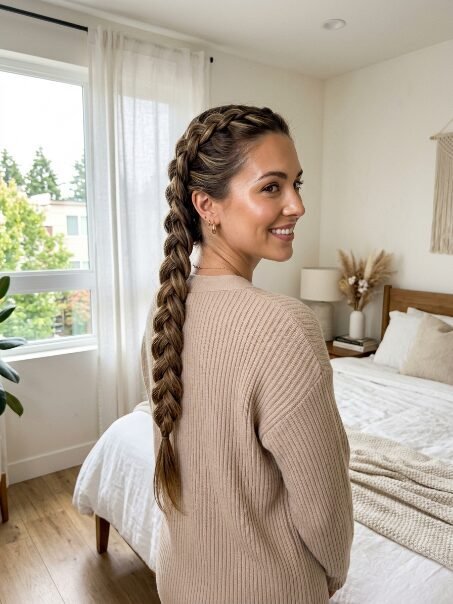
How to Dutch Braid Your Own Hair: Step-by-Step Tutorial
I remember standing in my bathroom at 6 AM. My arms ached. My fingers felt confused. I wanted a beautiful look for the day. Every tutorial looked easy on screen. Real life felt different. I spent months practicing. My early attempts looked messy. Hair stuck out everywhere. I kept trying. I noticed patterns that worked. Now I can do this blindfolded. I want to share my exact method with you. You can master this look.
This guide gives you everything you need. You will get clear instructions. I will share the exact tools I use. We will cover preparation. I will walk you through the hand movements. We will look at styling for different events. You can wear this as prom hair. You can wear this among other hairstyles for school. You will save time in the morning. You will feel confident all day.
Best Tools For Braiding Your Own Hair
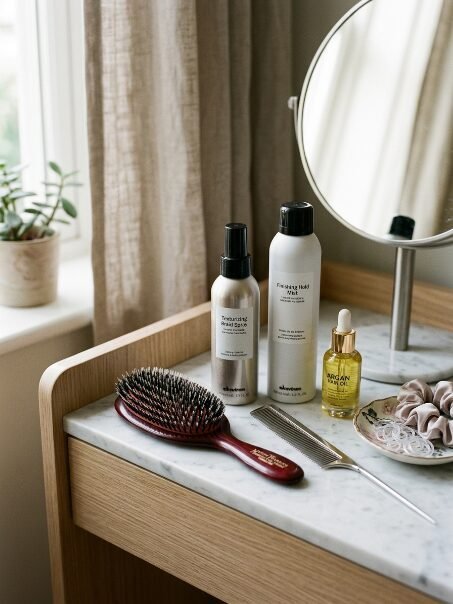
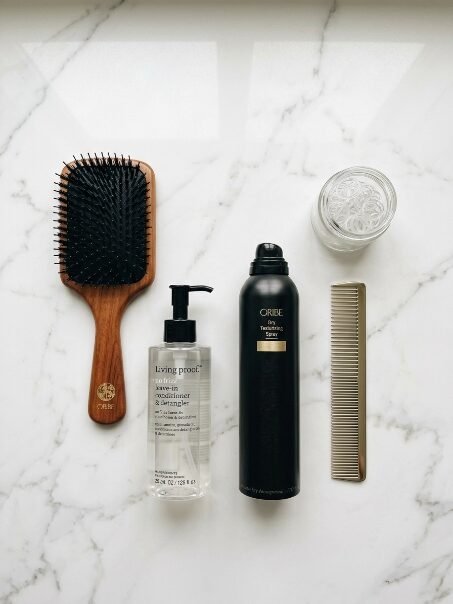
Having the right tools changes everything. I learned this the hard way. Cheap tools break your hair. Good tools make the work easy. I tested many brands over five years. These items sit on my counter right now.
- Ouai Hair Detangler
- Mason Pearson Boar Bristle Brush
- Tangle Teezer Fine and Fragile Brush
- Goody Ouchless Clear Elastics
- Oribe Dry Texturizing Spray
- Redken Triple Take 32 Hairspray
- K18 Molecular Repair Hair Mask
- Dyson Supersonic Hair Dryer
You do not need all of them today. Start with a good brush and clear elastics. A high quality hair detangler makes the biggest difference. It gives you slip. Slippery hair is easier to section. You get cleaner lines.
Preparing Your Hair
Preparation sets you up for success. You cannot rush this part. I used to skip brushing. My hair would tangle halfway through. I would have to stop and start over.
First you need clean hair. Day old hair works best. Freshly washed hair is too soft. It slips out of your fingers. If your hair is too clean spray some dry shampoo. Apply your hair detangler from middle to ends.
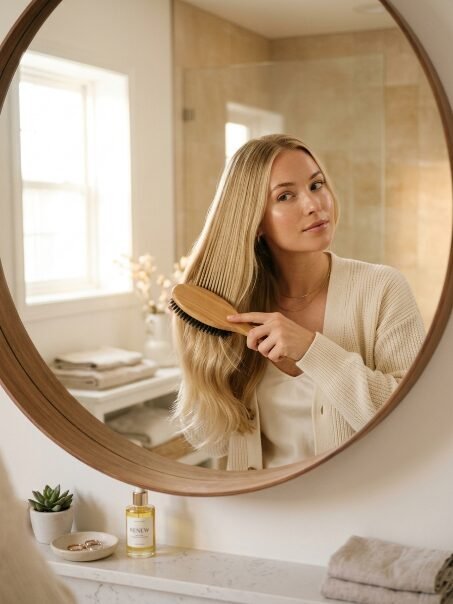
Take your Tangle Teezer brush. Start brushing at the very bottom. Work your way up to the roots. Never rip through knots. You will break your hair. Brush until your hair feels like silk.
Sectioning Like A Pro
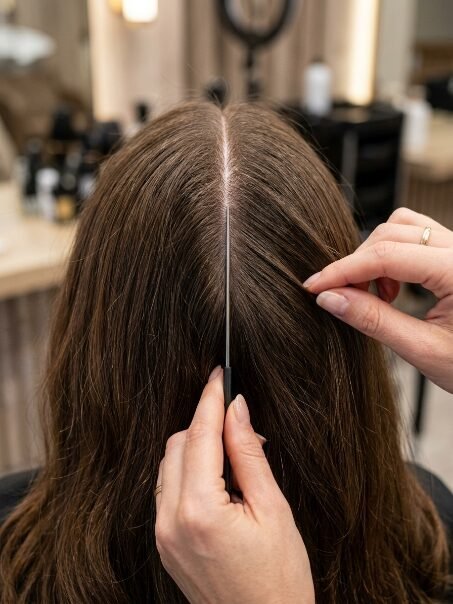
This step dictates the shape of your style. I like a deep side part. You can choose a middle part. Use the tail of a fine comb. Draw a straight line from your forehead back to your crown.
You need to isolate the hair you want to work with. Tie off the rest of your hair. Use a big clip. You only want loose hair where you are working.
Take a small triangle of hair at your front hairline. This is your starting piece. Make it about two inches wide. Comb it smooth.
The Core Technique For A Dutch Braid
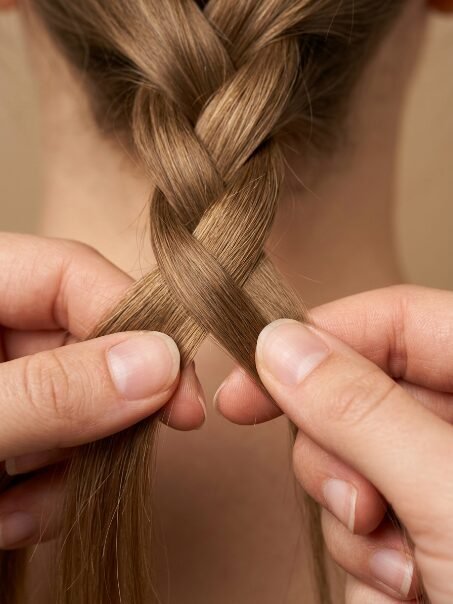
A standard braid goes over the middle. A Dutch braid goes under the middle. That is the only difference. It creates a 3D effect. The hair pops off your head.
Split your triangle into three equal pieces. Hold the left piece in your left hand. Hold the right piece in your right hand. Keep the middle piece loose for a second.
Take the right piece. Cross it under the middle piece. Now the right piece becomes the new middle piece. Take the left piece. Cross it under the new middle piece. You just completed one stitch.
How To Braid Your Own Hair Step By Step
Now we start adding hair. This makes it stick to your head. I hold the three strands in my left hand. I use my right hand to grab new hair.
Take a small slice of hair from the right side. Add it to the right strand. Cross that combined right strand under the middle strand. Pull it tight.
Switch hands. Hold the strands in your right hand. Take a small slice of hair from the left side. Add it to the left strand. Cross that combined left strand under the middle strand. Pull it tight.
Repeat this motion. Work your way down your head. Keep your hands close to your scalp. If you pull your hands away your style gets loose. Loose styles fall apart quickly. Keep the tension even.
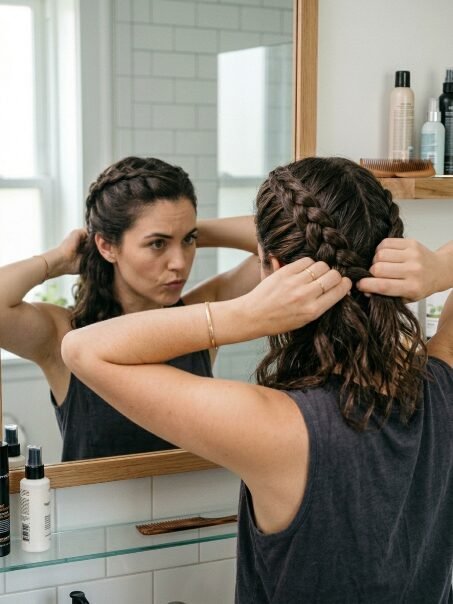
Braiding Down The Back
The back of the head is the hardest part. You cannot see what you are doing. I rely entirely on feel. You must trust your hands.
Keep your chin down. Look at the floor. This keeps the hair tight against your neck. If you look up the bottom will sag.
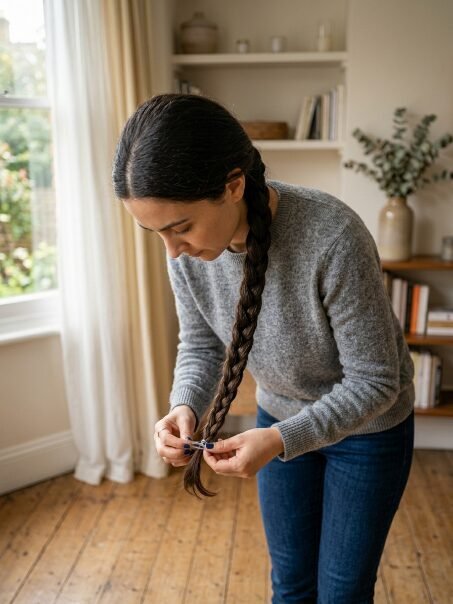
Continue pulling small slices of hair. Add them to the outer strands. Cross them under the middle. When you run out of hair at the nape of your neck stop adding.
Just do a regular three strand braid down the tail. Cross right under middle. Cross left under middle. Go all the way to the ends. Secure it with a Goody clear elastic.
Creating A Girlie Style
A tight braid looks sporty. We want a romantic look. We need to soften it. We call this pancaking.
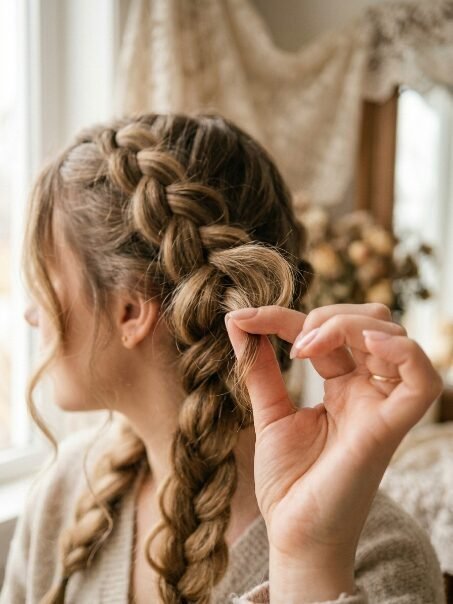
Start at the bottom near the elastic. Pinch the outer edge of the braid. Pull it gently. It will fan out. Move up one stitch. Pinch and pull again.
Work your way all the way to the top. I have noticed that pulling too hard ruins the shape. Just tiny tugs work best.
Spray Oribe texturizing spray all over. This gives it a messy finish. It looks like you spent hours at a salon.
Adapting For Different Events

You need different variations for different days. I change my routine based on my schedule.
For school mornings you need speed. Skip the texturizing spray. Keep it tight. It will last through gym class. Step by step hairstyles save your morning routine.
For prom you need drama. Pull the edges out very wide. Pin small pearls into the center of the pattern. Let pieces fall around your face. Curl those face framing pieces with a curling iron.
You can also try a small waterfall variation. Drop the bottom piece instead of crossing it. It looks incredibly romantic. It works beautifully for weddings.
Fixing Common Mistakes

Everyone makes mistakes at first. I still make them. My arms get tired. I lose my grip. The strands mix together.
If a section gets messy do not panic. Do not start over immediately. Try to smooth it with a comb. If it feels too loose pull the two outer strands apart sharply. This tightens the stitch above it.
If your arms hurt stop and breathe. Use a clip to hold the strands together. Drop your arms for ten seconds. Pick up the strands and continue.
In my experience practice beats talent. Do it while watching television. Your fingers will memorize the motions. Braiding your own hair becomes muscle memory.
Frequently Asked Questions
Is it easier to work with wet or dry hair?
Dry hair is much easier. Wet hair shrinks when it dries. The tension changes. Wet hair is also fragile and snaps easily. Always dry your hair completely with a Dyson dryer before starting.
Why does my hair stick out of the sides?
You have layers in your hair. Short layers pop out of the pattern. Use Redken hairspray on your fingertips. Smooth the layers down as you cross the strands.
How long does this take to learn?
I practiced every day for two weeks. The first few days felt awkward. By day five my fingers knew what to do. Give yourself time. Do not rush the learning curve.
Will this work on fine hair?
Yes it works perfectly on fine hair. You must pancake the edges. Pulling the edges out makes fine hair look thick. Texturizing powder also helps give fine strands grip.
Final Thoughts On This Routine

You now have the knowledge to create something beautiful. It takes patience. Your arms will ache at first. The results are worth the effort.
Take your time. Buy good elastics. Keep your hands close to your head. Trust the process. You will look amazing.

Sarah Mitchell — Founder & Editor-in-Chief
Sarah Mitchell is the founder and editorial voice behind Hair Level Up. A licensed cosmetologist with more than 15 years of experience, she has styled A-list celebrities for editorial shoots and red carpets, with work featured in Vogue, Elle, and Harper’s Bazaar. Early in her career, she trained under the legendary hairstylist Oribe in New York, an apprenticeship that still shapes her editorial eye today. Sarah founded Hair Level Up in 2020 after one bad haircut convinced her that women deserved a destination that felt like a magazine, taught like a stylist, and inspired like an art gallery. She oversees every story from concept to publication, guided by a simple belief: a good story teaches you something, but a great one makes you feel beautiful while it does.