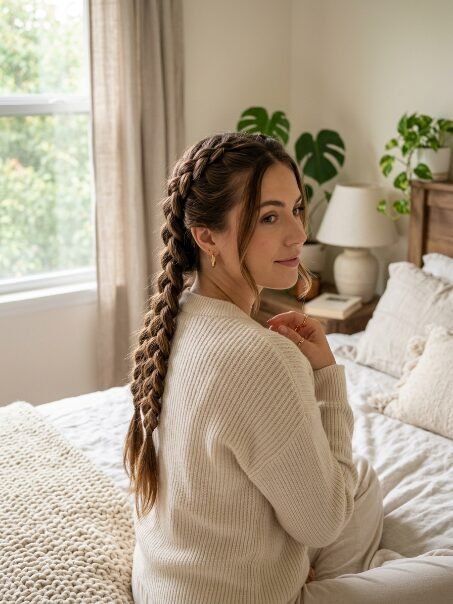
Braiding Your Own Hair for Beginners 5 Styles to Master First
Standing in front of the bathroom mirror with tangled fingers and aching arms is a rite of passage. I have been there countless times. Trying to figure out how do you braid your hair when you cannot see the back of your head feels impossible at first. Your fingers fumble constantly. The strands mix together in your hands. You end up with a messy knot instead of a beautiful style. But mastering your own hair changes everything about your morning routine. I spent months practicing on my own thick hair to figure out what actually works in the real world.
You will master five specific styles today. We start with the absolute basics and move to styles you can wear anywhere from the gym to a wedding. You only need a good brush and small clear elastics. Each style takes less than ten minutes once you practice the hand movements. I will show you exactly where to place your fingers and how to hold the tension tight. You will drop the frustration and finally get that perfect braid hair pattern you see everywhere on social media.
1. The Classic Three Strand Braid
Mastering how to make simple braid styles look good usually stops right here for many people. My early attempts were loose and fell apart in an hour. The standard three strand braid is the foundation of everything else. If you skip this step you will struggle later with the harder styles.
I tested this on my friend Sarah last month. She swore she could not even do a basic plait on herself. Within ten minutes she had a perfect side plait. The secret lies in finger placement and keeping your hands close to your body.
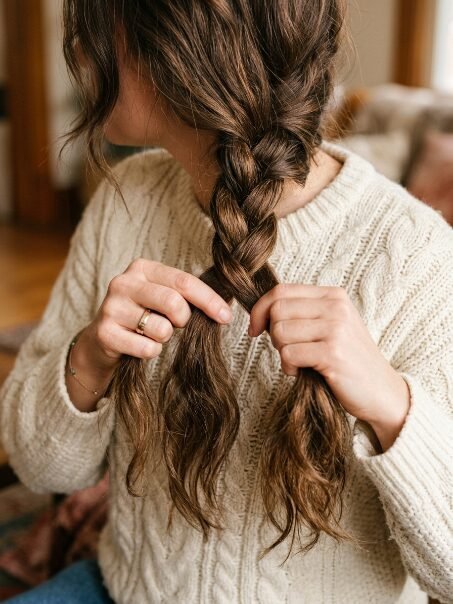
First you brush all your hair to one side over your shoulder. This gives you full visibility of the hair. Divide the hair into three equal sections. Hold the left section in your left hand. Hold the right section in your right hand. Let the middle section hang free for a second.
Cross the right section over the middle section. The original right section is now your new middle section. Grab it securely. Now cross the left section over the new middle section. Pull the strands tight after every single cross.
Tension is everything here. I used to let my hands relax too much as I moved down. That causes the standard braids to sag at the nape of the neck. Keep your hands close to your jawline as you work your way down the length of your hair. Secure the end with a small clear elastic.
I always spray a little texturizing spray before I start. It gives the hair grip and texture. Freshly washed hair is too slippery for beginners. Day old hair holds the shape beautifully and hides mistakes.
2. The Easy French Braid
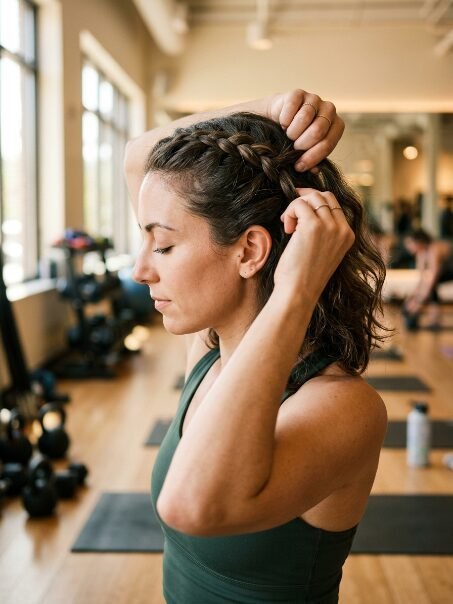
Mastering how to do braids by yourself usually hits a wall right here. The French style intimidates people. I avoided it for years because I thought my arms would fall off from exhaustion.
Here is what nobody tells you. You do not need to look in the mirror. Mirrors reverse your movements and confuse your brain completely. I tell everyone to close their eyes and feel the hair instead.
Start by gathering a section of hair at the crown of your head. Divide it into three smaller sections. Do one regular stitch just like the standard style we just covered above.
Now you need to bring in more hair from the sides. Before crossing the right section over the middle grab a small slice of loose hair from the right side of your head. Combine it with that right section. Then cross it over. Do the exact same thing on the left side.
Keep your hands resting against your scalp at all times. If you pull your hands away from your head the style will be loose and sloppy. I see this mistake constantly with beginners.
My personal case study with this style involves morning gym sessions. I needed a style that held my layers back completely. Once I mastered keeping my hands anchored to my scalp my French styles survived hour long workouts perfectly.
3. The Bold Dutch Braid
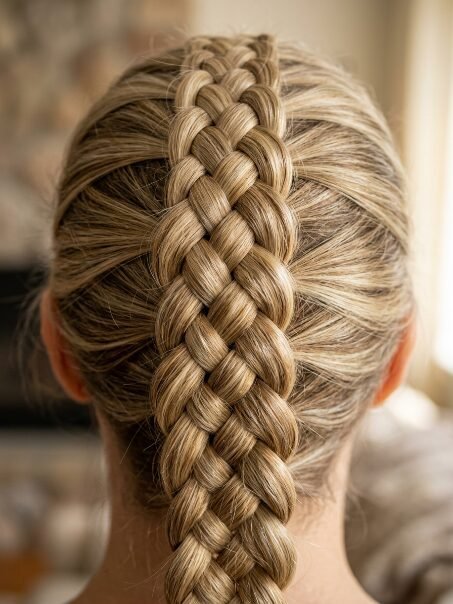
People think the Dutch style is harder than the French. I actually think it is much easier for beginners. The mechanics are exactly the same but reversed in direction.
Instead of crossing the sections over the middle you cross them under the middle. This makes the plait pop out from your head creating a bold 3D finish. It looks incredibly intricate but takes the exact same amount of time.
I noticed my hands cramped less with this style. The downward motion feels more natural for your wrists and shoulders. When my niece asked me how to braid hair for school this is the one I taught her first.
Start at the top of your head again. Take three small sections. Cross the right section under the middle. Cross the left section under the middle. Now grab loose hair from the right side. Combine it with the right section. Cross the entire thing under the middle.
Pulling the sections outward as you work creates an even tighter hold. Once you reach the bottom of your neck switch to a standard three strand motion down to the ends.
Pancaking is my favorite trick here. After securing the elastic gently pull on the outer edges of the loops. This makes the hair look twice as thick. It completely hides thin or fine hair perfectly.
4. The Twisted Rope Braid
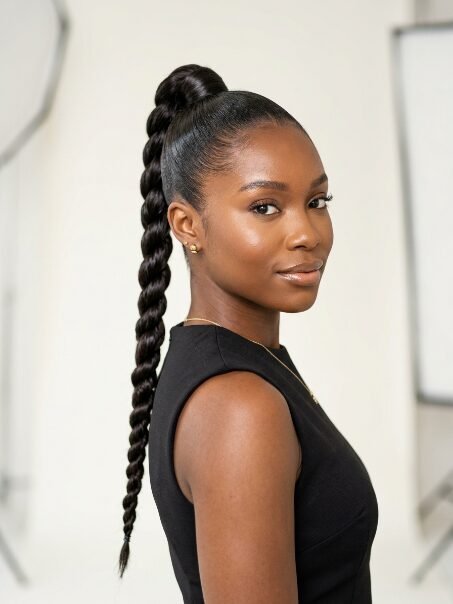
This is the ultimate emergency style. When I oversleep and have five minutes to leave the house I do a rope twist. It requires zero sectioning math and looks incredibly polished.
Knowing how to make a hair braid does not always mean twisting three strands. The rope twist only uses two. But there is a specific physics trick to keep it from unraveling instantly.
Pull your hair into a tight high ponytail. Secure it with a strong hair tie. Divide the ponytail tail into two equal halves.
Here is the secret. You must twist both individual sections to the right. Twist them tightly until they coil. Then cross the right section over the left section. You are twisting the strands one way but wrapping them around each other the opposite way.
I failed at this so many times before figuring out the directional tension. If you twist and wrap in the same direction the whole thing falls out the second you let go.
This style takes exactly two minutes. I love smoothing a tiny drop of hair oil over the sections before twisting. It eliminates frizz and gives the finished rope a sleek glossy finish.
5. The Messy Crown Sister Braid
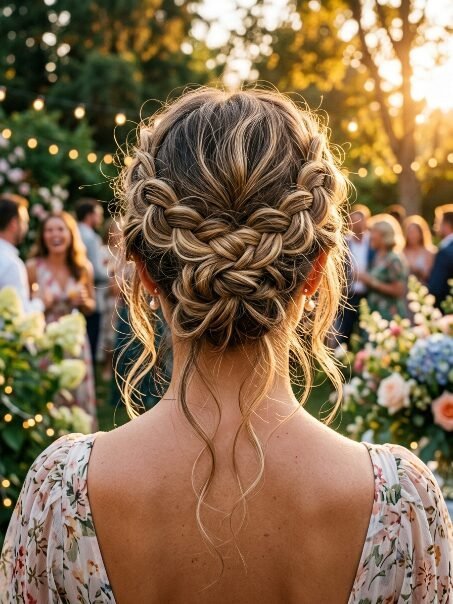
I call this the sister braid because it looks like someone else spent an hour doing it for you. It is actually just two simple pigtails pinned to your head.
This is perfect for weddings or summer parties. The beauty of this style is its imperfection. You want it to look a little messy and lived in.
Part your hair down the middle all the way to the nape of your neck. Create a basic three strand plait on the left side. Secure it with a clear elastic. Do the same on the right side. You should now have two standard pigtail plaits.
Gently pull apart the loops of both plaits to make them wide and flat. Take the left plait and lift it up across the top of your head like a headband. Pin it securely behind your right ear. Take the right plait and cross it over the left one pinning it behind your left ear.
Tuck the ends underneath the hair so the elastics disappear. Use large bobby pins. Push the pins in and then curve them downward to lock them against your scalp.
I wore this to an outdoor summer event last year. It kept my neck cool and stayed intact for twelve hours. No one believed I did it myself in my car mirror beforehand.
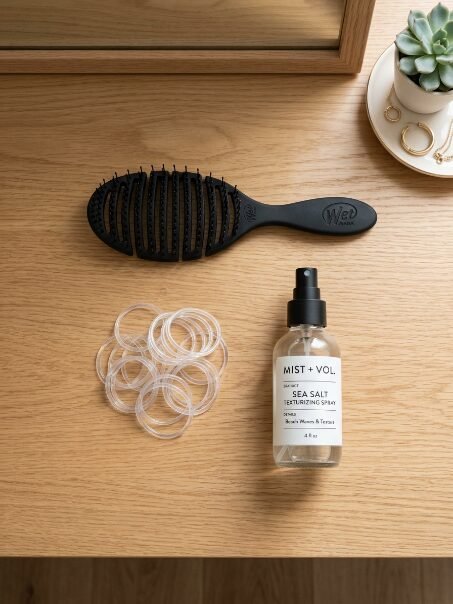
Required Tools for Perfect Styling
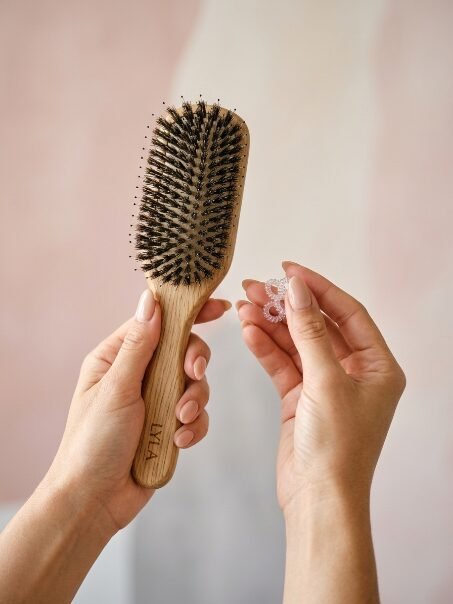
You cannot execute these styles with terrible tools. I spent years fighting my hair before realizing my brush was the main problem.
You need a high quality detangling brush. Boar bristle brushes smooth flyaways beautifully but you must remove tangles first. Working with tangled hair creates lumps you cannot fix later.
Clear silicone elastics are non negotiable. Thick fabric hair ties ruin the delicate ends of your work. Buy the tiny clear bands that disappear into your hair color.
Dry shampoo is your best friend. Freshly clean hair slips right out of your fingers. I spray dry shampoo directly onto my fingertips before I start. It gives me the grip I need to hold tension perfectly.
Frequently Asked Questions
How do you braid your hair without arms getting tired
Rest your elbows on a table or counter while you work on the front sections. When moving to the back drop your chin to your chest. This stretches the back of your neck and changes the angle for your shoulders. Take ten second breaks if needed. You can clip the sections together temporarily while you rest your arms.
How to make a hair braid last all day
Start with textured hair. Use a dedicated styling paste on your fingertips as you work. This catches all the tiny flyaways. Pull tighter than you want the final look to be. Hair naturally loosens throughout the day. Finish with a heavy hold hairspray while pressing the loose hairs flat against your head.
How to do a braid easy on wet hair
Wet hair stretches dramatically. I never work with soaking wet hair because it snaps easily under tension. Towel dry until it is just damp. Put a leave in conditioner from roots to ends. Wet hair shows every mistake so you must take smaller cleaner sections. It creates a beautiful wave pattern when you take it out the next morning.
Final Thoughts on Mastering Your Hair

Your fingers will feel clumsy at first. This is completely normal. Muscle memory takes time to sink in. The secret is consistency. Practice one style every single night before bed. Do not worry about how it looks. Just focus on the feeling of the hair passing between your fingers. Soon you will sit on the couch and recreate these styles without even thinking about it. Give yourself grace during the messy attempts. Every mistake teaches your hands exactly what not to do next time. You have the tools and the knowledge. Now you just need the repetitions.

Sarah Mitchell — Founder & Editor-in-Chief
Sarah Mitchell is the founder and editorial voice behind Hair Level Up. A licensed cosmetologist with more than 15 years of experience, she has styled A-list celebrities for editorial shoots and red carpets, with work featured in Vogue, Elle, and Harper’s Bazaar. Early in her career, she trained under the legendary hairstylist Oribe in New York, an apprenticeship that still shapes her editorial eye today. Sarah founded Hair Level Up in 2020 after one bad haircut convinced her that women deserved a destination that felt like a magazine, taught like a stylist, and inspired like an art gallery. She oversees every story from concept to publication, guided by a simple belief: a good story teaches you something, but a great one makes you feel beautiful while it does.