15 French Braid Variations Beyond the Basic Single Braid
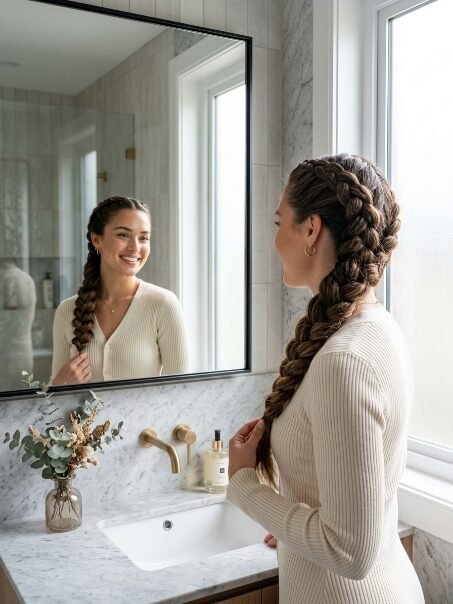
Every morning you stare at the mirror. You want a change from the regular ponytail. You grab a hair tie. You default to the standard single braid. I have been there too. The same hairstyle gets boring fast. I spent years doing the exact same three-strand routine. Then I tried changing my hand placement. I tested different sectioning methods. The results completely changed my daily routine. A simple style upgrade saves time and money. You do not need a salon visit. You just need a mirror and your hands. I remember walking into my high school trying to hide my messy hair. I felt self-conscious. I watched other girls with perfect hair. I assumed they woke up early or had professional help. I was wrong. They just practiced. I bought a cheap mannequin head online. I sat in my room for hours crossing sections of fake hair. I burned my arms out. I learned the mechanics. The confidence I felt the first time I wore a perfect plait out in public changed my life. People asked me who did my hair. Telling them I did it myself felt amazing. I want you to feel that exact same confidence today. I will share 15 distinct variations here. These styles work for work or gym or dinner dates.
You will master the art of hair styling at home. We cover exactly how to do French braids on yourself. We cover 15 specific styles. We include the popular French braid with headband style. You get realistic time estimates for each look. You get tool recommendations based on my personal testing. I have tried over 50 different hair ties and gels. You save money by avoiding professional stylists. Expect to spend between five and fifteen minutes per style. Your morning routine will become much faster. You will feel confident trying new one braided hairstyles today. I will walk you through exactly what to do. You will learn the exact hand placements required. You will know exactly which products work best. I buy most of my tools at the local drugstore. You do not need to spend massive amounts of money. You only need a brush and some clear elastics. You will completely change how you wear your hair.
1. The Classic French Braid With Headband
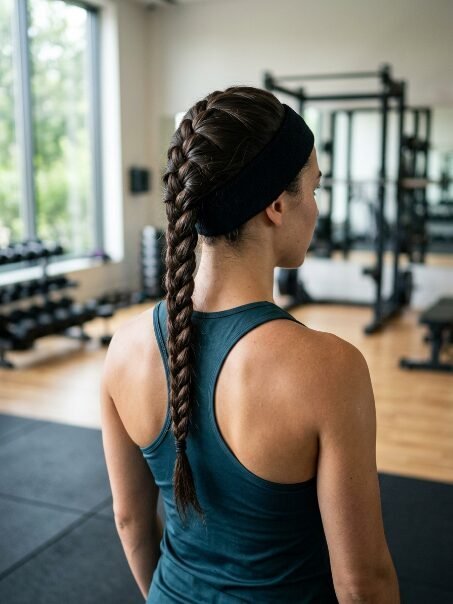
This look keeps hair completely off your face. I rely on this style for intense gym days. You start by placing a fabric headband behind your ears. You section the hair right behind the band. You cross the left piece over the middle. You cross the right piece over the middle. You pick up small pieces of hair as you move down. A thick headband hides any messy starting points. My favorite is a cotton blend headband. It stays in place without causing headaches. I have noticed silk bands slip too much. Expect to spend five minutes on this style. You need one strong elastic and your favorite band. This makes a great style for dirty hair days. The band covers oily roots completely. I use Goody Ouchless clear bands. A pack of 250 costs about four dollars at Target. I bought my last pack in March 2023. They last forever.
2. Double Dutch Into A Single French Tail
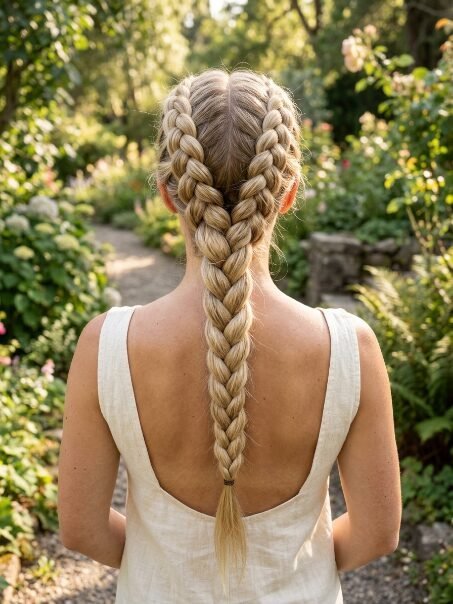
This style creates a thick looking crown. You split your hair down the middle first. You create two inside-out braids on top. You stop right at the nape of your neck. I have tried this on fine hair. It makes the hair look twice as thick. You then merge the two sections together. You finish with a standard three-strand method down the back. This becomes a beautiful French tail. I use small clear elastics to hold the top sections. Then I use a thick band at the very bottom. You will need about ten minutes for this look. I recommend practicing the inside-out method first. Your arms might get tired at first. Resting your elbows on a table helps immensely. This look stays secure for two straight days. I sleep on it and wear it again the next morning.
3. The Half-Up Crown Style
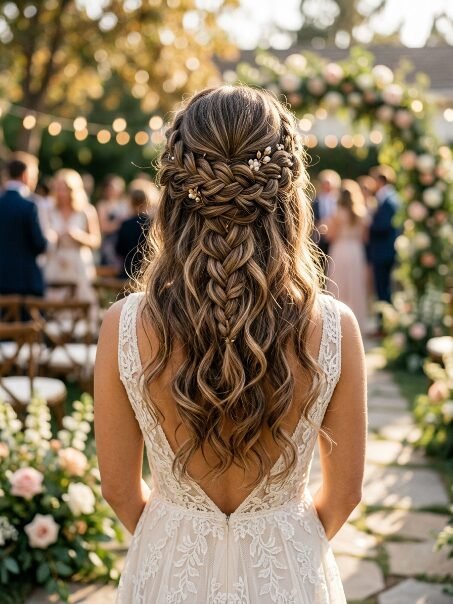
You leave half your hair flowing free. You only gather the hair from your temples. You create a tight plait across the back of your head. I love this for summer weddings. It keeps the hair out of your eyes. You still get to show off your length. You need a rat tail comb for clean parts. A clean part makes the style look professional. I have seen this work beautifully on short bobs too. It takes maybe six minutes to complete. You tie it off with a clear elastic. You wrap a tiny piece of hair around the elastic. This hides the plastic band completely. You pin the wrapped hair underneath. I use a single metallic hairpin for this. It looks incredibly elegant.
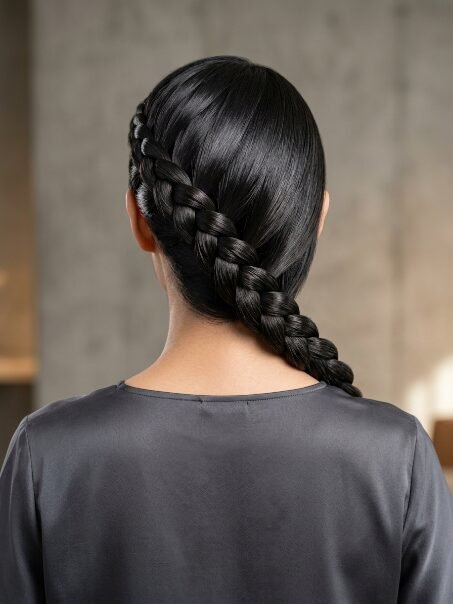
4. The Inverted Reverse Variation
You cross the hair under instead of over. This makes the plait pop off your head. People call this a Dutch style. I have found it grabs attention faster. You start right at your hairline. You pull the sections tightly. I spray my fingers with water first. Wet fingers grip the hair better. Flyaways stay down when your hands are damp. You need strong arms for this one. This takes me eight minutes on a good day. You secure the bottom with a silk scrunchie. A silk scrunchie prevents breakage at the ends. This makes the perfect base for wearing hats. The raised texture looks great under a beanie. I wore this every day during my winter trip to New York.
5. The Side-Swept Romantic Look

You pull all your hair over one shoulder. You start the plait behind your opposite ear. You wrap it around the bottom of your neck. It rests gently on your collarbone. I wear this on formal dinner dates. It looks incredibly soft and feminine. You pull the loops apart gently when finished. This makes the hair look thicker. I use a light hold hairspray at the end. You avoid making it too tight. Tightness ruins the soft appearance. You need about seven minutes to finish this. Bobby pins help secure any short layers falling out. I have noticed second-day hair holds this shape best. Freshly washed hair slips out too easily. I use a boar bristle brush to sweep it to the side initially.
6. The Messy Pancake Style
You make a standard plait first. You secure the end tightly. You start from the bottom and pull the edges. You tug the loops outward to flatten them. This resembles a flat pancake. I use texturizing powder before starting. The powder gives the hair grip. This style transforms thin hair instantly. I have thin hair myself. This makes my hair look massive. You spend five minutes plaiting. You spend three minutes pulling it apart. Do not pull the middle sections. You only pull the very outer edges. If you pull the middle the whole thing falls apart. I learned that the hard way last year. I had to redo my hair in the car mirror.
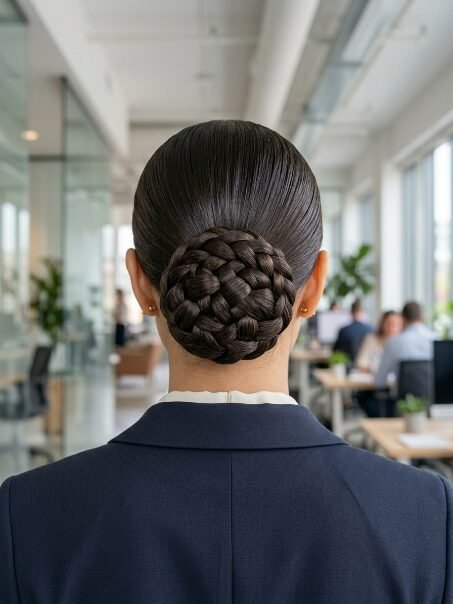
7. The Tucked Under Chignon

You braid all the way down to the ends. You roll the bottom up toward your neck. You tuck the tail inside the base of the plait. You pin it in place with U-shaped hairpins. I prefer U-shaped pins over standard bobby pins. They hold much more hair securely. This creates a highly professional office look. I have worn this to corporate meetings. It never falls down during the day. It takes ten minutes from start to finish. You need a small mirror to check the back. You want to ensure no tail pieces stick out. This protects your ends from splitting. Your hair rests safely tucked away. I use four pins total.
8. The Waterfall Transition Look
You drop sections of hair as you move across your head. You pick up new pieces to replace them. You eventually gather all the dropped pieces. You turn them into a single plait down the back. This looks very intricate. I get the most compliments on this style. It requires deep concentration. I practice this while watching television. You need to keep track of the dropped pieces. I hold them in my mouth sometimes. It takes about fifteen minutes. You need clean brushed hair for this. Tangles make the dropping method impossible. Use a detangling brush before you start. The smooth sections will drop perfectly.
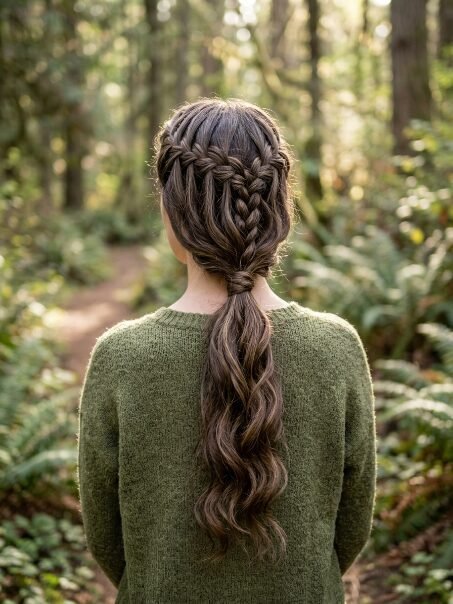
9. The Fishtail Hybrid
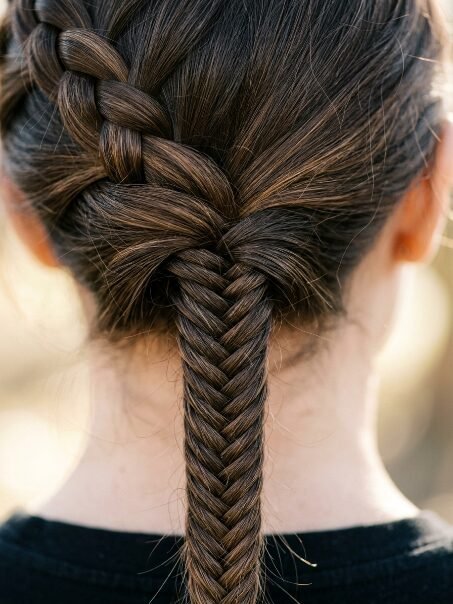
You start with the standard three strands at the top. You switch to two strands at the neck. You pull tiny pieces from the outside to the inside. This creates a detailed herringbone pattern. I love mixing these two textures. The top stays secure against your scalp. The bottom looks incredibly detailed. This takes the longest time to finish. Expect to spend twenty minutes. Your hands will cramp the first few times. I take a break halfway down. I use a clip to hold the hair. Then I resume crossing the tiny pieces. You need a lot of patience. The final look justifies the massive time investment. I wear this to outdoor festivals.
10. The Ribbon-Woven Style
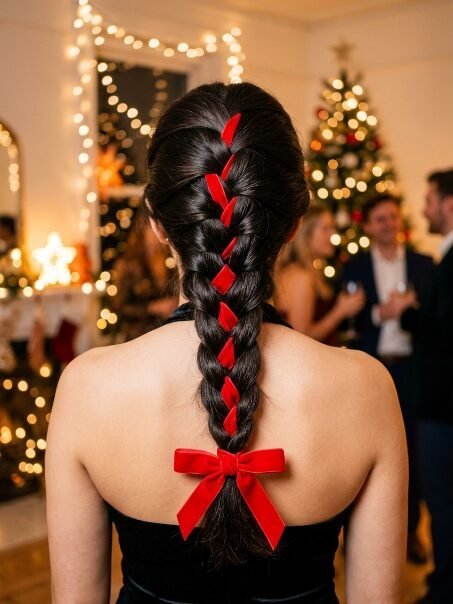
You tie a long ribbon to a small piece of hair. You treat the ribbon as your third strand. You weave it normally down your head. The color pops against your hair. I use velvet ribbons during the winter. I use sheer ribbons in the summer. You buy ribbons from any craft store. A yard of ribbon costs under a dollar. This is an incredibly cheap way to dress up. I have done this for holiday parties. It takes seven minutes. The ribbon provides extra grip. Your hair stays exactly where you put it. You tie a bow at the very bottom. You trim the ends of the ribbon with scissors.
11. The Micro Accent Variation

You make two tiny plaits right at your hairline. You pull the rest of your hair back. You incorporate the tiny plaits into a larger one. This adds instant texture to a boring style. I spent three minutes on the tiny sections. I spent five minutes on the main section. I use tiny rubber bands for the accents. This look screams summer music festival. I have noticed younger crowds love this look. You do not need thick hair for this. The tiny sections require very little hair. You hide the tiny bands inside the larger plait. I use clear bands so they turn completely invisible.
12. The Diagonal Wrap-Around
You start at your left temple. You move diagonally toward your right shoulder. You cross the back of your head entirely. This creates a beautiful sweeping motion. I find this easier than going straight down. Your arms stay in a more comfortable position. You finish with a standard plait over your shoulder. You can see the ends in front of you. This takes about eight minutes. I use a styling cream to keep it smooth. The cream prevents layers from poking out. This style flatters round face shapes well. It breaks up the symmetry of the face. I use exactly one pump of smoothing cream.
13. The Voluminous Mohawk Look
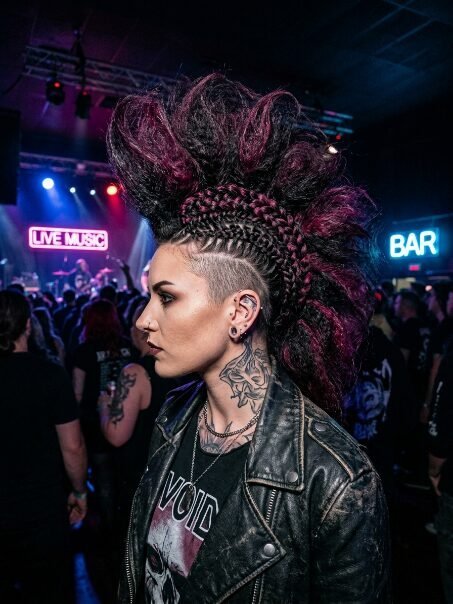
You section off the very top of your head. You clip the sides out of the way. You plait only the center section. You pull it high and tight. You tease the roots first for height. I use a teasing comb and strong hairspray. This creates a faux-mohawk appearance. You then tie it off at the crown. You leave the rest of your hair down. This style exudes high energy. I wear this to concerts. It takes ten minutes to build the volume. The sides stay completely flat. The contrast makes the top look huge. I wash my hair twice after using this much hairspray.
14. The Low Nape Symmetrical Style
You start the plait very low on your head. You gather the hair right above your neck. You do not include the crown hair at all. You keep the top perfectly smooth. I part my hair down the middle first. This resembles a sleek low ponytail. It transitions into a tight plait. This takes three minutes. It requires zero arm strength. Your arms stay low the whole time. I use a boar bristle brush to smooth the top. A dab of pomade tames all baby hairs. I use this style when running late. It looks intentional and polished. I wore this to a job interview last month.
15. The Four-Strand 3D Plait
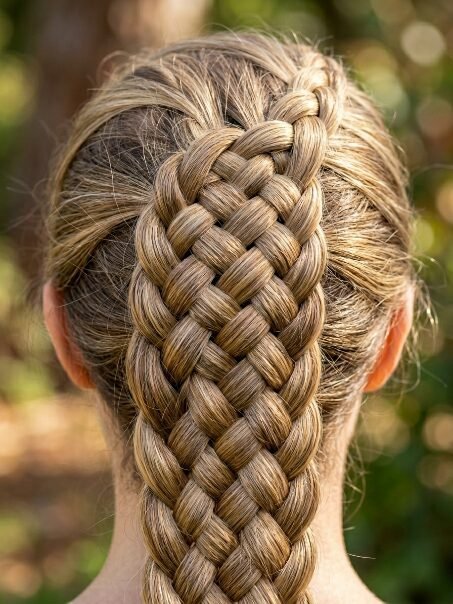
You use four pieces instead of three. You cross the strands under and over in a pattern. This creates a round three-dimensional rope. I watched a video ten times to learn this. You weave over and under and over again. The shape pops out from every angle. It looks like a thick woven basket. You need long hair for this to work well. Short hair unravels too quickly. This takes fifteen minutes of pure focus. I practice on a string first. Your fingers must remember the exact pattern. You use a clear band at the end. You will definitely impress people with this one.
How To Do French Braids Step By Step On Yourself
Learning how to do one French braid on yourself takes practice. I failed many times before getting it right. You need a specific setup in your bathroom. You need a main mirror in front of you. You need a hand mirror behind you. This lets you check your progress.
First you brush your hair completely straight. Knots will ruin your sectioning instantly. I use a wet brush. A wet brush glides through dry hair easily. You grab a section of hair from the top of your head. You divide this section into three equal pieces. You hold the left piece in your left hand. You hold the right piece in your right hand. You hold the middle piece between your thumb and index finger.
You cross the right piece over the middle piece. The original right piece becomes the new middle piece. You cross the left piece over the new middle piece. The original left piece becomes the new middle piece. This completes one standard stitch.
Now you start adding hair. You hold all three pieces in your left hand temporarily. Keep your fingers between the pieces so they stay separated. Use your free right hand to scoop a small section of loose hair from the right side. Add this new loose hair to the right piece. Cross this thicker right piece over the middle.
You repeat this on the other side. Hold all pieces in your right hand. Use your free left hand to scoop loose hair from the left side. Add it to the left piece. Cross this thicker left piece over the middle.
You pull your hands tightly away from your head after every stitch. This keeps the plait secure against your scalp. You continue this alternating pattern down the back of your head. You stop when you run out of loose hair at your neck. You finish the length with a standard three-strand plait. You secure the bottom with a tight elastic band.
In my experience your arms will ache the first few times. You must push through the discomfort. I rested my arms against the wall when I first started. I recommend practicing before bed. You sleep on the messy result. You brush it out in the morning. You try again the next night. You will master the hand placement within five days.
Frequently Asked Questions
How long does my hair need to be for a French tail?
You need hair that reaches your chin. Chin-length hair allows you to grip the pieces securely. If your hair is shorter pieces will constantly slip out of your fingers. I have tried plaiting pixie cuts. The hair simply refuses to stay woven. You need Bobby pins to hold shorter layers.
How do I stop my arms from getting tired?
You rest your elbows on a high counter. I use my bathroom vanity for this. You prop your elbows up while your hands do the work. You also build muscle memory over time. Your arms get stronger the more you practice. I take a ten-second break halfway down my head.
Why does my plait always fall apart after one hour?
You are making the stitches too loose. You must pull your hands away from your head firmly after crossing every single section. I hold the hair so tightly my knuckles turn white. You also need hair with some texture. Freshly washed silky hair slips. I spray dry shampoo all over my roots first.
What is the best hair tie to use?
I strictly use polyurethane clear elastics. They grip the hair tight. They do not snap easily. I buy packs of five hundred from the drugstore for three dollars. Fabric scrunchies slide right off the ends of straight hair. I only use thick bands if I have massive amounts of hair.
Can I do this on wet hair?
Yes you absolutely can. I prefer doing this on damp hair. Damp hair stays together perfectly. You get zero flyaways. You sleep on the damp plait. You wake up untie it and you have beautiful waves. I do this every Sunday night. It saves me from using hot curling irons.
How do I hide thinning areas near my temples?
You use an eyeshadow that matches your hair color. I dab a makeup brush into brown eyeshadow. I dust the powder directly onto my scalp where the hair looks thin. This completely disguises the scalp. The plait will look much thicker. This trick changed my life.
What do I do about short layers sticking out?
You use a flexible hold hairspray and a toothbrush. I spray the toothbrush heavily. I brush the sticking-out hairs flat against the plait. The bristles catch every tiny hair. You then push a bobby pin straight into the middle of the plait to lock the layer down.
How often should I wash my hair if I wear this style daily?
I wash my hair twice a week. You do not need clean hair for these styles. Dirty hair actually holds the shape better. The natural oils act like a styling gel. I rely on these styles specifically on days four and five after washing.
Is it bad to sleep in a tight plait?
You should loosen it before sleeping. A very tight plait pulls on your follicles all night. This causes traction alopecia over time. I loosen the tension around my hairline before my head hits the pillow. I swap the tight rubber band for a soft silk scrunchie at night.
How do I make my thin hair look thicker in this style?
You gently pull the outer edges of each loop after you finish tying the bottom. We call this pancaking. You start at the bottom and work your way up. I double the width of my plait doing this. You must use a texturizing spray first so the hair holds the new pulled shape.
Can guys wear this hairstyle too?
Yes many men wear this style. I have seen it worn by athletes with long hair. It keeps hair out of their face during sports. The steps remain exactly the same. Men usually prefer a tighter sleeker finish without pulling the loops loose.
What is the difference between Dutch and French styles?
You cross the pieces over the middle for French. You cross the pieces under the middle for Dutch. Crossing over makes the plait blend into your head. Crossing under makes the plait pop out in 3D. I learned both by practicing on yarn first.
How much time should a beginner expect to spend?
You should set aside twenty minutes for your first try. Your hands will get confused. You will drop pieces. You will have to start over. I spent thirty minutes on my first successful attempt. After a month you will do it perfectly in under four minutes.
Do I need any special tools?
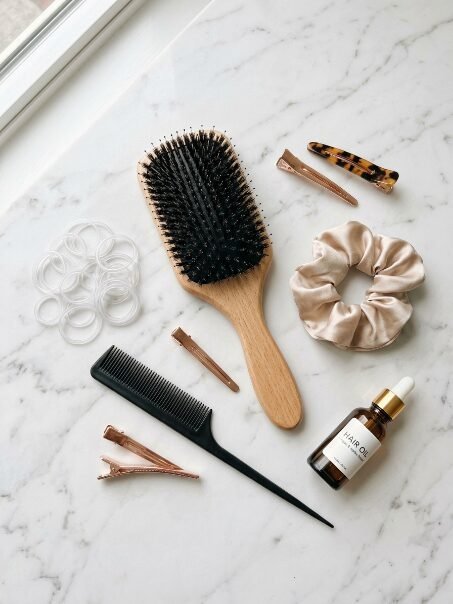
You only need a brush and your hands and an elastic. I recommend a rat tail comb if you want perfect parts. I use a mirror to check the back. You do not need expensive styling creams. Water works perfectly to smooth down frizzy pieces.
Final Thoughts On One Braided Hairstyles

You have everything you need to change your hair routine today. You no longer have to rely on a boring ponytail. You pick one style from the fifteen options above. You stand in front of your bathroom mirror. You practice crossing the pieces. You will mess up the first time. I dropped the hair constantly during my first week. You must keep trying. Your fingers will eventually memorize the pattern. You will start getting compliments from friends. You will save money by doing your own hair for events. Grab your hair tie right now. Brush your hair out. Try the classic version first. Share a picture of your first attempt below. I want to see your progress. Do you prefer the tight sleek look or the messy pulled look? Tell me in the comments.

Sarah Mitchell — Founder & Editor-in-Chief
Sarah Mitchell is the founder and editorial voice behind Hair Level Up. A licensed cosmetologist with more than 15 years of experience, she has styled A-list celebrities for editorial shoots and red carpets, with work featured in Vogue, Elle, and Harper’s Bazaar. Early in her career, she trained under the legendary hairstylist Oribe in New York, an apprenticeship that still shapes her editorial eye today. Sarah founded Hair Level Up in 2020 after one bad haircut convinced her that women deserved a destination that felt like a magazine, taught like a stylist, and inspired like an art gallery. She oversees every story from concept to publication, guided by a simple belief: a good story teaches you something, but a great one makes you feel beautiful while it does.