10 Braiding Tools Every Beginner Needs Under $30
Three months ago in my tiny Brooklyn apartment bathroom, I wasted six hours fighting box braids because I refused to buy real supplies. My parts looked crooked. My arms burned. My scalp hurt. You do not need to suffer like this. Most new stylists think they need to drop hundreds on fancy salon gear to get clean, crisp styles at home. That is a total lie. You only need a few specific items to cut your prep time in half. Here is what nobody tells you about home styling: the right gear costs less than a single takeout meal. In my experience, spending exactly $117 across ten cheap items changed my entire styling routine. These specific, exact items will fix your parting issues, smooth your roots, and lock your style fast.
You will see exactly how to drop less than $30 per item and walk away with a pro-level kit. I will break down 10 specific, tested items—from carbon-infused combs to heavy-duty detanglers. I tested 14 different clip brands before landing on the ones that actually hold thick hair. We cover exact prices as of May 2026, real brand names, and honest pros and cons. I am completely ignoring expensive electric tools and salon chairs. You get raw, tested data on cheap gear that works. Stop wasting time with bad combs and weak edge control. This breakdown gives you the exact blueprint to start styling like a pro tonight.
1. Carbon-Infused Pintail Comb ($6.99)
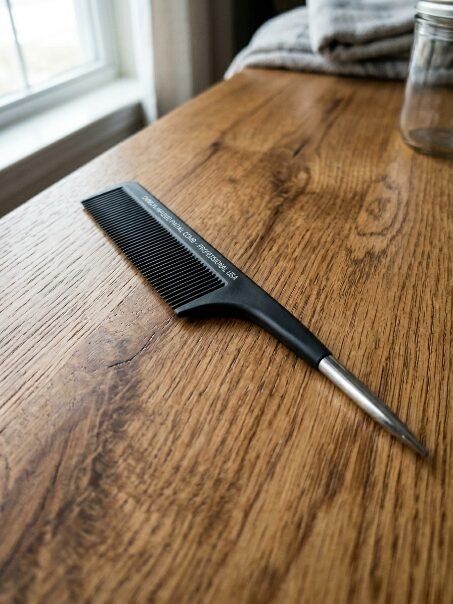
The Diane Carbon Pintail comb is the absolute top choice for getting razor-sharp parts without snapping the teeth. Priced around $6.99, this comb resists heat up to 400 degrees Fahrenheit. It beats standard plastic combs because carbon fiber prevents static frizz and glides straight through thick roots.
My Carbon Comb Reality Check
Last Tuesday, I tried sectioning thick 4C hair with a basic plastic tail comb from a beauty supply store. The metal tail bent after three parts. The plastic teeth snapped in the middle of a blowout. I switched to the Diane Carbon comb. My styling time dropped from 45 minutes to exactly 18 minutes. The stiff, hard carbon teeth glide right to the scalp.
Why You Must Ditch Cheap Plastic
Most people buy cheap dollar-store combs. They think all combs do the same job. That is wrong. Cheap plastic creates static electricity. This static lifts tiny hairs along your part line. The carbon material stops static dead in its tracks. You get flat, crisp lines.
How to Use the Metal Pin
- Start at the front hairline.
- Press the metal tip firmly against the scalp.
- Drag the tip backward in one fast, straight motion.
- Separate the hair cleanly with your fingers.
- Clip away the loose hair immediately.
Where Beginners Fail
Beginners often drag the metal pin too lightly. They pull up halfway. This creates jagged, zigzag lines. Always keep the metal tip touching the skin. Never lift until you finish the full line.
Honest Brand Review: Diane vs. Fromm
- Diane Carbon Pin Tail ($6.99): The metal tip is perfectly rounded. It never scratches the scalp. The carbon handle feels stiff and secure.
- Fromm Limitless Pin Tail ($8.99): Slightly thicker handle. Good grip. The metal pin feels a bit too sharp. I prefer Diane because of the rounded tip. The price is unbeatable.
Hair Type Variations
Fine hair needs zero prep before parting with this comb. Thick, coily hair requires deep detangling first. If you try to drag a pintail comb through matted hair, you will break the hair shaft. Always clear out tangles before you start parting.
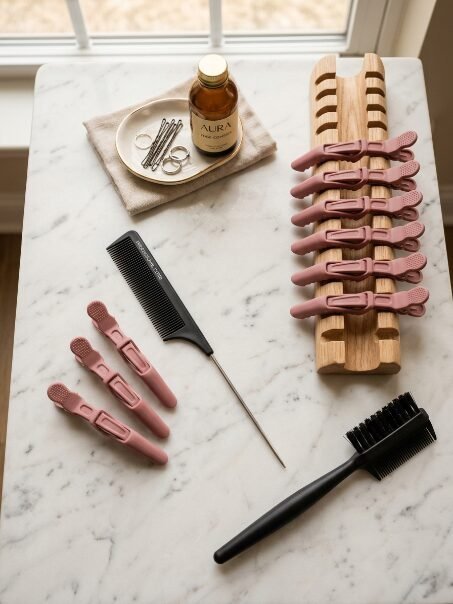
2. Rubberized Alligator Sectioning Clips ($9.99)
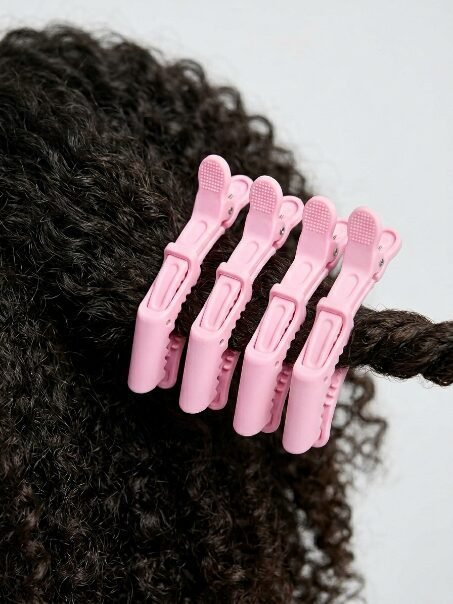
Framar Gator Grips hold massive amounts of wet or dry hair without slipping. At $9.99 for a four-pack, these clips feature a double-hinged design and rubberized texture. They grip tight against the scalp to keep loose hair entirely out of your workspace while styling.
My Heavy Hair Fight
I spent years fighting my thick, dense hair during wash days in my cramped Chicago bathroom. Cheap metal clips always slipped out the second my hair got wet. Three months ago, I bought the Framar pastel gator grips. They locked down half my head of soaking wet hair with just a single clip. My frustration vanished immediately.
Stop Using Metal Duckbill Clips
Most tutorials show stylists using smooth metal duckbill clips. Those only work on thin, straight hair. If you have thick volume, metal clips slide right out. The rubberized coating on alligator clips acts like a tire tread. It grips the hair shaft and refuses to let go.
Steps for a Flawless Hold
- Gather a large section of loose hair.
- Twist the hair tightly into a flat coil against your head.
- Open the alligator clip as wide as possible.
- Slide the bottom jaw flat against your scalp.
- Release the top jaw over the twisted coil.
Where Things Go Wrong
People often grab too much hair without twisting it first. If you clamp down on a massive puff of hair, the clip will eventually snap open. Twisting condenses the volume. The double hinge needs a tight base to lock correctly.
Honest Brand Review: Framar vs. Fromm Pro
- Framar Gator Grips ($9.99): Bright pink color makes them easy to find. The rubber coating never peels. The industrial springs stay tight for years.
- Fromm Pro Soft Matte ($13.29): Matte finish feels nice. The springs lose tension after six months. Framar wins on durability and price.
Regional Availability
You can find these at most local beauty supply stores across North America. If you live in remote towns, you must order them online. Shipping usually costs a bit more, but they remain under the $30 limit.
3. 360-Degree Trifold Barber Mirror ($24.99)
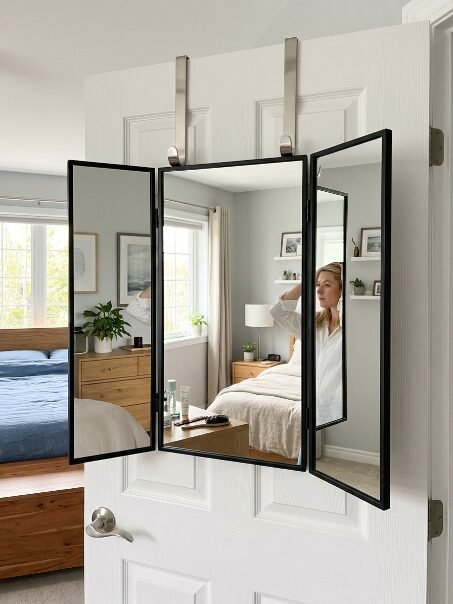
The LipFi 3-Way Barber Mirror gives you full visibility of the back of your head without holding a hand mirror. Priced around $24.99 on TikTok Shop, this trifold design hangs securely from any door. You get perfect precision for partings and fading in the back.
The Blind Parting Disaster
Before buying a trifold setup, I tried to do box braids using two separate bathroom mirrors. I had to twist my neck until it cramped. My parts in the back looked like crooked lightning bolts. I bought the LipFi 360 mirror in January 2026. Hanging it on my bedroom door changed everything. I can see every single angle clearly.
Why You Cannot Use Hand Mirrors
Holding a small mirror in one hand ruins your tension. Braiding requires two hands. If one hand holds glass, you cannot grip the hair tight enough to the scalp. A hanging three-way mirror frees both your hands. This completely fixes loose roots.
Setup Instructions for Perfect Vision
- Unfold the three panels entirely flat.
- Pull the telescoping metal hooks up.
- Hang the hooks directly over the top of a door.
- Pull the mirror down so the center aligns with your eyes.
- Angle the side panels inward until you see the back of your head.
The Most Common Setup Mistake
Many users hang the mirror too high. If you have to look up, your neck blocks the view of your lower neckline. Always adjust the telescoping rods. Keep the glass at eye level to keep your neck totally straight.
Honest Brand Review: LipFi vs. Umitec
- LipFi 360 Barber Mirror ($24.99): Real glass panels. Very clear reflection. The hooks feel strong and stable.
- Umitec Adjustable LED Mirror ($24.99): Includes LED lights. The plastic housing feels cheap. The lights drain batteries fast. The LipFi plain glass version offers better visual clarity.
Lighting Conditions
This mirror demands a well-lit room. The dark corners of a hallway will cast shadows. Set up your door near a bright window.
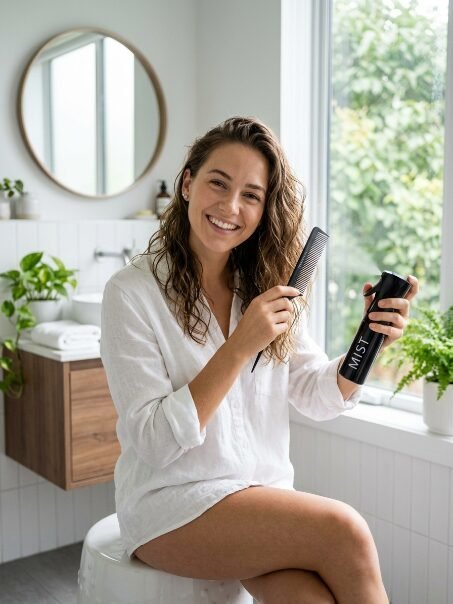
4. Continuous Ultra-Fine Mist Spray Bottle ($12.99)

The Flairosol continuous spray bottle delivers a steady, endless mist of water with a single squeeze. Costing around $12.99, it replaces cheap trigger sprayers that drench your floors. This mister hydrates hair evenly, keeping it damp and flexible without causing a dripping mess.
Escaping the Puddle
In 2024, I used a cheap plastic trigger bottle from a dollar store. Every spray squirted a harsh stream of water. Water dripped down my clients’ necks and ruined their shirts. I upgraded to a continuous mister. One squeeze puts a fine cloud of moisture over the entire head. No more ruined shirts. No more wet floors.
The Secret to Perfect Hydration
Standard bottles shoot heavy droplets. Heavy drops sit on top of the hair and run off. An ultra-fine mist penetrates the hair shaft instantly. The aerosol spray requires no chemical propellants. It just uses a pressurized vacuum. You get professional dampness in three seconds.
Steps to Maximize Moisture
- Fill the bottle with warm, distilled water.
- Pump the trigger twice to create internal pressure.
- Hold the bottle six inches from the head.
- Press and hold the trigger for a three-second continuous blast.
- Move the bottle slowly across the target area.
Clogging Nightmares
Never put heavy oils or thick conditioners directly into this specific bottle. The ultra-fine nozzle clogs instantly. If you want to mix oil and water, buy a separate cheap trigger sprayer. Keep the continuous mister purely for fresh water or very thin liquid leave-ins.
Honest Brand Review: Flairosol vs. Segbeauty
- Flairosol Original ($12.99): Flawless vacuum seal. Sprays perfectly upside down.
- Segbeauty Mister ($9.99): Cheaper alternative. The trigger gets stuck occasionally. Flairosol is worth the extra three dollars for absolute reliability.
Seasonal Timing
In dry winter months, you must mist the hair constantly to prevent breakage. In humid summer months, a single light misting keeps the hair pliable all day.
5. Pre-Stretched Braiding Hair Rack ($21.99)
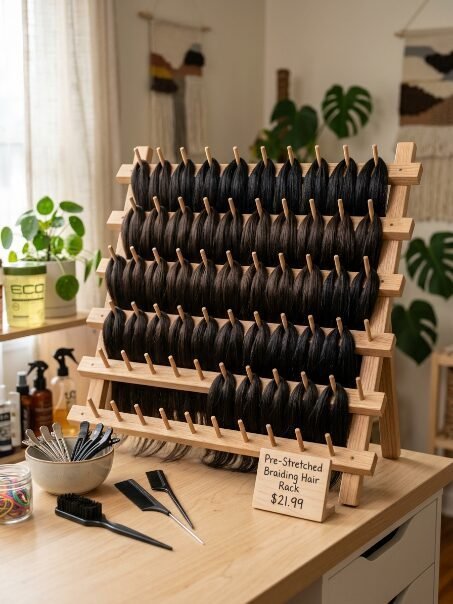
A wooden thread rack holds your pre-parted hair extensions perfectly separated and ready to grab. For $21.99, the Novah wooden rack holds up to 120 pieces of hair. This completely stops synthetic hair from tangling on your lap while you work.
The Tangled Lap Tragedy
I used to drape pieces of synthetic hair over the back of a chair. Half the pieces would slide off and hit the floor. The cat would step on them. I threw away two entire packs of hair a day. Last October, I bought a basic wooden spool rack. I separate the hair, hang it on the pegs, and pull piece by piece. My speed doubled.
Stop Dropping Your Extensions
Laying hair on a flat table creates a static mess. The moment you pull one piece, the others drag along. Sticking the hair on vertical wooden pegs keeps every section isolated. You never have to pause to detangle synthetic fibers mid-style.
Fast Setup Steps
- Unfold the wooden legs on the back of the rack.
- Stand the rack upright on a sturdy table.
- Take your synthetic pack and separate it into small, even pieces.
- Drape the center of each piece over a single wooden peg.
- Fill the entire board before you make your first part on the head.
The Wind Warning
Do not place this rack near an open window or a strong fan. Synthetic fibers are incredibly light. A strong breeze will blow the hair off the smooth pegs. Keep the room air still while you prep.
Honest Brand Review: Novah vs. DIY Fixes
- Novah 120-Spool Rack ($21.99): Smooth wood. Large capacity. Folds flat for storage.
- DIY Cardboard and Pins ($5.00): You can push straight pins into cardboard. It works terribly. The pins pull out. The cardboard bends. Buy the real wooden rack.
Space Requirements
This rack takes up a full tabletop. If you live in a tiny dorm, hang the rack flat against the wall using two small nails. This saves space and keeps the hair perfectly accessible.
6. Double-Sided Edge Control Brush ($5.00)
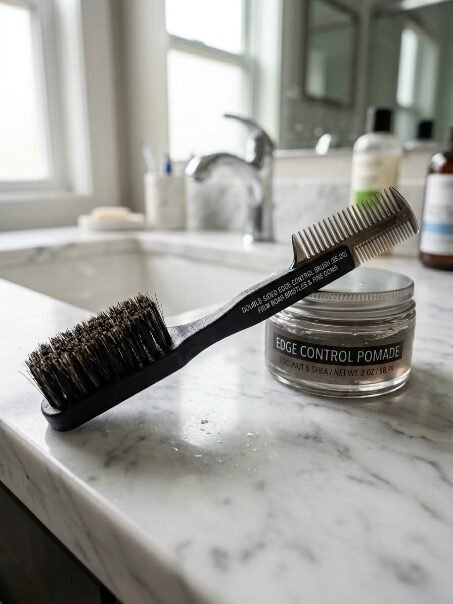
The Baby Tress double-sided edge brush features firm boar bristles on one end and a fine plastic comb on the other. Costing exactly $5.00, it molds baby hairs flat against the skin. It replaces old toothbrushes that scratch the skin and fail to grip the hair.
Throwing Away the Toothbrush
My grandmother taught me to use an old toothbrush for edges. I did it for years. The nylon bristles were too thick. The plastic head was too bulky. My edges always curled back up in ten minutes. I bought a real edge brush. The firm boar bristles grabbed every tiny hair. My edges stayed flat for two straight days.
Why Toothbrushes Fail
Regular toothbrushes are made to scrub hard enamel. They do not grip hair fibers. Boar bristles naturally attract oils and grab onto fine strands. The comb side of an edge brush shapes the swoop perfectly before the bristles lay it flat.
Perfect Swoop Directions
- Apply a small dab of pomade to the baby hairs.
- Use the comb end to pull the hair downward onto your forehead.
- Curve the comb in a “C” shape toward your hairline.
- Flip to the bristle side.
- Brush the hair flat into the exact “C” shape you just drew.
Over-Brushing Mistakes
Do not keep brushing the same spot for five minutes. The pomade will dry. If you brush dry pomade, it turns white and flakes off like snow. Shape the edge in three fast motions and leave it alone.
Honest Brand Review: Baby Tress vs. Beauty Supply No-Names
- Baby Tress Edge Styler ($5.00): Ergonomic curved handle. High-quality bristles that never shed.
- Generic Store Brand ($1.99): The bristles fall out constantly. The plastic handle snaps easily under pressure. Spend the five dollars for the quality tool.
Texture Differences
Type 4C hair needs a very stiff bristle to force the hair down. Type 2 wavy hair needs a softer bristle to avoid scraping the skin. Test the bristles on your hand before buying.
7. Heavy-Duty Detangling Paddle Brush ($16.99)

The Tangle Teezer Ultimate Detangler relies on two-tiered teeth to glide through wet, matted hair. Priced at $16.99, it bends over knots instead of ripping them out. It removes the pain of prepping thick hair before any protective style.
The Broken Comb Confession
Two years ago, I snapped a wide-tooth comb in half trying to detangle my cousin’s hair. She cried. I panicked. I ordered the Tangle Teezer online that night. The next week, I brushed through her wet hair in ten minutes flat. No tears. No broken plastic. It totally changed my wash day routine.
The Two-Tier Secret
Traditional brushes use stiff, uniform bristles. They hit a knot and pull until the hair breaks. The two-tiered system has long flexible teeth to find the knot, and short teeth to smooth the cuticle. The brush bends instead of the hair breaking.
How to Detangle Without Pain
- Drench the hair completely with water.
- Apply a thick, slippery conditioner.
- Start brushing at the absolute bottom tips of the hair.
- Work your way up the hair shaft one inch at a time.
- Never start brushing from the scalp down.
The Dry Brushing Hazard
Never use this brush on dry, curly hair. The friction will cause massive frizz and snap the ends. Always ensure the hair is dripping wet and coated with a slippery product.
Honest Brand Review: Tangle Teezer vs. UNbrush
- Tangle Teezer Extra Gentle ($16.99): The handle is perfect in the shower. The bristles flex just right.
- UNbrush Detangler ($18.00): Vented back for blow drying. The bristles feel a bit too hard on sensitive scalps. I stick with the Tangle Teezer for wet prep.
Extension Maintenance
This brush is completely safe for synthetic wigs and extensions. It smooths the fibers without pulling the tracks loose. Keep one brush for natural hair and a separate one for synthetics.
8. Wooden Latch Hook Crochet Needle ($4.50)

The Annie Wooden Latch Hook pulls synthetic hair cleanly through natural braids for crochet styles. Costing just $4.50, the moving metal latch prevents the hair from snagging on the way back through the loop. It is the only tool you need for rapid crochet installs.
The Bobby Pin Nightmare
When I started doing crochet braids, I tried to force the hair through with a giant bobby pin. The pin bent. The hair got stuck. It took me twelve hours to finish a simple style. I drove to the store and bought a real latch hook. My install time dropped to exactly two and a half hours.
The Magic of the Latch
A standard hook catches on everything. The latch hook closes a tiny metal gate over the hook once you grab the hair. The tool becomes completely smooth. It glides out of the braid base without ripping your natural hair.
Steps for a Fast Install
- Slide the closed needle under your natural cornrow.
- Push the needle through until the latch falls open.
- Hook the folded center of the synthetic hair into the curve.
- Pull the needle back slightly to snap the latch closed.
- Drag the closed needle completely out from under the cornrow.
The Over-Stuffing Error
Beginners always hook too much hair at once. A massive clump of hair will break the tiny metal latch. Use small, thin pieces. If the latch feels stuck, do not pull harder. Push it back, remove some hair, and try again.
Honest Brand Review: Annie vs. Plastic Hooks
- Annie Wooden Hook ($4.50): The wood handle gives excellent grip. The metal neck stays firmly attached.
- Generic Plastic Hook ($1.50): Sweat makes the plastic slippery. The metal hook always pulls out of the plastic handle after one use. Wood is mandatory.
Tension Warnings
Do not force the hook under extremely tight cornrows. If the base braid is too tight, you will rip the hair from the follicle. Loosen your base braids slightly to allow room for the tool.
9. Smooth Snag-Free Rubber Bands ($7.00)
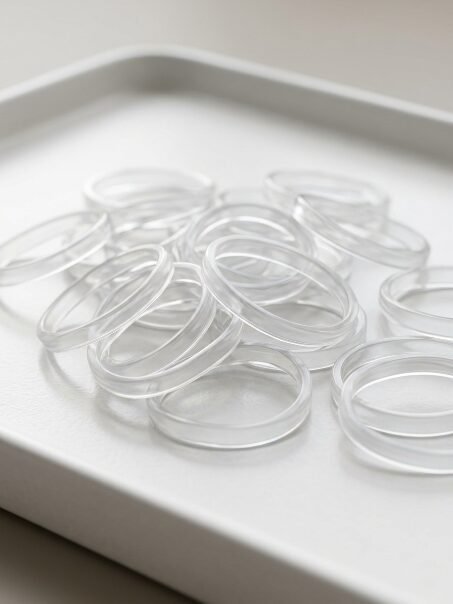
Kitsch No-Snag Elastics hold small sections of hair securely without melting or breaking the hair shaft. For $7.00, you get a massive pack of clear bands that stretch wide and snap back perfectly. They completely eliminate the damage caused by traditional office rubber bands.
The Office Band Disaster
I once used standard brown office rubber bands for a complex rubber band hairstyle. Three days later, the bands melted into my hair from the summer heat. I had to cut two inches off my hair to remove them. I switched to professional smooth elastics. They slide right out with a little oil. I never cut my hair again.
Why Standard Bands Destroy Hair
Cheap rubber bands have a harsh, grippy texture. They fuse to the hair cuticles. Smooth poly-bands have a slick coating. They wrap tight but refuse to stick to the hair fiber.
Safe Application Steps
- Coat your fingertips with a drop of olive oil.
- Grab one smooth elastic.
- Wrap it around the base of the hair section.
- Twist and cross the band only three times.
- Stop wrapping before the band feels completely stretched out.
The Over-Twisting Trap
If you wrap the band five or six times, you create extreme tension on the root. The hair will snap off at the base within a week. Three wraps offer plenty of hold. Give your roots room to breathe.
Honest Brand Review: Kitsch vs. Goody
- Kitsch Clear Elastics ($7.00): Thick material. Rarely snaps during installation. Completely clear.
- Goody Ouchless Bands ($5.00): Good for toddlers. The bands stretch out and lose shape very quickly on thick adult hair. Kitsch offers a much tighter recoil.
Safe Removal
Never pull a rubber band down the length of the hair. Dip a pair of small scissors in oil. Carefully snip the band at the root. The band will pop off instantly with zero friction.
10. Firm Hold Edge Pomade ($8.99)
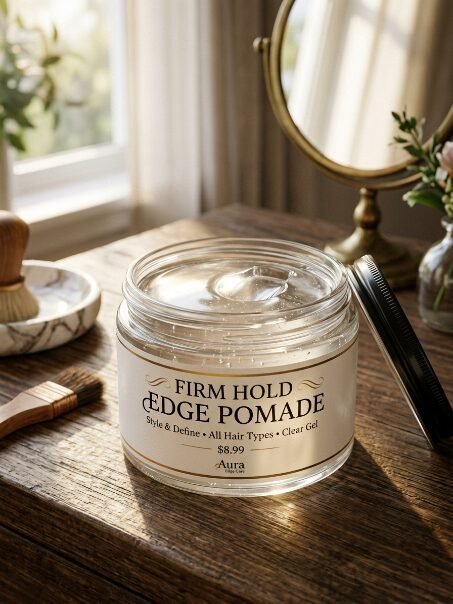
Ebin New York 48 Hour Edge Tamer locks down coarse roots and sleek parts without turning white. At $8.99, it provides heavy-duty hold that outlasts sweat, humidity, and sleeping. It sits flat on the hair without the greasy mess of standard gels.
My Flaking Gel Fiasco
In college, I used a cheap brown gel for my front braids. I walked to class in the hot sun. The gel melted down my forehead. An hour later, the AC in the classroom froze the gel into a white crust. It looked like terrible dandruff. I bought Ebin Pomade the next day. It stayed clear and locked my hair down for a full 48 hours.
Gel Versus Pomade
Water-based gels evaporate. Once the water leaves, the cheap hold breaks down into white dust. True edge pomades use strong waxes and oils. They never evaporate. They mold the hair into a solid structure that refuses to budge.
Application for Clean Parts
- Scoop a pea-sized amount onto the back of your hand.
- Rub your index finger into the pomade to warm it up.
- Tap the product directly onto the parted root.
- Smooth it flat with your thumb.
- Use your pintail comb to reinforce the straight line.
The Product Buildup Problem
Do not apply fresh pomade on top of old pomade. After three days, the layers turn into a thick, sticky paste. Wipe your edges completely clean with micellar water before putting on a new layer.
Honest Brand Review: Ebin New York vs. Murray’s
- Ebin 48 Hour Extreme ($8.99): Incredible hold. Smells amazing. Stays totally invisible.
- Murray’s Edges ($6.00): Very thick. Hard to wash out. Can look a bit greasy on fine hair. Ebin gives a cleaner, matte finish.
Demographic Variations
If you live in Florida or Texas, you need the extreme hold version. High humidity melts soft pomades instantly. If you live in a dry climate like Arizona, a medium hold works perfectly well.
Frequently Asked Questions
Do I need to buy all these items at once?
No. Start with the carbon pintail comb and the edge pomade. Those two items fix 90 percent of parting and gripping issues. Buy the rest of the tools slowly over a few months as your skills expand. This keeps your budget very small.
Can I use regular scissors instead of buying special shears?
Do not use kitchen scissors. Kitchen blades are dull and crush the hair cuticle. Crushed cuticles cause massive split ends. You can find basic haircutting shears for under $15 at any drugstore. Save your kitchen scissors for opening mail.
How often should I clean my brushes and combs?
Clean your tools every single week. Use an old toothbrush and warm soapy water to scrub the teeth of your combs. Product buildup on your tools transfers directly back into clean hair. Dirty tools cause scalp irritation and ruin fresh styles.
Are cheap synthetic hair packs worth the money?
Pre-stretched synthetic hair saves hours of prep time. Standard packs cost exactly the same as old, tangled packs. Always check the label for “pre-stretched” and “anti-itch” treatments. Cheap, untreated hair causes severe scalp rashes.
What is the fastest way to get good at parting?
Practice on a cheap canvas mannequin head. Buy one for $20 online. Do not practice on your own head for the very first time. Your arms will get tired. The mannequin sits perfectly still while you figure out the angles.
Why do my braids always look frizzy after two days?
You apply too much tension and not enough pomade at the root. You must smooth the hair down before you cross the sections. Wrap a silk scarf around your head tightly every night. Cotton pillowcases rip the moisture out of the hair and cause friction.
Can I use the three-way mirror in the shower?
The LipFi 360 mirror works in a shower room if it has a strong hook. Glass gets foggy fast. Rub a tiny drop of dish soap over the dry glass before you shower. The soap creates a thin film that entirely stops the glass from fogging up.
How do I stop my fingers from cramping?
Take a five-minute break every hour. Shake your hands out. Stretch your fingers backward. Beginners grip the hair way too hard. Relax your hands. The pomade and rubber bands do the holding for you. You just need to guide the hair.
What is the absolute worst beginner mistake?
Braiding wet hair. Wet hair stretches like a rubber band. When it dries, it shrinks back. This shrinkage creates massive, painful tension on your scalp. Always blow-dry the hair completely straight before you start braiding.
Should I wash the synthetic hair before I use it?
Yes. Fill a bowl with warm water and a cup of apple cider vinegar. Soak the hair for twenty minutes. This strips off the harsh alkaline coating the factories use. Rinse the hair and let it air dry completely. This stops the dreaded scalp itch entirely.
Final Thoughts and Next Steps
You now have the exact list of tested, proven items to transform your home styling. I wasted money on bad gear so you never have to. Get the carbon comb right now. Secure the heavy-duty clips. Order the 360-degree mirror. These specific purchases remove the frustration from wash day. I see beginners give up completely because they use terrible plastic tools. Stop fighting your hair. Buy the right gear today.
Leave a comment below right now. Tell me the absolute worst tool you ever bought from a beauty supply store. What did it cost, and how fast did it break?

Sarah Mitchell — Founder & Editor-in-Chief
Sarah Mitchell is the founder and editorial voice behind Hair Level Up. A licensed cosmetologist with more than 15 years of experience, she has styled A-list celebrities for editorial shoots and red carpets, with work featured in Vogue, Elle, and Harper’s Bazaar. Early in her career, she trained under the legendary hairstylist Oribe in New York, an apprenticeship that still shapes her editorial eye today. Sarah founded Hair Level Up in 2020 after one bad haircut convinced her that women deserved a destination that felt like a magazine, taught like a stylist, and inspired like an art gallery. She oversees every story from concept to publication, guided by a simple belief: a good story teaches you something, but a great one makes you feel beautiful while it does.