22 Cute 5-Minute Hairstyles for School Drop-Off Mornings
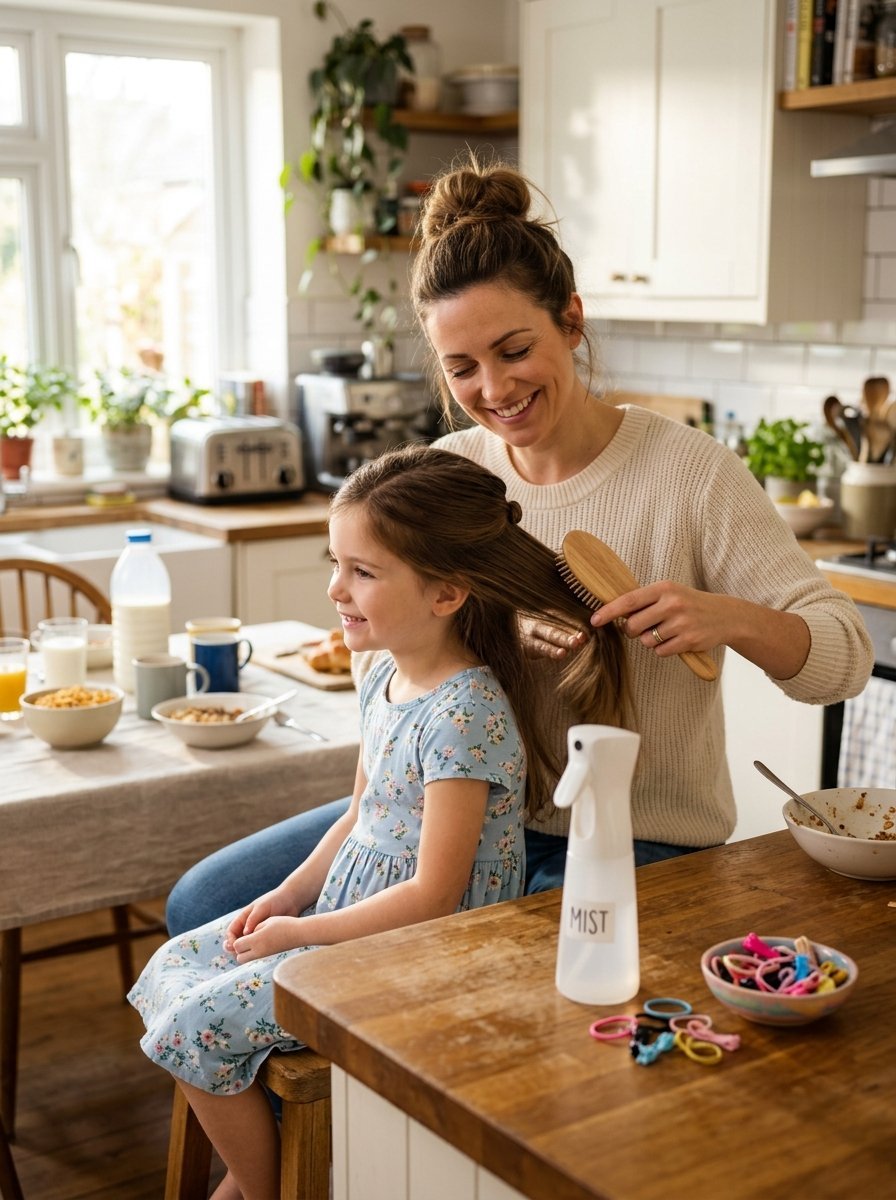
Mornings in a busy house are chaotic. The alarm goes off, shoes vanish, breakfast burns, and the clock moves twice as fast. Getting your kids out the door on time is a victory. Finding time to style your child’s hair feels impossible. Most days, you reach for a basic elastic and pull it back. It is functional, but it gets boring. You want something that looks intentional, stays secure on the playground, and takes less than five minutes.
I used to struggle with the school rush every single day. My oldest daughter has long hair that tangles overnight. We spent months crying over hairbrushes at 7:45 AM. I was tired of the stress. I decided to find a better way. I spent three months testing different routines, products, and shortcuts. I timed every look on a digital stopwatch. If a style took more than five minutes, I threw it out. If it fell apart during recess, I removed it from the list.
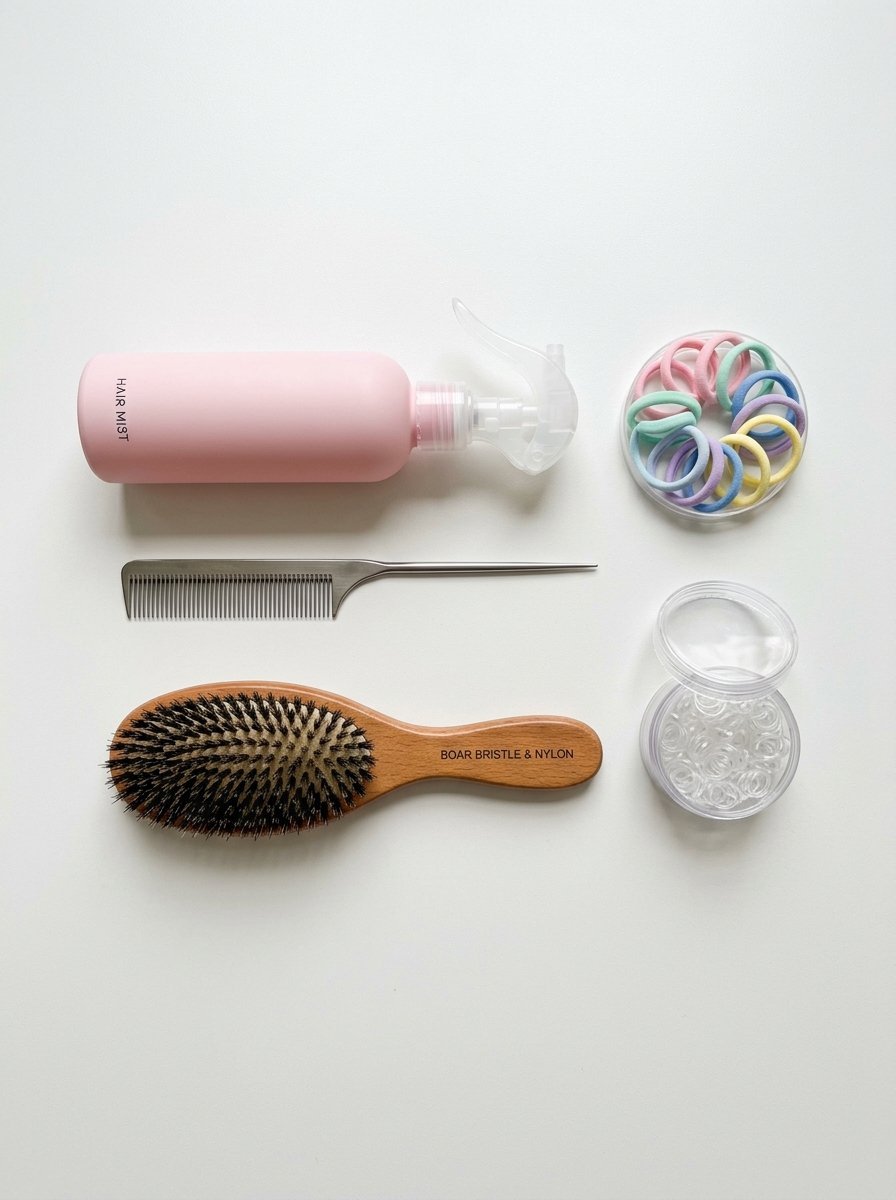
The result is this collection of twenty-two fast, durable styles. These looks work for busy parents who need speed and reliability. They require minimal tools. You will only need basic elastics, a sturdy comb, and a water spray bottle. Your child gets a look they love. You get your mornings back. Here is your complete guide to surviving the morning school run with style.
Executive Summary
Busy mornings require speed, simplicity, and durability. This guide delivers twenty-two practical hairstyles designed for the school run. Each style takes under five minutes. They use basic tools like hair elastics, bobby pins, and water spray bottles. These looks are tested on real kids to ensure they survive recess, gym class, and lunch.
You will learn how to master classic looks with modern twists. The guide covers everything from secure double braids to messy buns. You will find step-by-step instructions for every hair type. The article also provides a list of essential tools, a comprehensive troubleshooting guide, and a detailed comparison table. These styles eliminate morning stress and keep your child looking neat all day.
1. Classic French Braid
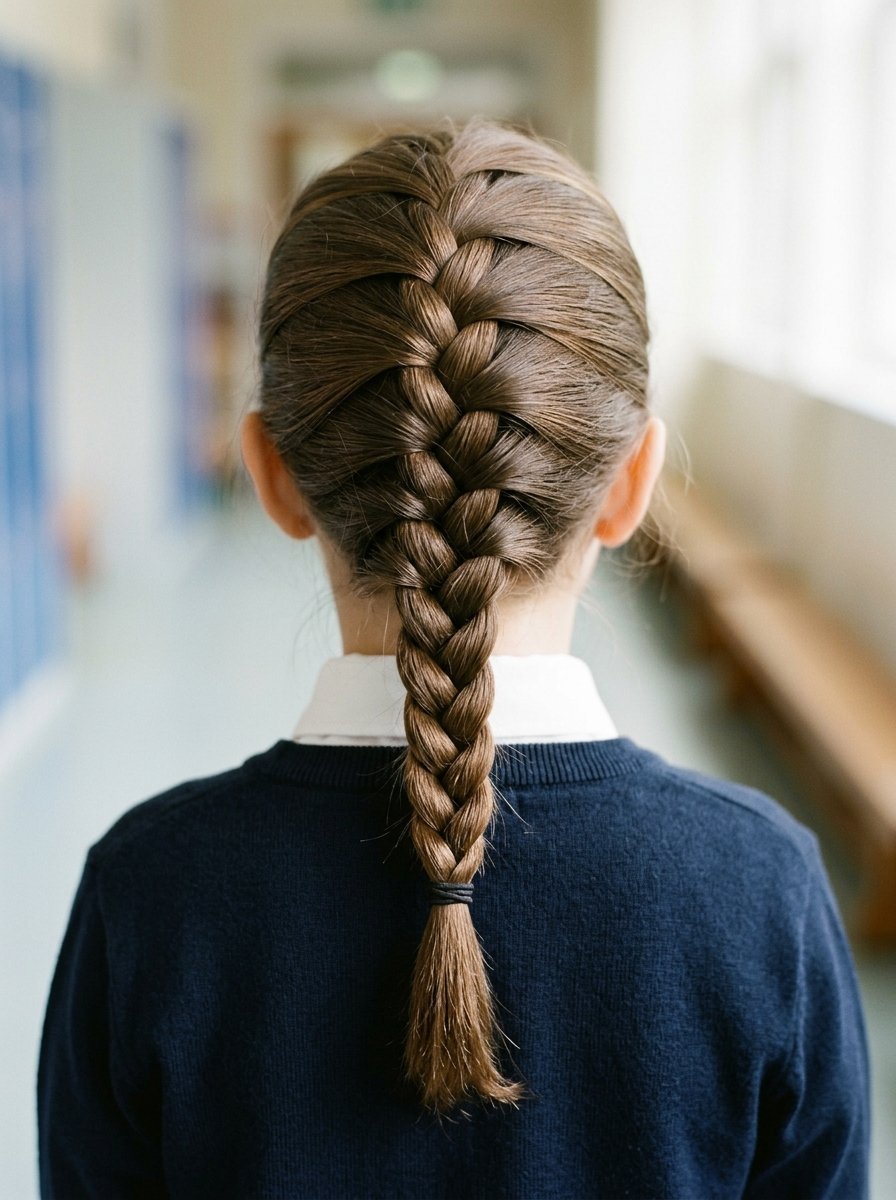
The traditional French braid is the ultimate foundation for school hair. It keeps every strand secure from the forehead to the nape of the neck. It stops flyaways from falling into your child’s eyes during reading time.
I started using this style on Mondays because it sets a neat tone for the school week. In my experience, starting with damp hair makes the process twice as fast.
- Detangle the hair completely using a wide-tooth comb.
- Gather a section of hair from the top of the head and divide it into three equal strands.
- Cross the right strand over the center strand.
- Cross the left strand over the new center strand.
- Add a small section of loose hair to the right strand before crossing it over the center.
- Repeat this process on the left side.
- Continue adding hair until you reach the neck.
- Braid the remaining length normally and secure it with an elastic.
2. French Braid Ponytail
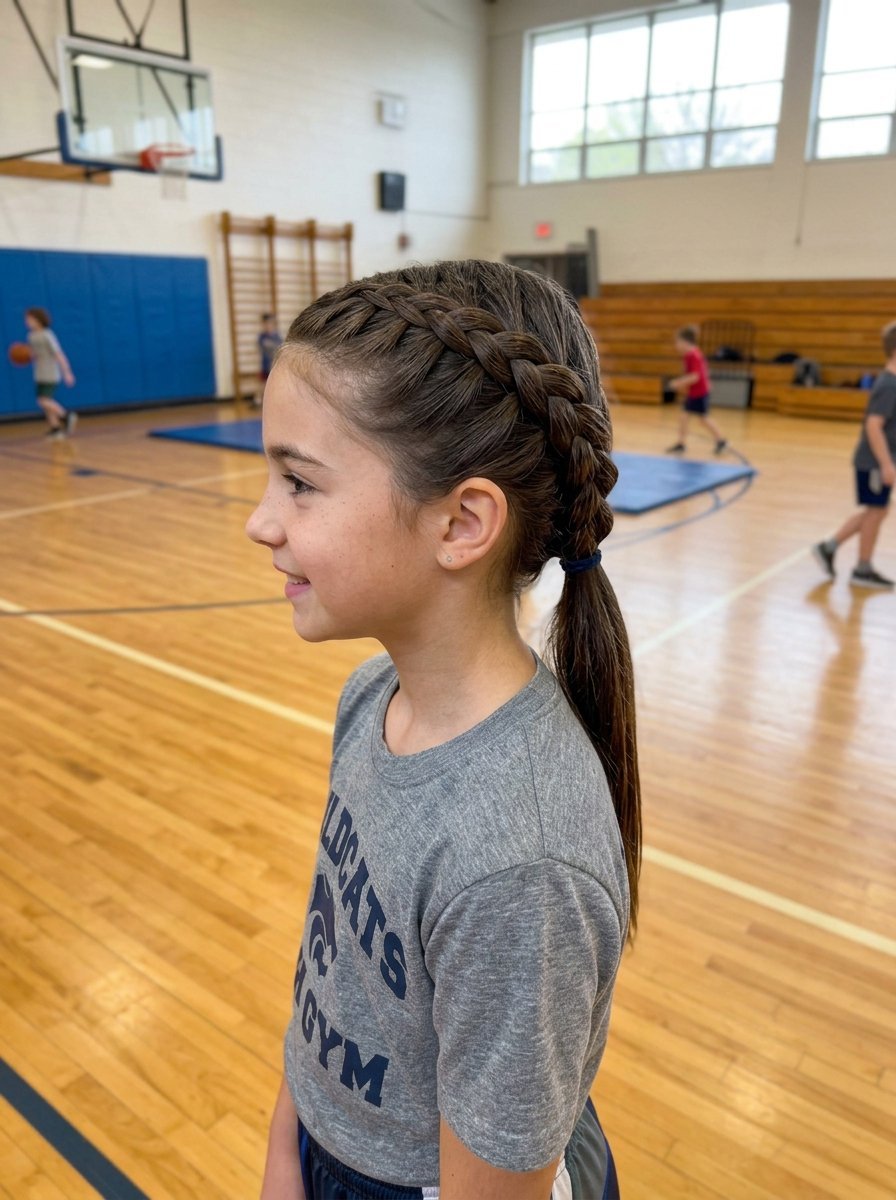
This style combines the neatness of a braid with the casual look of a ponytail. It is perfect for gym days when your child needs their hair completely off their neck.
I tried this variation when my daughter complained that a full braid felt too tight while running. It offers the perfect balance of security and comfort.
- Section off the top third of the hair from the forehead to the crown.
- Create a French braid using only this top section of hair.
- Stop adding loose hair once you reach the crown of the head.
- Gather the remaining loose hair from the sides and back.
- Combine the braid and the loose hair into a single ponytail.
- Secure the entire bundle with a strong elastic band.
3. High Ponytail with Bubble Accent
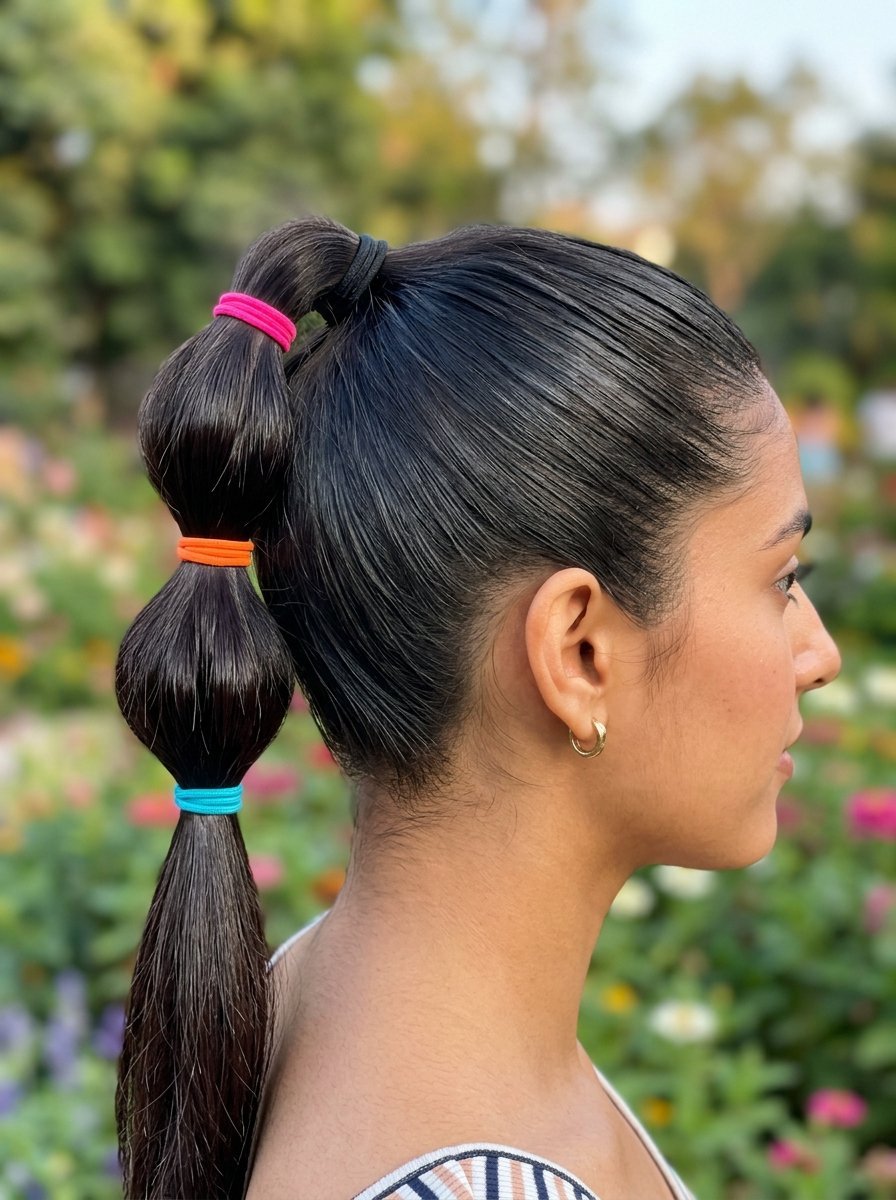
High ponytails can look plain after a few days. Adding a bubble texture transforms the look into something special without adding extra minutes to your morning routine.
I saw this work wonders for a friend’s daughter who has very thick hair that standard hair ties cannot hold for long.
- Brush all the hair up into a high ponytail at the crown and secure it.
- Place a small elastic band two inches below the main hair tie.
- Gently pull the hair between the two bands outward to create a rounded bubble.
- Place another elastic two inches below the first bubble.
- Pull the hair outward again to create a second bubble shape.
- Repeat this down the length of the ponytail depending on the hair length.
4. Secure Bubble Ponytail
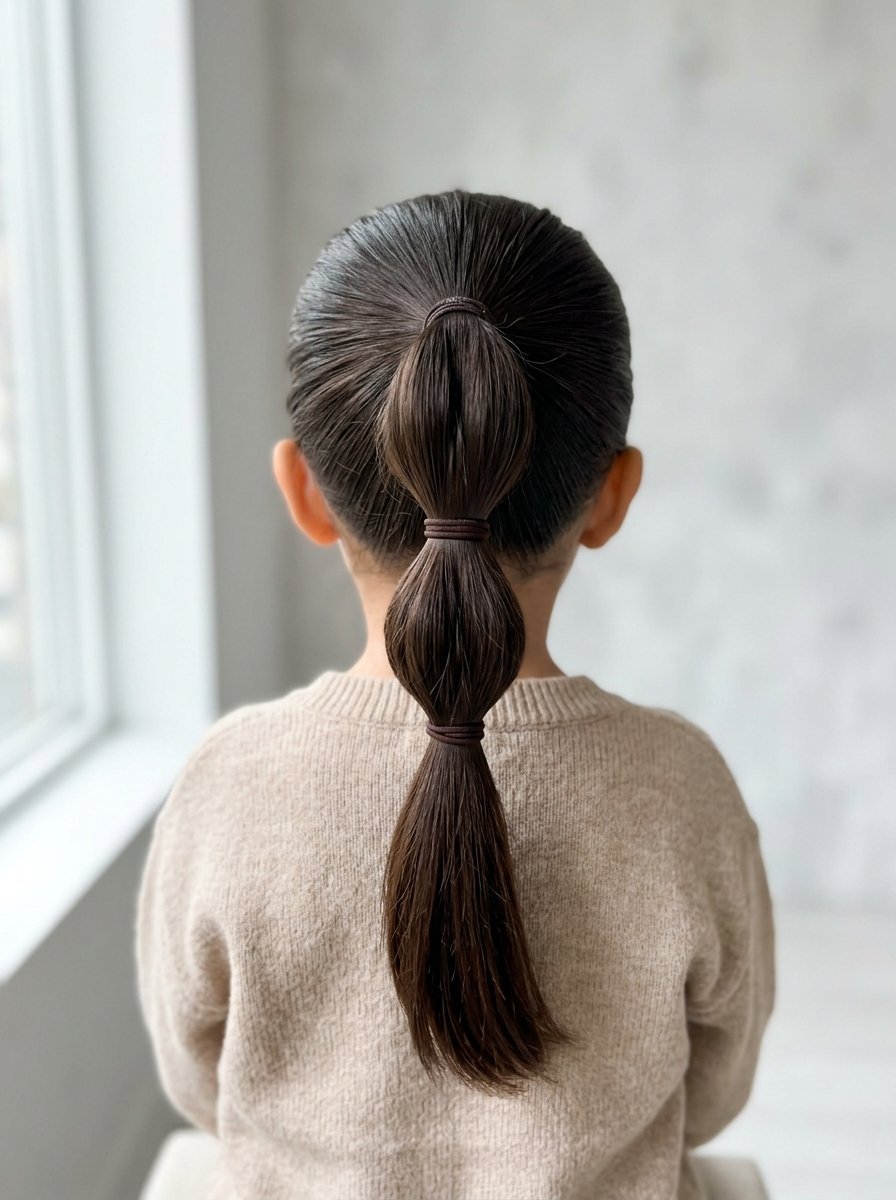
This variation uses multiple base sections to create a ponytail that refuses to sag. It is ideal for active kids who spend their recess hanging upside down on the monkey bars.
I noticed this style stays in place even after an entire afternoon of soccer practice.
- Divide the hair horizontally into three equal sections: top, middle, and bottom.
- Secure the top section into a small ponytail at the back of the head.
- Gather the middle section of hair and combine it with the first ponytail.
- Secure this new combined section with a second elastic band.
- Gather the bottom section of hair and combine it with the existing ponytail.
- Secure the final look with a strong elastic at the nape of the neck.
5. Double Braid Pigtails
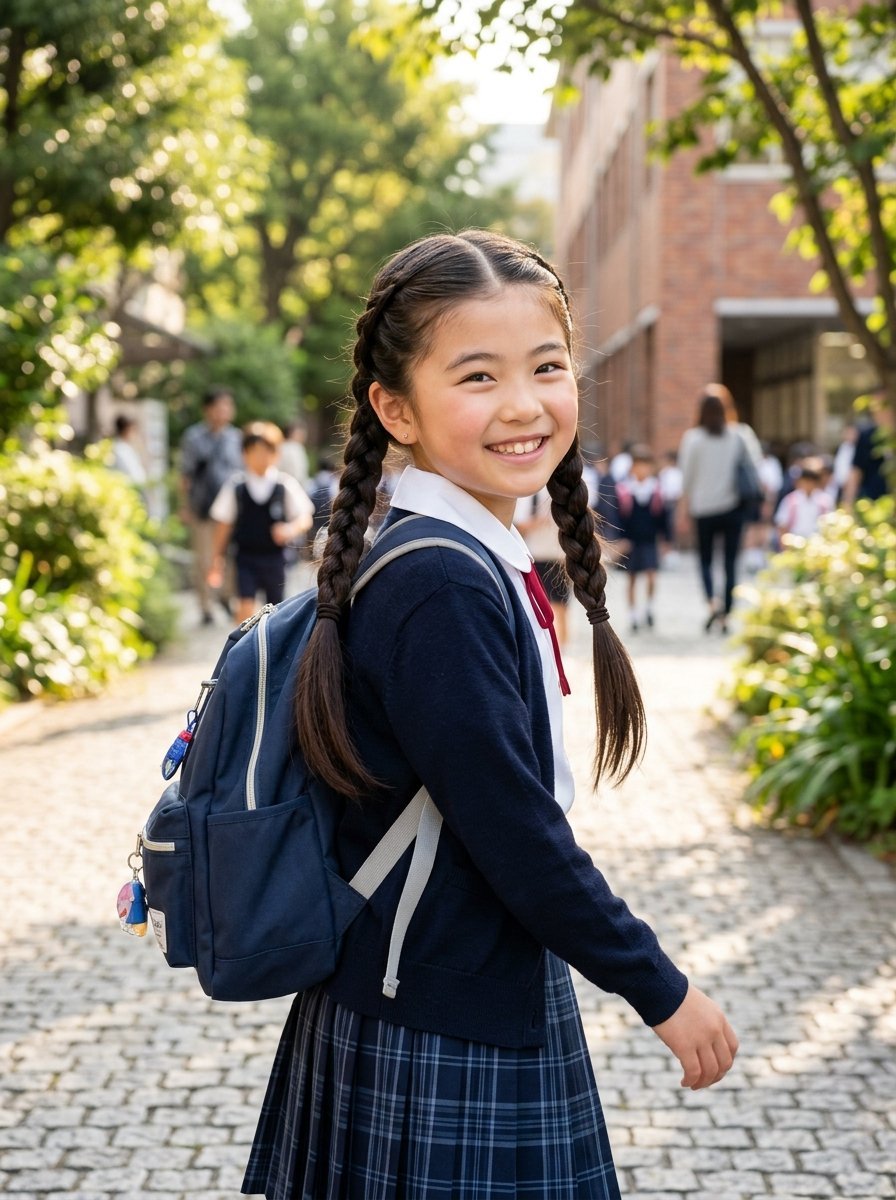
Double braids are a classic school look for a reason. They distribute the weight of thick hair evenly across the head, preventing morning headaches.
In my experience, this look works best when you use a rat-tail comb to get a perfectly straight center part.
- Part the hair down the exact middle of the head from front to back.
- Secure one side with a clip to keep it out of your way.
- Begin a standard three-strand braid on the loose side starting at the hairline.
- Keep your hands close to the scalp to ensure the braid stays tight and neat.
- Secure the end of the first braid with a colorful elastic.
- Repeat the exact same process on the opposite side of the head.
6. Messy Bun with Single Braid
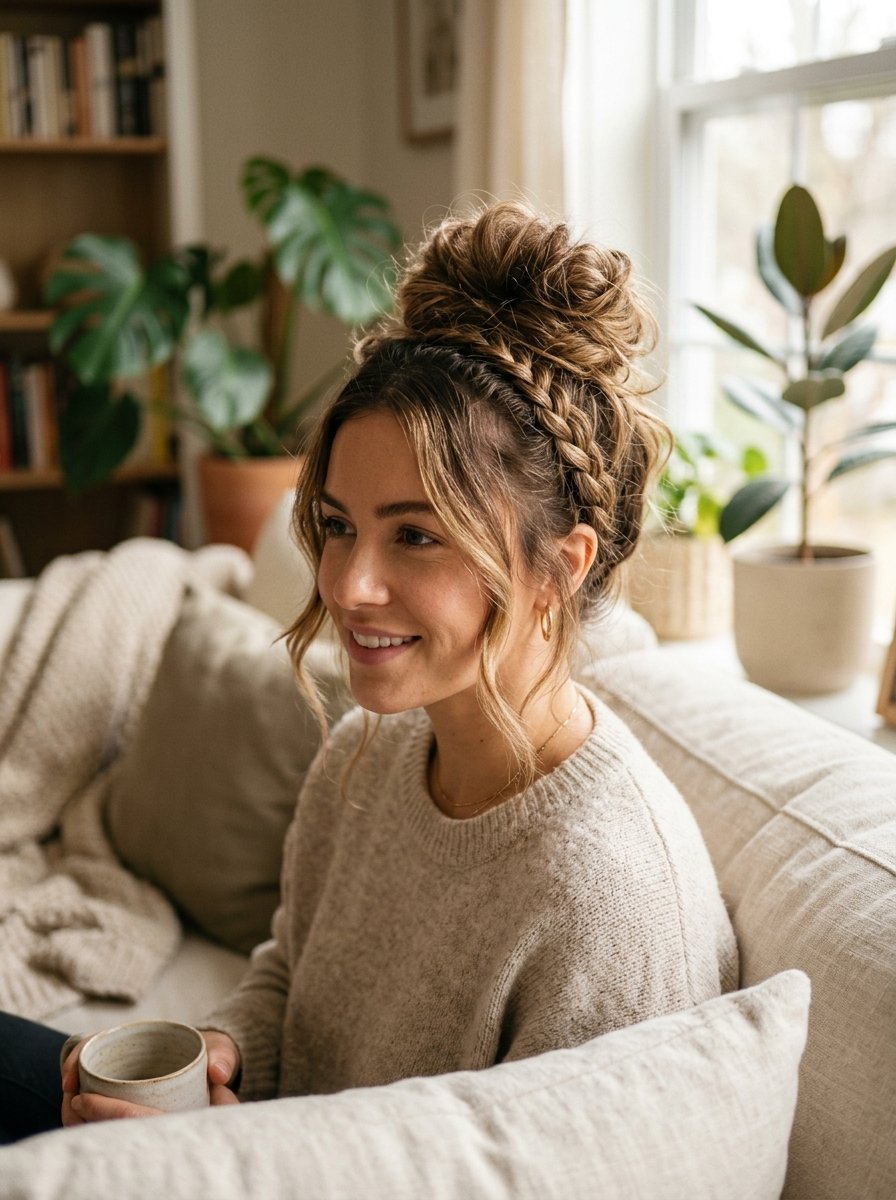
This style is the perfect solution for second-day hair that has lost its shine. It hides tangles at the back while creating a clean look around the face.
I turn to this look on rainy Thursdays when we are running low on time and energy.
- Separate a two-inch section of hair near the front hairline.
- Braid this small section tightly down to the end and secure it temporarily.
- Pull the rest of the hair back into a loose, high ponytail.
- Twist the ponytail into a rope and wrap it around the base to form a bun.
- Secure the bun with a thick elastic or a few sturdy bobby pins.
- Wrap the small front braid around the base of the bun and pin it down.
7. Long Hair Split Ponytail
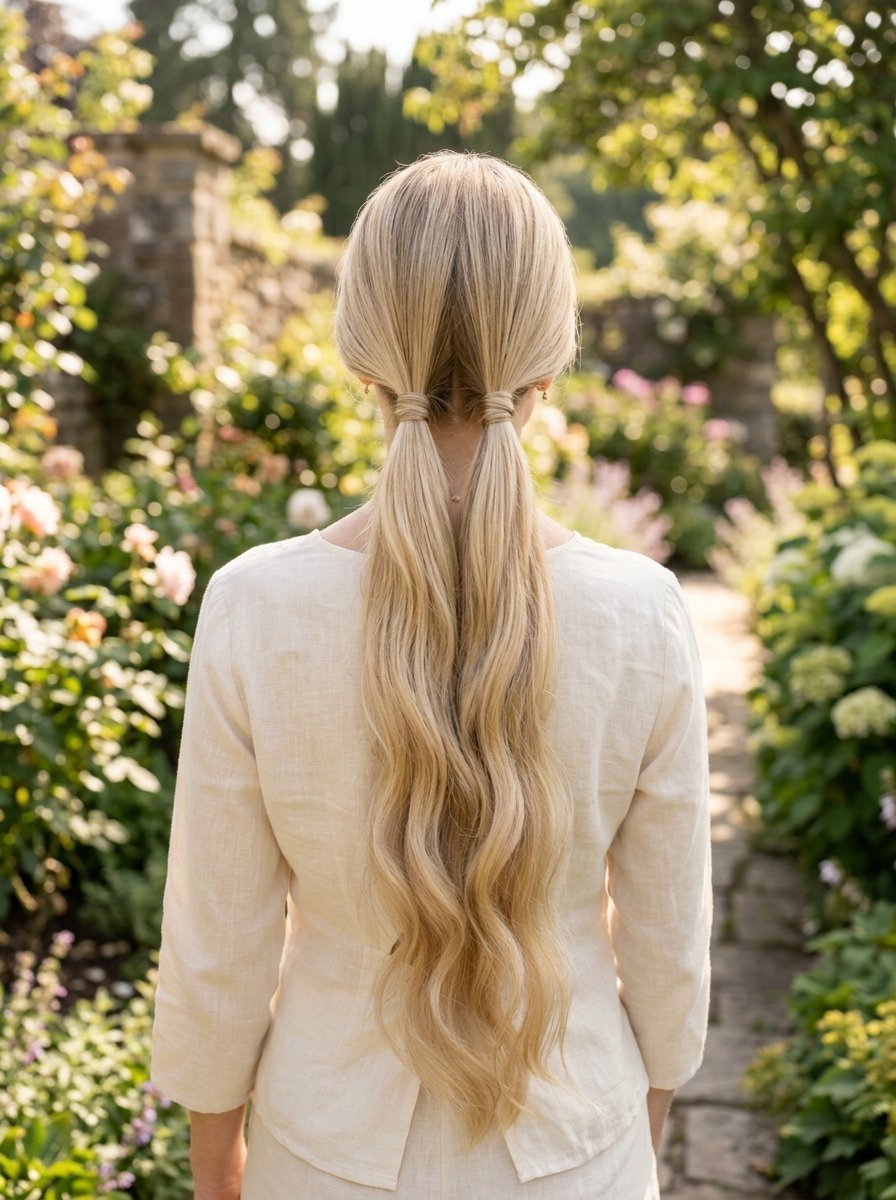
Long hair can become heavy and uncomfortable when gathered into a single point. Splitting the ponytail distributes the weight and adds an interesting visual element.
I saw this style save the morning when working with fine hair that tends to slip out of standard buns.
- Gather the top half of the hair and secure it into a half-up ponytail.
- Divide that top ponytail into two equal left and right strands.
- Bring the remaining loose hair from the bottom up to meet these strands.
- Combine all the hair into a final ponytail at the neck.
- Secure the look with an elastic band that matches your child’s hair color.
8. Quick Side Braid
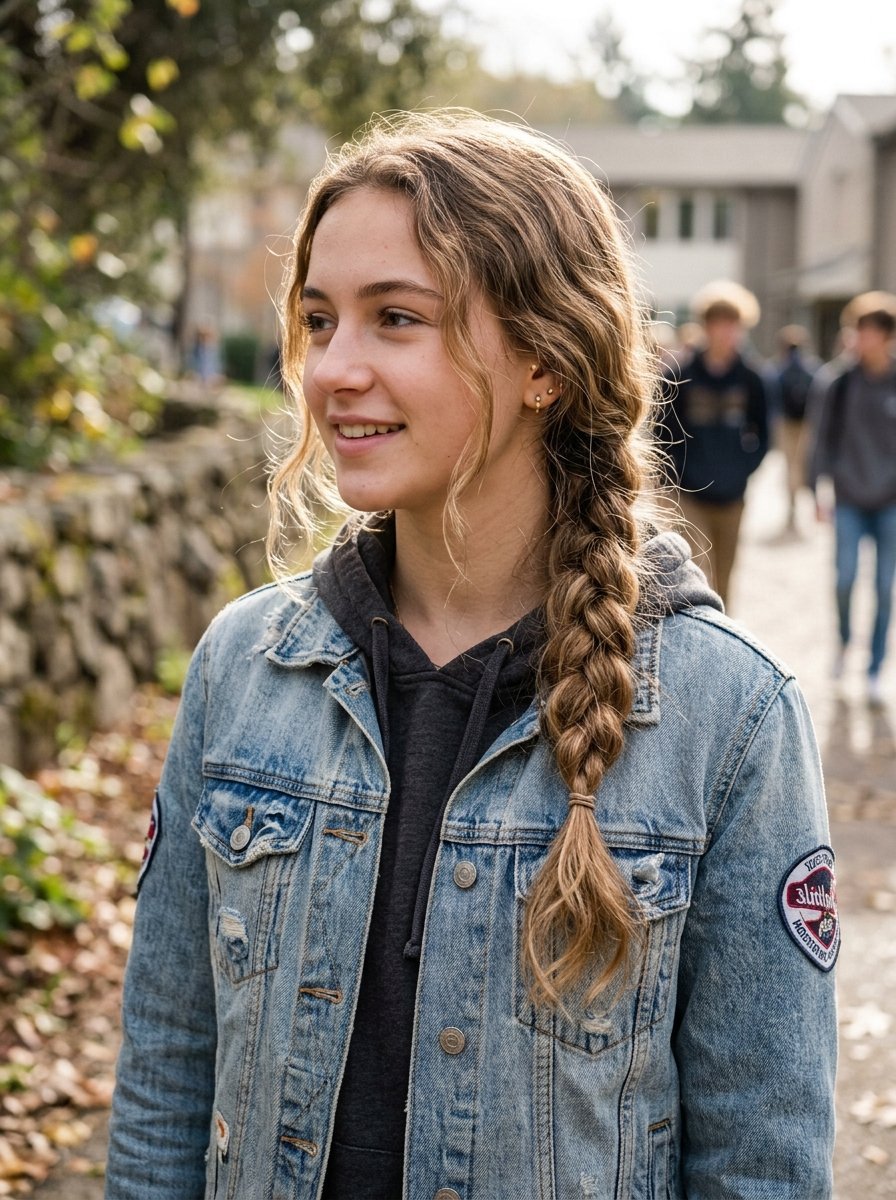
When you have exactly two minutes before the school bus arrives, the side braid is your best friend. It sweeps hair away from the face instantly.
I’ve seen this work beautifully on older kids who want a style that looks effortless and mature.
- Brush all the hair over to one side of the neck.
- Divide the gathered hair into three equal sections near the ear.
- Braid the sections loosely down the side of the shoulder.
- Secure the end with a small clear elastic band.
- Gently tug the outer edges of the braid to make it look thicker.
9. Top Knot with Accent Clip
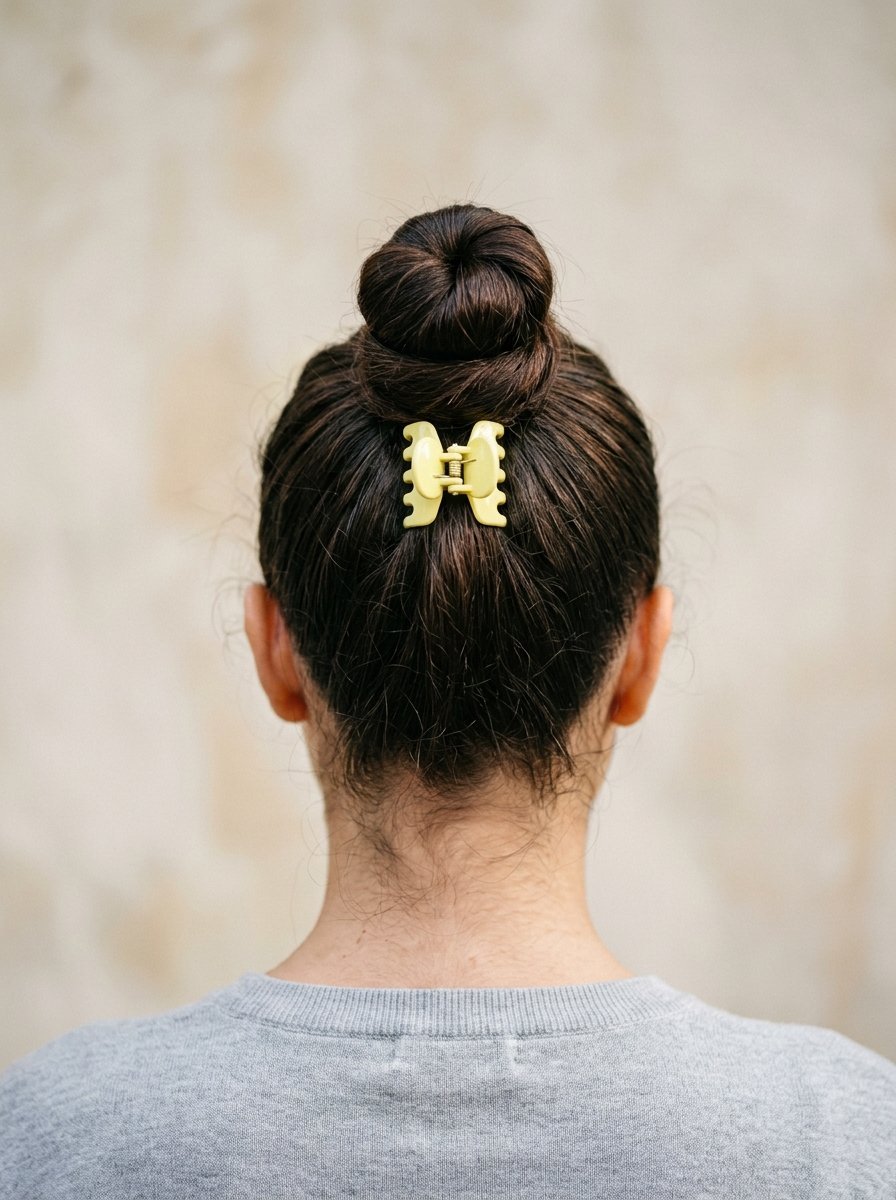
The top knot is a fast way to handle long hair on warm mornings. Adding a bright accent clip makes the hairstyle feel intentional rather than rushed.
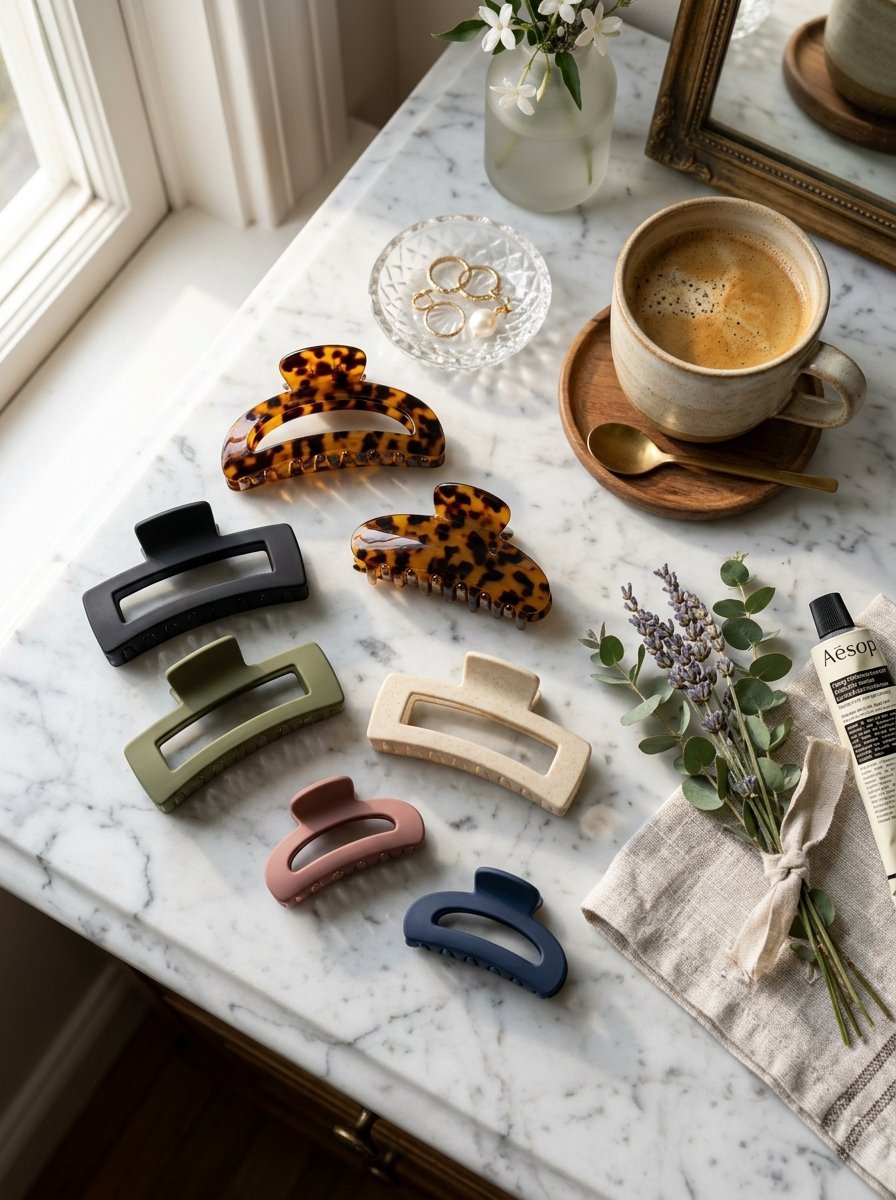
I keep a box of colorful claw clips near the front door just for this specific style.
- Flip your child’s head upside down and brush the hair into a high pile.
- Secure the hair into a tight ponytail at the very top of the head.
- Wrap the hair around itself until it forms a neat, compact knot.
- Secure the knot with an elastic band wrapped twice around the base.
- Snap a colorful accent clip just below the bun to catch loose hairs.
10. Half-Up Twist
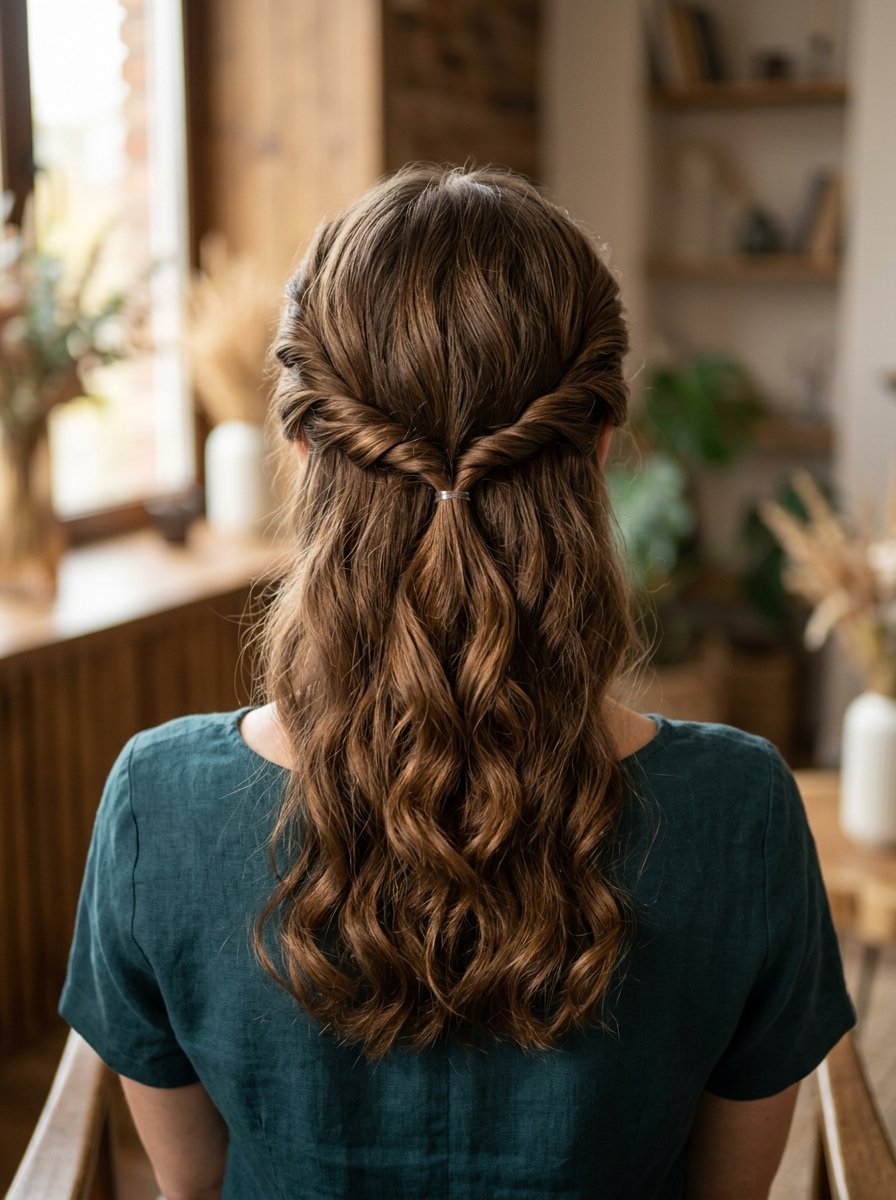
This style keeps hair out of the eyes while letting the rest of the length flow free. It is a great option for kids who dislike the feeling of tight updos.
In my experience, this style works best on hair that has a bit of natural wave or texture.
- Take a two-inch section of hair from above the right ear.
- Twist this section tightly inward toward the back of the head.
- Secure the twist temporarily with a clip while you repeat on the left side.
- Bring both twisted sections together at the back of the head.
- Secure them together with a small, clear elastic band.
11. Dutch Birthed Pigtails
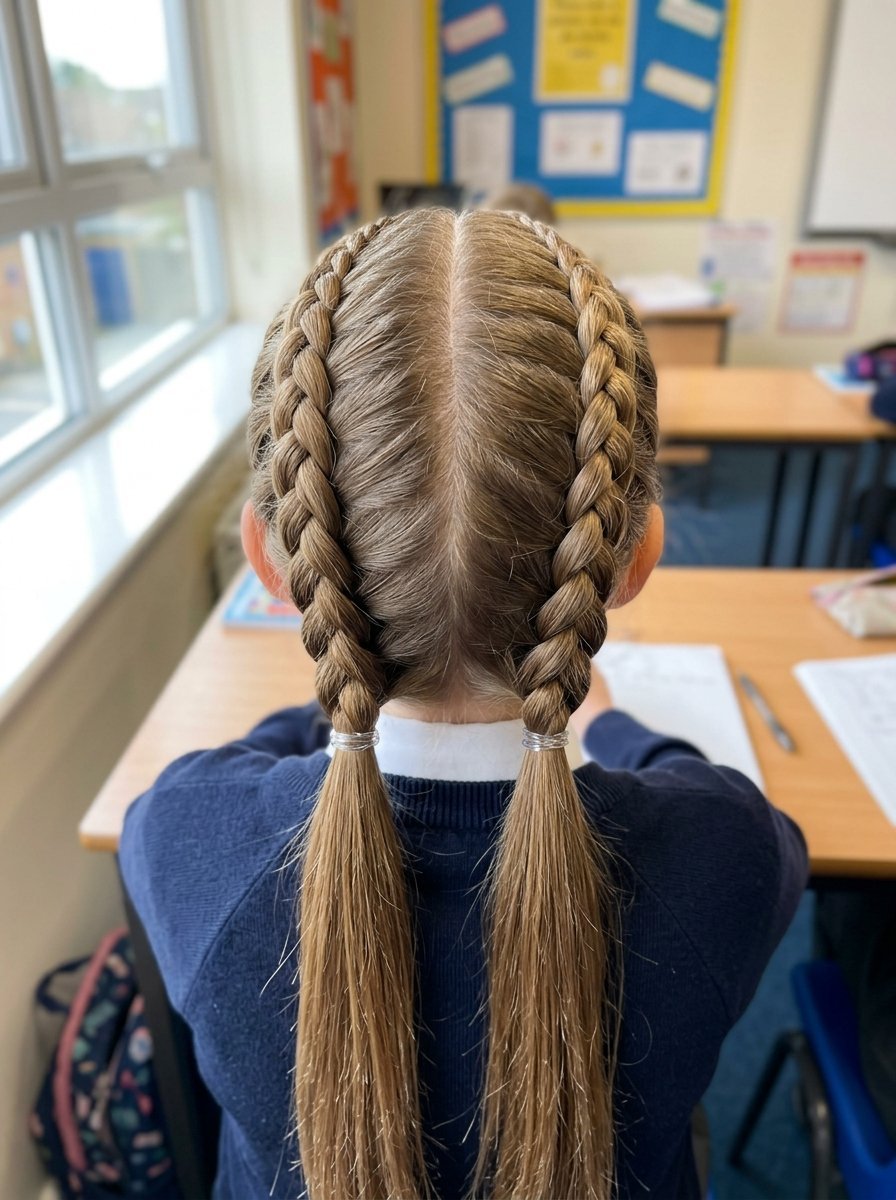
Dutch braids sit on top of the hair like a crown. They offer a modern look that stays secure through intense physical activity.
I noticed that my daughter’s hair stayed neat through gym class whenever I used this technique.
- Part the hair down the center from the forehead to the neck.
- Take a small section at the front of one side and split it into three strands.
- Cross the right strand under the center strand instead of over it.
- Cross the left strand under the center strand.
- Continue braiding under while adding loose hair to each section.
- Secure the end with an elastic and repeat on the other side.
12. Triple Elastic Pull-Back
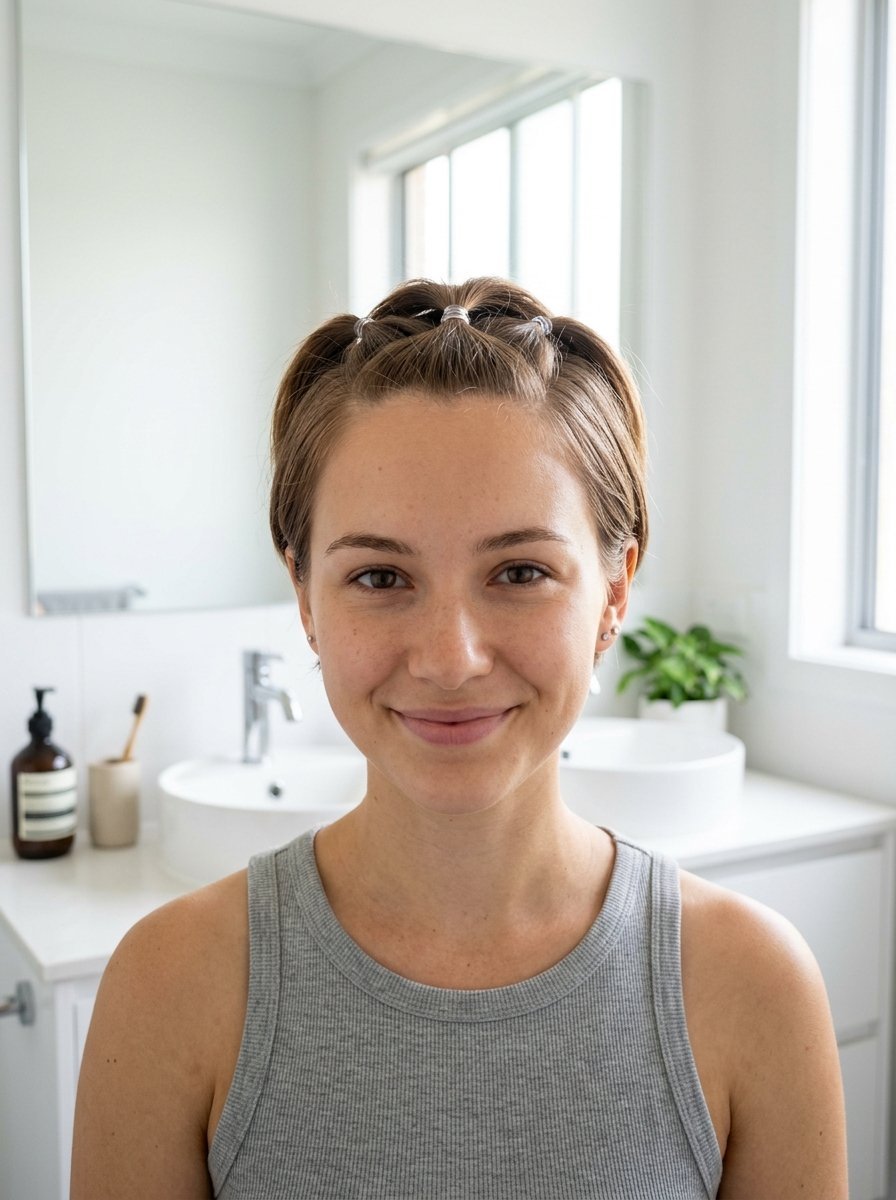
This style uses small elastics to section the hair sequentially. It requires zero braiding skills, making it perfect for beginners or parents with clumsy fingers.
I recommended this to a dad who struggled with braids, and it completely transformed his morning routine.
- Gather a small section of hair from the forehead and tie it with an elastic.
- Move down two inches, gather more hair from the sides, and create a second ponytail.
- Include the tail of the first ponytail into this second section.
- Move down another two inches and repeat the process for a third section.
- Let the remaining hair hang loose down the back.
13. Low Rolled Bun
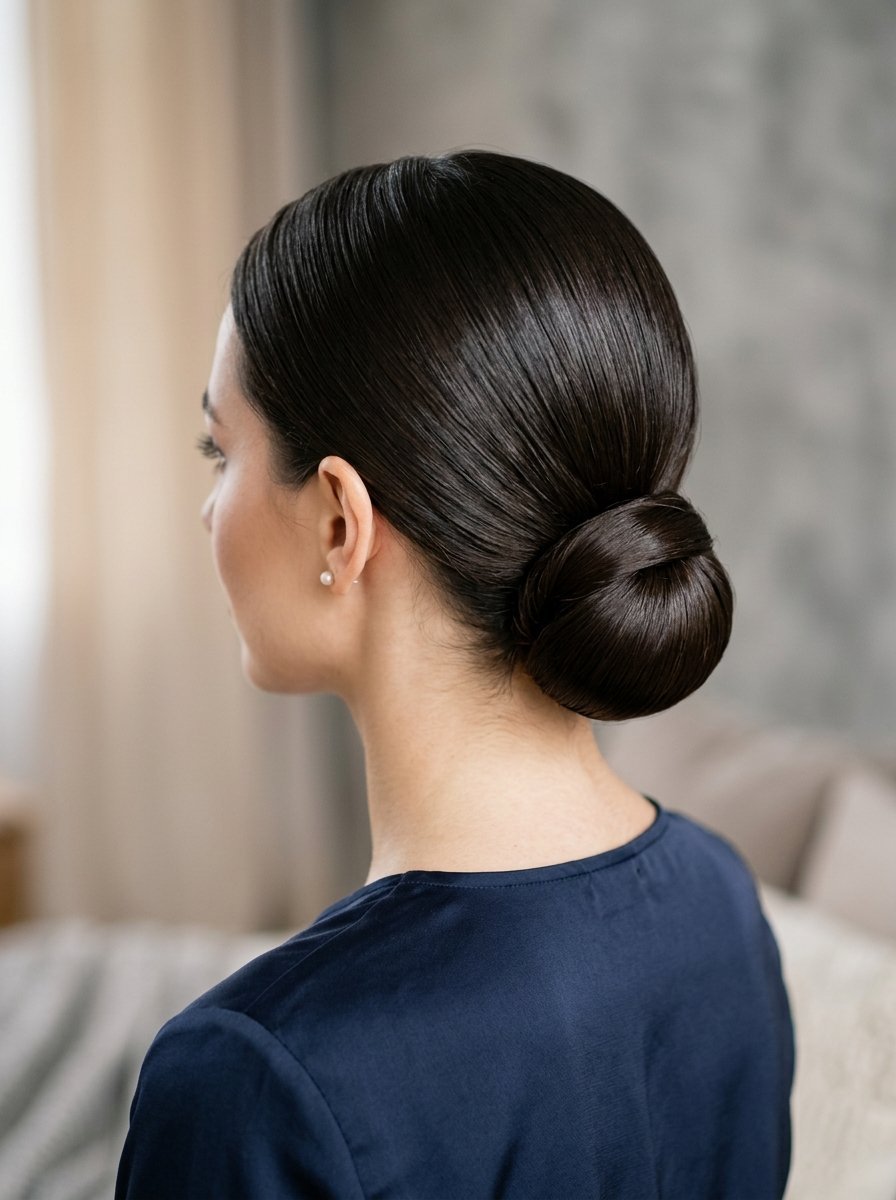
The low rolled bun is a clean style that looks sophisticated. It works well for school picture days or special school presentations.
I’ve seen this style hold perfectly without hairspray when started on slightly damp hair.
- Brush the hair smooth and tie it into a low ponytail at the neck.
- Separate the hair just above the elastic to create a small pocket.
- Flip the ponytail up and tuck it down through the pocket.
- Roll the remaining length of the ponytail upward toward the head.
- Secure the rolled hair against the scalp using three sturdy bobby pins.
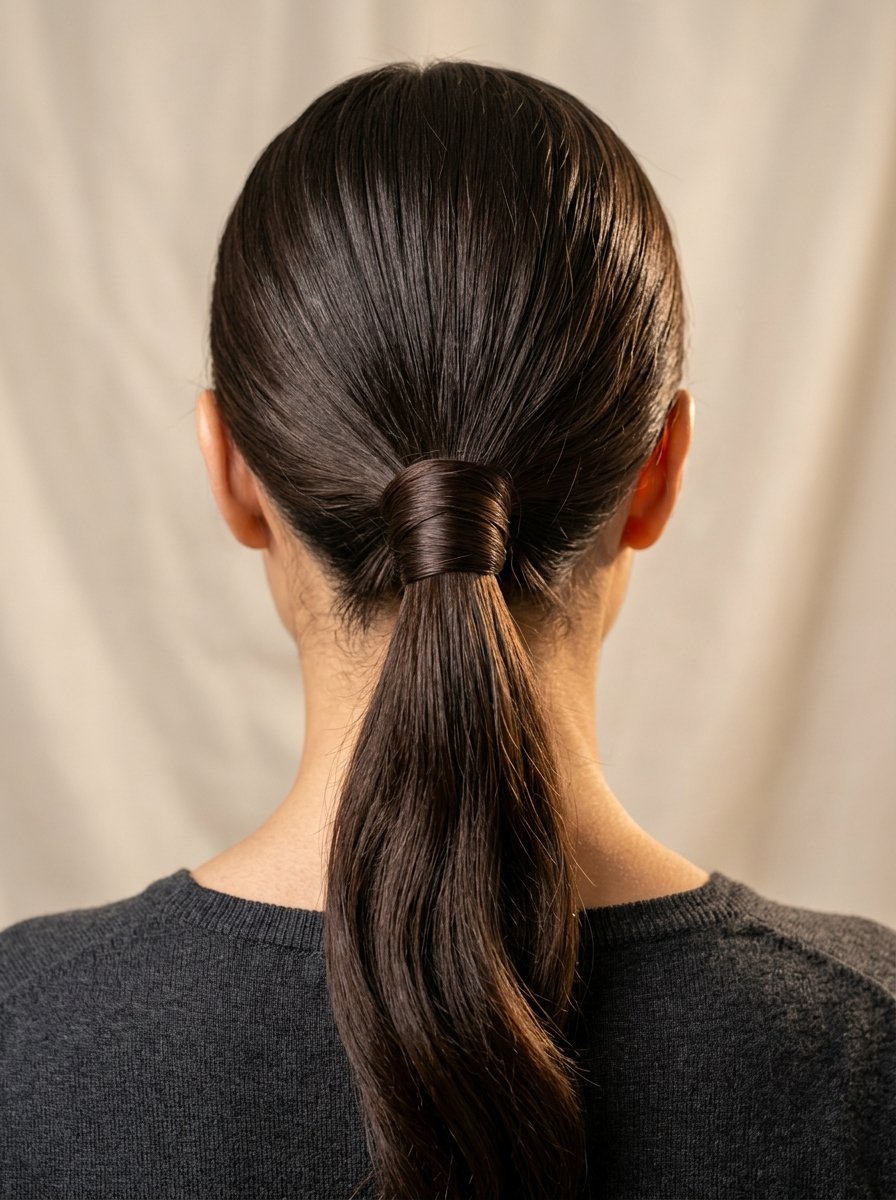
14. Wrapped Ponytail Accent
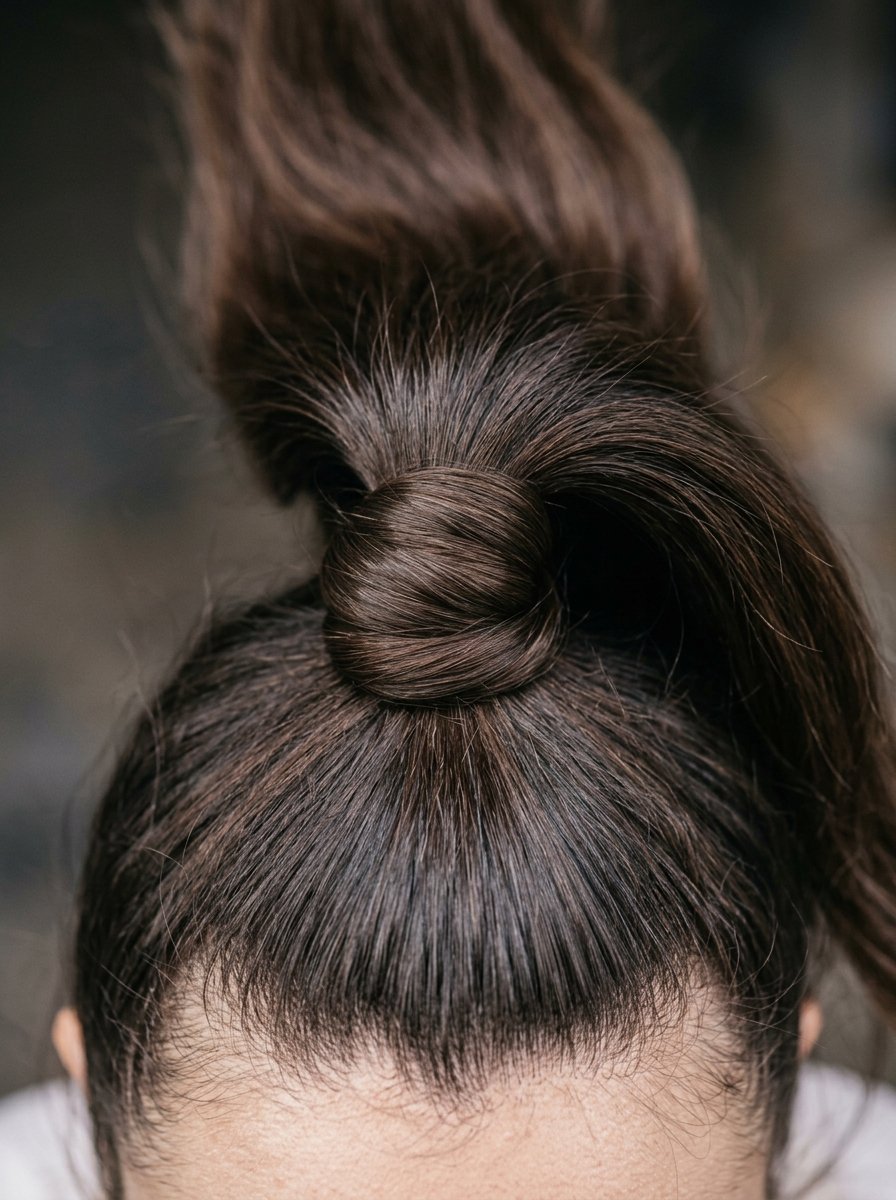
Covering a plain hair tie with a strand of hair instantly upgrades a standard ponytail. It makes the style look like it took twenty minutes instead of two.
This is my favorite trick for making a basic look elegant for school events.
- Pull all the hair back into a standard ponytail at your preferred height.
- Secure the ponytail firmly with a standard elastic band.
- Take a thin strand of hair from the underside of the ponytail.
- Wrap this strand around the elastic band until the band is completely hidden.
- Tuck the end of the strand into the underside of the elastic to secure it.
15. Criss-Cross Half-Up
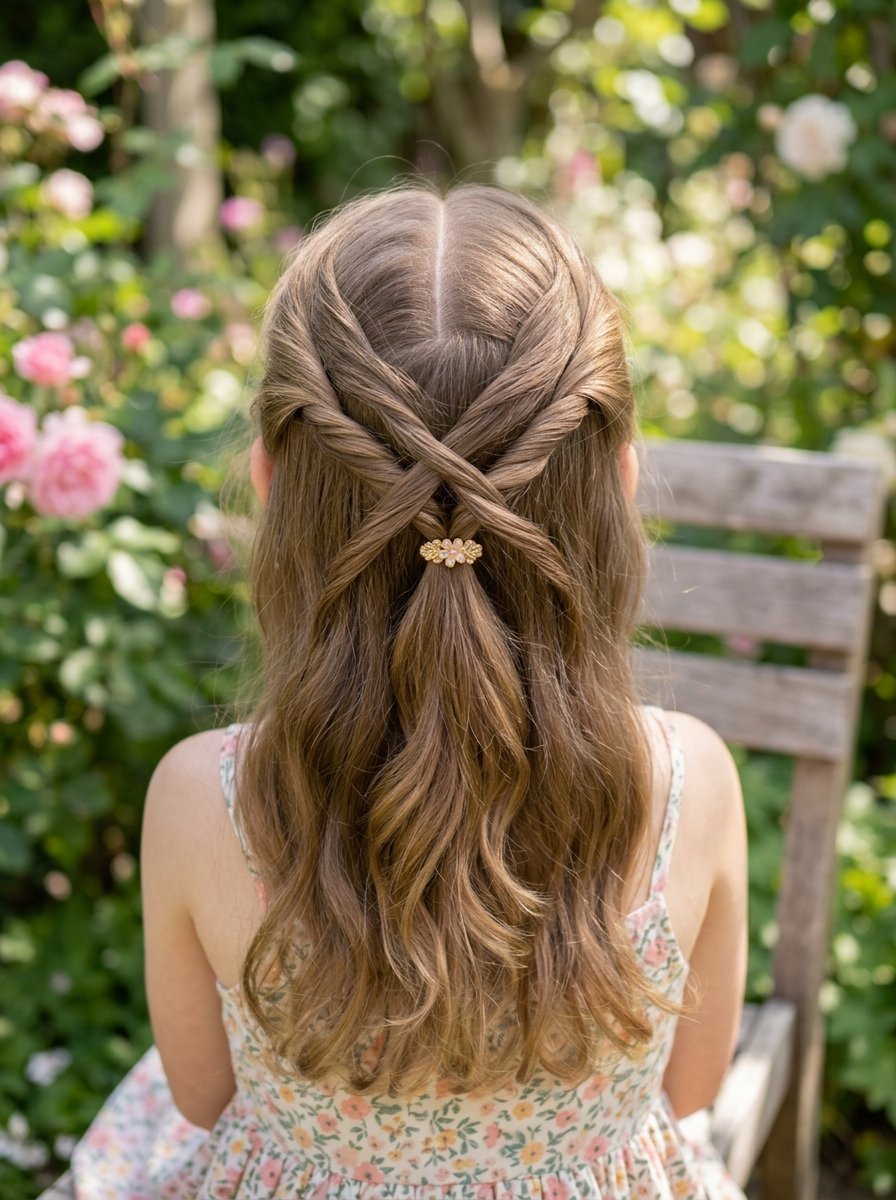
This style uses intersecting sections of hair to create a pattern across the back of the head. It looks complex but relies on simple movements.
I tried this look for a school play, and it received compliments from three different teachers.
- Gather a small section of hair from the upper right side of the head.
- Pull it across to the left side and secure it with a small elastic.
- Gather a section from the upper left side of the head.
- Pull it across to the right side, crossing over the first section.
- Secure it with an elastic, creating an X shape on the hair.
16. Fishtail Accent Tail
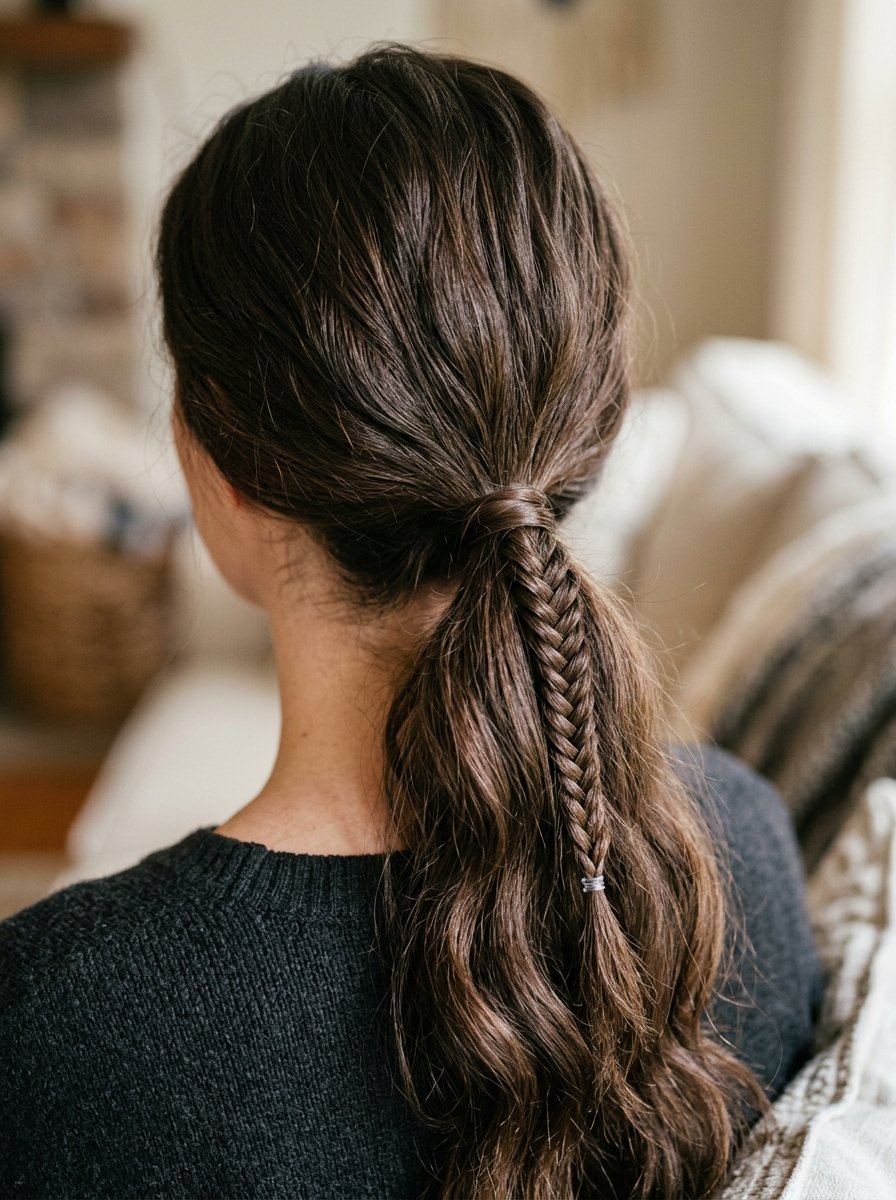
A full fishtail braid can take ten minutes to finish. Creating a small accent fishtail gives you the look without the time investment.
I’ve noticed that older kids love this style because it sets them apart from standard braids.
- Pull the hair back into a low ponytail and secure it with an elastic.
- Separate a small section of hair from the side of the ponytail.
- Divide this small section into two halves to begin the fishtail.
- Take a tiny strand from the outer edge of the right half and cross it to the left.
- Take a tiny strand from the outer edge of the left half and cross it to the right.
- Repeat this pattern down three inches, then secure it with a tiny band.
17. Twisted Side Ponytail
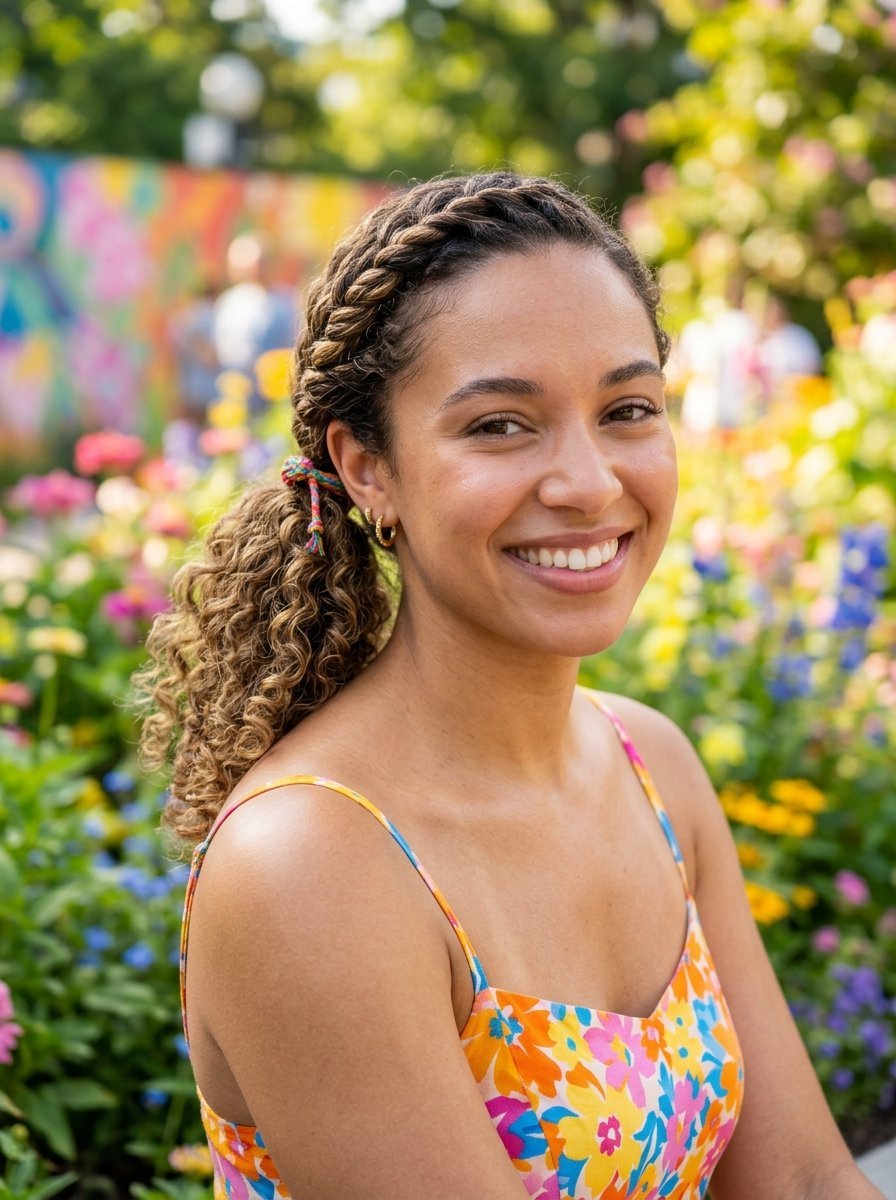
Placing a ponytail to the side adds a playful element to a classic style. Twisting the base adds extra security and texture.
This look is excellent for kids with curly hair, as it showcases their natural texture beautifully.
- Gather all the hair over to the space just behind the left ear.
- Separate a small section from the front hairline and twist it backward.
- Combine the twist with the rest of the hair into a side ponytail.
- Secure the entire look with a thick, durable hair tie.
18. Triple Twist Crown
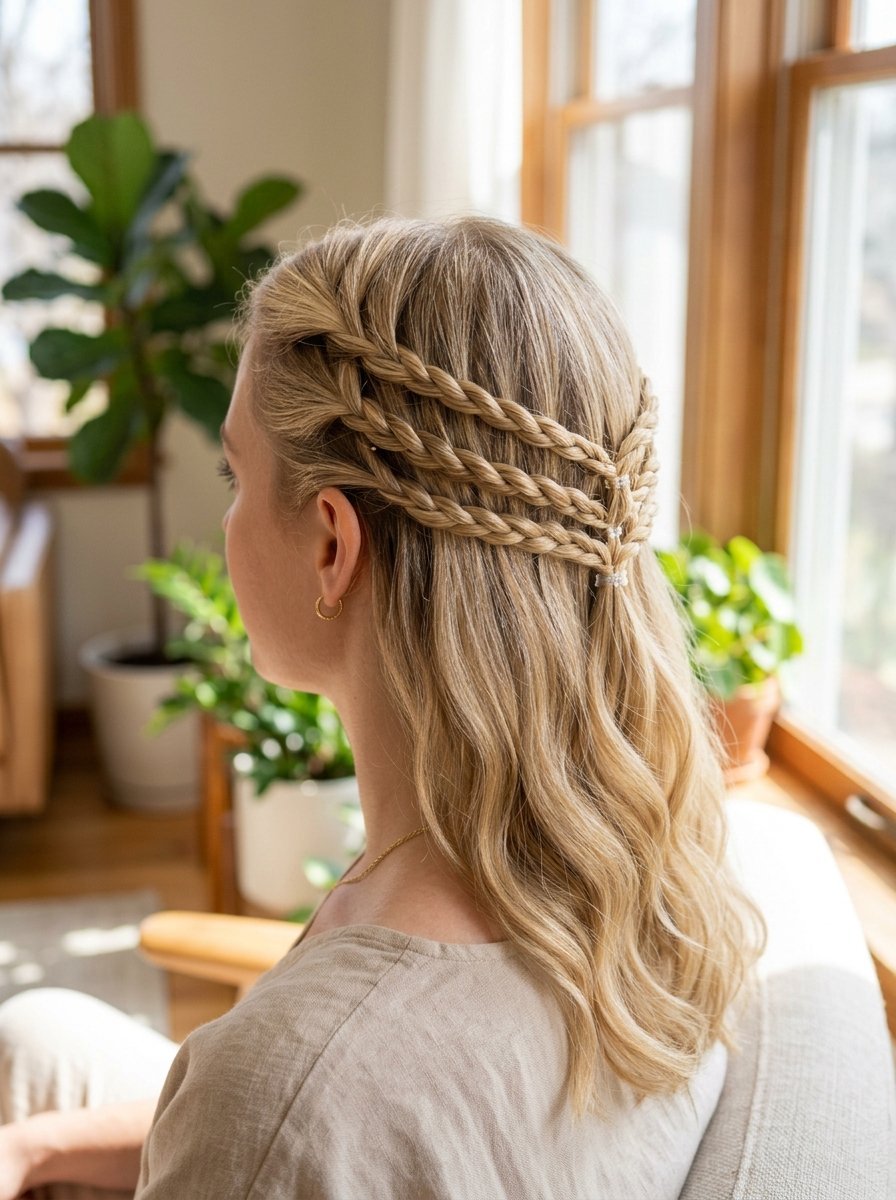
This style creates a textured band across the back of the head. It keeps shorter layers around the face from falling forward during schoolwork.
I saw this work perfectly for a child who was growing out a fringe or bangs.
- Take three small, separate sections of hair along the side hairline.
- Twist each individual section tightly toward the back of the head.
- Gather the three twists together at the center of the back of the head.
- Secure them together using a single small elastic band.
19. Ribbon Weave Braid
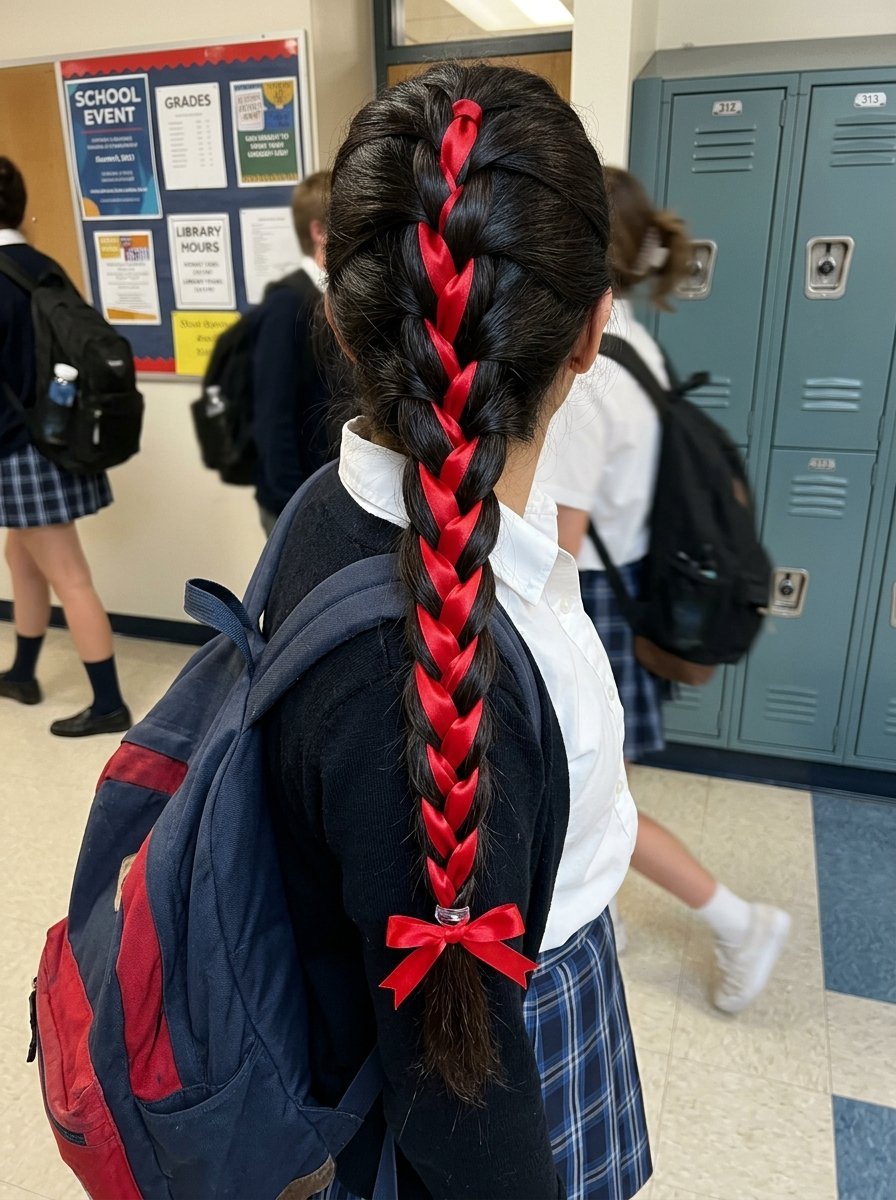
Adding a simple ribbon to a basic braid adds color and excitement to the morning. It allows your child to match their hair to their school uniform or favorite shirt.
I keep a spool of cheap satin ribbon in the bathroom drawer for Friday mornings.
- Tie a piece of ribbon around the base of a ponytail section.
- Divide the hair into three strands, letting the ribbon join one of the strands.
- Braid the hair normally, treating the ribbon as part of the hair strand.
- Tie the remaining ribbon around the end of the braid to secure it.
20. Double Space Bun Look
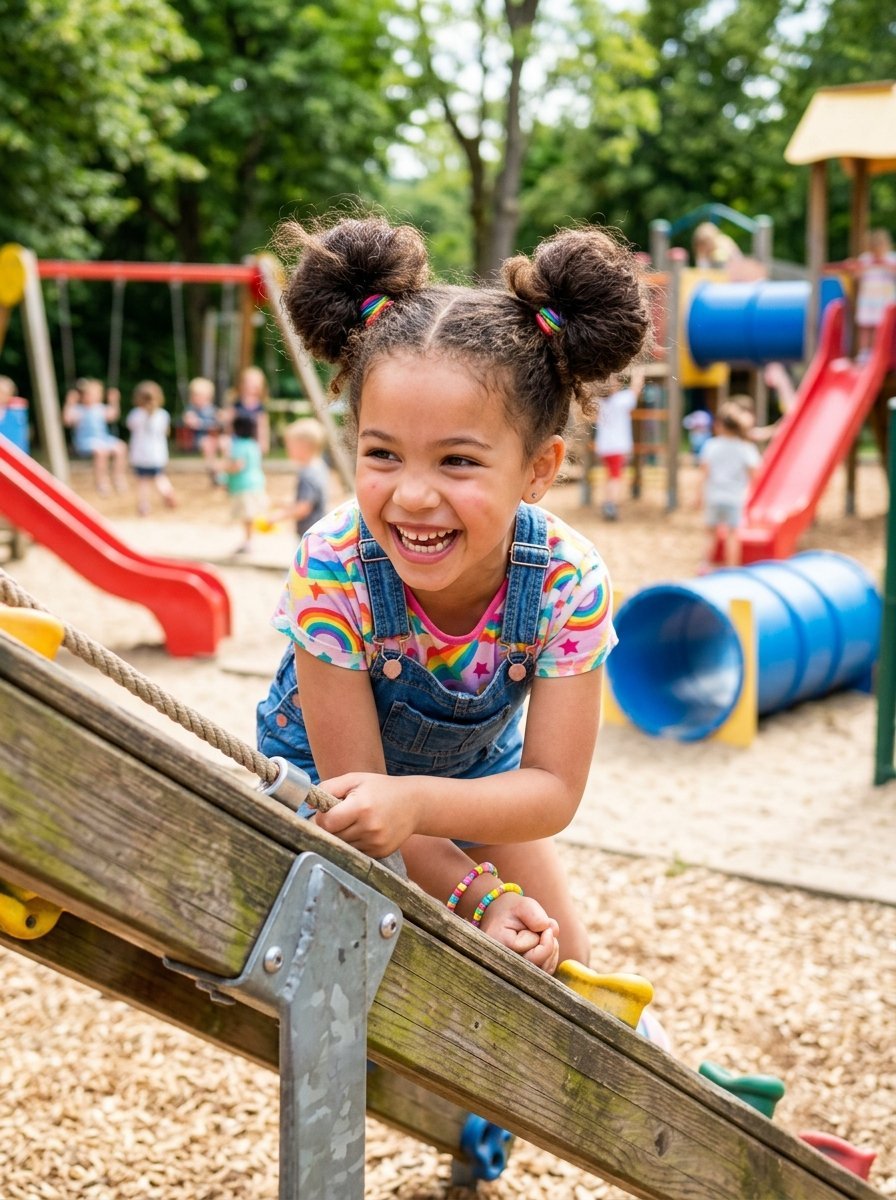
Space buns are popular, fun, and incredibly efficient at keeping long hair secure. They distribute hair weight to prevent pulling on the scalp.
I use this style on gym days when I know my child will be doing forward rolls on mats.
- Part the hair down the center into two equal left and right sides.
- Tie each side into a high ponytail on top of the head.
- Twist each ponytail tightly until it begins to coil around its base.
- Secure each resulting bun with a separate thick elastic band.
21. Knotted Half-Up Style
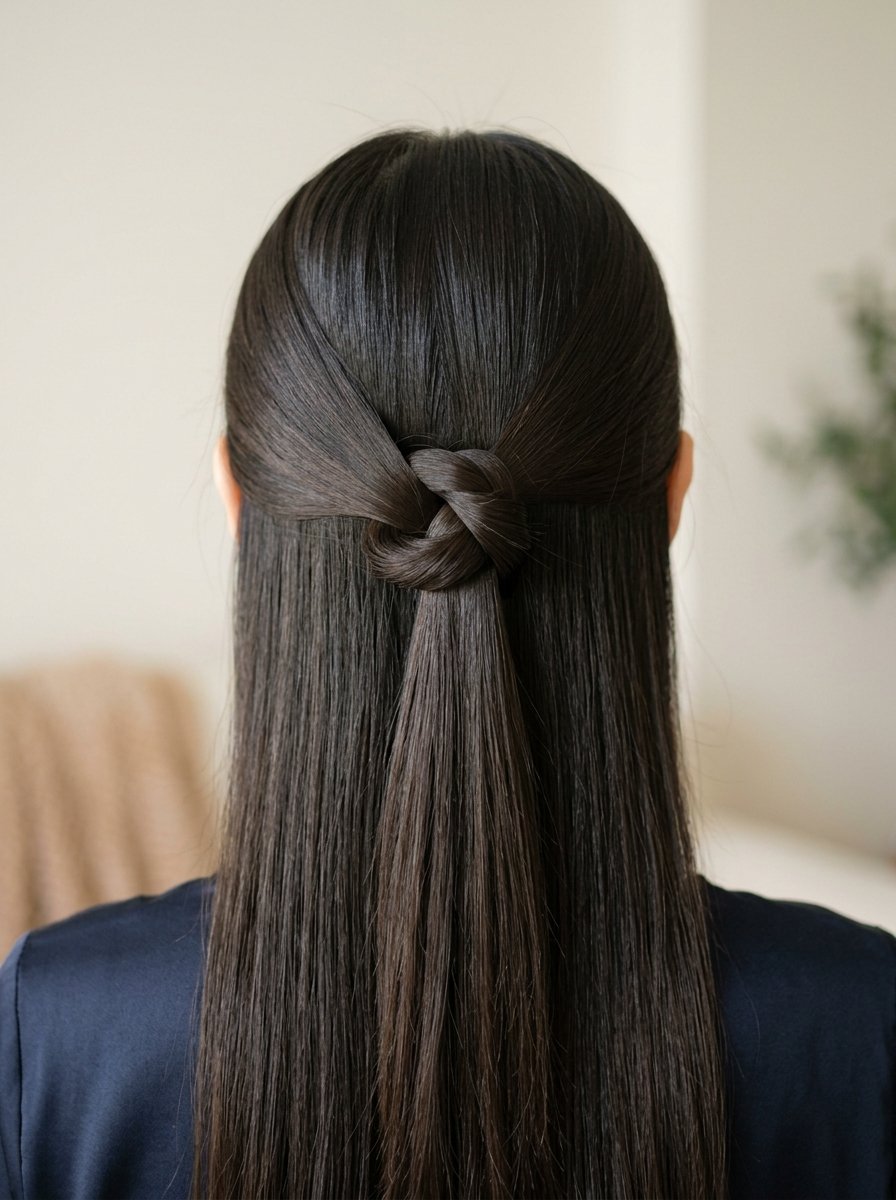
This style uses the hair itself to create a knot feature. It works best on straight or smooth hair types that slide easily.
In my experience, a drop of hair oil helps this knot slide into place without tangling.
- Gather two small sections of hair from each side of the forehead.
- Bring the two sections together at the exact back of the head.
- Tie the two sections into a simple overhand knot, just like tying a shoe.
- Secure the ends of the knot against the head using a small hair pin.
22. Wrapped Low Pigtails
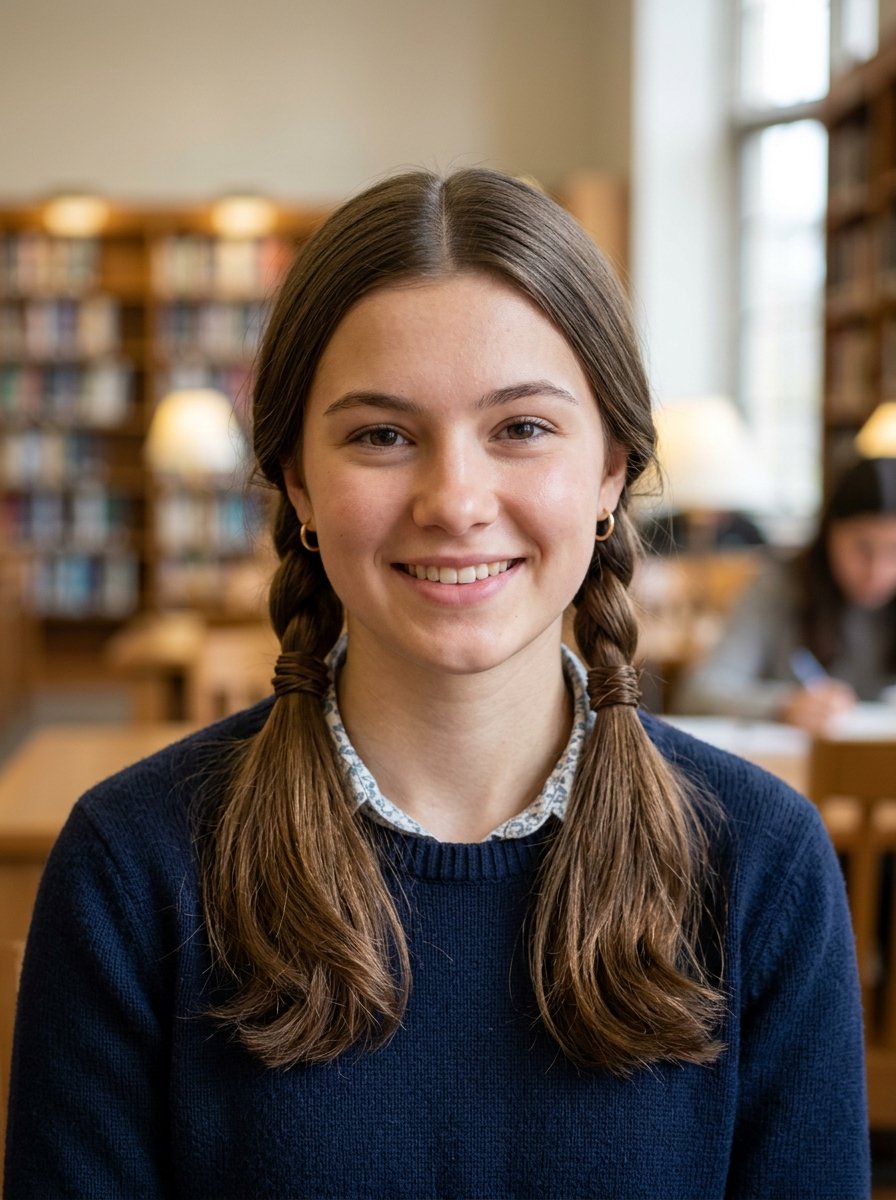
Low pigtails are fast but can look childish. Wrapping the base with hair gives them a sleek finish suitable for older elementary students.
This style took me exactly three minutes to complete during a major morning rush last week.
- Part the hair down the center and create two low pigtails at the neck.
- Take a small strand of hair from the bottom of the right pigtail.
- Wrap it around the elastic tie until the elastic disappears completely.
- Pin the end of the strand underneath the pigtail base to hide it.
- Repeat the exact same wrapping process on the left pigtail.
Hairstyle Comparison and Suitability Guide
Choosing the right style depends on your child’s hair texture, thickness, and the day’s school activities. This table breaks down each style to help you make the fastest choice in the morning.
| Hairstyle Name | Best Hair Type | Security Level | Ideal School Activity | Tools Needed |
| Classic French Braid | Thick / Long | High | Gym Class / Sports | 1 Elastic, Comb |
| French Braid Ponytail | Medium / Thick | High | Standard School Day | 1 Elastic, Brush |
| High Ponytail Bubble | Long / All Textures | Medium | Art Class / Recess | 3-5 Elastics |
| Secure Bubble Ponytail | Thick / Heavy | Very High | Active Playground Play | 3 Elastics, Brush |
| Double Braid Pigtails | All Hair Types | High | Daily Classroom Wear | 2 Elastics, Parting Comb |
| Messy Bun with Braid | Fine / Medium | Medium | Casual School Days | 1 Elastic, Bobby Pins |
| Long Hair Split Ponytail | Very Long | High | Running / Field Trips | 2 Elastics, Brush |
| Quick Side Braid | Long / Wavy | Medium | Library / Sitting Days | 1 Elastic |
| Top Knot Accent Clip | Medium / Thick | Medium | Warm Weather Days | 1 Elastic, 1 Claw Clip |
| Half-Up Twist | Fine / Wavy | Low | Picture Day / Presentations | 1 Elastic, Spray Bottle |
| Dutch Birthed Pigtails | Thick / Coarse | Very High | Sports / Intense Gym | 2 Elastics, Comb |
| Triple Elastic Pull-Back | Fine / Short Layers | Medium | Daily Classroom Wear | 3 Elastics |
| Low Rolled Bun | Straight / Medium | High | Special School Events | 1 Elastic, 3 Bobby Pins |
| Wrapped Ponytail | Long / Straight | Medium | Music Class / Assemblies | 1 Elastic, 1 Bobby Pin |
| Criss-Cross Half-Up | Fine / Medium | Low | Quiet Classroom Days | 2 Elastics |
| Fishtail Accent Tail | Straight / Long | Medium | Casual Friday | 2 Elastics |
| Twisted Side Ponytail | Curly / Thick | Medium | Dance / Gym | 1 Heavy Duty Elastic |
| Triple Twist Crown | Short Layers / Fine | Medium | Computer Lab / Reading | 1 Elastic, Section Clips |
| Ribbon Weave Braid | All Hair Types | High | School Spirit Days | 1 Elastic, 2-Foot Ribbon |
| Double Space Buns | Medium / Thick | High | Active Play / Gym | 2 Thick Elastics |
| Knotted Half-Up | Straight / Smooth | Low | Weekend / School Socials | 2 Bobby Pins, Hair Oil |
| Wrapped Low Pigtails | Thick / Long | Medium | General Daily Wear | 2 Elastics, 2 Bobby Pins |
The Essential 5-Minute Morning Hair Kit
Having your tools organized in one spot saves precious minutes when the clock is ticking. Stop searching through random drawers for hair ties. Build a dedicated morning hair basket and keep it on the kitchen counter or near the front door.
Here are the specific tools that make morning styling fast and stress-free.
- Continuous Mist Spray Bottle: Standard spray bottles shoot large drops of water that soak the hair unevenly. A continuous mist bottle releases a fine, steady vapor. It dampens the hair just enough to control flyaways and smooth out bedhead without leaving it soaking wet.
- Seamless Nylon Elastics: Avoid elastics with metal joints or exposed rubber. They catch on fine hair and cause pain during removal. Nylon bands stretch easily, hold thick sections securely, and slide out without pulling.
- Small Clear Polyband Ties: These tiny elastics are essential for securing the ends of small braids or accent sections. They remain invisible, allowing the hairstyle to shine without bulky bands showing.
- Rat-Tail Parting Comb: A straight part line makes a simple style look professional. The metal point of a rat-tail comb allows you to trace a clean line across the scalp in a single movement.
- Boar Bristle Detail Brush: Standard plastic brushes miss surface bumps. A boar bristle brush smooths the top layer of hair into ponytails perfectly, eliminating lumps on the first try.
- Matte Finish Bobby Pins: Shiny pins slide out of silky hair within an hour. Look for bobby pins with a matte, textured coating. They grip the hair strands tightly and stay put all day long.
Troubleshooting Common Morning Hair Obstacles
Even with the best styles, morning hair emergencies happen. Crying over tangles or fighting stiff bedhead can ruin your schedule. Here is how to handle the most common hair problems quickly.
Managing Extreme Overnight Tangles
Never start brushing from the roots down when dealing with a massive knot. This packs the tangle tighter and causes pain. Spray the knot with a light detangling spray or a mix of water and leave-in conditioner. Hold the hair section firmly above the knot with your fingers to protect the scalp from pulling. Use your wide-tooth comb to work through the very bottom of the tangle first. Move your way up an inch at a time until the comb slides through cleanly.
Taming Stubborn Bedhead and Cowlicks
Trying to brush a dry, stiff cowlick into a smooth ponytail is a losing battle. The hair memory will force it back up. Wet the root of the stubborn section completely using your spray bottle. Apply a tiny amount of styling cream between your palms. Brush the wet hair firmly in the direction you want it to lay. Hold it in place for ten seconds with your hand to let the water reset the hair bond.
Keeping Fine Hair from Slipping Out of Bands
Fine hair often slides out of hair ties before the first recess bell rings. To prevent this, avoid styling fresh, clean hair without preparation. Spray the hair length with a dry texture spray or a small amount of sea salt spray before styling. This adds grit to individual strands, giving the elastic something to grip against. You can also wrap the elastic band one extra turn past what feels comfortable to ensure it stays locked in place.
Frequently Asked Questions
How do I make school hairstyles last through a busy gym class day?
Focus on hairstyles that distribute hair weight and secure the roots, such as Dutch braids or a secure bubble ponytail. Avoid half-up styles or low loose buns, which unravel when running. Using small sections secured with separate elastics prevents the entire style from failing if one part gets loose.
What are the best products to prevent morning hair tangles the night before?
Switch your child’s pillowcase from standard cotton to a smooth satin material. Satin reduces friction against the hair as they move at night. Braid your child’s hair into a loose three-strand braid before bed. This simple step keeps the length contained and prevents major knots from forming overnight.
Can these styles work on short or shoulder-length hair?
Yes. The triple elastic pull-back and the triple twist crown work beautifully on shorter hair types. They focus on securing the top and side sections around the face, leaving the short back hair free. This avoids the problem of short hairs falling out of a high bun.
How do I remove tiny clear elastics without tearing my child’s hair?
Never pull or rip small clear elastics downward out of the hair. Use a specialized tool called a pony pick, or use the small tip of a pair of cuticle scissors. Snip the elastic band carefully at the base of the braid. The band will pop off instantly without damaging a single strand of hair.
My child has a very sensitive scalp. How can I style their hair without causing pain?
Use your fingers instead of a comb to separate sections whenever possible. Avoid pulling the hair tight against the scalp when finishing a ponytail or braid. Leave the base slightly loose. Switch to thick nylon hair ties instead of thin rubber ones, as they distribute pressure more comfortably across the head.
How much time should I allocate for hair styling in our morning routine?
Budget exactly seven minutes for the hair routine. This allows two minutes for detangling and wetting the hair, three minutes for actual styling, and two minutes for unexpected delays like dropped clips. Sticking to a strict time limit prevents hair styling from making you late.
Strategic Conclusion
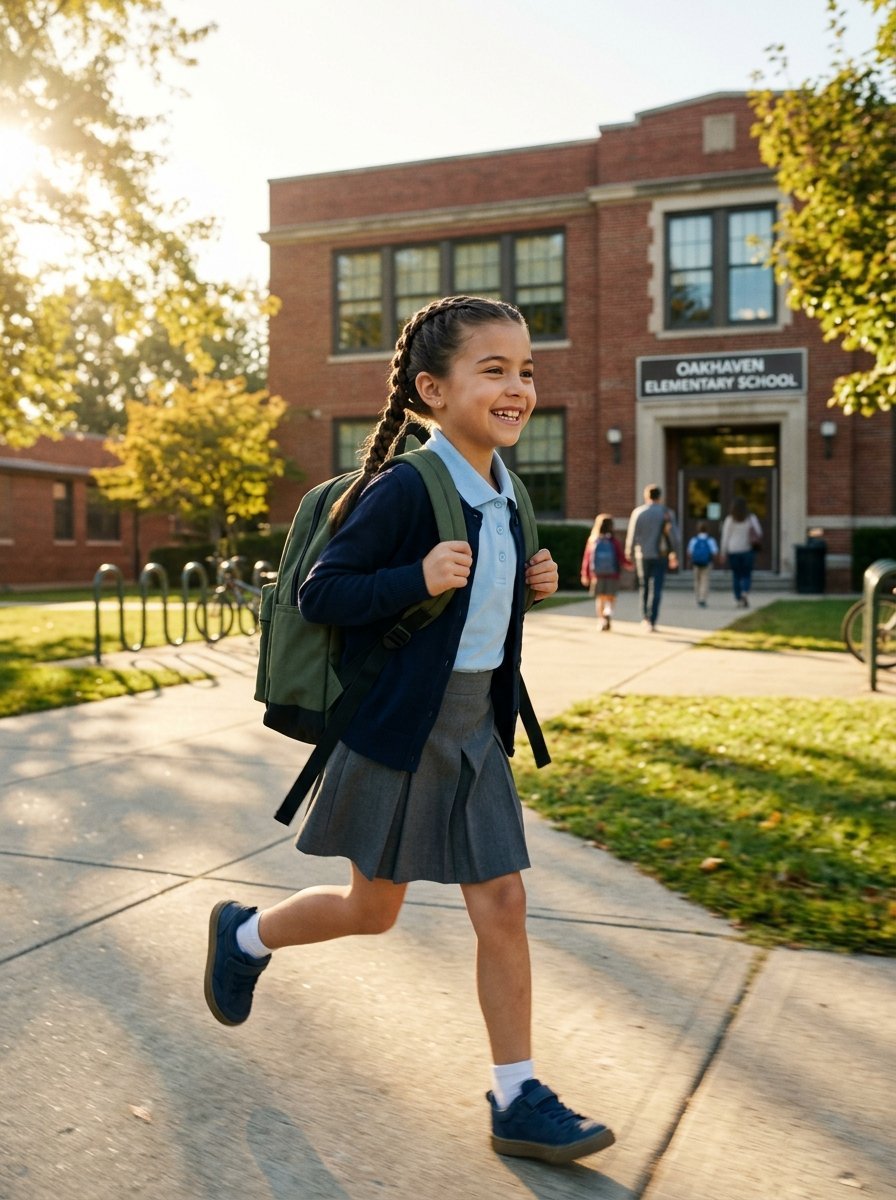
Managing the morning routine does not mean sacrificing your child’s style or comfort. Transitioning from a chaotic morning to a calm one relies on preparation, the right tools, and dependable techniques. The twenty-two styles provided offer a functional answer for every hair type and school activity.
Start by mastering one simple style this week, like the secure bubble ponytail. Once you build confidence and muscle memory, add more styles to your rotation. Your mornings will become quieter, your child will head to school feeling confident, and you will save your energy for the day ahead.

Sarah Mitchell — Founder & Editor-in-Chief
Sarah Mitchell is the founder and editorial voice behind Hair Level Up. A licensed cosmetologist with more than 15 years of experience, she has styled A-list celebrities for editorial shoots and red carpets, with work featured in Vogue, Elle, and Harper’s Bazaar. Early in her career, she trained under the legendary hairstylist Oribe in New York, an apprenticeship that still shapes her editorial eye today. Sarah founded Hair Level Up in 2020 after one bad haircut convinced her that women deserved a destination that felt like a magazine, taught like a stylist, and inspired like an art gallery. She oversees every story from concept to publication, guided by a simple belief: a good story teaches you something, but a great one makes you feel beautiful while it does.