The 4 Strand Braid Tutorial That Looks Harder Than It Is
Sitting in front of the mirror at 7 AM feels frustrating. Your arms burn. You want a style that turns heads. You see thick styles on Pinterest. They look impossible. I felt exactly this way three years ago. I spent hours wrestling with my hair. I failed repeatedly. My sections looked uneven. They tangled together constantly. Then I found the right rhythm. I will show you exactly how to make a hair braid using four pieces. It takes ten minutes. You just need the right hand placement. This guide shares my personal trials and successes. You will master this style today.
You will master the four piece weave today. I outline the exact hand movements required for success. I share the exact gripping setup I use daily. We check detangling routines and finishing sprays. You need three specific tools for perfect execution. I review eight styling creams and brushes. I share exactly what works for fine or thick textures. We fix the three most common dropping mistakes. I guarantee you will wear this style to your next event. The steps inside give you total control over your hair.
1. Tools And Preparation To Make A Hair Braid
Freshly washed hair slips wildly. Dirty hair holds much better. I prefer second day hair. You need grip. You need texture. I tested five dry shampoos last year.
- Living Proof Perfect Hair Day works beautifully.
- It absorbs oil completely.
- Amika Perk Up leaves zero white residue.
- It smells amazing.
- Both options give you the right texture.
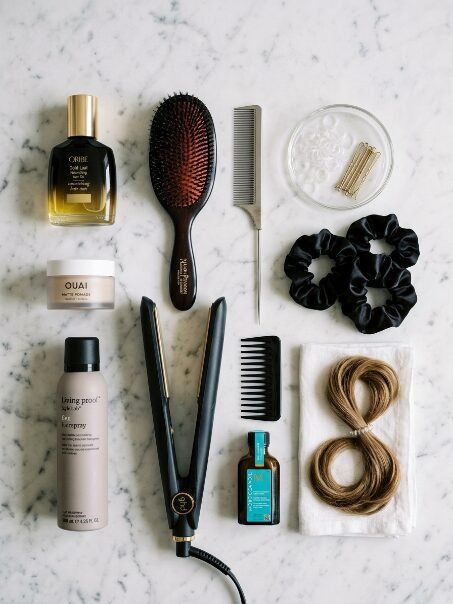
You need specific tools. Cheap elastics snap fast. Bad combs create frizz. A rat tail comb parts hair perfectly. Carbon fiber combs resist static electricity. Cricket Silkomb is my top choice. It glides through tangles easily.
Goody Ouchless clear elastics break easily. Blax snag free hair bands hold tight. I trust them completely. Gimme Beauty thick hair bands work for finishing.
Tangle Teezer Ultimate Detangler smooths everything perfectly. Mason Pearson pure boar bristle distributes oils. I use this daily. Color Wow Dream Coat stops humidity frizz. Kenra Platinum Texturizing Taffy gives serious hold. I rub a pea sized amount on my fingertips. Olaplex No 7 Bonding Oil seals the ends.
You must brush your hair thoroughly. Start at the ends. Work up to the roots slowly. This stops breakage entirely.
My friend Sarah has very fine hair. We tried this style on her last month. Her hair kept slipping out of my hands. We applied Got2b Powderful to her roots. We sprayed Oribe Dry Texturizing Spray mid shaft. The powder gave massive grip instantly. Her four piece style held for nine hours.
My sister Jessica has thick curly hair. Her curls clumped together during the parting phase. I did not brush her dry curls. I used Shea Moisture Curl Smoothie. I separated the four pieces gently with my fingers. Her style looked incredibly thick and rich.
Preparation makes the actual styling phase much easier. You cannot skip these steps. Good tools save you hours of frustration. The right products transform thin strands into thick ropes.
2. The Step By Step 4 Strand Braid Hair Pattern
This is the core pattern. You must follow these steps closely. Hand placement matters most.
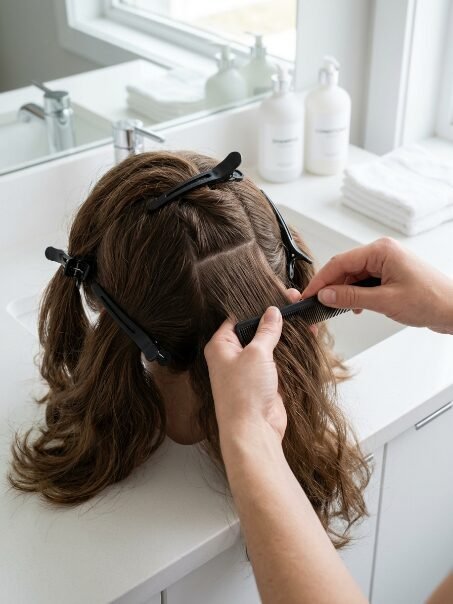
- Create the base first.
- Gather hair at the nape of your neck.
- Brush it completely smooth.
- Section it out perfectly.
- Split the ponytail into two equal halves.
- Split each half again.
- You now have four sections.
- Number them one through four from left to right.
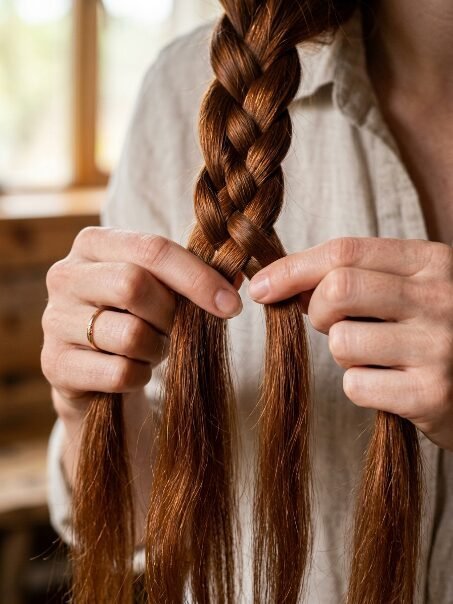
The first crossing starts on the left. Take strand one. Cross it under strand two. Cross it over strand three.
The second crossing starts on the right. Take strand four. Cross it under strand three. Cross it over strand two.
Establish the rhythm in your mind. The pattern is always under then over. The outside strand goes under the next piece. Then it goes over the third piece. Repeat on the other side continuously.
Maintain tension at all times. Pull the sections tight after every weave. Loose tension ruins the final shape. Keep your hands close to your head.
Regular plaits cross outside over middle. You weave three sections. A four piece version weaves under and over. You use four equal sections. It looks wider. It looks flatter. It resembles a woven basket. People stare at it everywhere I go. I wore this to a wedding last month. Three different women asked for a tutorial. Standard braids look round and simple. This style looks intricate and professional.
A sister braid uses two sections crossing. This requires four independent pieces. The brain struggles with four pieces at first. The muscle memory takes time. Once your fingers memorize the path you fly through it.
I tried teaching my roommate this style. She kept pulling her hands away from her neck. The top section became incredibly loose. I made her press her knuckles against her skin. The tension fixed the whole look instantly. Keep your hands anchored to your scalp.
You can figure out how to make simple braid styles easily. You just need repetition. Practice on a handful of yarn first. Tape four pieces of string to a table. Weave the strings using the under and over pattern. This trains your brain without arm fatigue.
3. Fixing Mistakes When You Do Braids By Yourself
Working on your own head burns your arms. Your shoulders will ache terribly. I practice on myself while watching television.
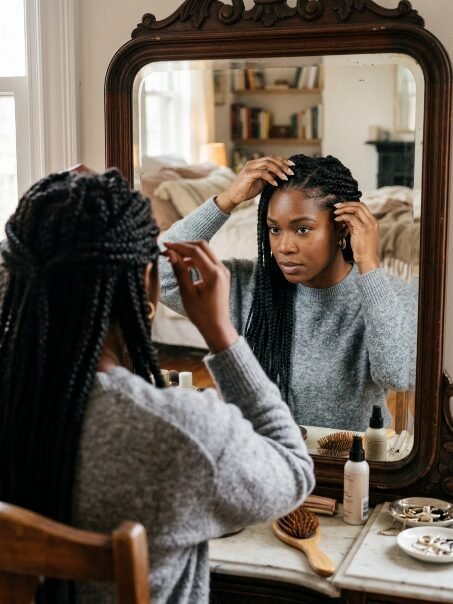
Do not look in the mirror while practicing. Mirrors reverse the image completely. Your brain gets confused fast. Close your eyes. Feel the sections in your hands. Learning how do you braid your hair takes physical feeling.
I ruined dozens of styles before figuring this out.
Dropping a strand happens constantly. You let go of a section. It mixes with the rest of the hair. Hold two sections in each hand. Use your pinky fingers to grip the outer pieces. Use your thumb and index fingers for the inner pieces.
Uneven sections ruin the final look. One side gets skinny. One side gets fat. Spend two minutes perfecting your initial four parts. Equal sections make a beautiful uniform weave.
Braiding outward causes massive sagging. You pull your hands away from the scalp. The top becomes loose and sloppy. Keep your knuckles touching your neck at all times.
You finished the weave. Now you must tie it off. Pull gently on the outside edges. This makes the style look twice as thick. Pull from the bottom up. Tresemme Micro Mist gives flexible hold. Moroccanoil Luminous Hairspray smells like heaven. It gives gorgeous shine.
Use strong elastics for thick hair. Keep sections damp for easier handling. Put heavy cream on your fingertips to control flyaways.
I failed a style at a graduation party last year. I dropped the third section halfway down. I did not want to start completely over. I used a clear elastic right at the drop point. I pancaked the hair around the elastic to hide it. I continued weaving below the elastic. Nobody noticed the mistake. You can fix errors quietly.
Frequently Asked Questions About Four Strand Styles

Many people struggle with this style. These answers will help you succeed.
How do you do a braid easy for beginners?
Start with three pieces first. Master the basic under and over rhythm entirely. Then practice with four different colored ribbons. Ribbon helps your brain see the pattern clearly. It creates muscle memory fast. You figure out how to do a braid easy this way.
How to braid hair for school mornings fast?
Wash your hair at night. Prep with dry shampoo before bed. Do a simple side sweep in the morning. It takes five minutes once you know the rhythm. This teaches you how to braid hair for school quickly. You sleep longer when you prep at night.
What is a sister style compared to this?
A sister style twists two sections around each other. This weaves four independent pieces flat. They look entirely different. This style lies flat against your back. A sister style looks more like a rope.
How long does it take to memorize this hand pattern?
Most people grasp the hand movements in twenty minutes. Muscle memory takes about a week of daily practice. Do not give up on day one. Your fingers will memorize the path eventually.
How to make a hair braid hold all night?
Use a pure silk pillowcase. Slip Silk Pillowcase reduces friction drastically. Tie a silk scarf around your head tightly. Spray a light hairspray before sleeping. You will wake up with a perfect style.
What do I do about short layers poking out?
Short layers pop out constantly. Put a texturizing paste on your fingertips. I use Ouai Matte Pomade for this exact problem. Smooth the paste over the layers as you weave. The paste glues the short hairs into the main section.
Can I do this on wet hair?
Wet hair stretches and breaks easily. I prefer styling dry or slightly damp hair. Damp hair gives great control for thick textures. Just avoid yanking on wet strands.
How do I stop arm fatigue?
Your shoulders will burn initially. Take a break halfway down. Secure the unfinished section with a big clip. Rest your arms for two minutes. Then unclip and continue the pattern.
Does this work on short hair?
You need shoulder length hair minimum. The four pieces need length to cross properly. Shorter hair slips out of the weave too fast.
Why does my style twist and curl up?
You are pulling one side tighter than the other. Uneven tension causes the whole piece to spiral. Pull all four pieces with equal force. Practice makes your tension more balanced.
Can I put hair extensions in?
Clip in extensions work perfectly. Place the clips low on your scalp. Make sure the natural hair covers the tracks entirely. Extensions make the final look incredibly thick.
How do I undo this without tangling?
Do not pull from the top. Start at the bottom elastic. Unweave one crossing at a time gently. Use a detangling spray if sections feel stuck. Pulling from the top creates massive knots.

You have the exact steps to master this four piece style. Your hands will feel clumsy at first. Your arms will get tired. Keep practicing the under and over motion daily. Try the ribbon trick if your brain gets confused. Use the styling creams I mentioned for better grip. You will wear this gorgeous look confidently very soon. Leave a comment below with your biggest styling struggle.

Sarah Mitchell — Founder & Editor-in-Chief
Sarah Mitchell is the founder and editorial voice behind Hair Level Up. A licensed cosmetologist with more than 15 years of experience, she has styled A-list celebrities for editorial shoots and red carpets, with work featured in Vogue, Elle, and Harper’s Bazaar. Early in her career, she trained under the legendary hairstylist Oribe in New York, an apprenticeship that still shapes her editorial eye today. Sarah founded Hair Level Up in 2020 after one bad haircut convinced her that women deserved a destination that felt like a magazine, taught like a stylist, and inspired like an art gallery. She oversees every story from concept to publication, guided by a simple belief: a good story teaches you something, but a great one makes you feel beautiful while it does.