18 Fine Hair Updo Ideas That Don’t Fall Flat
Dealing with fine hair feels like a constant battle against gravity. You spend an hour styling your hair in the mirror. You walk outside. Five minutes later your hair completely collapses. I have been there many times. Thin strands slip right out of pins. Clips slide down your head without warning. Finding a style that stays put takes serious work. Here is what nobody tells you about fine hair. The right preparation matters much more than the style itself. Texture spray acts as your best friend. Clean hair acts as your absolute worst enemy. We will fix these daily frustrations right now with real solutions.
You are about to see exactly how to keep your hair up all day long. I tested these specific styles on my own fine hair. We cover everything from casual messy buns to formal wedding guest looks. You will see exact product names like Kenra Volume Spray 25 and Oribe Dry Texturizing Spray. I share precise bobby pin placements for thin hair. You get realistic time estimates for every single style. Most take under ten minutes to finish. You will finally master the messy slick back. You will perfectly execute prom bun hairstyles without panic. Say goodbye to flat roots and slipping pins today.
1. The Messy Slick Back
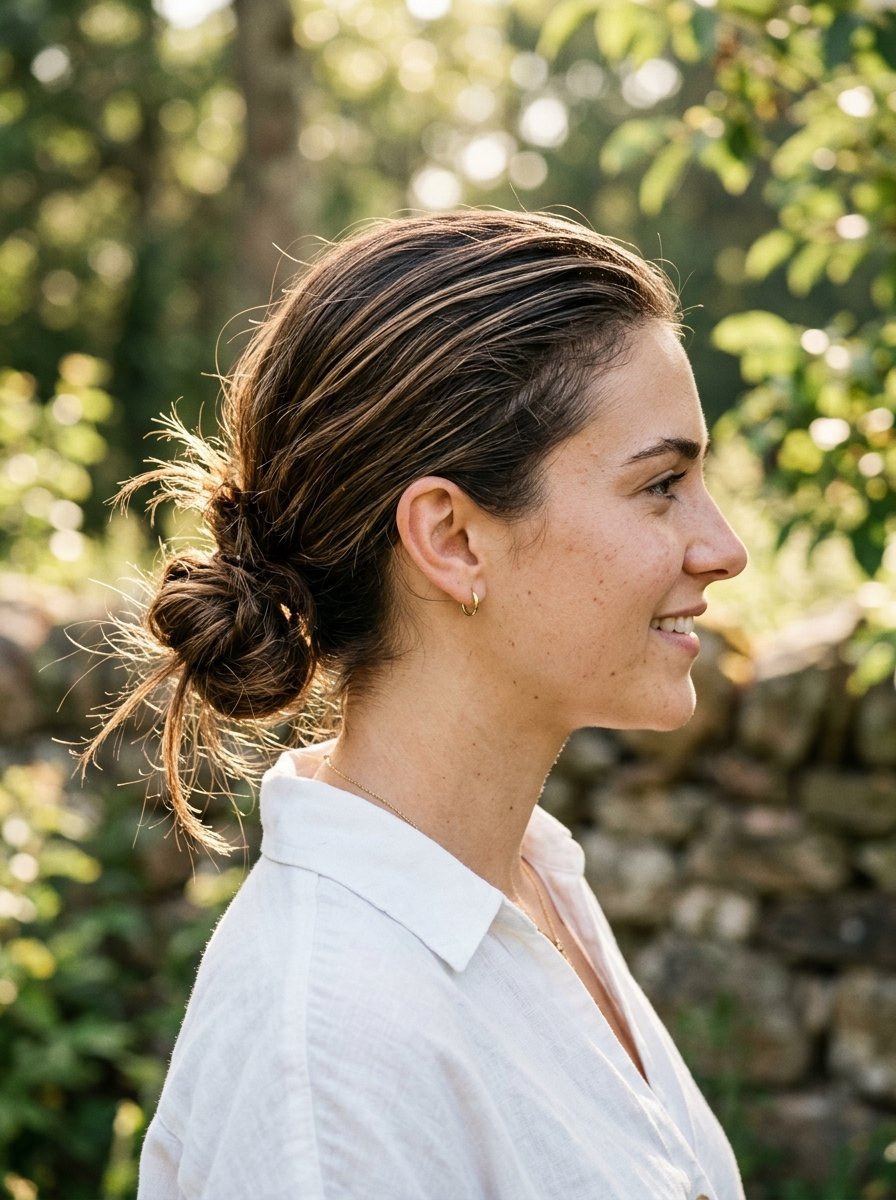
Getting a messy slick back right takes exact product placement. Fine hair normally separates when you pull it back. The scalp shows through the thin strands. I see this happen constantly with my clients. You fix this by changing your prep routine completely. Start with second day hair instead of freshly washed hair. Spray Batiste Dry Shampoo directly at the roots. Massage it in deeply with your fingertips. This gives the hair intense grip. Gather your hair at the middle of your head. Do not brush it perfectly smooth. Leave some natural texture in the middle sections. Smooth only the very front edges with a boar bristle brush. Put a dime sized amount of got2b Glued styling gel on the front hairline. Tie the back into a loose knot. Let the ends stick out slightly for a modern look. This style takes exactly five minutes. It stays tight for ten hours straight. You never have to worry about flat roots again.
2. The Textured Curled Bun
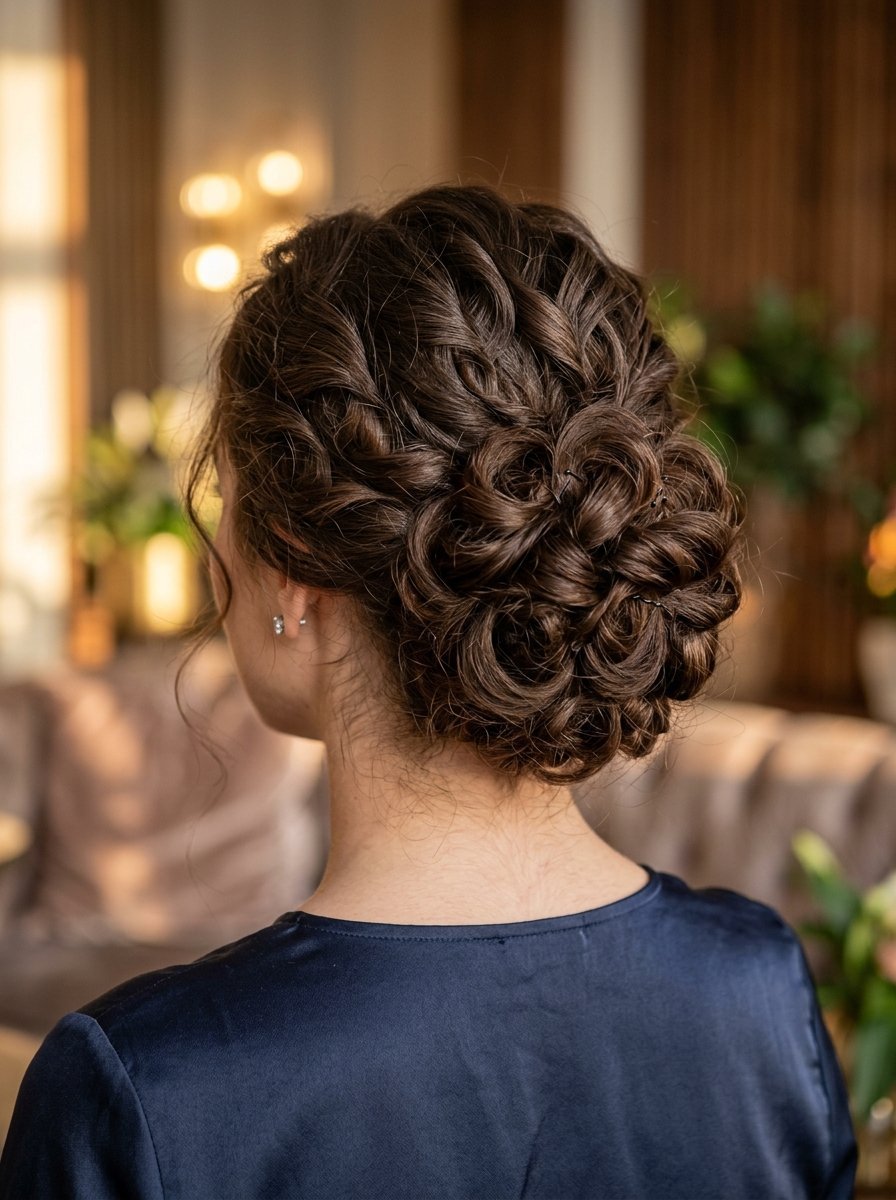
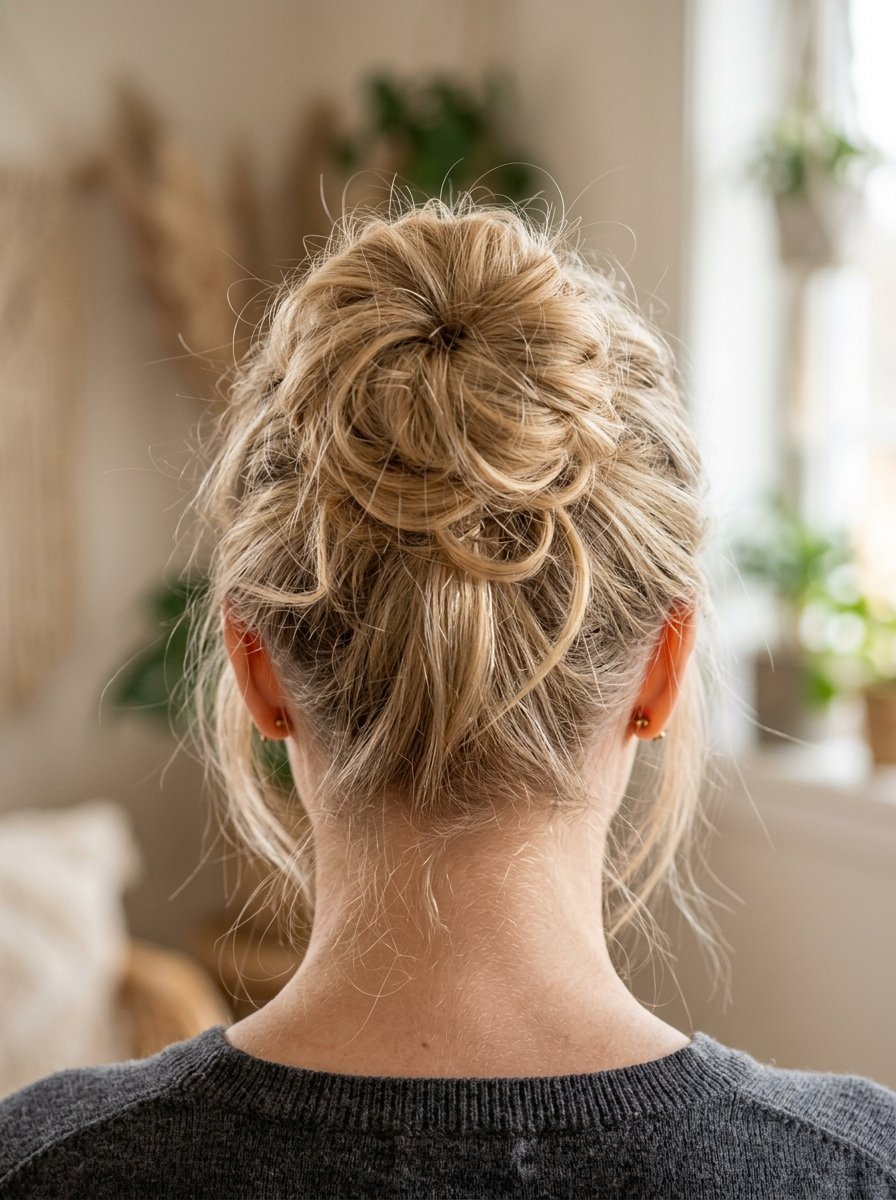
A curled bun makes fine hair look twice as thick. Straight fine hair wraps into a tiny sad knot. Curls take up much more physical space. Someone taught me this trick for a friend last Tuesday. We curled her whole head first. Use a one inch Hot Tools curling iron for tight waves. Spray each section with Kenra Volume Spray 25 before curling. Do not brush the curls out at all. Gather them gently at the nape of your neck. Use a clear elastic to tie a loose ponytail. Pin individual curls around the elastic base. Use matte bobby pins instead of shiny ones. Matte pins grip fine hair much better than standard pins. This curled bun gives the illusion of massive volume. It takes about twenty minutes to finish completely. The style works perfectly for formal dinners and evening galas. Your hair will look incredibly thick all night.
3. The Soft Elegant Twist
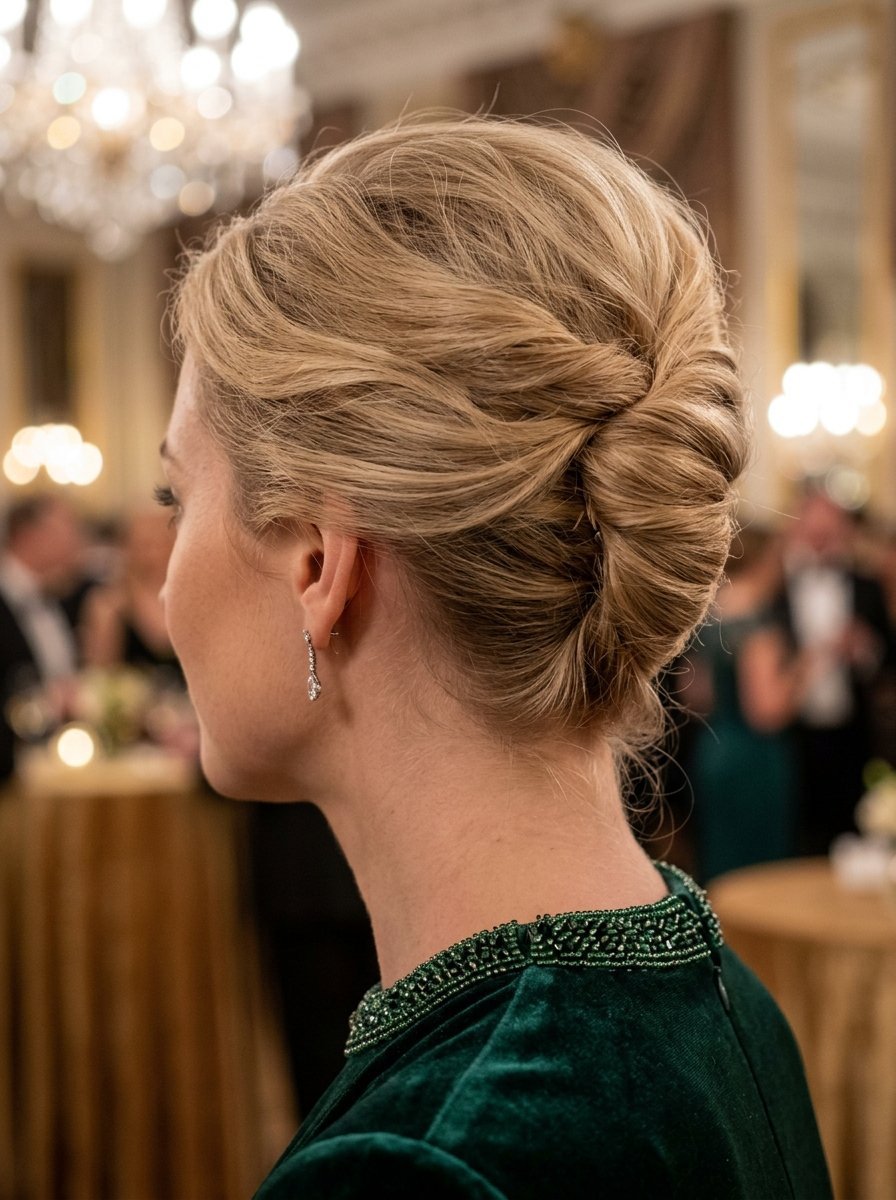
Finding hairstyles elegant enough for galas feels hard with thin strands. Most twists fall perfectly flat against the skull. I have noticed a simple trick for this issue. You need a teasing comb and some dry texture spray. Spray Oribe Dry Texturizing Spray all over your roots first. Backcomb the crown area gently with three strokes. Smooth the top layer over the teased section. Gather your hair at the back of your neck. Twist it upward tightly against your head. Fold the top ends down inside the twist pocket. Insert U shaped hairpins along the seam. Regular bobby pins slide out of twists easily. U shaped pins catch the hair and hold it tight. I see this hold up for entire outdoor weddings. The style takes ten minutes of your time. You get a beautiful voluminous shape. The twist stays locked in place through hours of dancing.
4. The Low Slick Back Bun
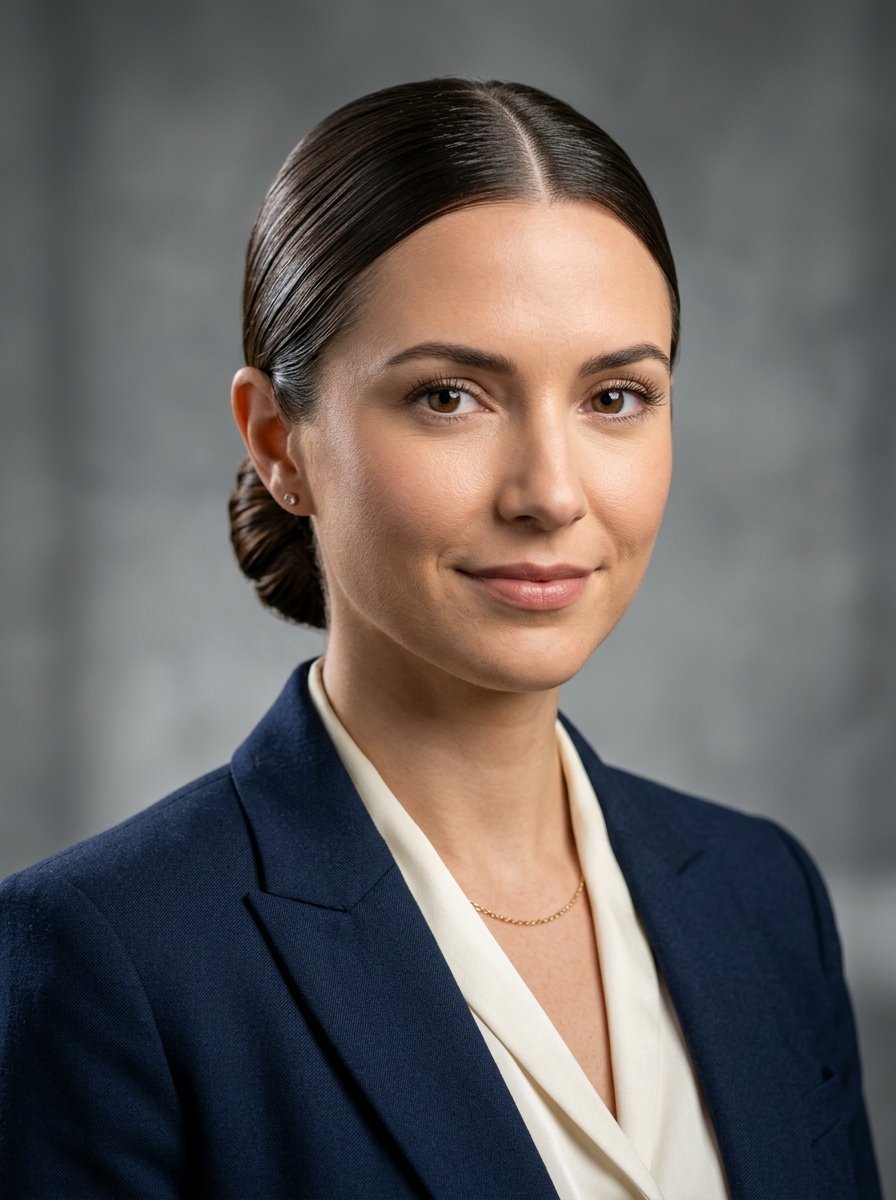
Slick back bun hairstyles perfectly hide greasy roots. Thin hair gets oily very quickly. Second day hair often lies completely flat against the head. This style uses that natural oil to your advantage. Part your hair exactly in the middle. Use a fine tooth comb for a sharp line. Apply a generous amount of Ouai Matte Pomade from the roots to the middle shaft. Brush the hair back tight against your scalp. Tie a low ponytail at the base of your neck. Twist the ponytail tightly like a rope. Wrap it around the base to form a small flat knot. Pin it tight with grip pins. In my experience putting hairspray on the pins before insertion makes them grip better. You get a sleek finish that lasts all day long. It takes just five minutes. You look highly polished for any business meeting.
5. The Wedding Guest Crown Braid
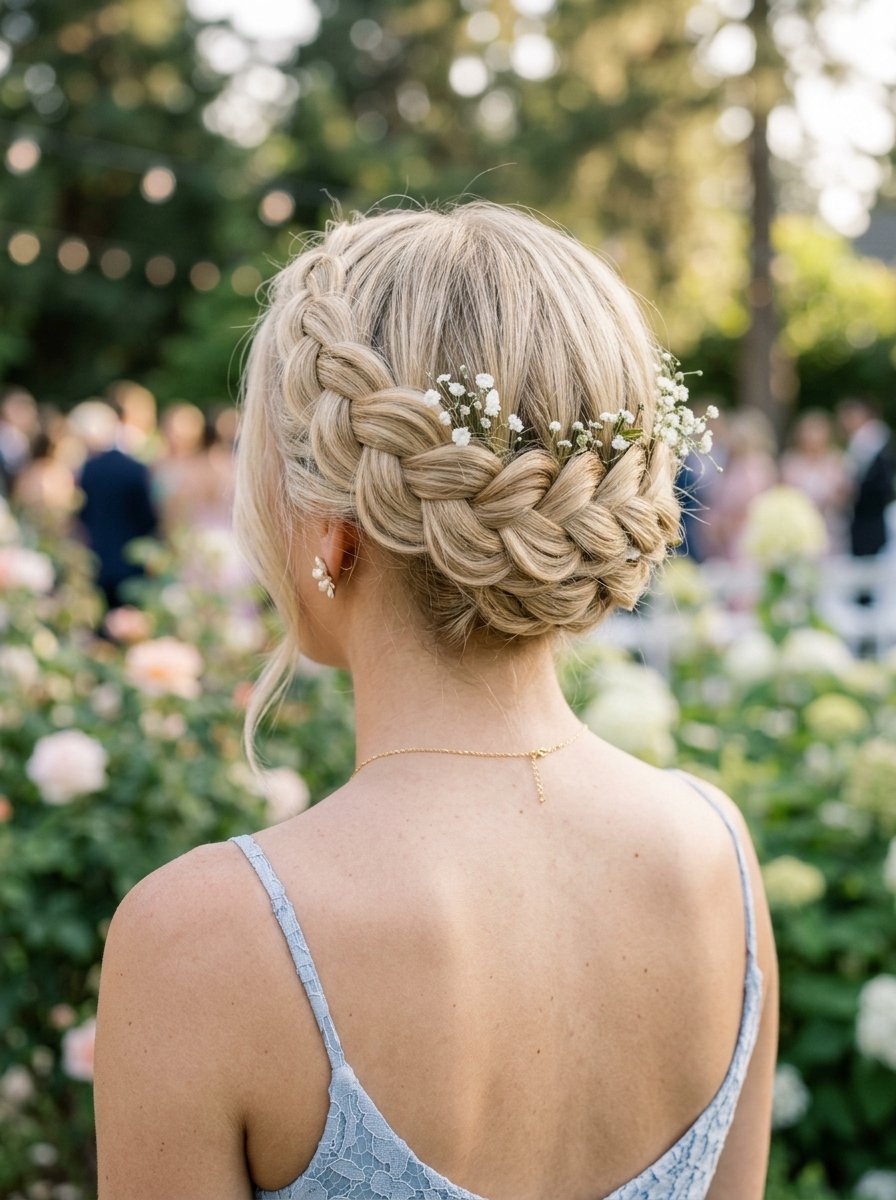
Finding the right hair wedding guest style causes so much stress. You want something pretty that stays out of your face completely. A crown braid works wonderfully for thin hair. You do not need thick hair for this at all. Part your hair down the middle. Start a Dutch braid on one side of your head. Pull the outer pieces outward gently as you braid. People refer to this as pancaking. Pancaking makes the braid look three times wider. Use IGK Beach Club Texture Spray on the braid before pulling. The spray stops the fine pieces from slipping out. Pin the braid across the back of your head. Hide the ends under the opposite braid. I wore this to a summer wedding last year. It stayed flawless through hours of dancing. You need about fifteen minutes to style this perfectly.
6. The High Prom Updo
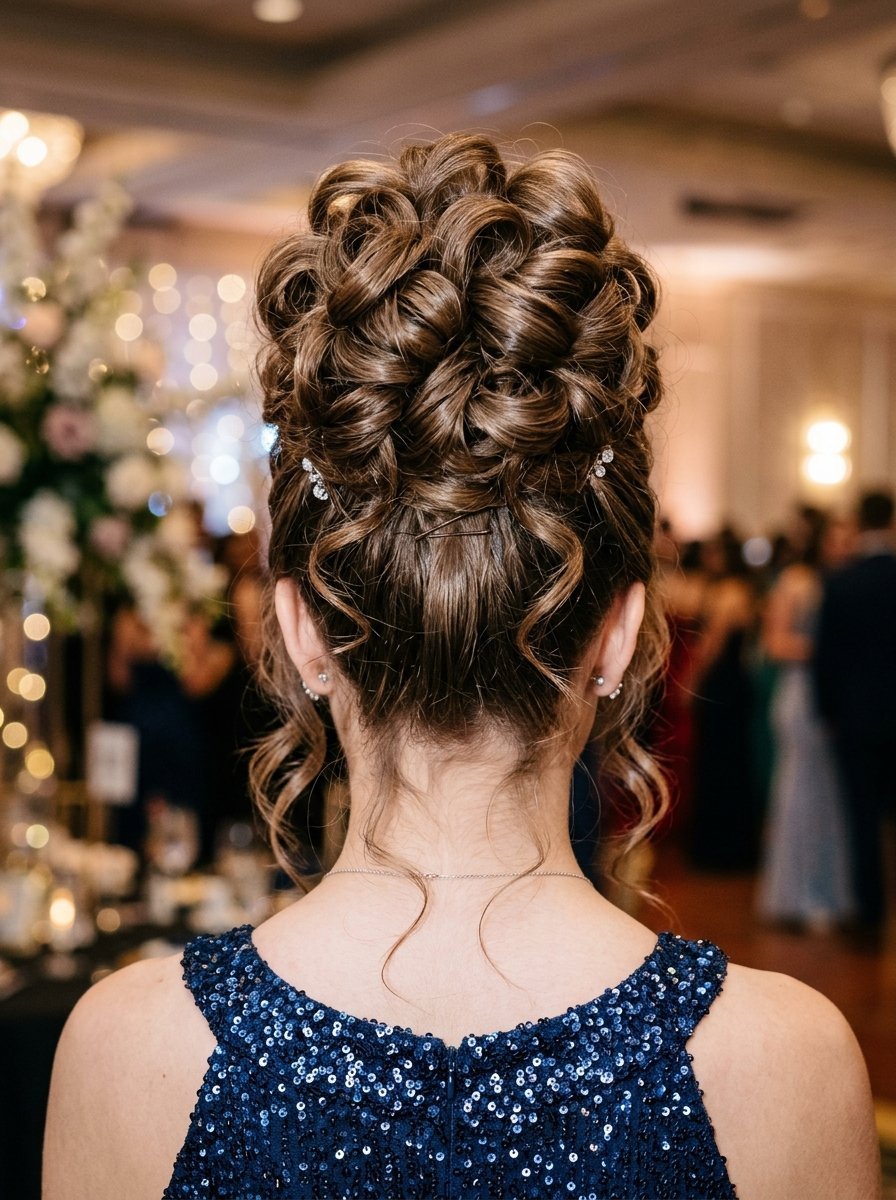
Teenagers constantly struggle with prom updo hairstyles falling flat. Fine hair drops entirely under the weight of heavy hairspray. You need a lightweight structure to hold the shape. Start by putting your hair into a high ponytail. Use two elastic bands instead of one. The double band pushes the ponytail out from the head. This instantly gives root lift. Split the ponytail into four equal sections. Curl each section lightly with an iron. Loop each curl back toward the base. Pin them tightly to the head. Leave two small pieces out around your face. Use a very light misting of L’Oreal Elnett Satin Hairspray. Heavy sprays weigh thin hair down immediately. This style looks completely full from every angle. It takes fifteen minutes to finish. It survives all night on the dance floor without dropping.
Using a professional root lift spray helps maintain volume throughout the day.
7. The Sculpted Slick Back Updo
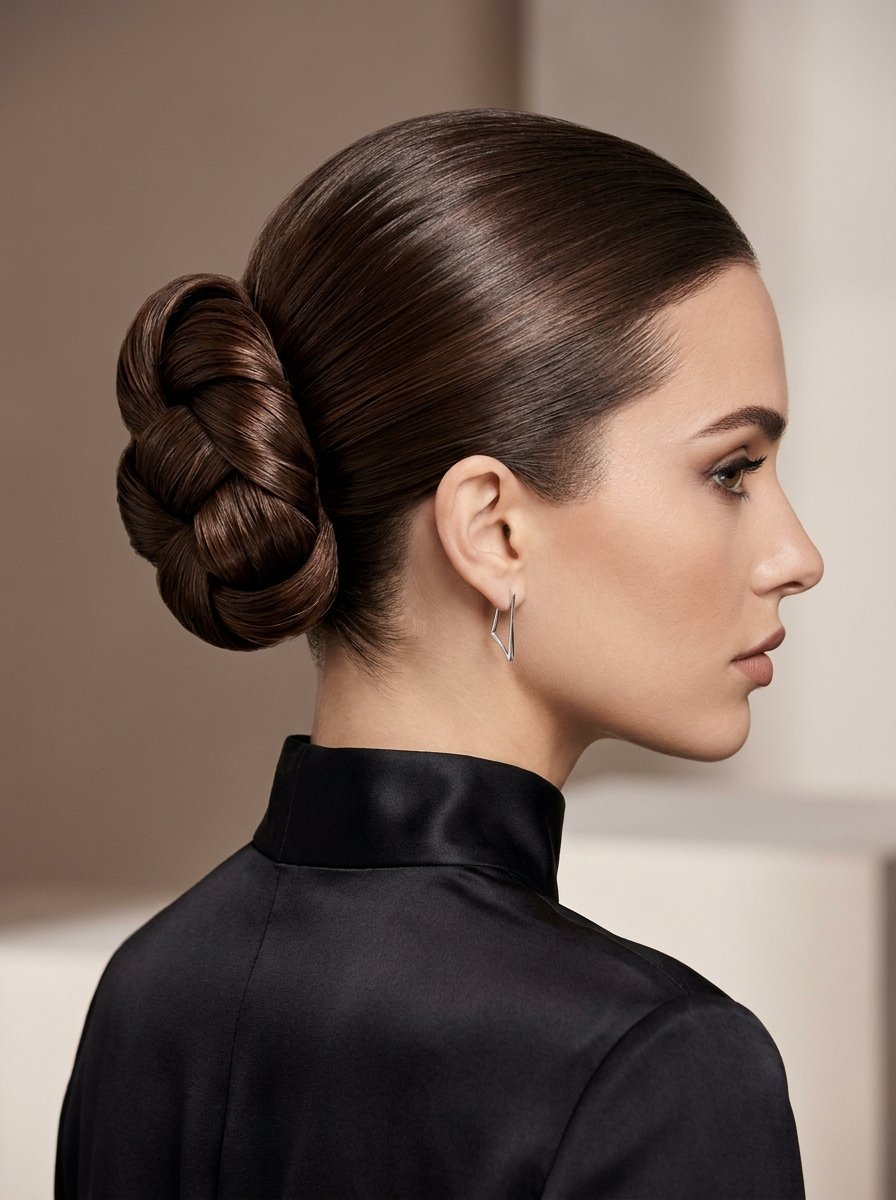
A high slick back updo gives a highly polished look for formal events. Fine hair cooperates beautifully with this specific style. Thick hair often gets too heavy for high placements. Thin hair stays up effortlessly without causing headaches. Brush your hair straight back with no part. Use a soft boar bristle brush for smoothing. Apply Redken Max Hold Hairspray to the brush directly. Brush the spray right into the hair. Gather the hair at the very top of your crown. Tie it tightly with a strong band. Twist the tail into a tight coil. Wrap it flat against your head. Pin it with four strong pins. Smooth flyaways with a clear brow gel. I love using Anastasia Beverly Hills Clear Brow Gel for this step. It glues the fine baby hairs down completely. The style takes eight minutes total.
8. The Romantic Twisted Guest Style
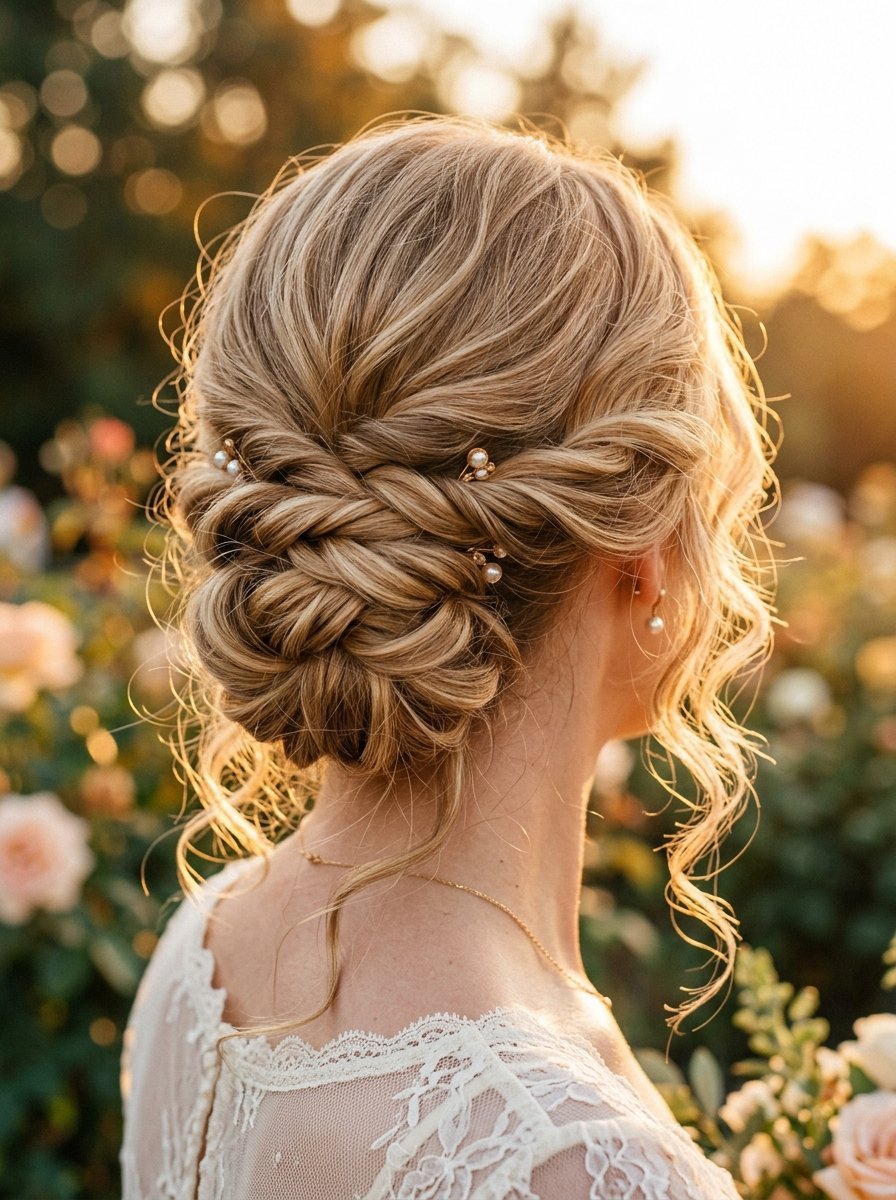
A romantic wedding guest hair updo needs softness and movement. Fine hair usually looks severe when pulled back tightly. You want loose volume instead of strict lines. Curl your whole head with a large barrel iron first. Do not use hairspray yet. Take small sections from the front near your face. Twist them loosely toward the back of your head. Pin them temporarily in the center. Cross the twists over each other gently. Pin them facing downward. Roll the remaining hair upward into a loose roll. Pin it right below the twists. Leave out wispy pieces around your ears. Pulling everything back exposes the scalp on thin hair. Leaving pieces down softens the face entirely. I love this style for outdoor garden ceremonies. It looks better as the wind loosens it naturally. Allocate twenty minutes for this beautiful look.
9. The Classic French Roll
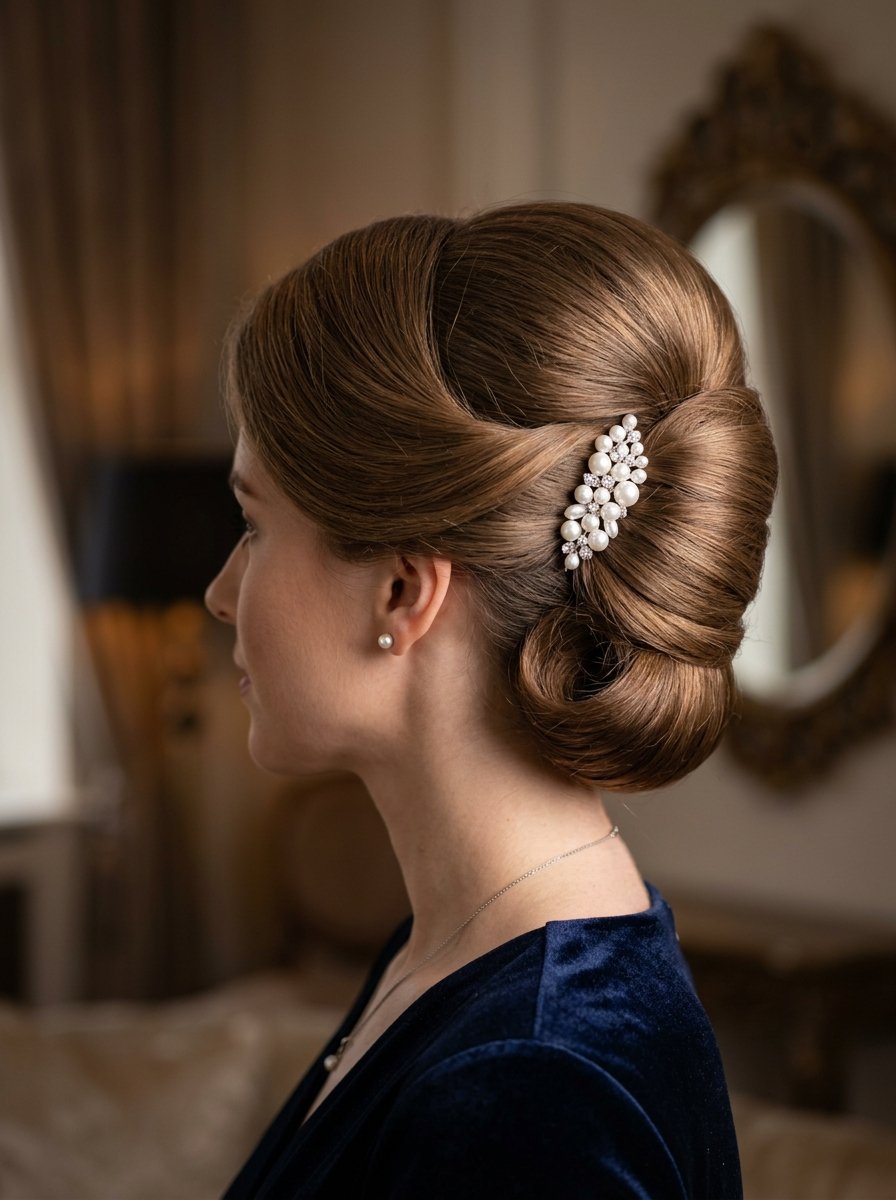
A French roll normally requires massive amounts of thick hair. We cheat the volume with thin hair using a secret trick. Someone taught me this trick three years ago before a gala. You need a foam hair rat or a rolled up hairnet. Match the foam color to your hair perfectly. Sweep all your hair to the left side. Pin it vertically up the back of your head. Place the foam insert over the bobby pins. Roll your hair back over the foam from left to right. The foam fills the inside of the roll completely. Tuck the ends in cleanly at the top. Pin the roll tightly along the seam. Spray heavily with Tresemme Extra Hold Hairspray. Nobody knows the volume comes from a hidden insert. You get a perfect shape in twelve minutes. It looks incredibly sophisticated.
10. The Braided Nape Chignon
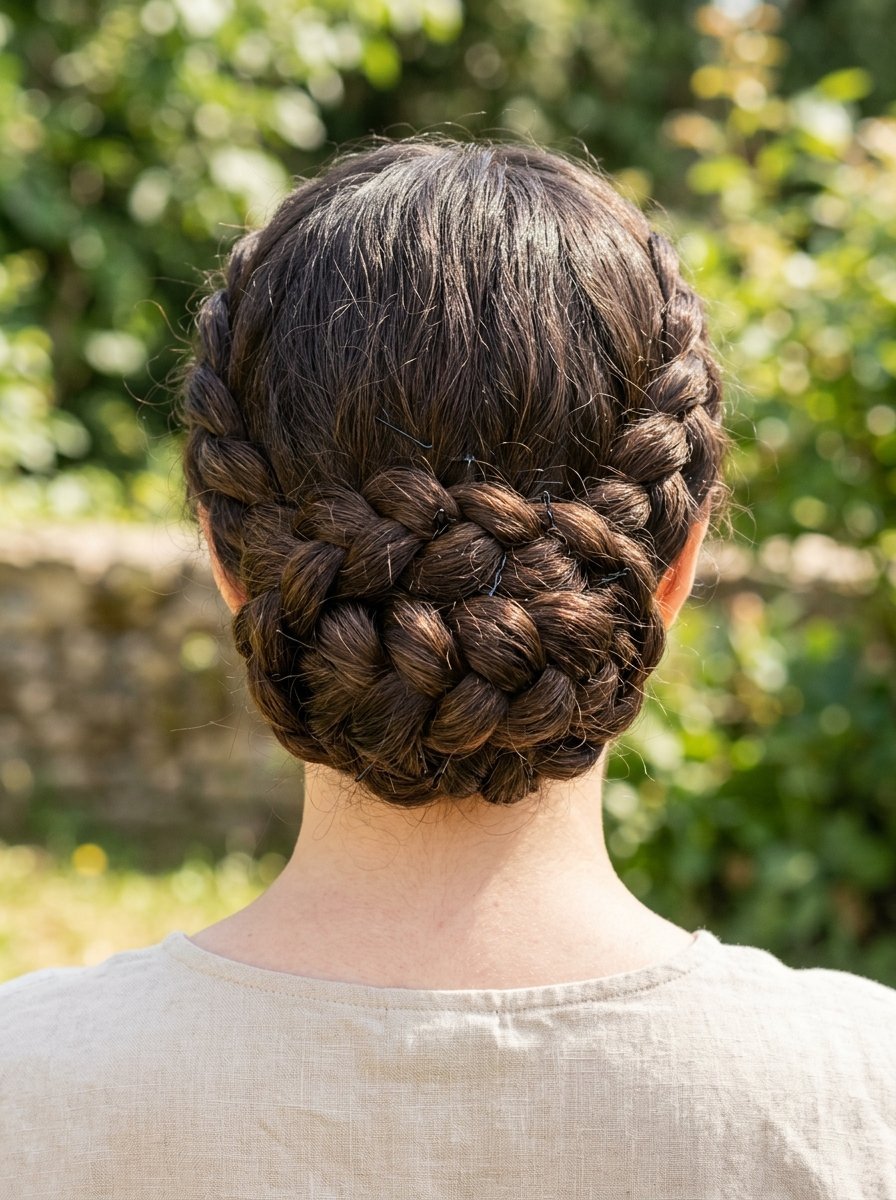
A chignon looks beautiful but often slips right out of fine hair. Braiding the hair first fixes this slipping issue completely. Braid your hair into a simple three strand braid. Tie the end with a small clear elastic. Pull the loops of the braid outward with your fingers. Make the braid look as wide as possible. Apply a dusting of Got2b Powderful Volumizing Styling Powder. The powder makes the hair sticky and fat. Roll the wide braid up toward your neck. Pin it flat against your head. The braided texture holds bobby pins tightly in place. Straight fine hair lets pins slide right out. Braided hair traps the pins entirely. I do this style when I have zero time in the morning. It takes exactly four minutes. It looks highly polished for the office.
11. The Double Rope Twist
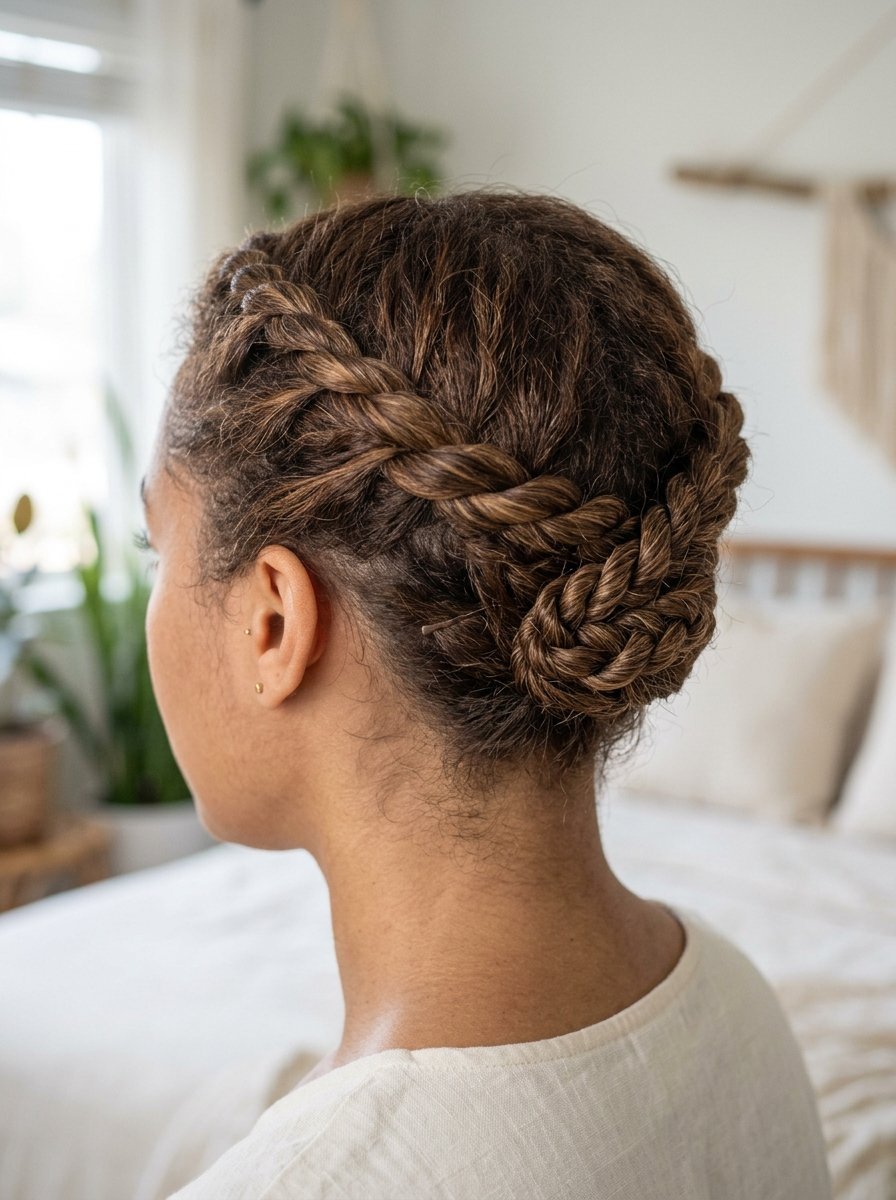
Rope braids work beautifully on thin hair because they hold tight. They lay flat against the head and stay completely secure. Part your hair horizontally across the back. You now have a top section and a bottom section. Split the top section in two pieces. Twist both pieces to the right. Cross them over each other to the left. This locks the twist into place. Tie the end tight. Do the exact same thing with the bottom section. You now have two rope braids. Wrap the bottom braid into a flat circle. Pin it well against your neck. Wrap the top braid around the bottom circle. Pin the ends underneath to hide them. Spray everything with Nexxus Comb Thru Finishing Mist. The double ropes give a highly detailed texture. It looks like you spent hours at a salon. It actually takes ten minutes.
12. The Elevated Crown Ponytail
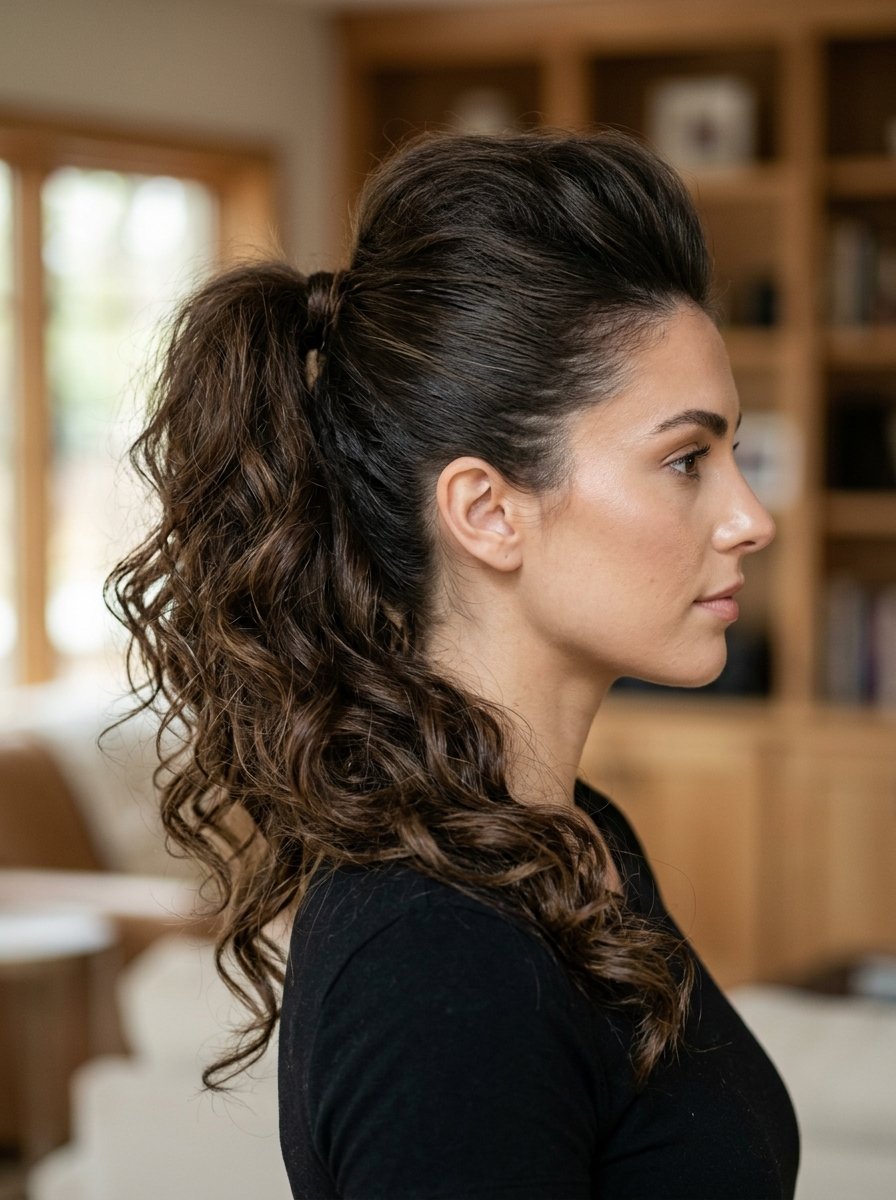
A ponytail counts as an updo when you style it right. Fine hair usually makes a sad skinny ponytail that sits flat. We fix this with aggressive teasing at the crown area. Take a horizontal section of hair at the crown. Hold it straight up in the air. Push a fine tooth comb down toward the roots three times. Spray the teased roots with hairspray immediately. Lay the section back down. Smooth the very top layer gently. Gather all hair into a middle height ponytail. Now for the secret trick. Push two bobby pins vertically downward into the elastic band on the underside. The pins prop the ponytail up away from the head. Your ponytail instantly looks fuller and higher. The crown height balances your face shape beautifully. It takes six minutes maximum before heading out.
13. The Face Framing Pin Up
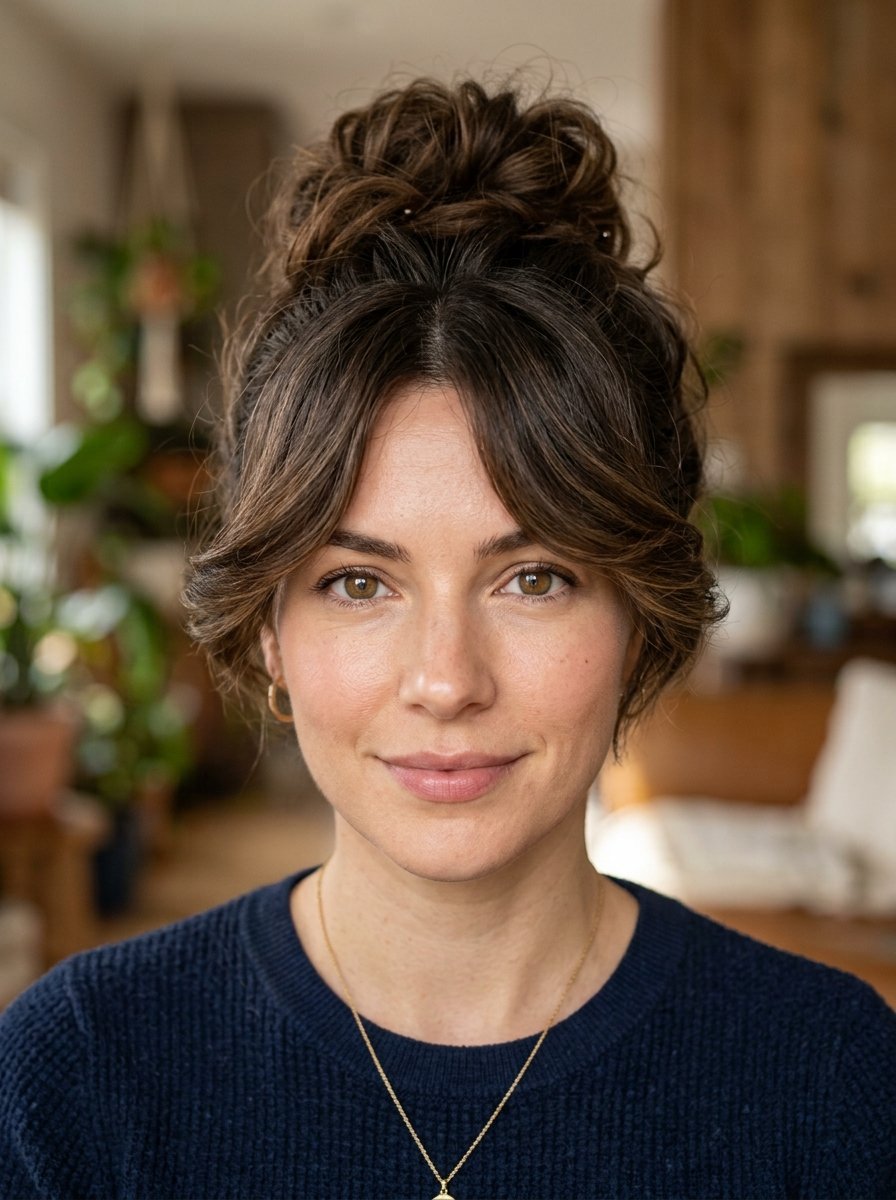
Pulling fine hair straight back often looks very harsh on the face. Your scalp might show through at the temples or hairline. A face framing style hides thinning edges completely from view. Section off the front two inches of your hair near your face. Clip these completely out of the way. Gather the rest of your hair into a messy bun at the back. Now take the front sections down. Drape them loosely backwards over your ears. Pin them into the bun at the back. Do not pull them tight at all. Let them swoop softly over your temples. This covers any sparse areas completely. I use this trick constantly for clients with postpartum hair loss. It forms a soft shadow around the face. You need about eight minutes for this gentle styling routine.
14. The Sock Bun Trick
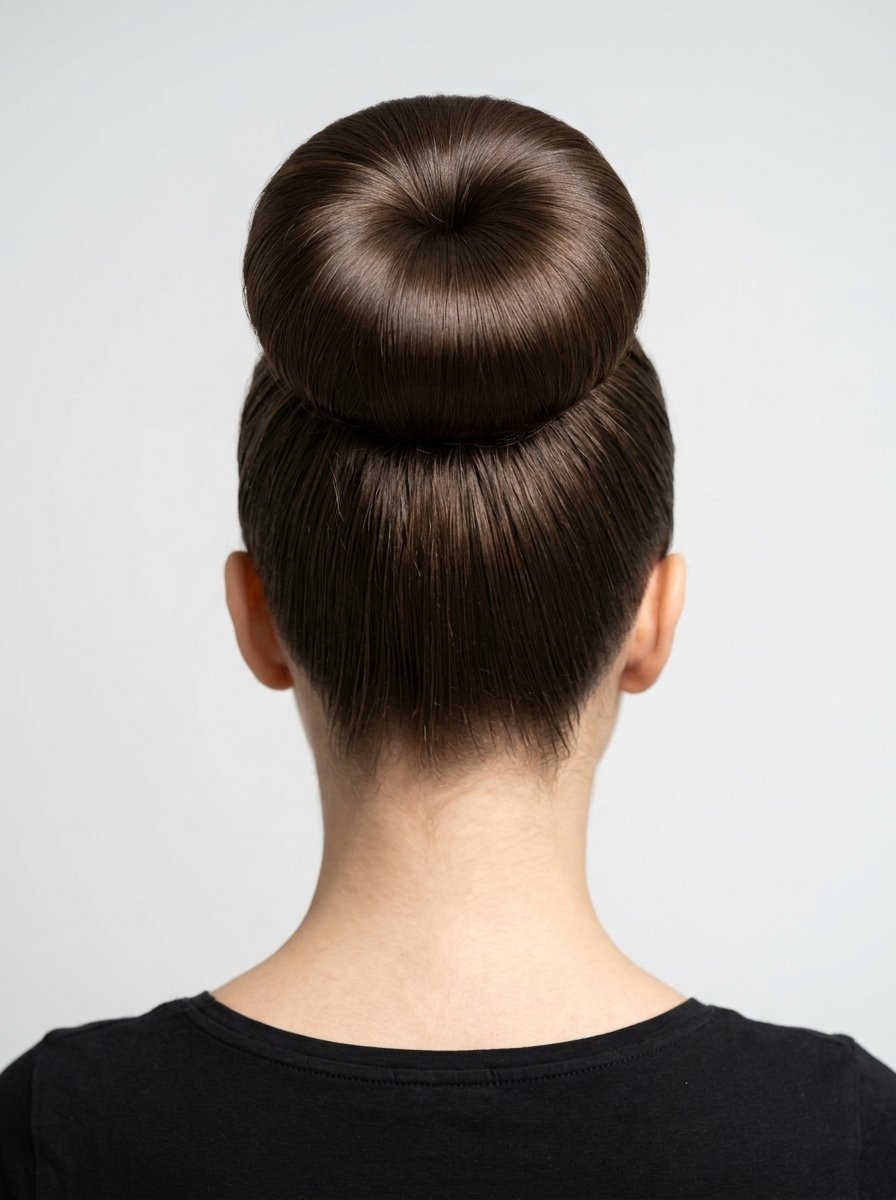
Fine hair rarely makes a large smooth bun on its own. You usually get a tiny knot the size of a golf ball. A mesh donut changes everything for thin hair. Buy a small hair donut matching your root color. Put your hair in a tight ponytail first. Pull the ponytail through the center of the donut. Spread your hair evenly over the mesh entirely. Wrap a thin elastic over the hair and the donut. Your hair now completely covers the mesh base. Gather the remaining ends. Wrap them around the base to hide the elastic. Pin the ends tightly. I prefer using a cut off dress sock instead of a store bought donut. The sock matches hair texture beautifully. This gives you a massive bun in four minutes flat. It looks incredibly professional.
15. The Voluminous Half Up Twist
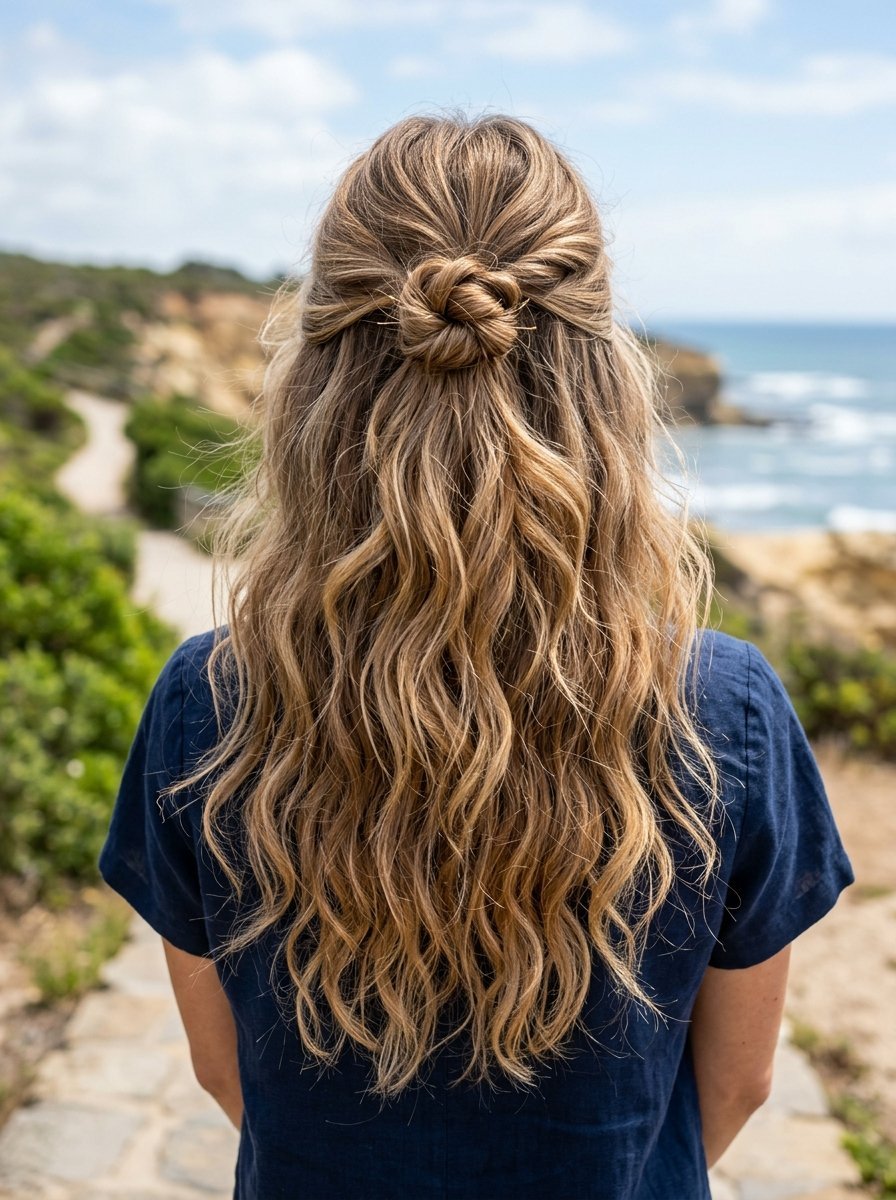
Sometimes a full updo feels too formal for daytime events. A half up style keeps hair off your face while looking casual. Fine hair often splits in the back when doing a half up style. You fix this by taking hair from higher up on the head. Do not take hair from above your ears. Take hair only from your temples upward. This leaves enough hair in the back to cover your scalp completely. Twist the gathered hair into a small knot. Pin it at the crown of your head. Spray the loose bottom hair with sea salt spray. Scrunch it wildly with your hands. I love Bumble and Bumble Surf Spray for this exact purpose. It gives fine hair a gritty texture that lasts. This style requires barely five minutes of your morning routine.
16. The Triple Knot Nape Bun
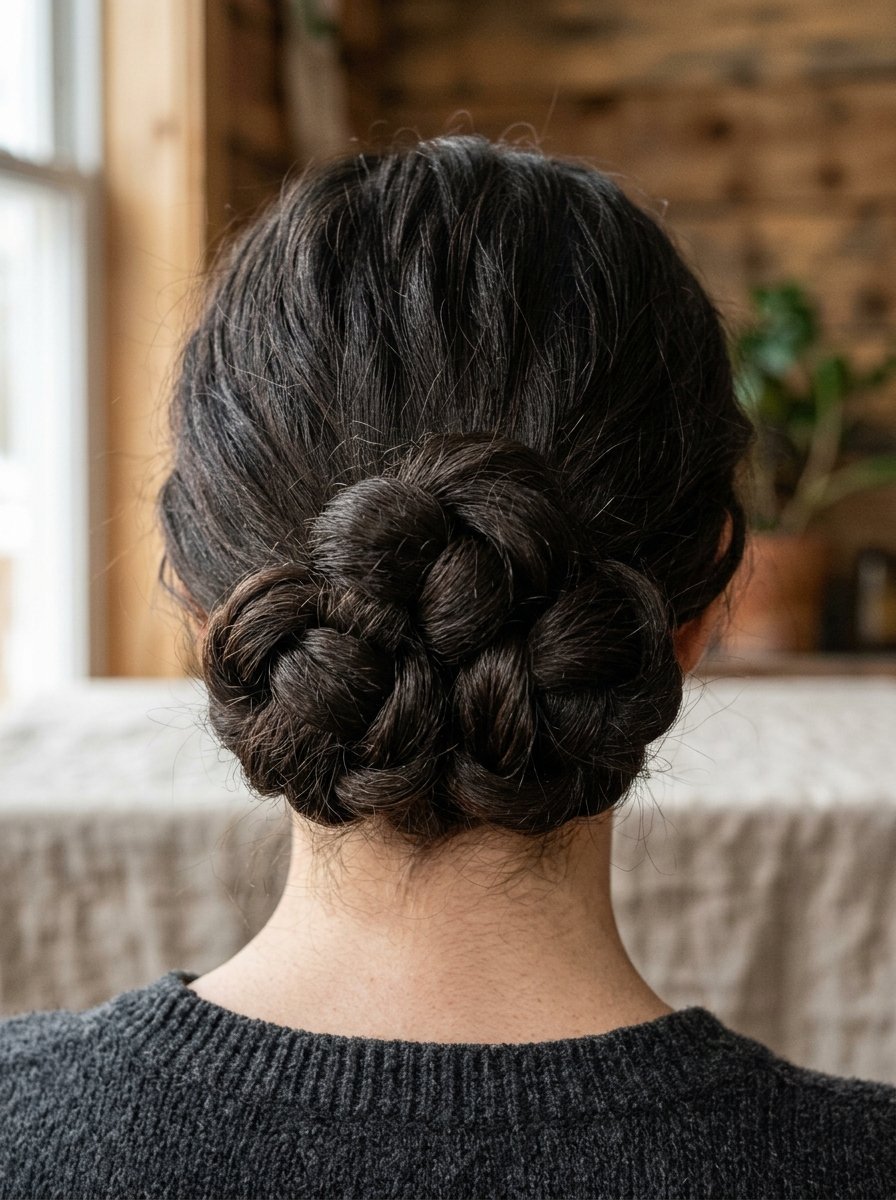
Bobby pins fall out of clean fine hair constantly throughout the day. Tying the hair in literal knots holds much better than pins. Brush all your hair to the back of your neck. Divide it into three equal sections. Take the middle section first. Tie it into a simple knot exactly like tying a shoelace. Pin the knot flat against your head. Take the left section next. Tie it into a knot right next to the middle one. Pin it tight. Do the same with the right section. You now have three textured knots sitting at your neck. They interlock together securely. They will never slip out. The knots naturally push against each other for volume. I figured this out when I ran out of elastics on a trip. It takes seven minutes. It stays flawless until you take it down.
17. The Bubble Braid Pin Up
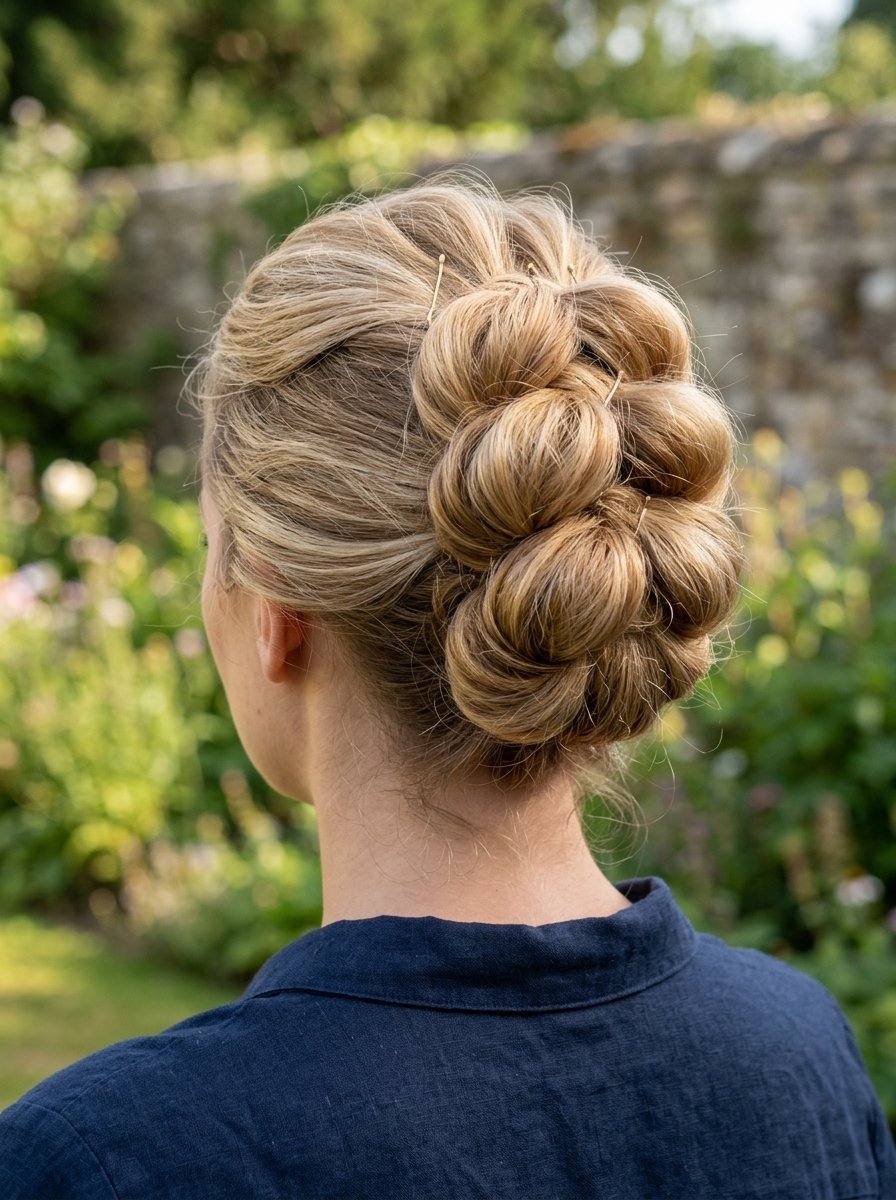
Bubble braids make fine hair look incredibly thick and voluminous. They require no braiding skills at all to master. Put your hair in a high ponytail to start. Tie a small elastic two inches down the ponytail shaft. Gently pull the hair between the elastics outward. This forms a round puffy bubble. Tie another elastic two inches down. Pull that section outward again. Repeat until you get to the ends of your hair. Now take this entire bubble ponytail and wrap it around the base. Pin it into a textured bun. The bubbles give the bun a complex braided look. It occupies twice the physical space of a regular bun. I use clear Goody elastics for this style. They never snap or break. You can finish this completely in nine minutes before work.
18. The Modern Claw Clip Twist
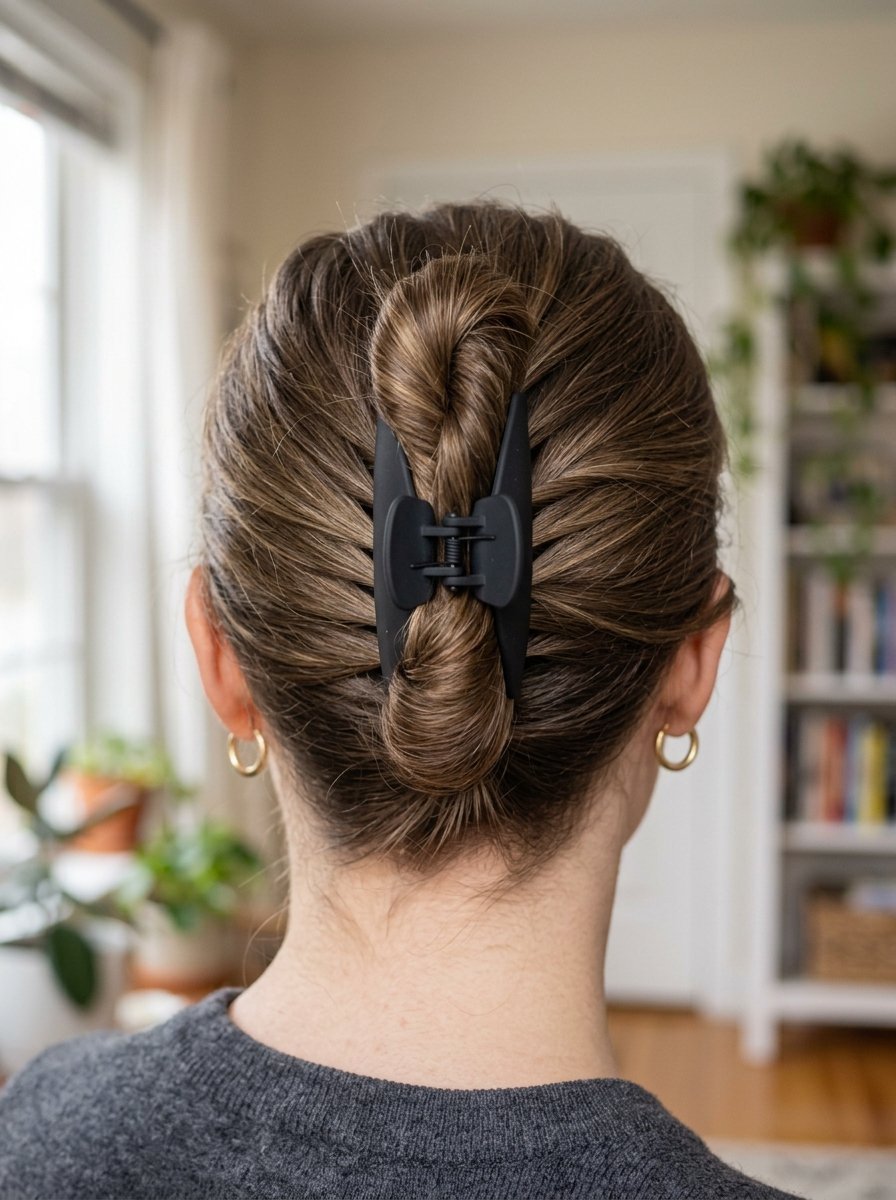
Claw clips are everywhere right now in fashion. Fine hair often slips straight through large modern clips. The teeth do not have enough hair to grab onto. You must use the twist and fold trick for thin hair. Gather your hair at the nape of your neck. Twist it upward tightly against the scalp. Once you get to the top of your head fold the tail downward. Now you have doubled the thickness of the twist entirely. Open a medium sized claw clip. Bite the clip directly over the folded section. The double thickness gives the clip exactly what it needs to hold tight. I buy matte rubberized clips from Target. The rubber coating grips thin hair beautifully. Shiny plastic clips slide right out onto the floor. This takes ten seconds. It looks perfectly styled every single time.
Frequently Asked Questions
How do I stop my scalp from showing?
Thin hair often parts in weird directions on its own. This exposes shiny patches of scalp. Try using a tinted dry shampoo or a root touch up powder. Color Wow Root Cover Up works perfectly for this exact issue. You paint the powder onto your scalp where the hair looks thin. It forms a dark shadow. The scalp entirely disappears from view. You must apply it after you finish pinning the style. Do not apply it before styling. Your fingers will smear the powder everywhere.
Why do my bobby pins keep sliding out?
You are likely opening the pins before inserting them. Never pull a bobby pin apart with your teeth or fingers. Push the closed pin directly into the hair. The metal needs to stay tight to grip thin strands. Always insert the wavy side down against your scalp. The flat side goes facing up. Spray the pins heavily with hairspray before putting them in your hair. The sticky spray grips the strands and stops all sliding.
Can I do these styles with freshly washed hair?
Clean hair feels completely too slippery for updos. The strands slide past each other without grabbing. You need grit and texture for hold. Wash your hair the night before you want an updo. If you must style clean hair you need products. Apply dry shampoo from roots to ends immediately. Spray sea salt spray on the middle lengths. Dry it fast with a blow dryer. This fakes the rough texture of second day hair completely.
What hairspray works best for thin strands?
Heavy sprays make thin strands stick together in clumps. Your hair ends up looking like a wet hard helmet. You want a flexible dry finishing spray. Kenra Volume Spray 25 holds tight without giving moisture to the hair. Moroccanoil Luminous Hairspray Strong gives great hold with zero crunchiness. Always hold the can ten inches away from your head. Spraying too close causes heavy liquid buildup that drags the hair down.
How do I hide thinning edges around my face?
Never pull your hair back tightly at the temples. Always leave soft wisps down around your ears and face. If your edges are very sparse try a sweeping motion. Sweep your hair downward over the ears before pulling it back. This covers the thin spots entirely with hair. Use a soft toothbrush with a tiny bit of gel. Gently brush baby hairs forward to cover the hairline naturally.
Does teasing damage thin fragile hair?
Aggressive backcombing breaks fragile hair easily. You must do it very gently. Use a proper teasing brush with boar bristles only. Never use a hard plastic comb. Take small sections of hair. Push the brush down toward the scalp only three times. Never scrub the brush up and down the hair shaft rapidly. When removing the tease later start brushing from the very ends of your hair. Work upward slowly.
How do I make my bun look bigger without extensions?
Pancaking acts as your best tool for volume. This means gently pulling on the edges of your hair to loosen the shape. Pin your bun tightly first. Then use your thumb and index finger to pinch tiny pieces of the bun. Pull them outward slightly from the center. The bun expands in size instantly. You can also use a foam hair donut as a hidden filler base.
Are silk scrunchies good for thin hair?
Silk protects fragile ends from breaking off completely. Regular rubber bands snap thin hair very easily. Silk scrunchies slide out too fast on their own. Use a small clear elastic first. Tie your hair tightly with it. Place the silk scrunchie right over the clear elastic. You get the strong hold of the elastic and the visual bulk of the silk scrunchie.
What tools do I need for these styles?
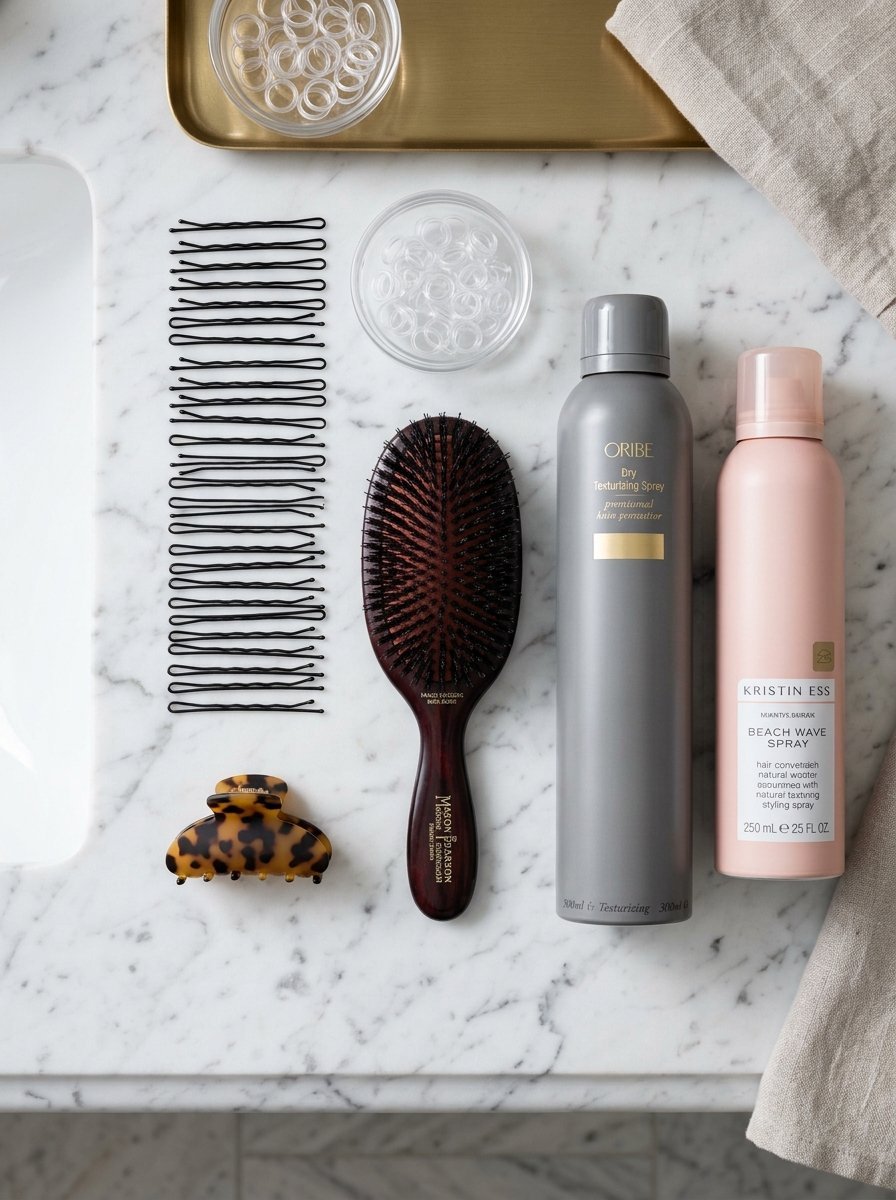
You do not need expensive styling tools at all. Good pins and good spray do all the heavy work. Here is what you need in your bathroom.
- Clear elastics in small sizes for invisible holds
- Matte bobby pins to grip fine hair tightly
- U shaped hairpins for twists and rolls
- A boar bristle brush for smoothing flyaways
- A high quality texturizing spray for grip
- A lightweight hairspray for flexible hold
How long do these styles actually take?
Most of these updos take under ten minutes in the mirror. The curled styles take up to twenty minutes because of the heat styling. Practicing the twists takes a few tries at first. Fine hair styles much faster than thick heavy hair. You have less mass to pin up. Once you learn the grip tricks you will finish your hair in five minutes flat every single morning.
Will sweating ruin the volume?
Sweat flattens fine hair at the roots immediately upon contact. Apply powder dry shampoo before you start sweating. The powder absorbs moisture instantly as it happens. If you plan to dance at a wedding choose a slicked back style. Slick styles use the moisture to stay completely smooth. Avoid teased styles if you sweat heavily. The tease will drop straight down and look flat.
Can I sleep in these styles?
Leaving pins in your hair overnight causes severe breakage. Fine hair breaks very easily under constant tension. Always take all pins and tight elastics out before bed. Brush your hair gently to remove the hard hairspray. Put your hair in a loose silk scrunchie braid for sleeping. This stops tangles in the night without pulling on your delicate roots.
Final Thoughts on Fine Hair Updos
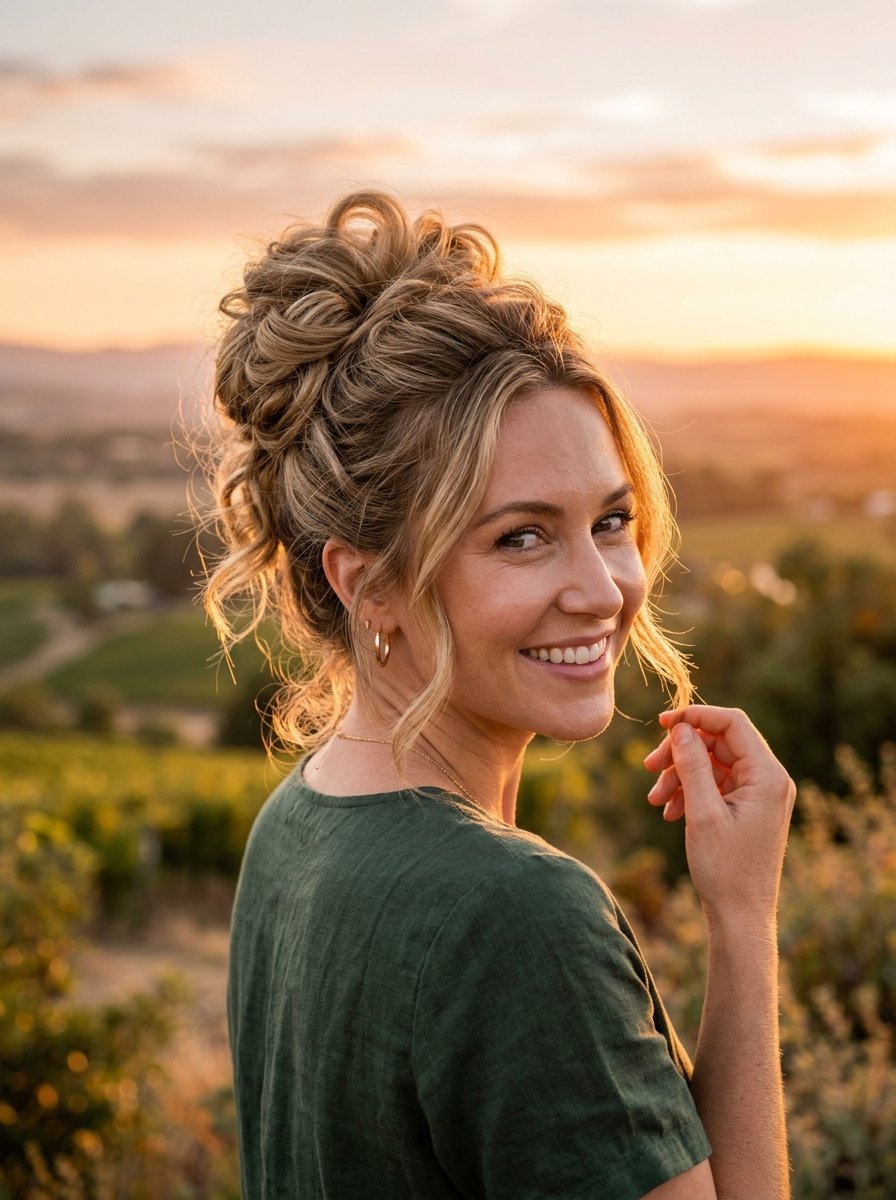
Dealing with thin strands does not mean wearing flat hair every single day. You now have exactly eighteen ways to keep your hair up securely. I remember fighting with slipping clips and dropping buns constantly. Changing your prep routine fixes most of these issues forever. Texture spray gives the rough grip you need. The right pins keep everything locked tightly in place. The messy slick back works flawlessly for daily casual wear. The curled bun saves you at formal events and dinners. Try the double rope twist tomorrow morning before work. Pay attention to how the matte pins feel different from the shiny ones. What style will you try for your next night out? Drop a comment below with your favorite look. I read every single reply.

Sarah Mitchell — Founder & Editor-in-Chief
Sarah Mitchell is the founder and editorial voice behind Hair Level Up. A licensed cosmetologist with more than 15 years of experience, she has styled A-list celebrities for editorial shoots and red carpets, with work featured in Vogue, Elle, and Harper’s Bazaar. Early in her career, she trained under the legendary hairstylist Oribe in New York, an apprenticeship that still shapes her editorial eye today. Sarah founded Hair Level Up in 2020 after one bad haircut convinced her that women deserved a destination that felt like a magazine, taught like a stylist, and inspired like an art gallery. She oversees every story from concept to publication, guided by a simple belief: a good story teaches you something, but a great one makes you feel beautiful while it does.