15 Medium Length Half-Up Styles for Daily Variety
Every morning presents a battle with the mirror. You stare at your medium length hair and wonder what to do. Leaving it entirely down feels boring. Pulling it completely back feels too severe. I noticed this exact frustration with my own shoulder-grazing cut back in 2023. I spent exactly twenty five minutes wrestling with bobby pins before a morning meeting. That morning changed my routine forever. I threw my hair into a basic half up half down hairstyle. The compliments rolled in all day. A minimal half up half down hair look gives you the best of both worlds. You get the polish of an updo with the soft framing of loose hair. Pinterest is flooded with hair tutorials easy enough for beginners. But many of those pins skip the exact step by step directions. They leave you guessing about the products used. I tested dozens of variations on my own hair. My medium length hair finally found its groove. Here is exactly what I found works best for busy mornings.
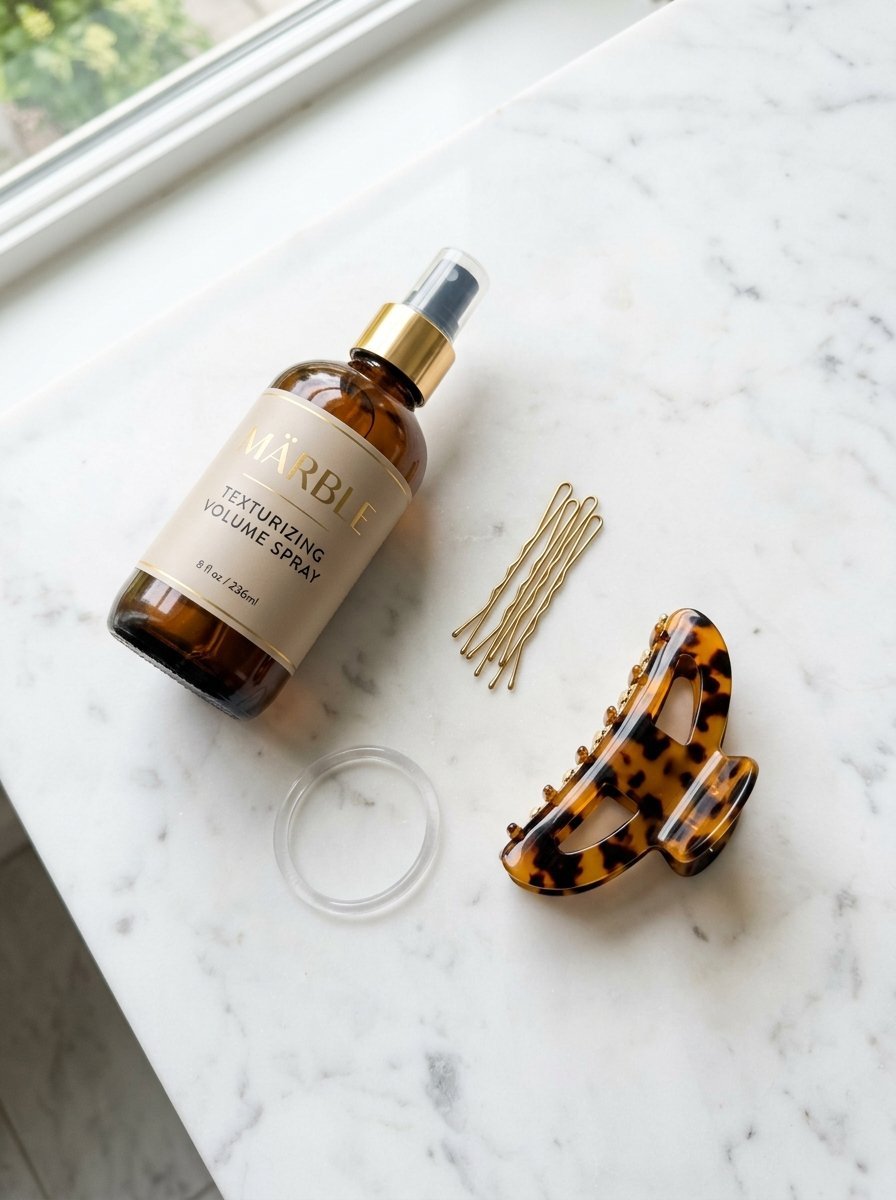
You will master fifteen exact hair half up styles in this guide. Most of these looks require under four minutes to finish. You only need basic tools like clear elastics and texturizing spray. I cover specific product recommendations like Oribe Dry Texturizing Spray.
- Quick styling routines
- Product cost details
- Pin placement secrets
- Wedding guest looks
Beginners will find the directions easy to follow. You will stop wasting time in the mirror every morning. Your hair will look polished and stay out of your face. You get detailed cost information for the best styling tools on the market. Let us get your hair looking perfect today.
1. The Twisted Crown Classic
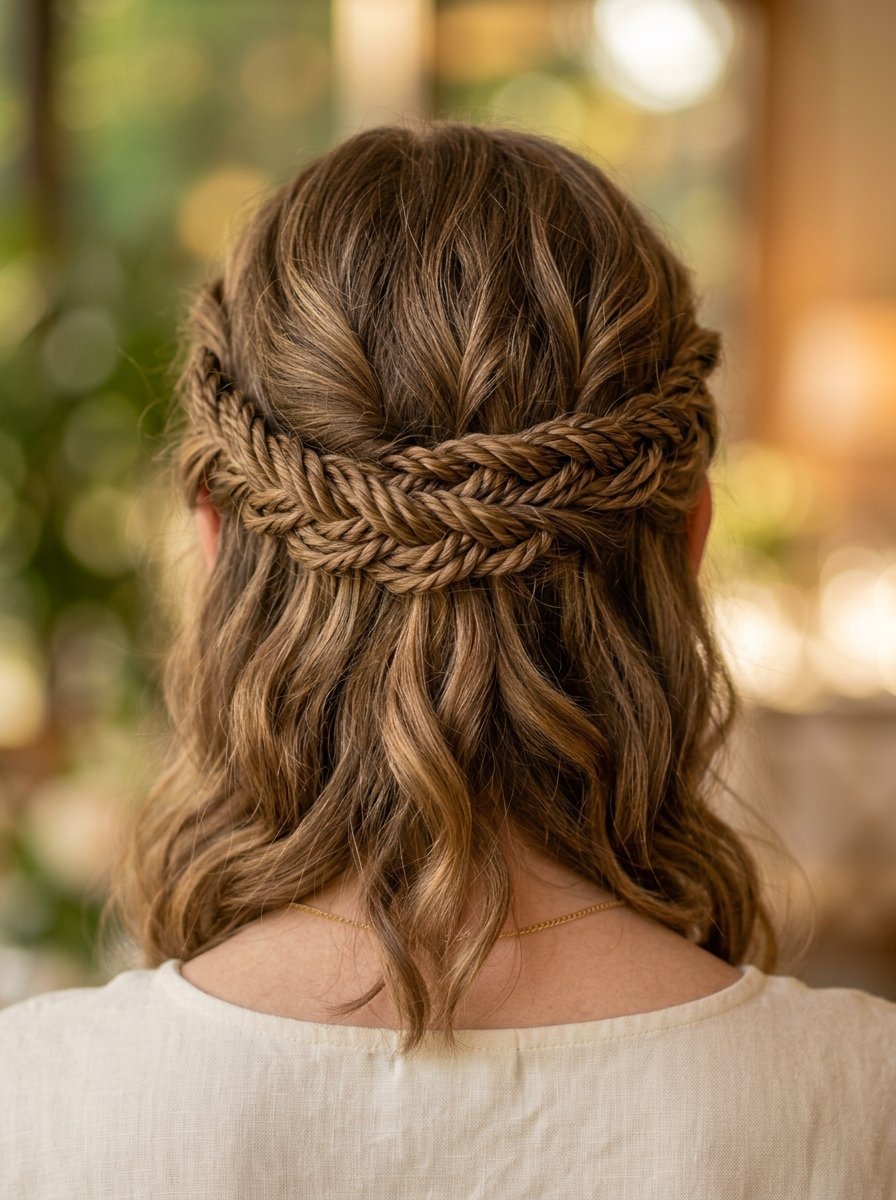
Creating a twisted crown takes less than two minutes. I rely on this half up hairstyle when running late. Start with dry hair that has a little grit. Freshly washed hair slips right out of the twists. Spray two pumps of Living Proof Full Dry Volume Blast. Part your hair straight down the middle. Grab a one inch section of hair from the right side. Twist this section tightly toward the back of your head. Hold it temporarily with a metal duckbill clip. Repeat this exact twisting motion on the left side. Bring both twisted pieces together at the back of your head. Tie them tightly with a clear Goody elastic band. Gently tug at the edges of the twists. This tugging makes the hair look thicker and softer. I tested this look during a ten hour shift last Tuesday. The style stayed completely put without any touch ups. You can spray a tiny bit of hairspray on your fingertips. Run your fingers over any flyaways near your face. This hair cover trick hides rubber bands instantly.
2. The Teased Mini Bouffant
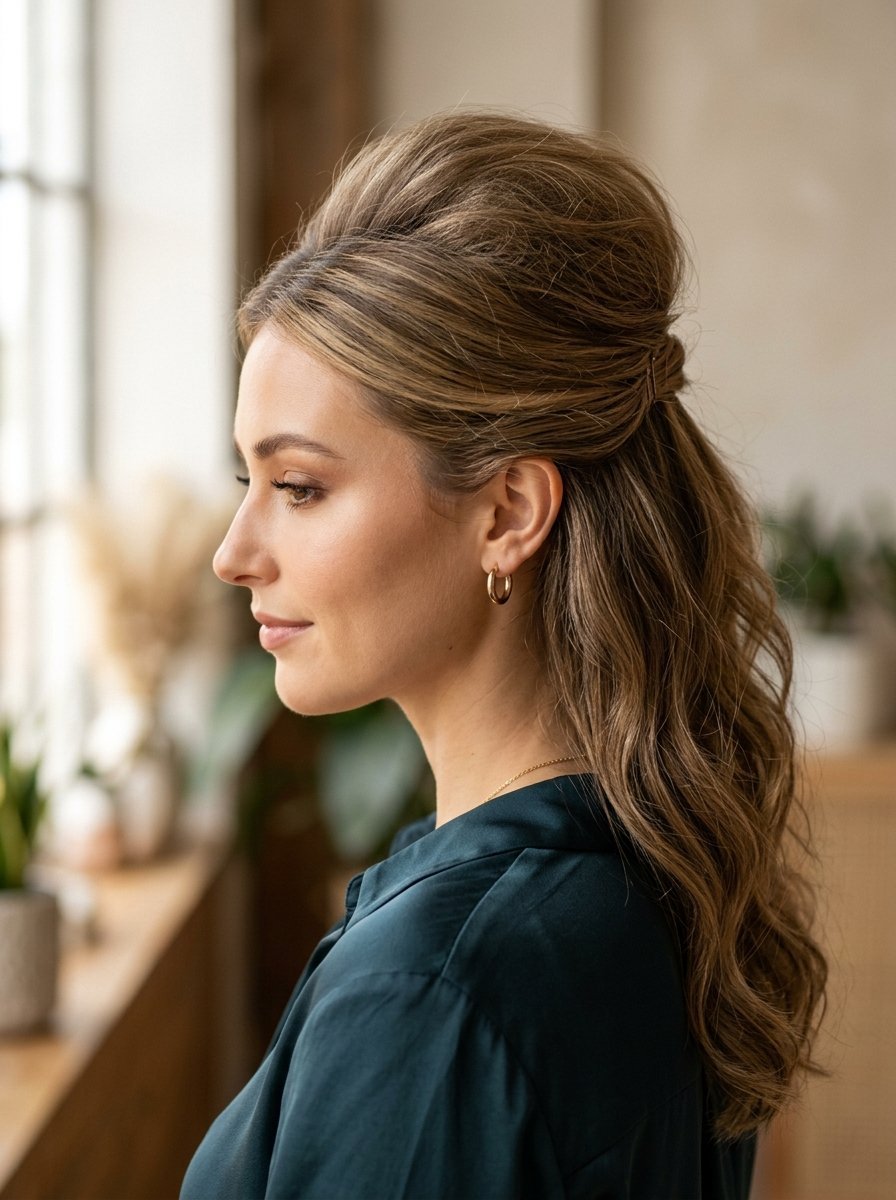
Many people want volume at the crown of their head. Flat hair makes any half up half down hairstyle look lifeless. I used to struggle with flat roots every day. Then I bought a Spornette teasing brush for seven dollars. This tool changed my entire morning routine. Take a three inch section of hair at your crown. Hold it straight up toward the ceiling. Comb the hair backward toward your scalp three times. Spray the roots with L’Oreal Elnett Satin Hairspray. Let the spray dry for exactly five seconds. Gently lay the hair back down to cover the teased section. Smooth the top layer lightly with your brush. Gather the sides of your hair and pull them back. Hold the hair just below the teased bump with pins. Use two bobby pins crossed into an X shape. This X shape locks the hair firmly in place. I wore this hait style to a formal dinner last month. It acts as a perfect base for wedding hairstyles half up half down. Your hair gets incredible height without looking messy.
3. The Double Braided Halo
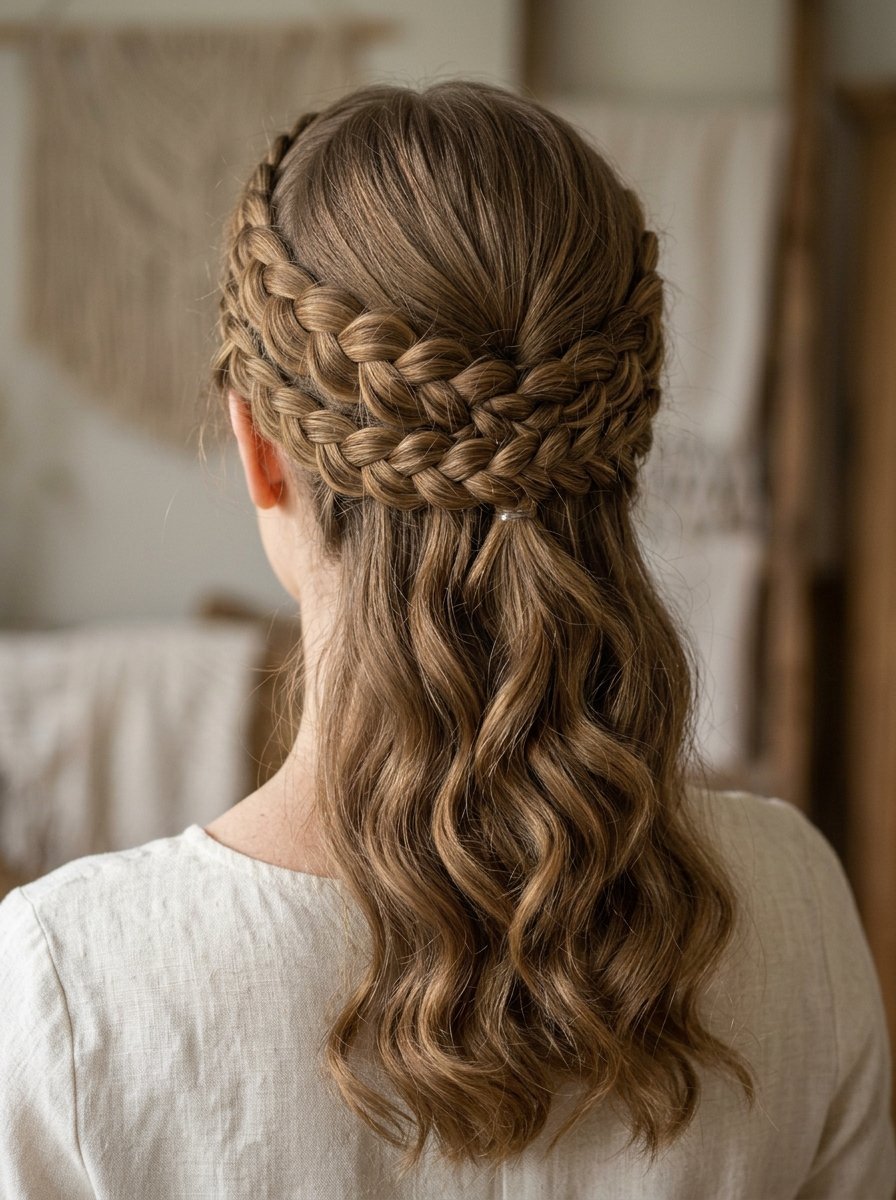
Braids give instant texture to any minimal half up half down hair look. I love this style for casual weekend outings. You need two clear elastics and some basic braiding skills. Start by taking a small section above your left ear. Braid this section normally all the way to the ends. Tie the bottom with your clear elastic. Do the exact same thing on the right side. Pull the left braid across the back of your head. Pin it tightly behind your right ear. Take the right braid and cross it over the left braid. Pin it behind your left ear. Tuck the ends of the braids under each other. This hides the elastic bands completely from view. I like spraying the braids with a flexible hold hairspray. Tresemme Micro Mist works perfectly for this and costs six dollars. Gently pull apart the loops of the braids. Making the braids wider gives a softer and more romantic feel. It feels like a very intricate style but takes three minutes. People will ask how you did it.
4. The Messy Top Knot Half-Up
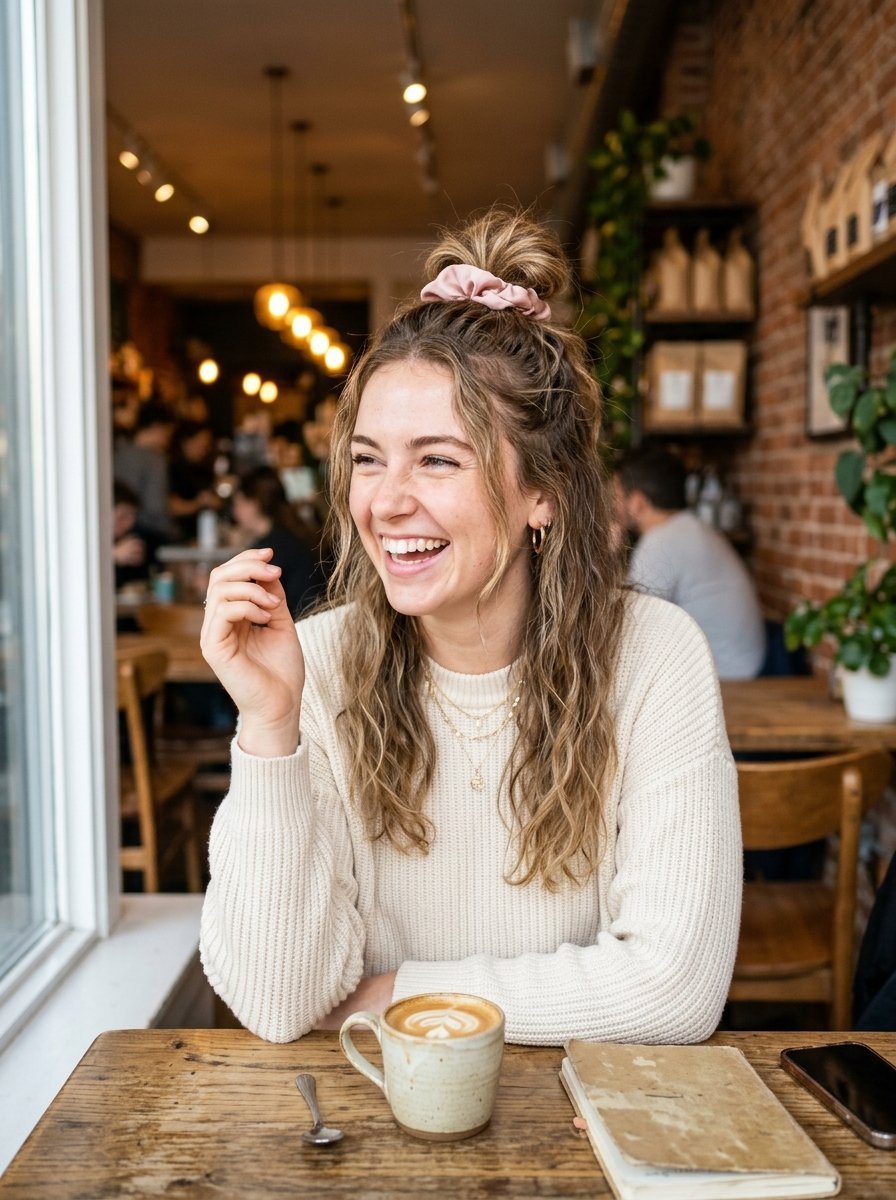
Some days you just want your hair out of your eyes completely. The messy top knot is my absolute favorite casual look. Section off the top portion of your hair from ear to ear. Gather this hair at the very top of your head. Twist the hair into a loose rope. Wrap the twisted hair around itself to form a bun. Hold the bun with a thick scrunchie or a hair tie. I prefer using a silk scrunchie from Slip. Slip scrunchies cost thirty nine dollars for three but stop breakage. Pull a few pieces of hair loose around your face. These loose pieces soften the overall look instantly. If the bun feels too tight, gently pull it apart. You want it to look slightly undone and relaxed. This is one of the most popular hair half up styles today. It works perfectly on second day or third day hair. The natural oils actually help the bun hold its shape better. Spray the loose hair underneath with dry shampoo for extra texture. Batiste Original Dry Shampoo remains the best drugstore choice.
5. The Sleek Glass Hair Pull-Back
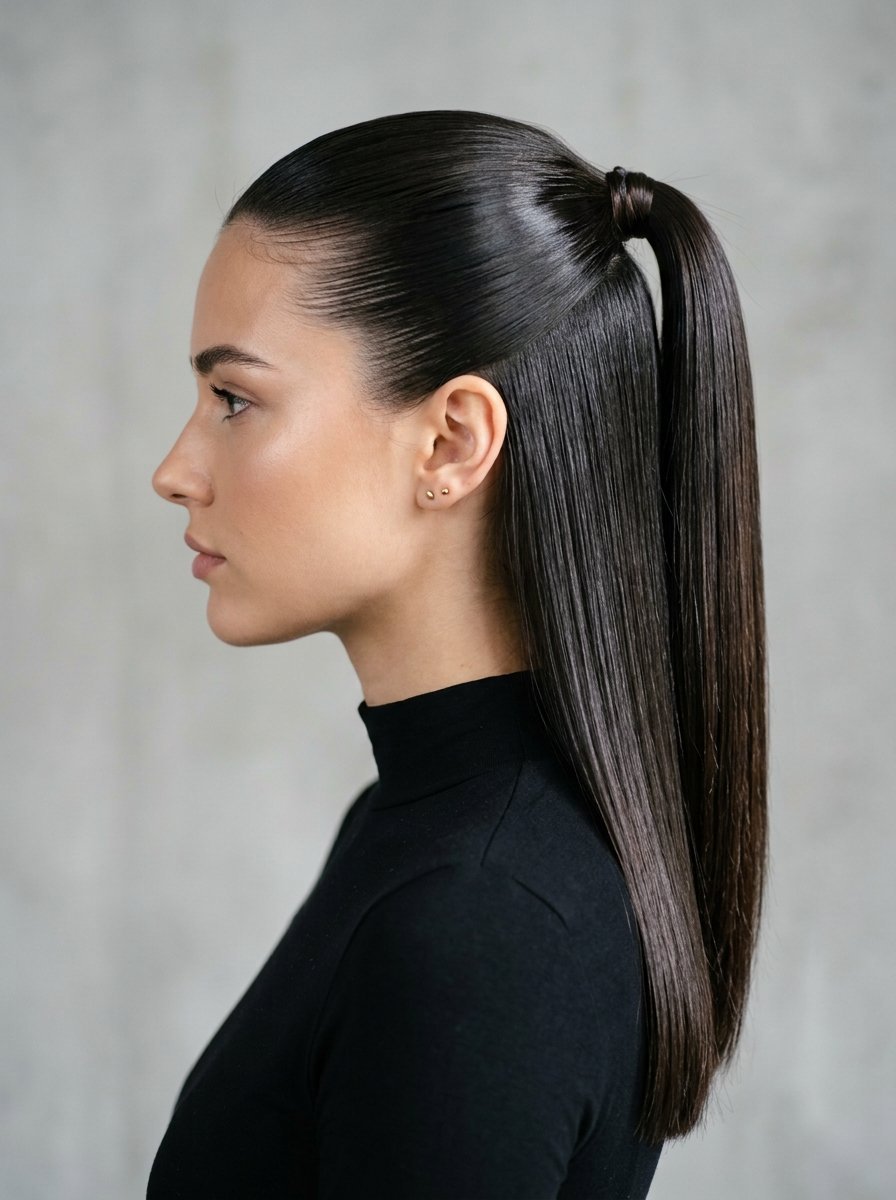
Glass hair refers to hair that looks insanely shiny and smooth. You need straight hair to make this look work properly. I use a Chi ceramic flat iron to straighten my hair first. Put a dime sized amount of Olaplex Number 7 Bonding Oil. Run the oil through the middle and ends of your hair. Use a boar bristle brush to gather the top section. Pull the hair back tightly so no bumps show. Hold it at the middle of your head with a tie. Take a tiny piece of hair from the ponytail. Wrap this small piece around the hair tie completely. Pin the end of the wrapped hair underneath the ponytail. This creates a flawless and polished finish. Mist a toothbrush with strong hold hairspray. Run the toothbrush over your hairline to lay down baby hairs. This trick keeps the style looking sharp all day long. It makes a beautiful professional look for the office. I wear this easy half up half down hair to client meetings.
6. The Floral Pin Retreat
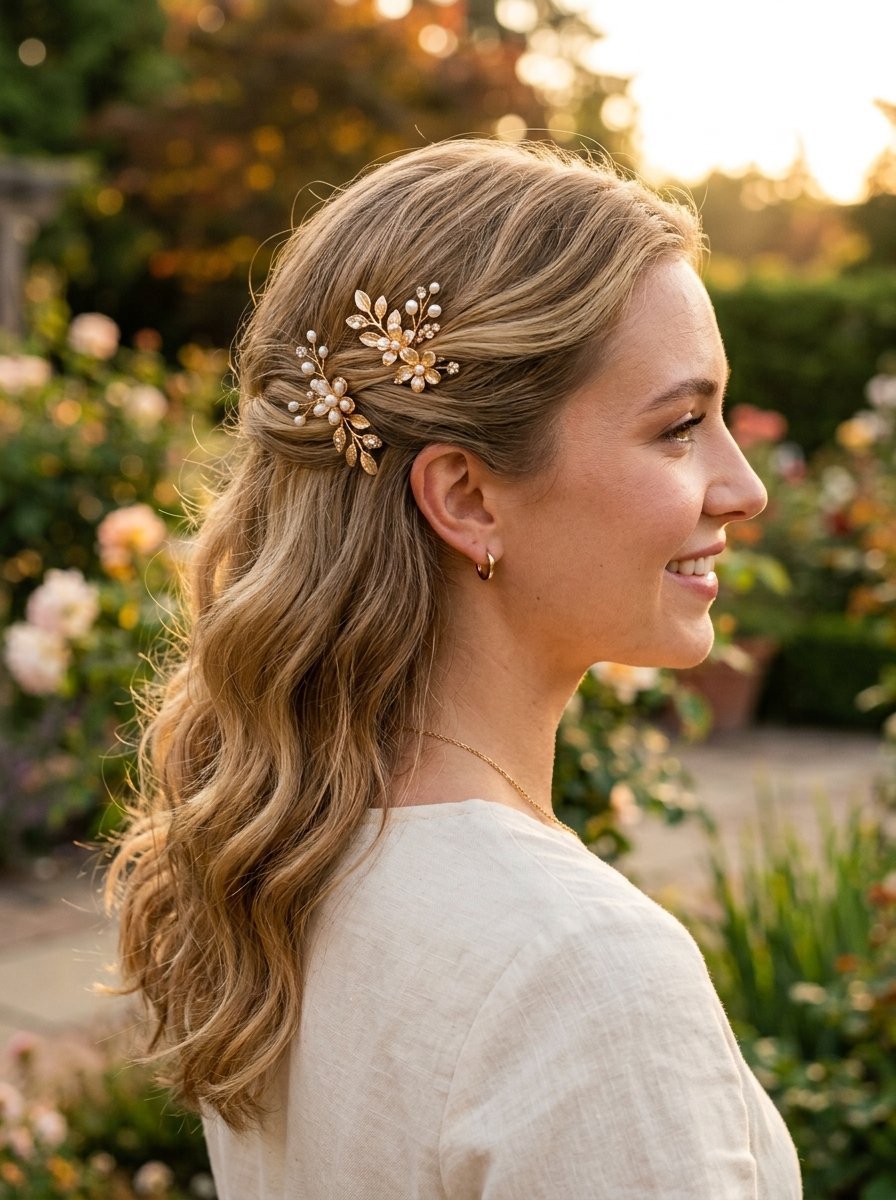
Putting in accessories instantly upgrades a basic half up hairstyle. I found beautiful gold floral pins on Amazon for twelve dollars. You can use any decorative clips you have at home. Part your hair on the side instead of the middle. Sweep the heavier side of your hair back behind your ear. Slide your decorative floral pin in to hold the hair. Take a small section from the other side and pull it back. Pin it to meet the first section at the back. Let the rest of your medium length hair fall naturally. I like to put loose waves to the bottom half. A one inch curling wand makes the perfect sized wave. Hold the curling iron on each section for five seconds. Let the curls cool completely before touching them. Brush through the curls gently with your fingers. This gives a very soft and romantic vibe. It works beautifully as wedding hairstyles half up half down for guests. The decorative pins do all the hard work for you.
7. The Fishtail Accent Sweep
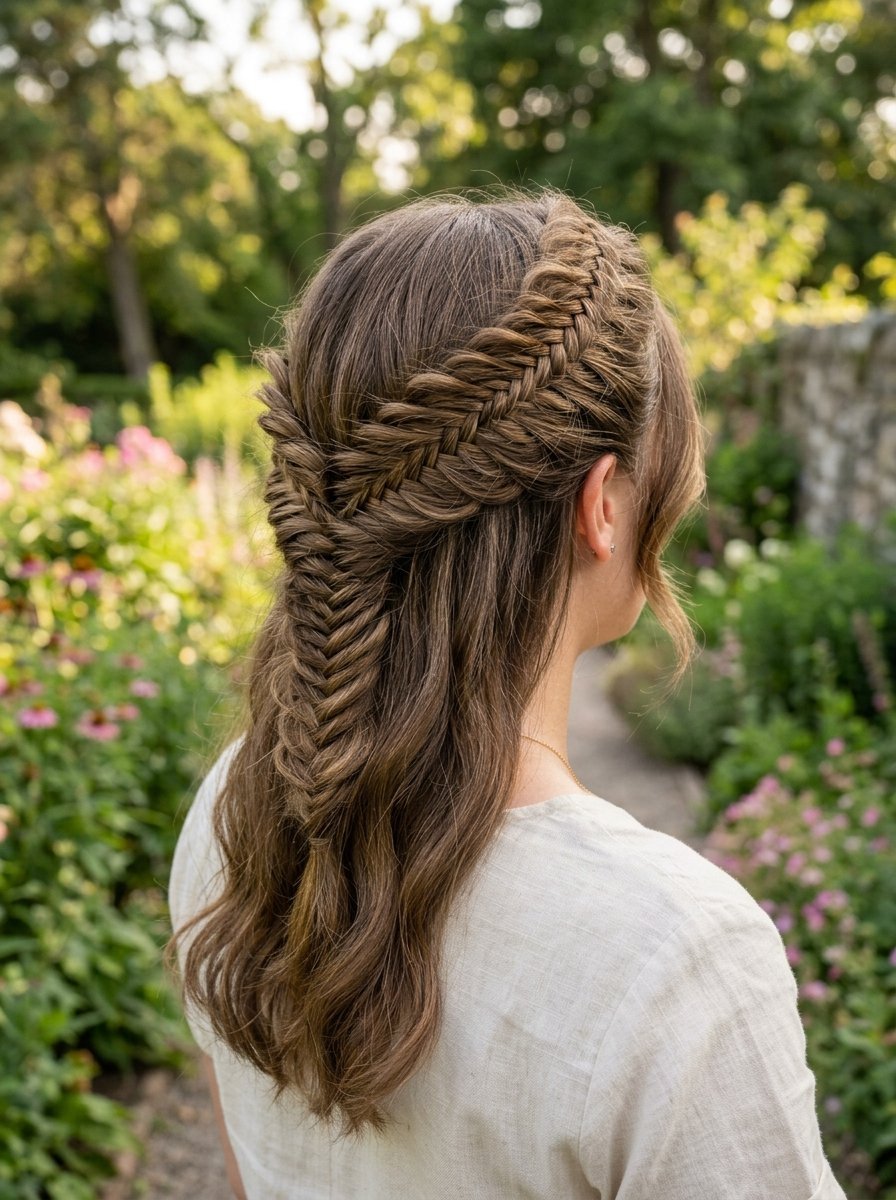
A fishtail braid looks much more complicated than it actually is. I learned this trick by watching hair tutorials easy videos. Grab a medium section of hair from the crown. Split this section into two equal halves. Take a tiny piece from the outside of the right half. Cross it over and join it with the left half. Take a tiny piece from the outside of the left half. Cross it over and join it with the right half. Repeat this exact crossing motion until you reach the bottom. Tie the end with a small clear elastic band. Gently massage the braid by pulling the edges outward. This massaging makes the fishtail look thick and pancake flat. Pin the finished braid straight back against your head. You can leave the rest of your hair straight or curly. I prefer spraying the braid with Kenra Volume Spray 25. This spray costs twenty dollars but holds perfectly without flaking. The fishtail gives incredible detail to an otherwise plain style.
8. The Volume Bubble Braid
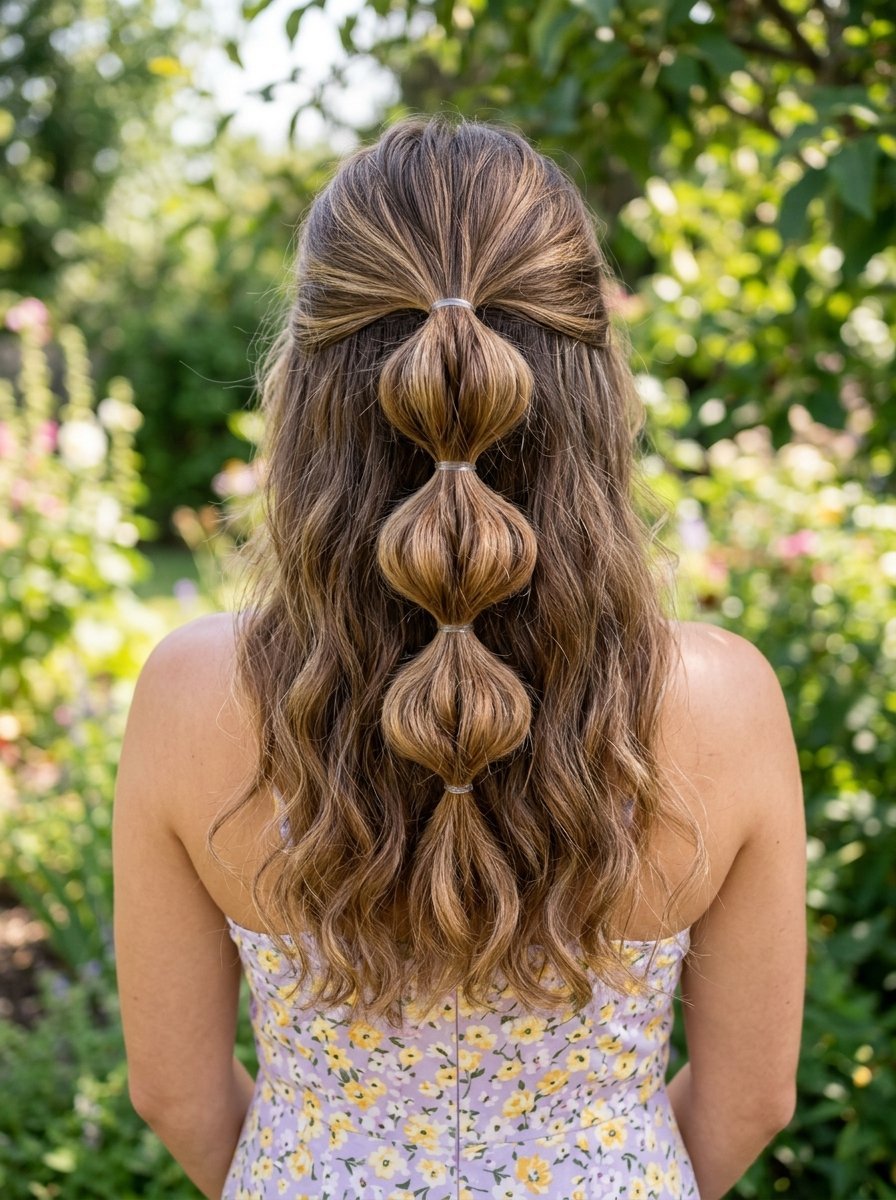
Bubble braids are currently dominating social media feeds everywhere. They are actually much easier to do than regular braids. Gather the top section of your hair into a high ponytail. Hold it tightly with a clear elastic tie. Move two inches down the ponytail and put another elastic. Gently pull the hair between the two elastics outward. This outward pulling makes a round bubble shape. Move down another two inches and put a third elastic. Pull the hair to make a second bubble. Repeat this until you run out of hair in the ponytail. I usually get about three bubbles on medium length hair. You need very tight elastics for this to work properly. I buy the Goody Ouchless mini elastics in bulk. This look is playful and keeps your hair perfectly contained. I wore this exact style to an outdoor concert last July. It survived the wind and the humidity completely intact. It offers a fresh take on the standard half up hait style.
9. The Hidden Bobby Pin Lift
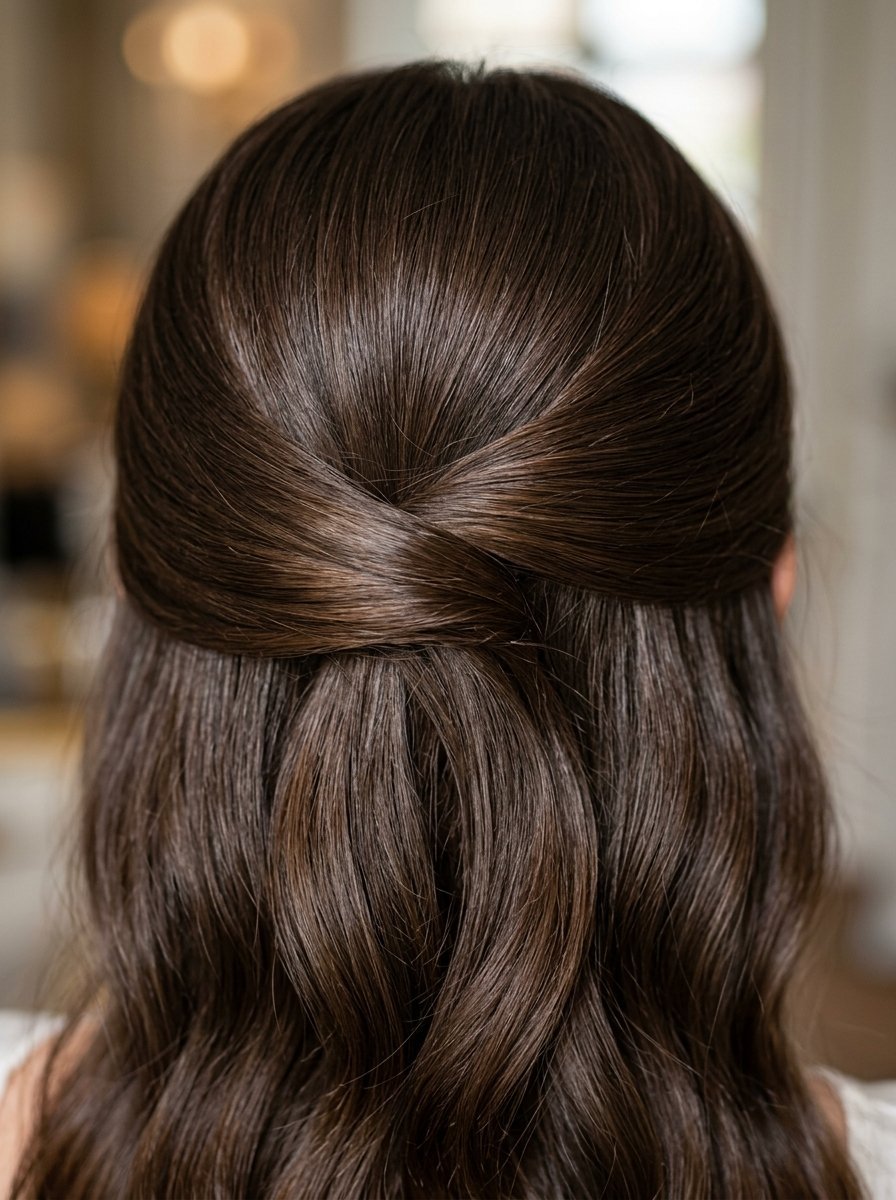
Sometimes you want a very minimal half up half down hair look. You want your hair out of your face with zero visible ties. The hidden bobby pin trick is my secret weapon. Take a one inch section of hair from above your left ear. Pull it straight back to the center of your head. Slide a bobby pin upward into the hair. The pin should go against the direction the hair is pulled. Take a section from the right ear and pull it back. Cross it directly over the first section of hair. Slide a second bobby pin upward to hold it. If you do this correctly, both pins disappear completely under the hair. You get a seamless sweep of hair across the back. I use Conair curved bobby pins because they match head shapes better. A pack of ninety pins costs about four dollars at drugstores. This style takes thirty seconds and looks incredibly chic. It makes a flawless hair cover for dirty roots.
10. The Velvet Bow Romantic Tie
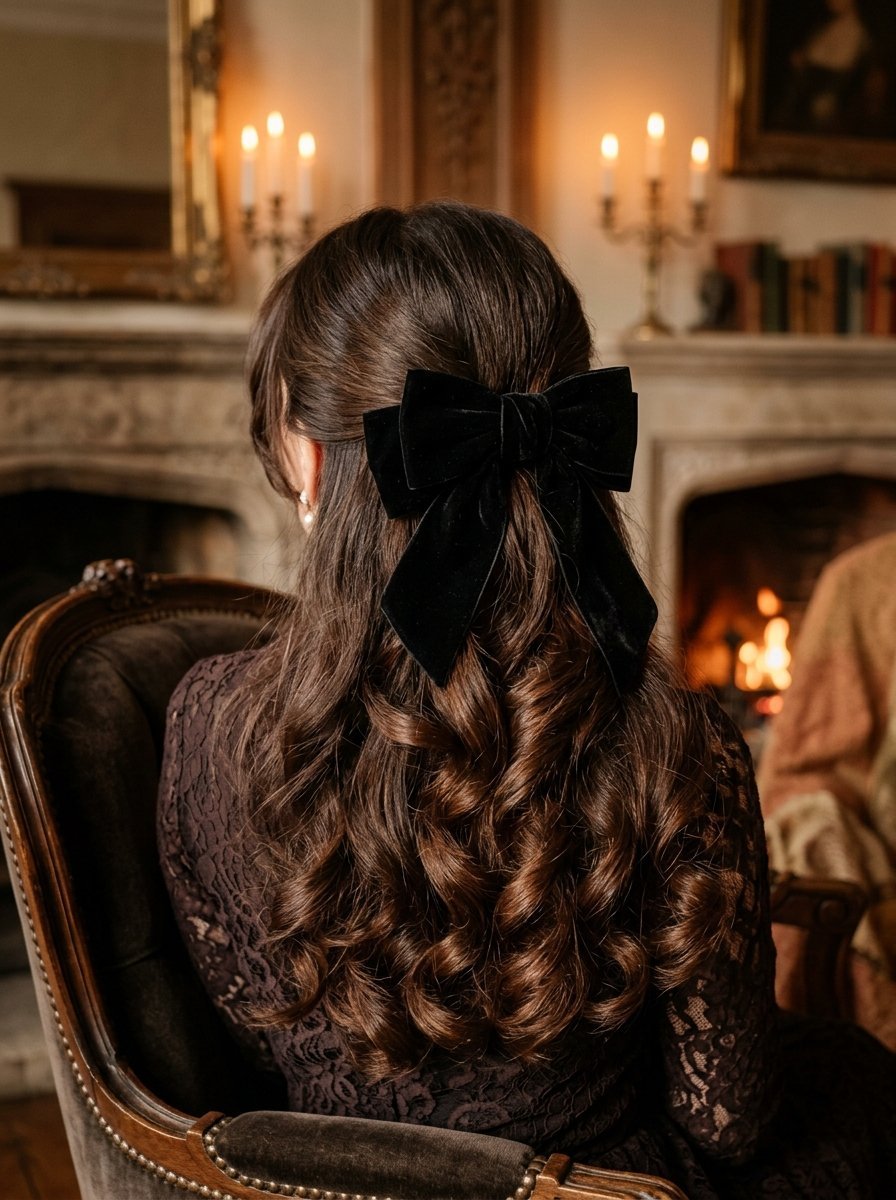
Hair bows made a massive comeback in the fashion world recently. A simple black velvet bow elevates any easy half up half down hair. I bought a pack of velvet bows on Etsy for fifteen dollars. Start by curling all of your hair with a large barrel iron. Brush out the curls so they look like soft vintage waves. Gather the top half of your hair straight back. Hold it with a small elastic first. Clip your velvet bow directly over the elastic band. The bow hides the band and gives instant glamour. I love wearing this style during the holiday season. It looks very put together but requires almost zero technical skill. Make sure the velvet ribbon tails hang evenly down your back. Spray the ends of your hair with a shine spray. Moroccanoil Glimmer Shine spray costs thirty dollars and smells amazing. The contrast between the soft hair and the rich velvet is stunning. It serves as a beautiful option for wedding guest hair.
11. The Criss-Cross Back Fasten
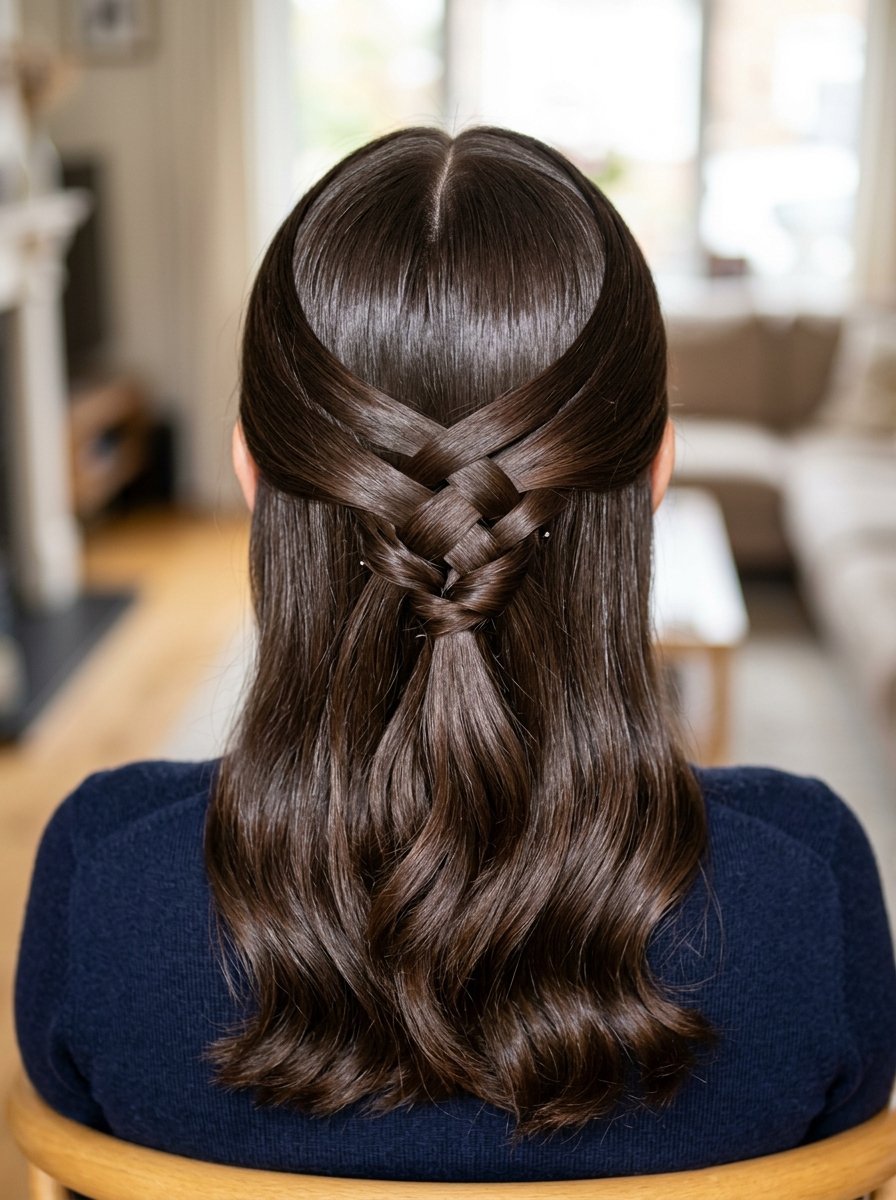
This style makes a beautiful woven look at the back of your head. Start by sectioning off two small pieces near your temples. Leave the rest of the top hair falling naturally down your back. Take the left temple piece and pull it straight across the back. Pin it tightly on the right side of your head. Take the right temple piece and pull it across the back. Lay it directly over the first piece of hair. Pin it tightly on the left side of your head. Take another small section from lower down on the left side. Cross it over to the right and pin it. Take one more section from the lower right side. Cross it over to the left and pin it. You just created a four piece woven pattern. Spray the pinned area generously with a strong hold hairspray. This criss-cross trick holds thick hair back very tightly. I use this style when I need my hair to stay put all day. It looks much more detailed than a simple ponytail.
12. The Loose Waterfall Drape
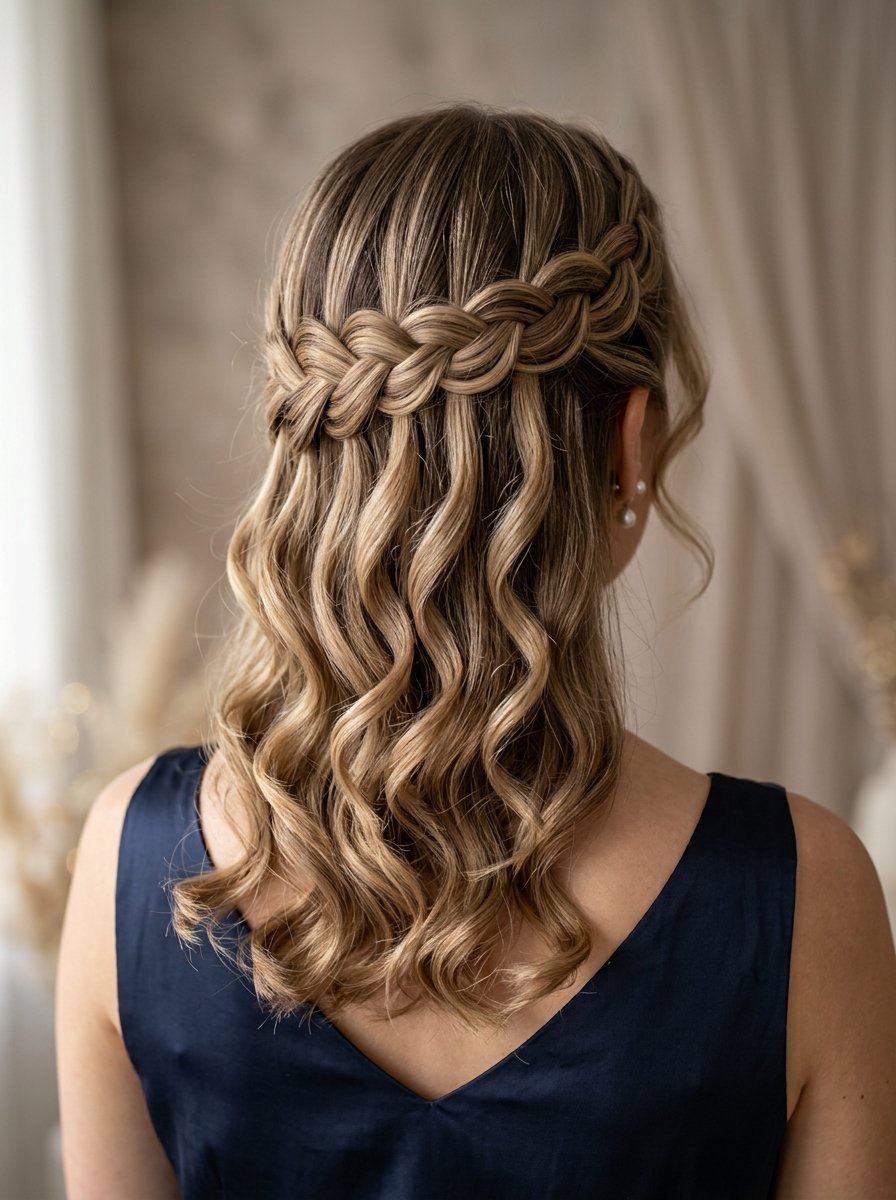
A waterfall braid allows the hair to flow down beautifully. This style takes a little practice to master completely. Start near your front hairline on the right side. Pick up three small pieces of hair to begin a regular braid. Cross the right piece over the middle piece. Cross the left piece over the new middle piece. Now drop the right piece completely so it falls down. Pick up a brand new piece of hair next to it. Use this new piece to cross over the middle. Repeat this dropping and replacing pattern around the back of your head. Stop when you reach the middle of your head and pin it. Do the same thing starting from the left side. Meet the two braids in the back and tie them together. This style is heavily requested for wedding hairstyles half up half down. It looks stunning when paired with loose barrel curls. I watched three hair tutorials easy videos to finally learn this. It takes me about eight minutes to do on myself now.
13. The 90s Claw Clip Twist
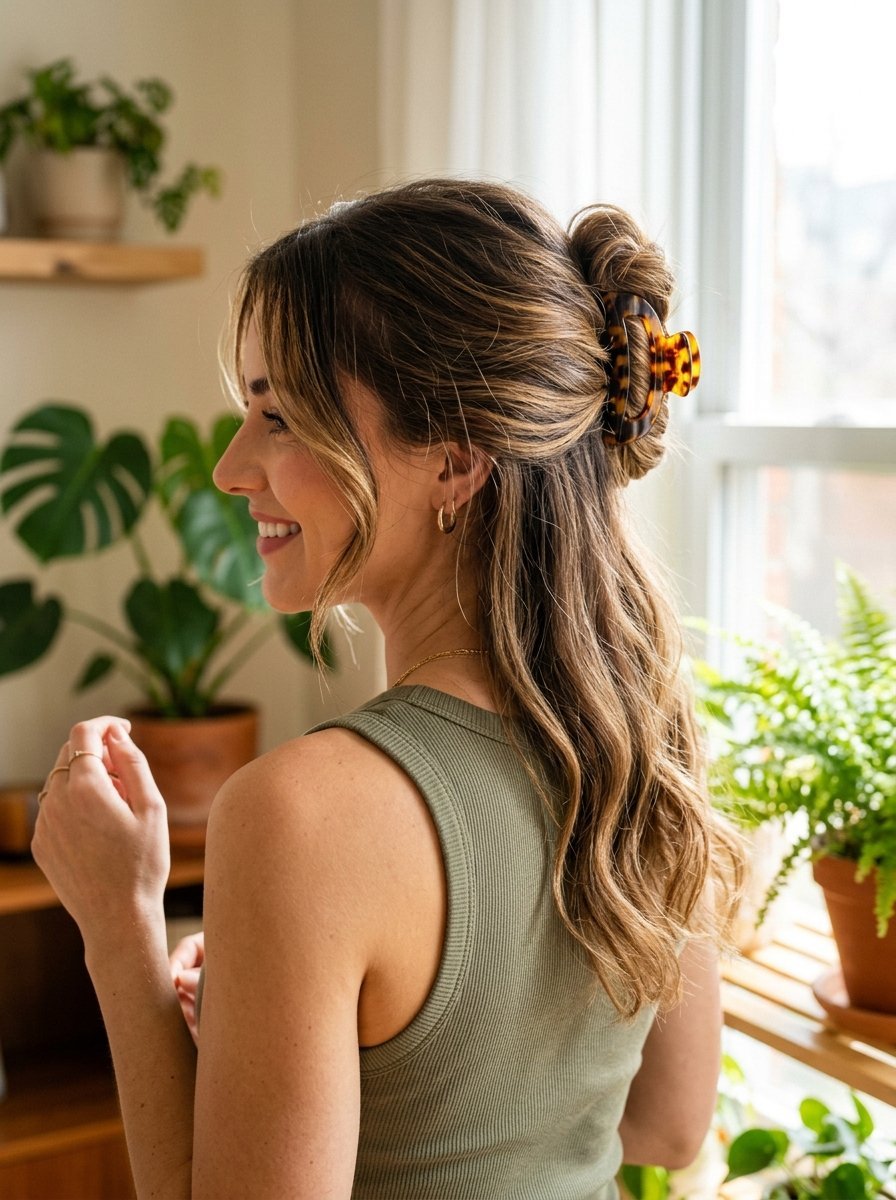
Claw clips returned from the 1990s and became a daily staple again. I keep a medium sized tortoise shell clip in my purse always. Gather the top half of your hair into your hands. Twist the hair upward against the back of your head. Open your claw clip wide and clamp it over the twisted hair. Let the ends of the hair spill loosely over the top of the clip. This style requires absolutely no hair elastics or bobby pins. It causes less tension and breakage than tight rubber bands. I buy my claw clips from Target for about eight dollars each. Choose a clip that matches your hair thickness perfectly. Medium length hair usually needs a two or three inch clip. Pull two tiny tendrils of hair down around your face. This frames your eyes and softens the severe pulled back look. You can do this style at a red light in your car. It remains the ultimate minimal half up half down hair trick.
14. The Face-Framing Tendril Pull
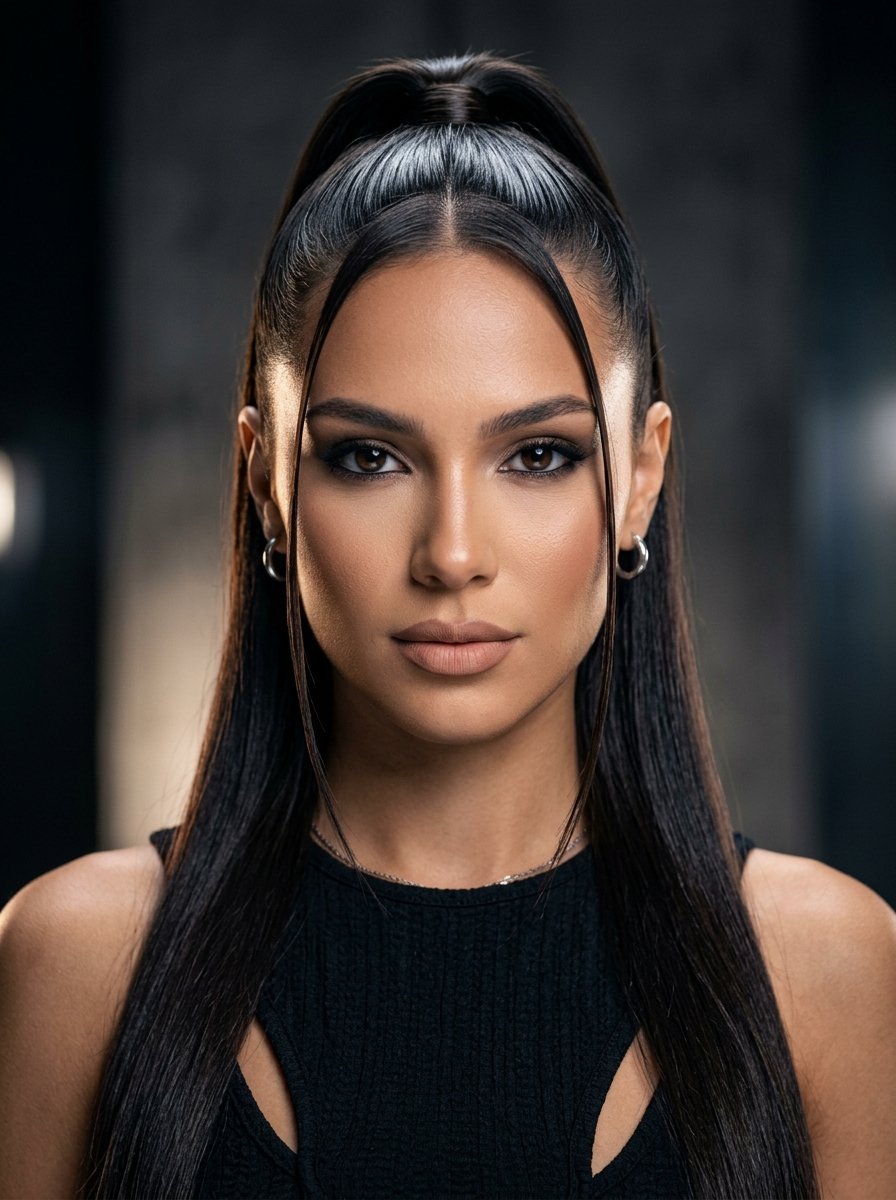
Sometimes you want a sleek look but need softness around the face. The tendril pull focuses entirely on the front sections of hair. Use a rat tail comb to part out the very front pieces. These pieces should be no wider than half an inch. Clip these front pieces out of the way temporarily. Gather the rest of your top hair straight back tight. Hold it into a high half ponytail with a strong tie. Unclip the front tendrils and let them fall forward. Use a flat iron to give the tendrils a slight bend. Bend them away from your face at cheekbone level. Put a tiny drop of hair oil to the tendrils to prevent frizz. Ouai Hair Oil works beautifully and costs thirty dollars. This style heavily mimics the iconic early 2000s pop star looks. I wear this look when I want to feel slightly edgy. It balances a round face shape very nicely. The tight ponytail lifts the eyes while the tendrils soften the jaw.
15. The Braided Faux Hawk Lift
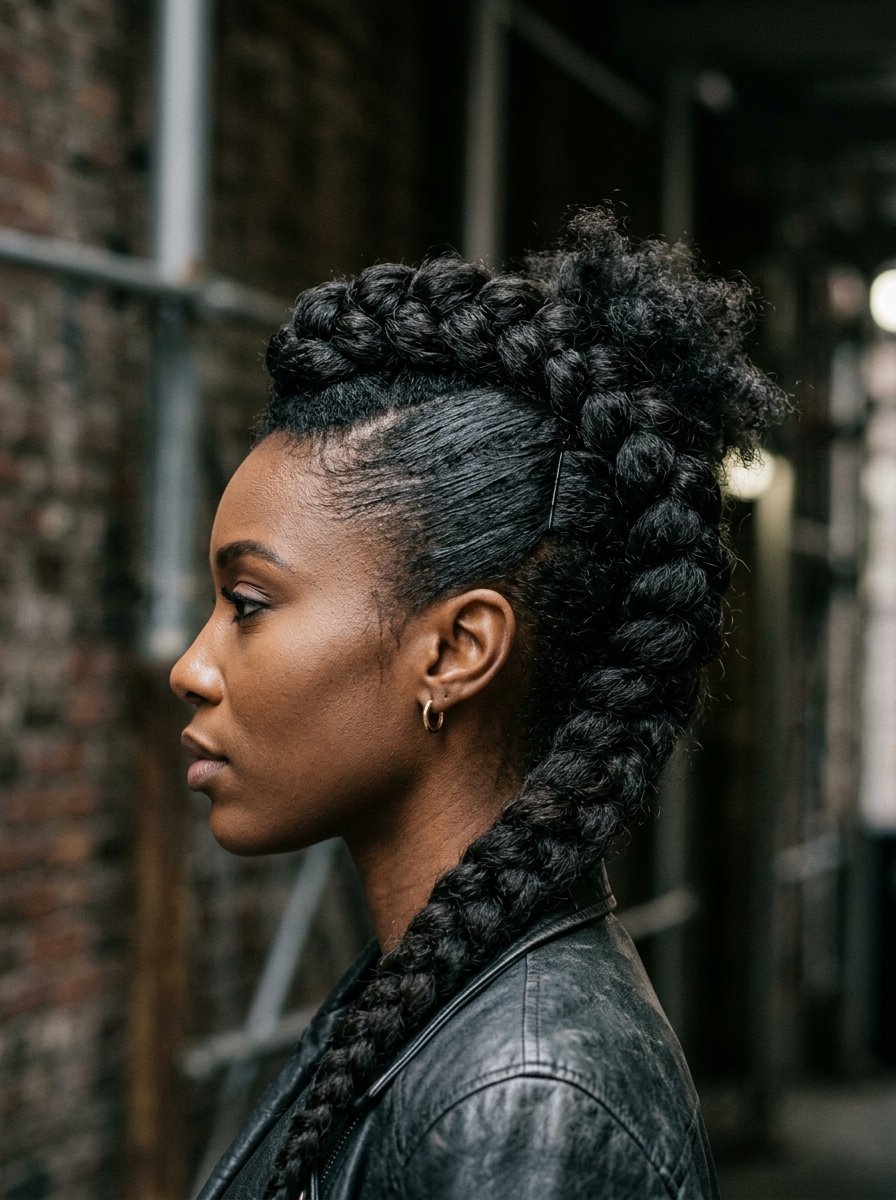
This style gives massive volume and a cool rockstar vibe. It works best on hair that has not been washed for two days. Spray dry shampoo at the roots to absorb any oil. Section the hair at the very top center of your head. Create a thick Dutch braid straight down the middle of your head. A Dutch braid crosses the pieces under instead of over. Stop braiding when you reach the crown of your head. Tie the braid off with a clear elastic band. Now comes the biggest step of this style. Gently pull the loops of the braid straight upward. You want the braid to stand up tall off your scalp. Pin the sides of your hair flat against your head. This contrast makes the center braid pop even more. I use Got2b Glued Blasting Freeze Spray to hold the height. This hairspray costs eight dollars and acts like concrete. The faux hawk gives you an aggressive and fun hair half up styles look.
Frequently Asked Questions
How do I stop my half up hair from slipping down all day?
Slipping usually happens because your hair is too clean or too soft. Freshly washed hair lacks the grip needed to hold pins and ties. You must put texture back into the hair before styling it. I always use a dry texturizing spray at the roots. Spray it exactly where you plan to place your clips or elastics. Another trick involves crossing your bobby pins in an X shape. A single bobby pin will slide out of straight hair easily. Two pins locked together create a firm anchor that stays put. Make sure the wavy side of the bobby pin faces down against your scalp. The flat side should face outward. This grips the hair much more tightly.
Can I do these styles if my hair is very thin?
You absolutely can style thin hair in half up looks. The secret lies in preparation and the tools you choose. Never use heavy oils or thick creams on fine hair. These products weigh the hair down and expose the scalp. Instead use a volumizing mousse on damp hair before blow drying. When making your half up style avoid pulling the hair too tightly. Pulling tight separates the hair and makes thin spots very visible. Leave the hair slightly loose and push it forward slightly before pinning. This forward push creates the illusion of thicker hair at the roots. You can also use a tinted dry shampoo like Batiste Hint of Color. This colors the scalp slightly and masks any thin areas perfectly.
What is the best way to hide elastic bands in my hair?
Visible rubber bands instantly ruin a sophisticated hair look. The easiest trick takes only twenty seconds to do. Take a tiny section of hair from the ponytail you just tied. Spray this tiny section with hairspray so it stays smooth. Wrap this piece of hair tightly around the elastic band until it disappears. Take a small bobby pin and slide it up into the elastic. Make sure you pin it underneath the ponytail so it stays hidden. You can also use decorative accessories to cover the bands. A velvet scrunchie or a metal cuff works perfectly. I buy metal hair cuffs from Amazon for ten dollars a pack. They snap right over the elastic and look very professional.
Are these half up styles okay for a formal wedding?
Half up styles are highly requested by brides and bridesmaids everywhere. They offer the perfect balance of formal styling and romantic softness. The Twisted Crown and the Loose Waterfall Drape are perfect for weddings. To make these styles formal you must focus on the hair texture. The hair left down must be styled with hot tools. Put smooth barrel curls or deep vintage waves to the bottom half. Use a high shine gloss spray to give the hair a healthy finish. Incorporate pearl pins or rhinestone clips instead of plain bobby pins. Make sure you pin everything with extra pins and professional hairspray. A style that lasts through a wedding reception needs a strong foundation. Ask your stylist to tease the crown for extra formal height.
Conclusion
Managing medium length hair on busy mornings no longer needs to cause stress. You now have fifteen specific styles to rotate through your week. These half up half down looks offer many choices for any schedule. I relied on these exact styles when my hair hit that awkward shoulder length. Start by practicing the simple twisted crown or the basic claw clip trick. Once you feel comfortable try the fishtail or waterfall braids. Buy a good texturizing spray and clear elastics today. These small investments make styling your hair infinitely easier. Your morning routine will drop from twenty minutes to under five minutes. Let your hair look polished while keeping it out of your face. Try the messy top knot tomorrow morning and see how it feels. Share your favorite style with a friend who struggles with their hair.

Sarah Mitchell — Founder & Editor-in-Chief
Sarah Mitchell is the founder and editorial voice behind Hair Level Up. A licensed cosmetologist with more than 15 years of experience, she has styled A-list celebrities for editorial shoots and red carpets, with work featured in Vogue, Elle, and Harper’s Bazaar. Early in her career, she trained under the legendary hairstylist Oribe in New York, an apprenticeship that still shapes her editorial eye today. Sarah founded Hair Level Up in 2020 after one bad haircut convinced her that women deserved a destination that felt like a magazine, taught like a stylist, and inspired like an art gallery. She oversees every story from concept to publication, guided by a simple belief: a good story teaches you something, but a great one makes you feel beautiful while it does.