22 Shoulder Grazing Cuts for Fine Hair That Create Volume
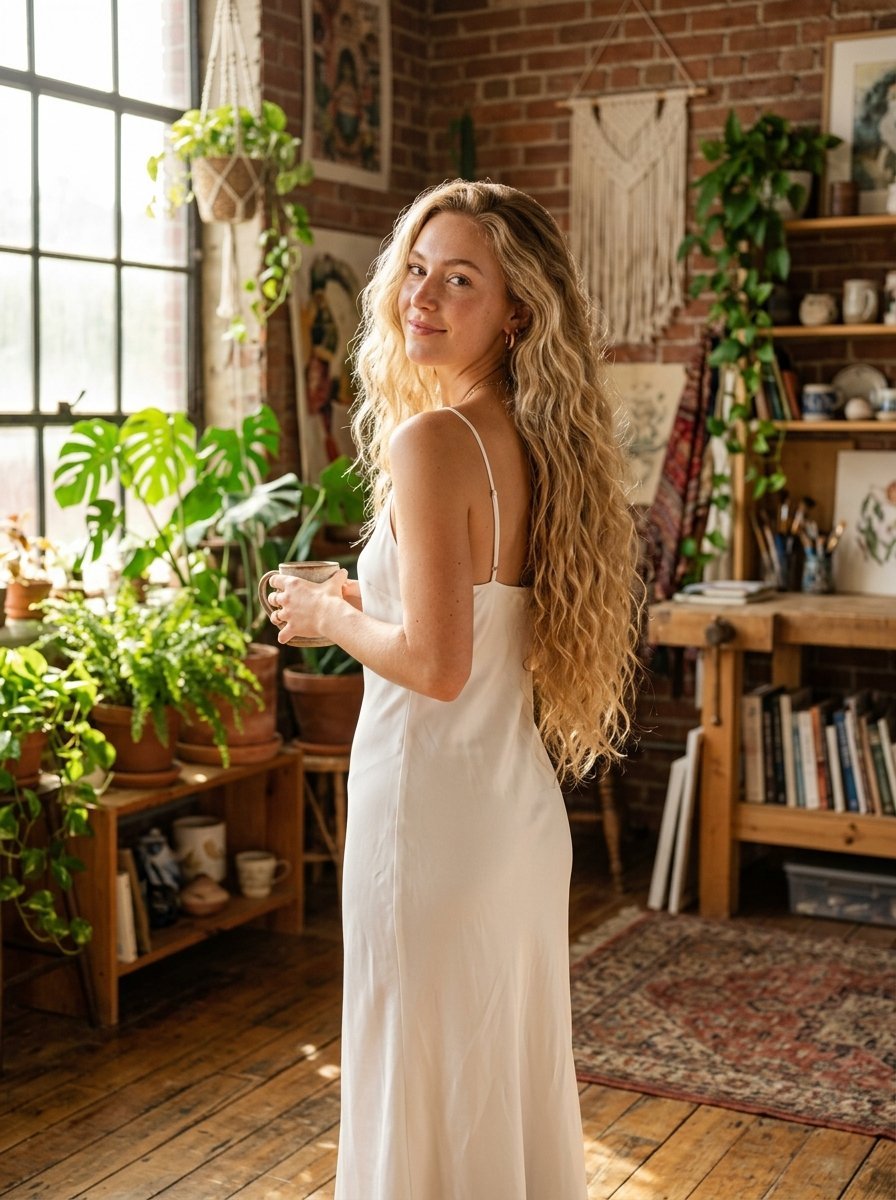
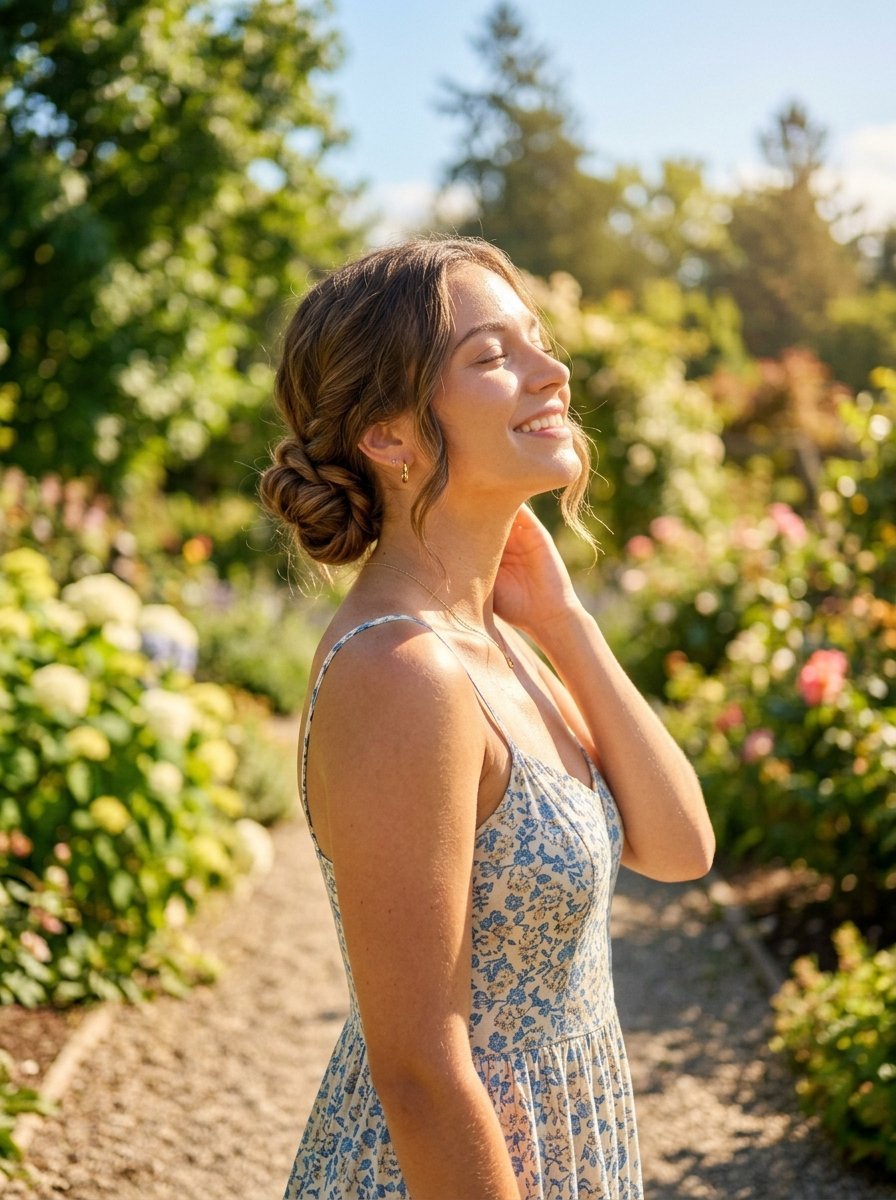
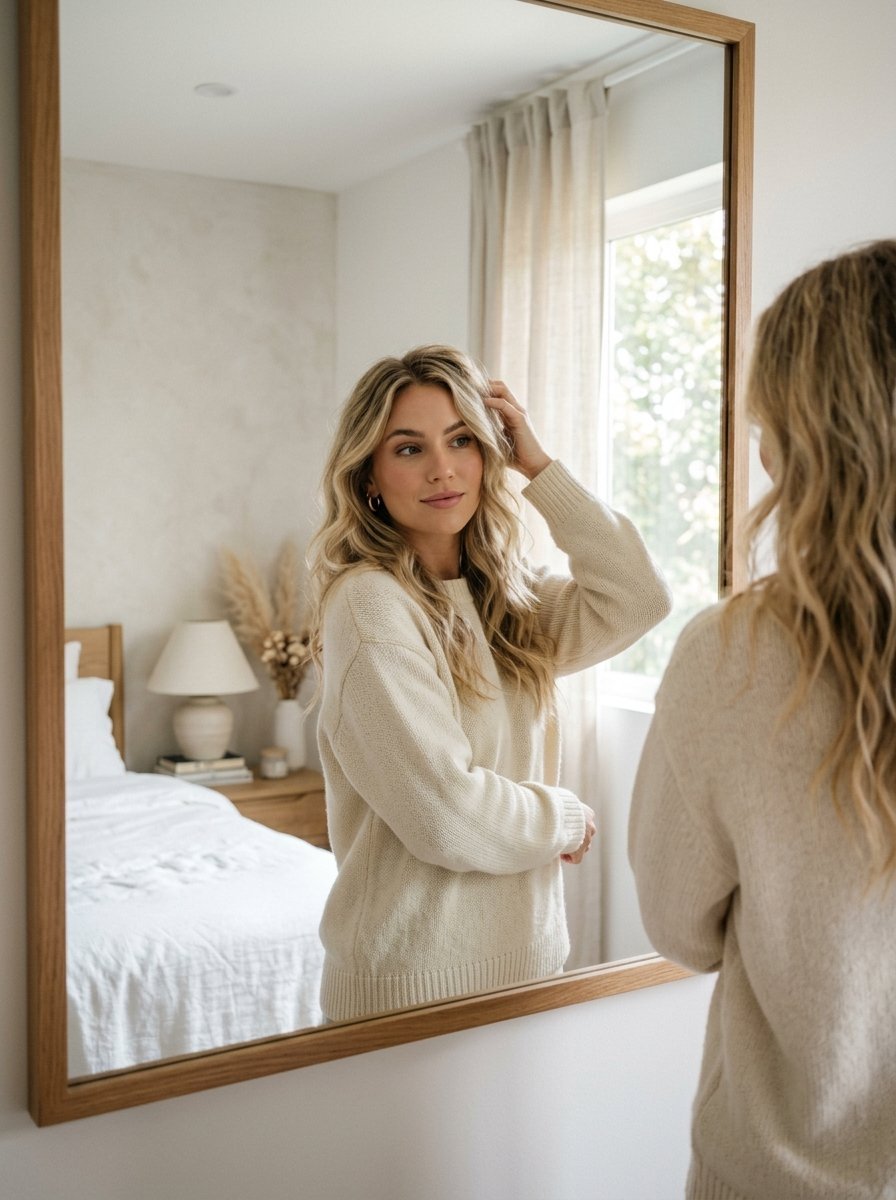
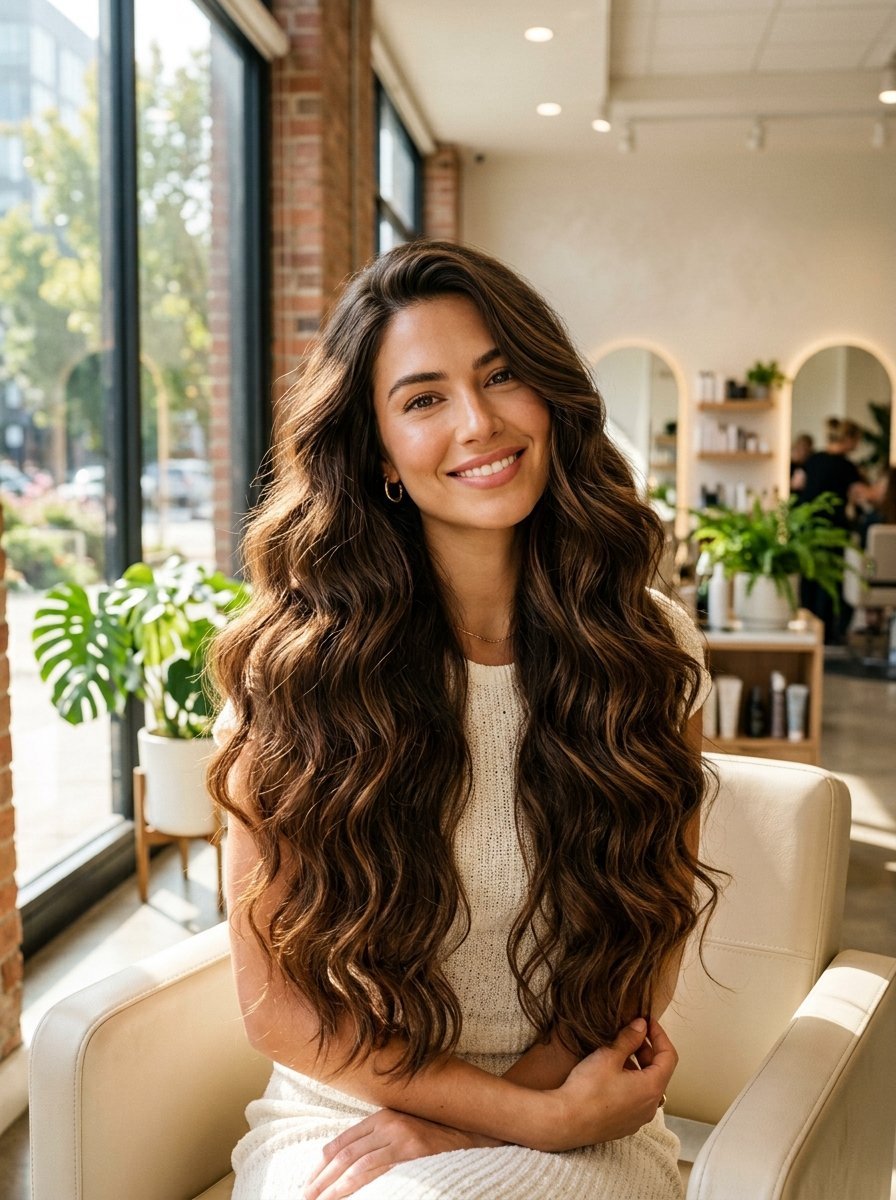
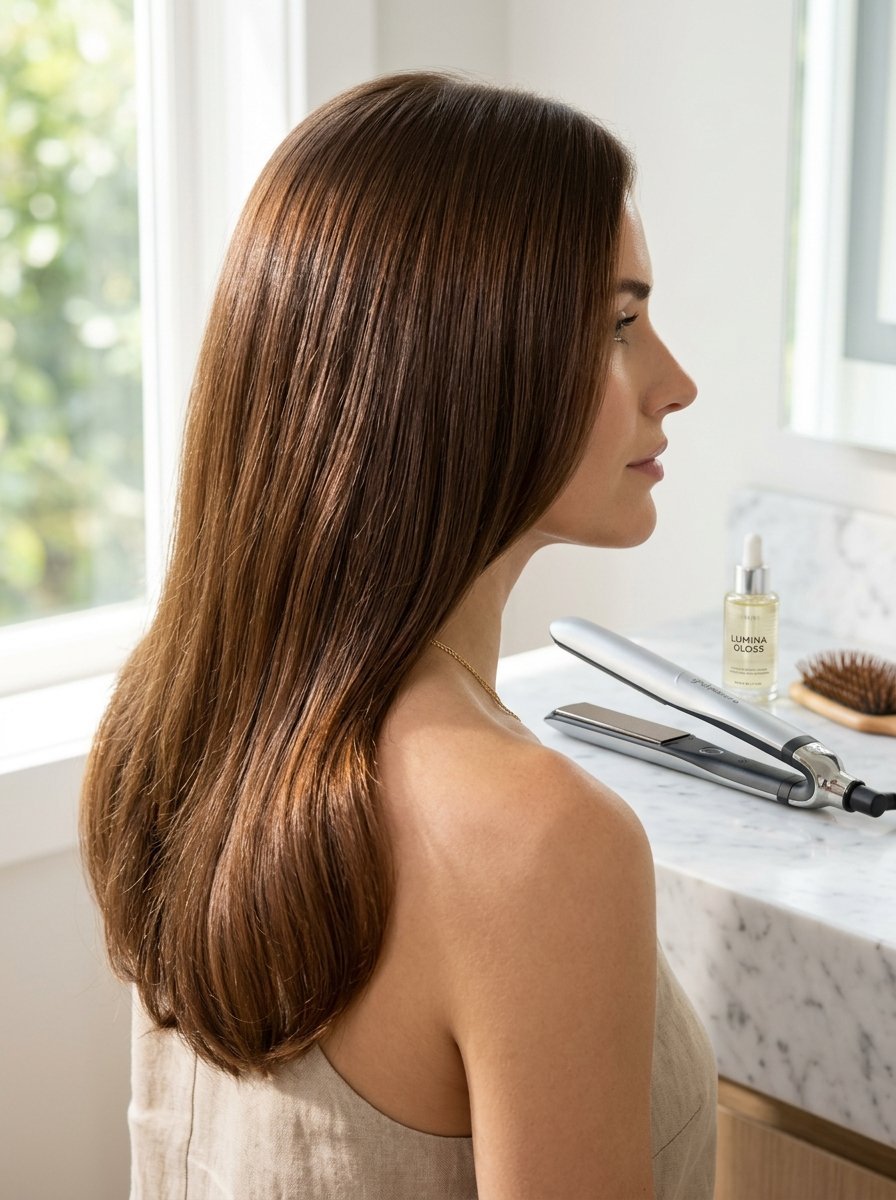
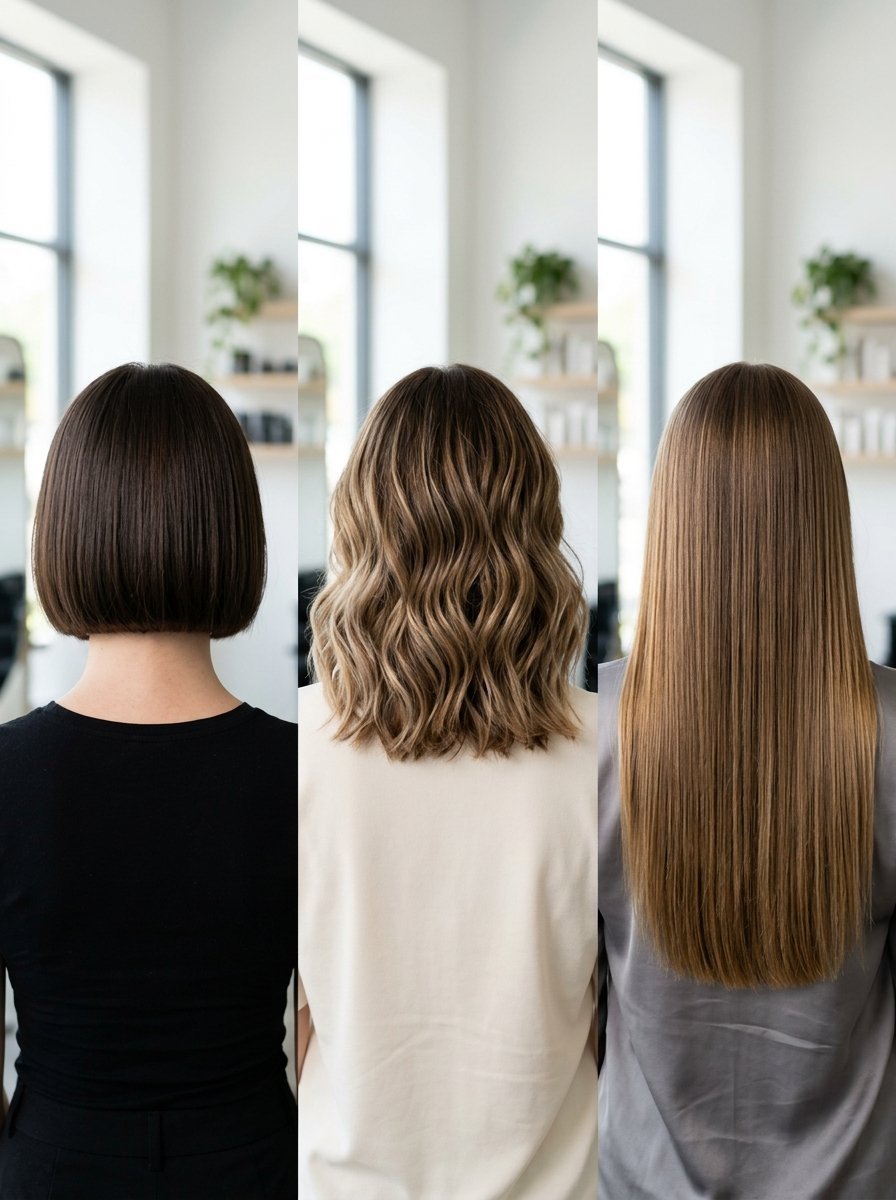
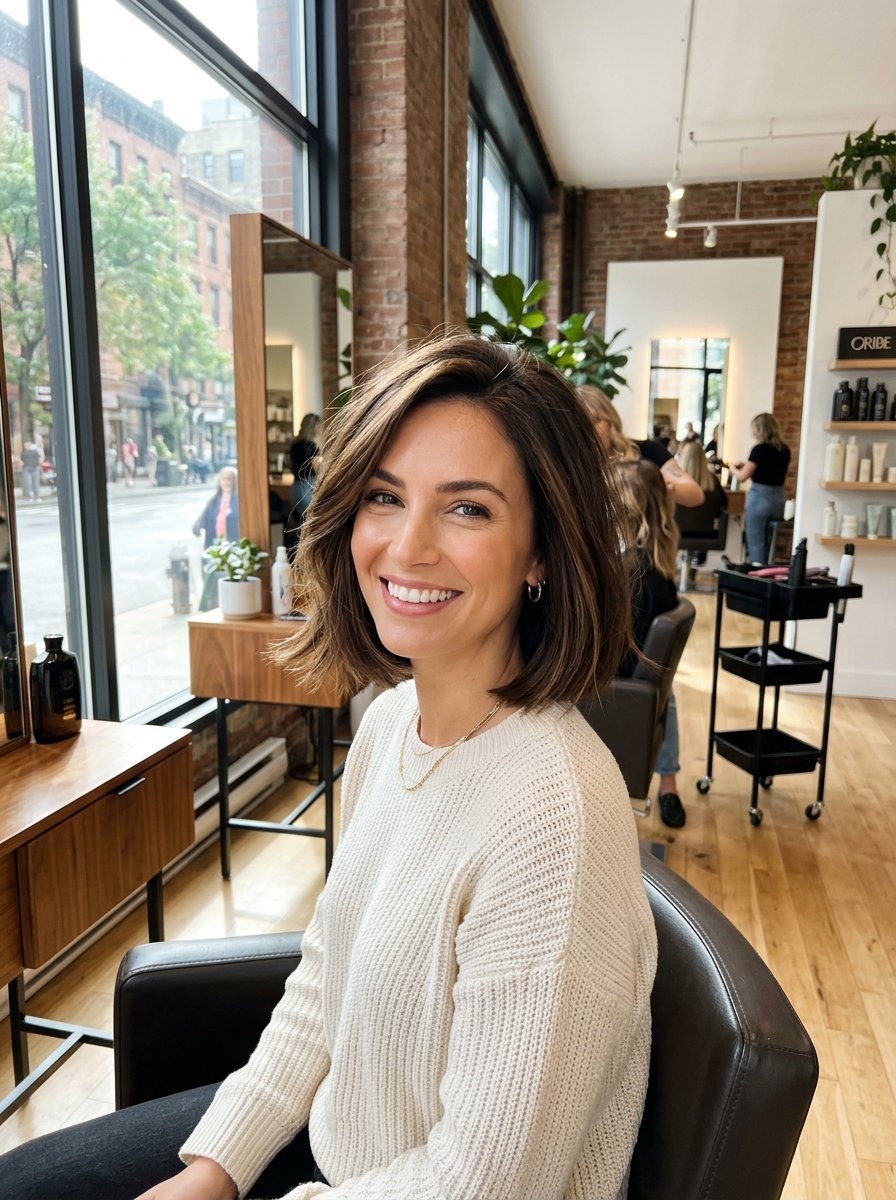
I remember staring at the salon mirror last Tuesday. My fine hair hung limp against my neck. Flat. Lifeless. We all know that feeling. You wash your hair, blow dry it, and ten minutes later it sticks right to your scalp. I spent years fighting my texture. I tried every mousse and spray on the market. Most just made my hair sticky or weighed it down entirely. Then I found out the truth. Volume starts with the scissors. The right length changes everything. Shoulder grazing cuts sit perfectly between short and long. They give fine hair movement without thinning out the ends. When you cut off the dead weight, your hair naturally lifts at the root. I have seen this work for hundreds of women in my chair. You just need the right shape.
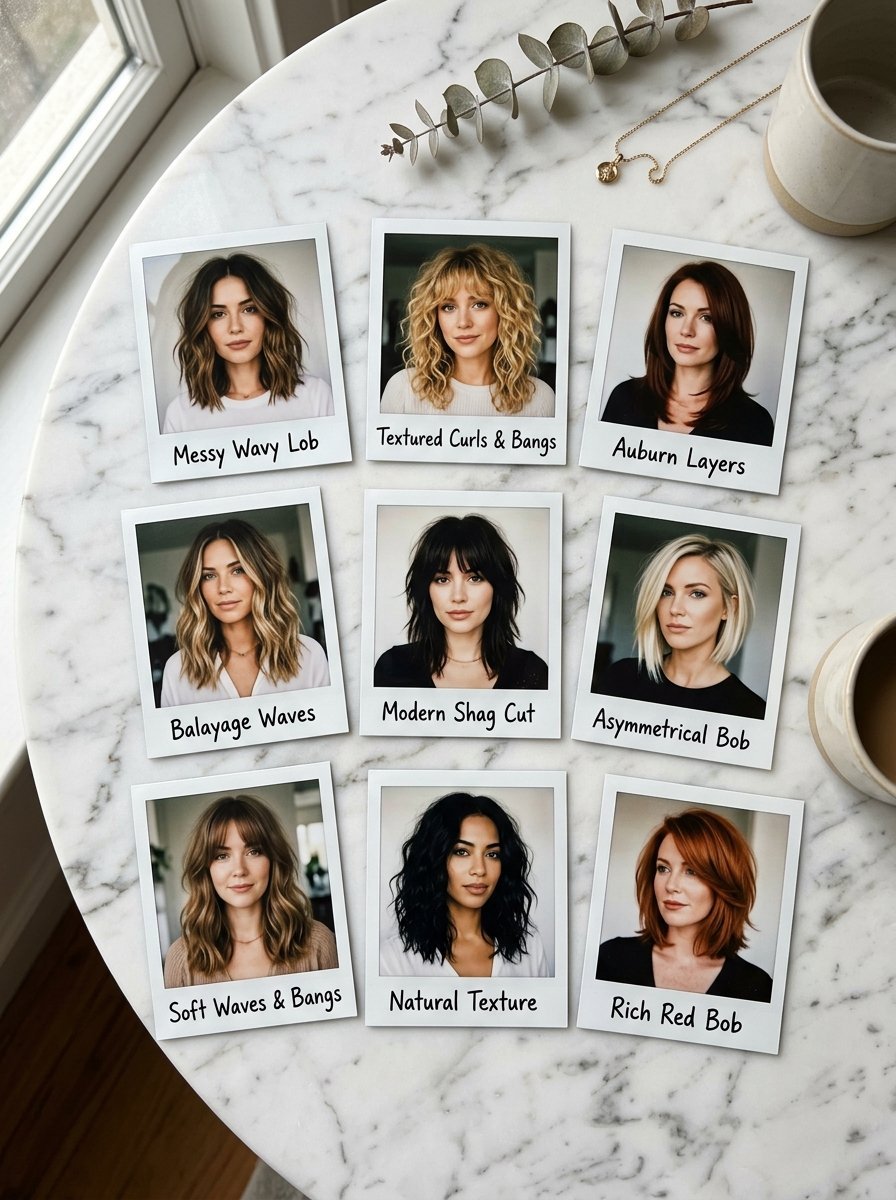
You will walk away with exactly 22 specific styles tailored for fine texture. These cuts create the illusion of thickness. Expect to pay between 50 and 150 dollars depending on your stylist and location. You can maintain most of these shapes with a fifteen minute morning routine. A good round brush and a lightweight texture spray will become your best friends. I cover everything from curtain bangs to blunt perimeters. You will see exactly what to ask for at your next salon visit. I skipped the styles that require a styling team. These are everyday shapes for real women who want thicker looking hair right now.
1. The Classic Blunt Collarbone Bob
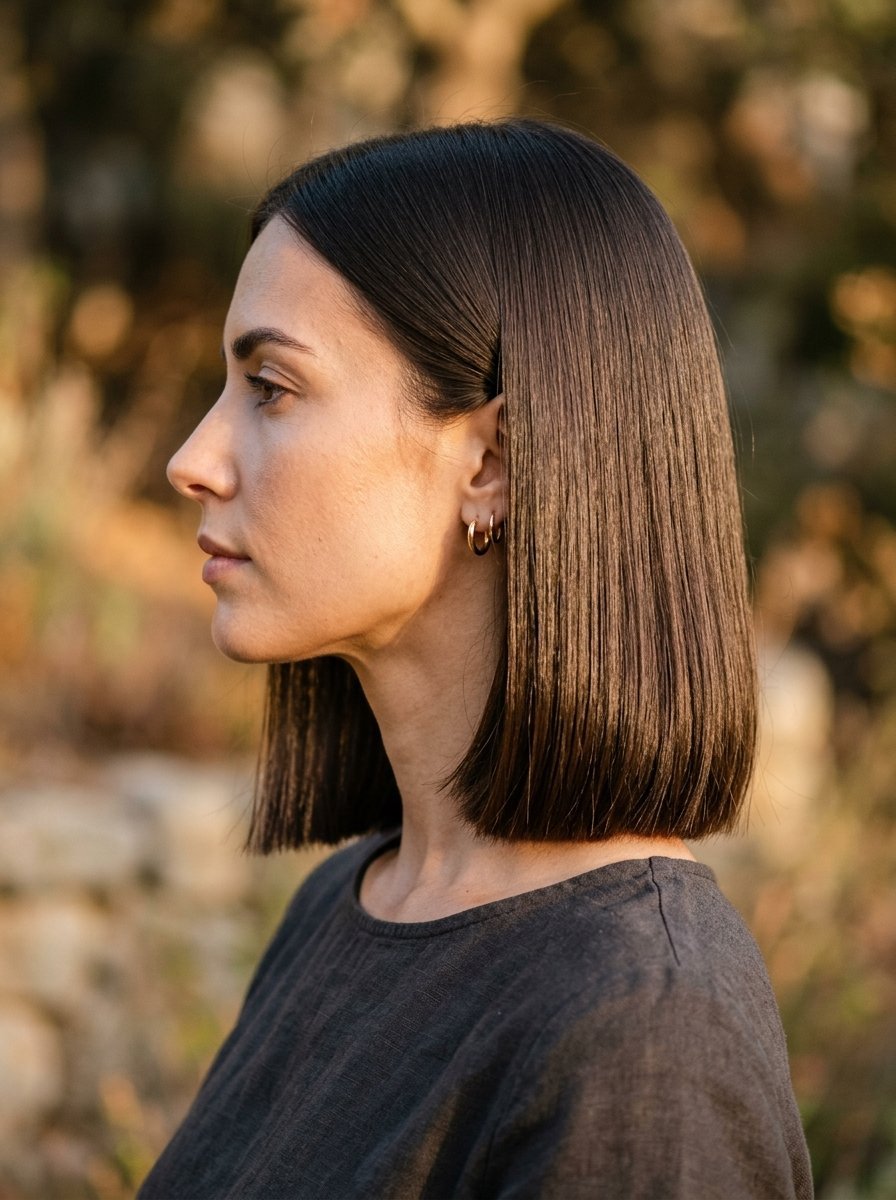
I always start my clients here. A blunt line creates the thickest possible baseline for your hair. When you leave the ends sharp, fine hair instantly looks denser. The collarbone length stops the hair from resting too heavily on your shoulders. It moves freely. I cut my own hair this way three months ago. The maintenance is incredibly low. You just need a quick pass with a flat iron to keep the line crisp. I tell my clients to grab a flat iron like the GHD Platinum Plus. It keeps the temperature at exactly three hundred and sixty five degrees. This prevents frying the delicate ends. Your baseline stays thick and sharp. I spent eighty dollars on my first real haircut like this. It completely changed my daily routine. A sharp perimeter stops the hair from looking wispy at the bottom. The density packs closely together. You will notice the difference immediately when you tie it back. The ponytail feels solid rather than stringy.
2. Soft Face Framing Layers
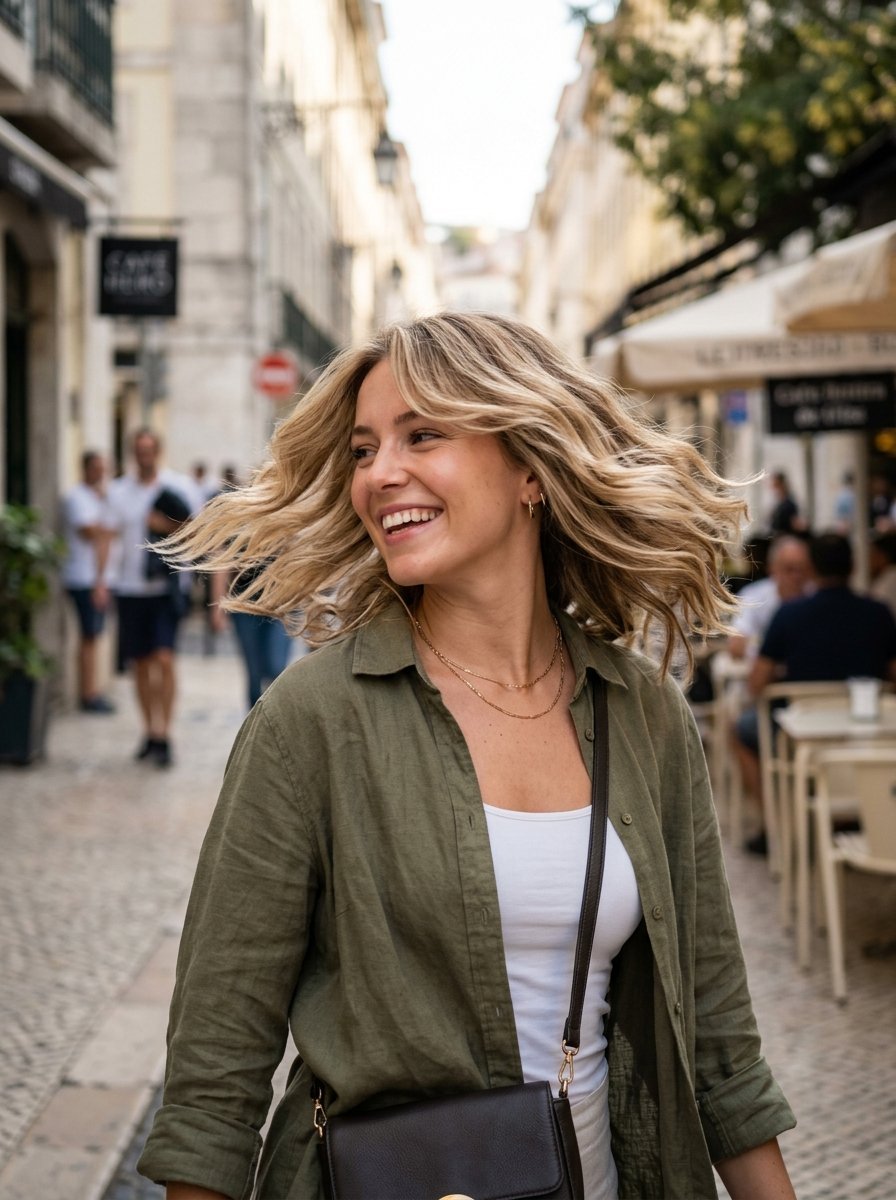
Fine hair sometimes falls flat around the front. You can fix this by cutting pieces that hit right at your cheekbones. I refer to these as cheekbone grazers. They frame your features without taking weight away from the bottom. I have noticed this works perfectly when you wear your hair in a ponytail. The front pieces fall out naturally. You get a lived in, effortless look. I cut my client Sarah’s hair like this last month. She came in complaining about her heavy forehead. We cut the pieces exactly at her cheekbones. She texted me three days later. She said it took her two minutes to style the front with a Dyson Airwrap. The rest of her hair just air dried beautifully. You get maximum movement with almost zero effort. A lightweight spray from Ouai keeps the layers separated perfectly. These pieces soften square jawlines beautifully. You never have to worry about flat strands falling in your eyes again.
3. The Deep Side Part Lob
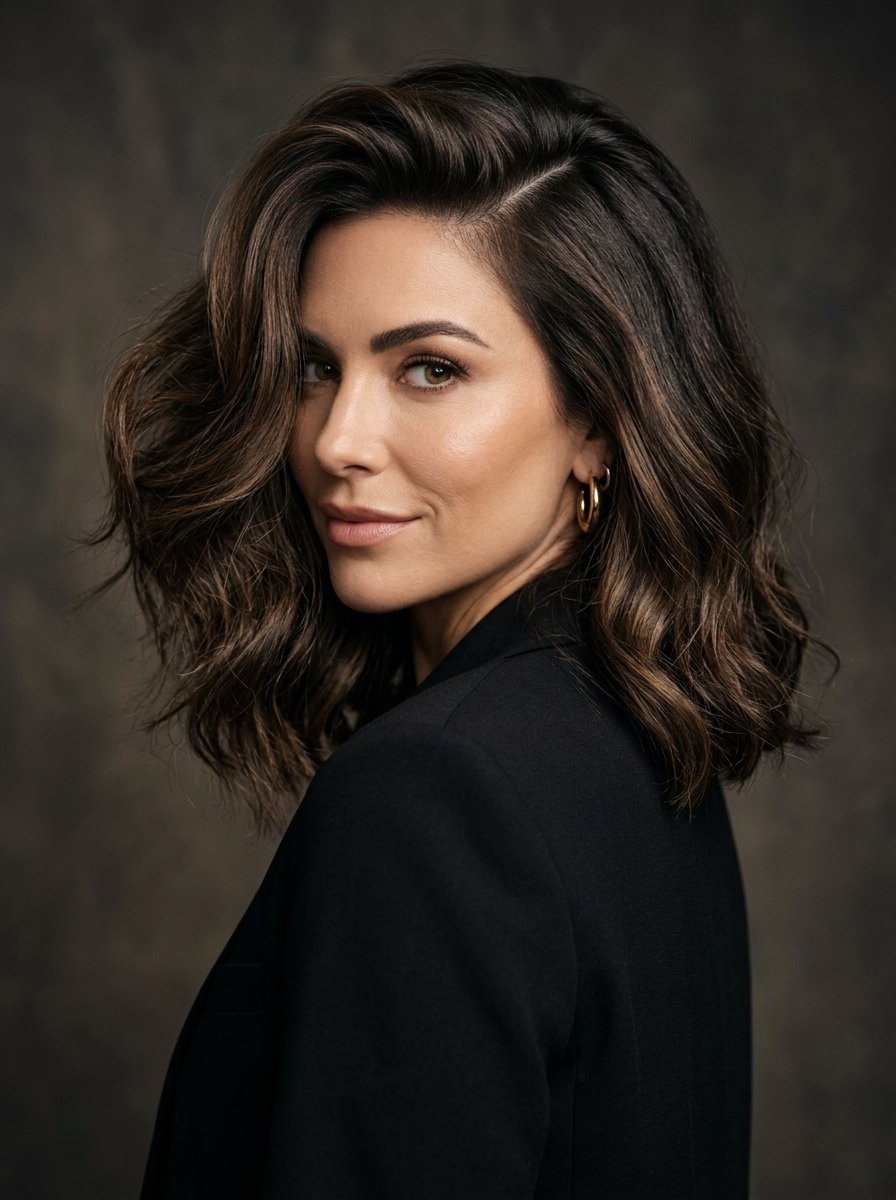
I tell everyone about the side part trick. Moving your part over lifts the roots off your scalp instantly. A shoulder length side part takes seconds to create. I watched my sister struggle with flat roots for a decade. I finally forced her to change her part. She flipped it over and gained two inches of lift instantly. It costs zero dollars. You do not need any new products. Just grab a fine tooth comb and redraw the line. The hair fights back at first. Use a little Oribe dry texturizing spray at the root to hold it in place. You will see a massive change in your profile photos. The asymmetry balances out round faces easily. It brings all the attention directly to your eyes. I usually tell clients to flip their part back and forth every few weeks. This stops the roots from flattening out permanently. It gives you instant height at the crown.
4. Korean Style Wispy Bangs
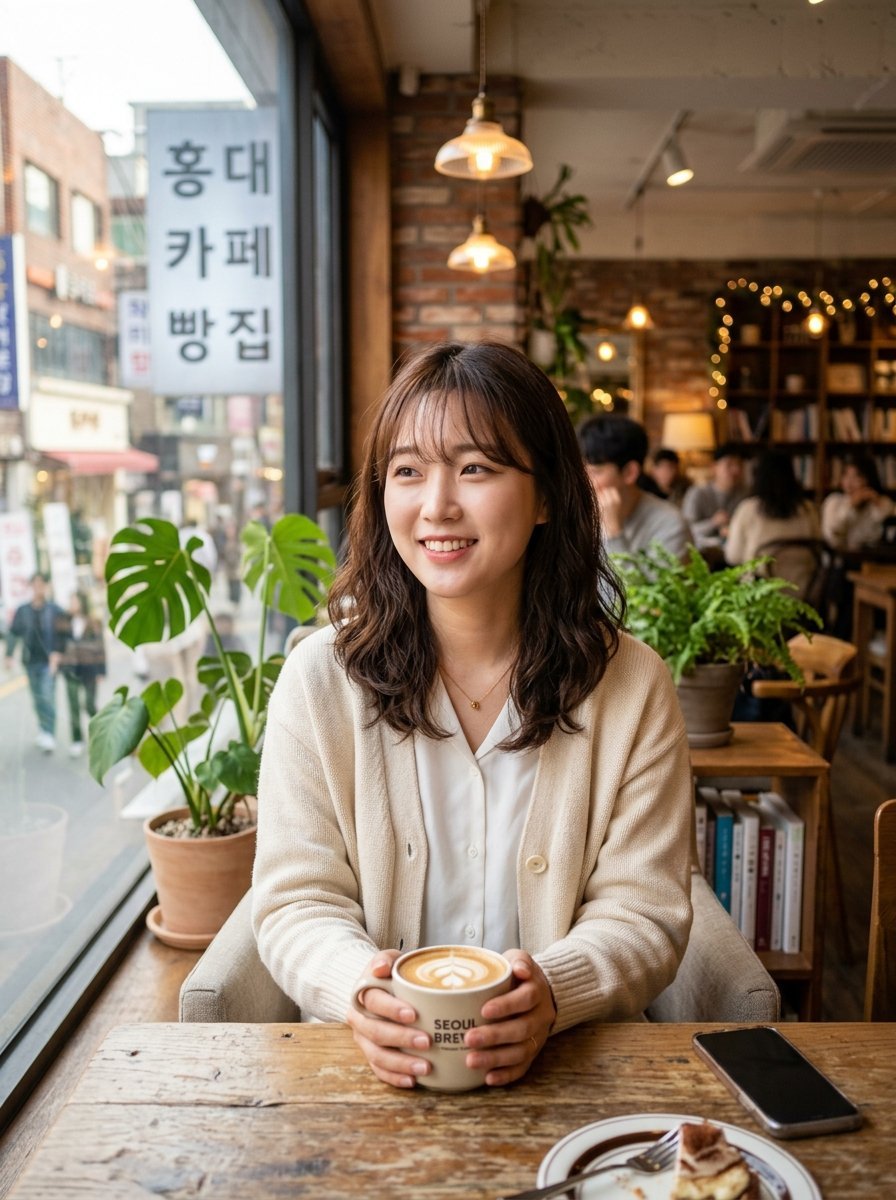
These sit high on my list of current favorites. The shoulder length haircut Korean style relies on airy, see through bangs. They lay gently across your forehead. Unlike heavy, blunt fringe, these wispy pieces do not steal density from the rest of your hair. You can sweep them away easily if you get tired of them. I spent two weeks walking around Seoul in twenty twenty three. Every woman had these bangs. They use a tiny micro iron to bend the bangs gently. I bought one for thirty dollars at a local shop. You can use any small straightener. Just curve it slightly inward. The bangs float above the forehead. They never look greasy. They never weigh the front down. It is the perfect compromise for fine texture. You get the style of a fringe without sacrificing any thickness from the sides. You just sweep them away when you exercise. I trim mine at home every three weeks with tiny scissors.
5. The Shaggy Wolf Cut Hybrid
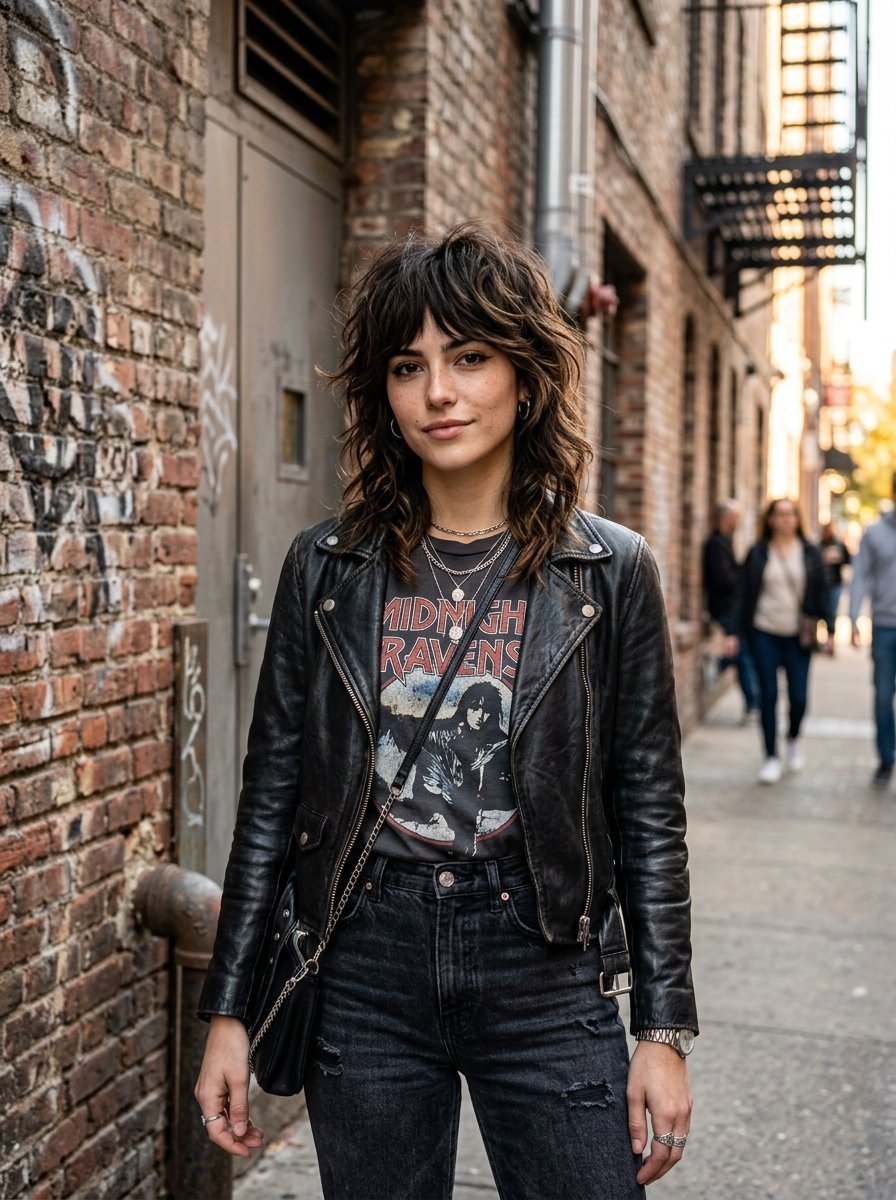
I used to hate heavily layered cuts for fine hair. I changed my mind completely. A modified wolf cut gives you incredible texture. You keep the length right above the collarbone. The top sections get heavily textured. This creates a crown of volume that lifts away from your head. Short layered hair hairstyles are making a massive comeback. My client Jessica almost cried when I pitched a wolf cut. She feared looking like a heavy metal singer. We compromised with a soft, hybridized version. I kept her collarbone length completely blunt. I only chopped the top three inches into choppy pieces. She uses a dab of R and Co matte paste on the top layers. It lifts the crown instantly. She gets compliments everywhere she goes now. You get incredible texture on the top of your head. It requires a bit of styling cream, but the shape holds itself all day.
6. Medium Length Curtain Bangs

Curtain bangs blend flawlessly into medium length cuts. They open up your face like French doors. I constantly pick these for clients who want a change without losing their length. They swoop back and tie into your face framing layers. Cute haircuts for medium hair with bangs often rely on this exact shape. I tell clients to buy a one inch Olivia Garden ceramic brush for these. You blow dry the bangs forward over your face first. Then you roll them back away from your face. When they fall, they split perfectly in the middle. The cheekbone pieces give your face a gorgeous shadow. It hides the thinness at the temples. Curtain bangs demand a trim every four weeks. Budget thirty dollars a month for upkeep. The maintenance pays off entirely. They frame a messy bun beautifully. You look fully styled even in sweatpants.
7. The A Line Angled Lob
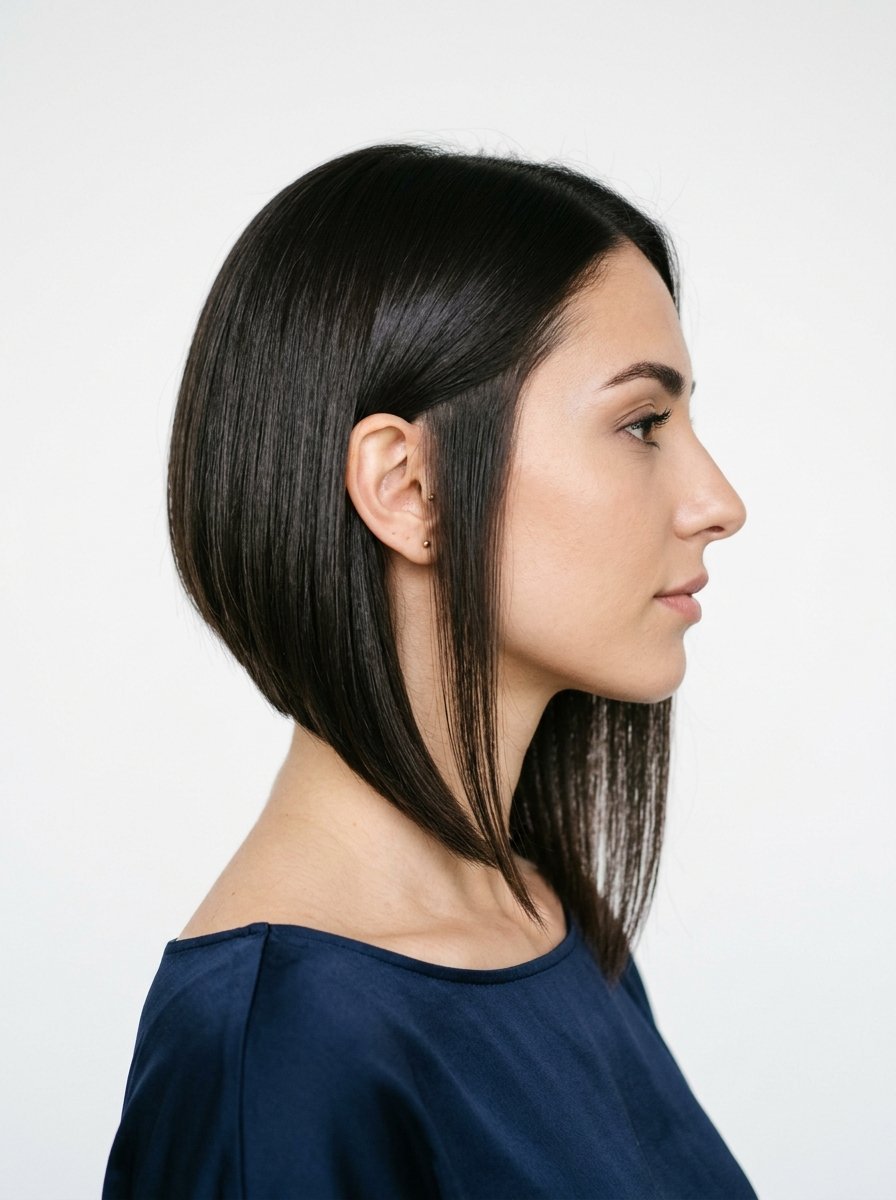
An A Line cut is shorter in the back and longer in the front. This geometry naturally pushes hair forward. It creates a bulkier look around your face. The angle must be subtle. I leave the front exactly one inch longer than the back. Any more than that looks like a bad two thousand ten flashback. The slight pitch pushes all the heavy hair forward toward your collarbone. You get a thick curtain of hair framing your neck. I use my Paul Mitchell smoothing iron to bend the ends under very slightly. It takes four minutes every morning. The back section stays incredibly full because it sits higher up. It forces a natural curve into straight hair without curling irons. I wore this cut for two years straight. It grows out beautifully without awkward stages. This ranks high among shoulder length straight hair hairstyles. You barely need to style it. The cut does all the heavy lifting.
8. Textured Internal Layers
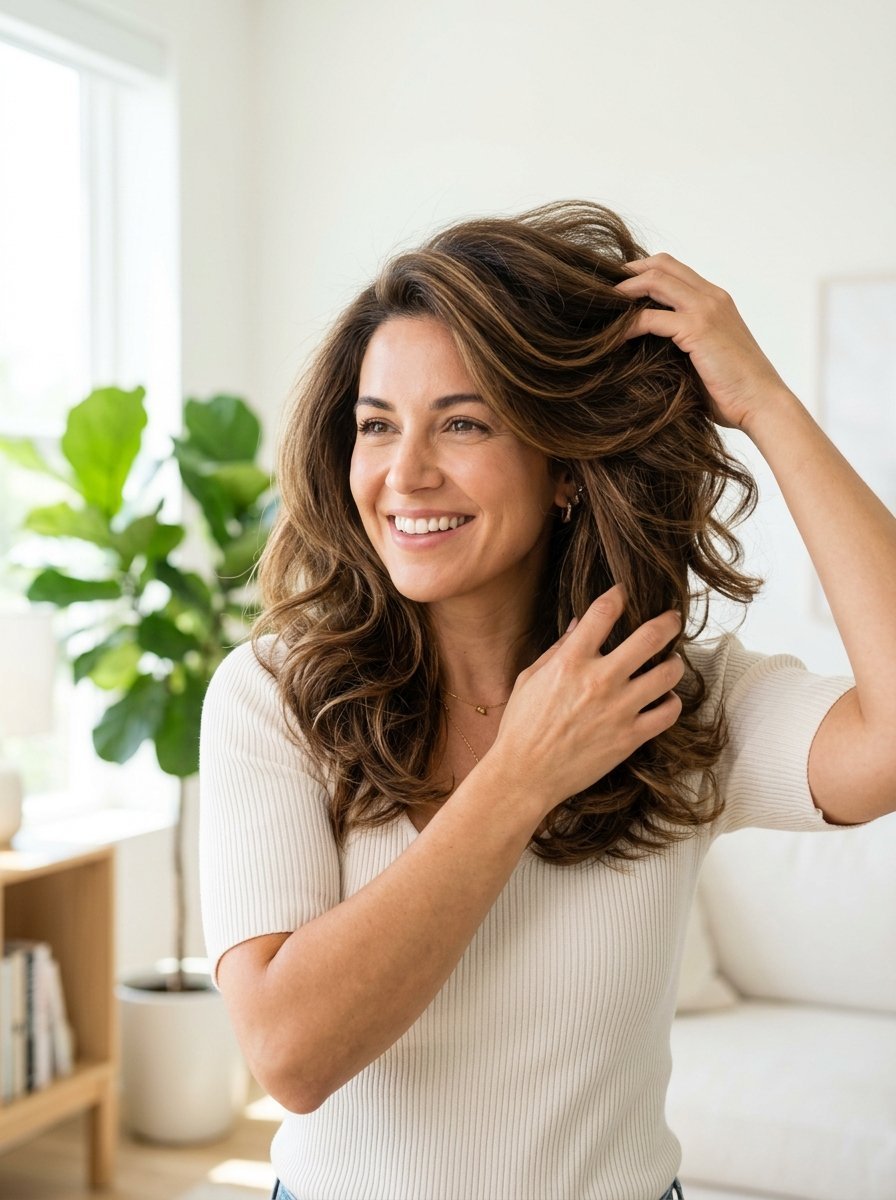
We refer to these as invisible layers in the salon. A medium lenght layer cut does not have to be obvious. Your stylist cuts shorter pieces underneath the top canopy of your hair. These hidden short pieces act like a push up bra for your longer top layers. You get the volume without seeing the choppy lines. I attended a cutting class in New York last fall. The instructor showed us how to cut invisible pockets into the interior of the hair. The longer hairs rest on top of these short pockets. It forces the hair outward. My fine haired clients book this cut months in advance. You pay a bit more for this technique. Expect to spend around one hundred and twenty dollars for an experienced cutter. It completely transforms limp strands. You never see the short pieces. You only see the volume they create underneath the surface.
9. The French Girl Fringe
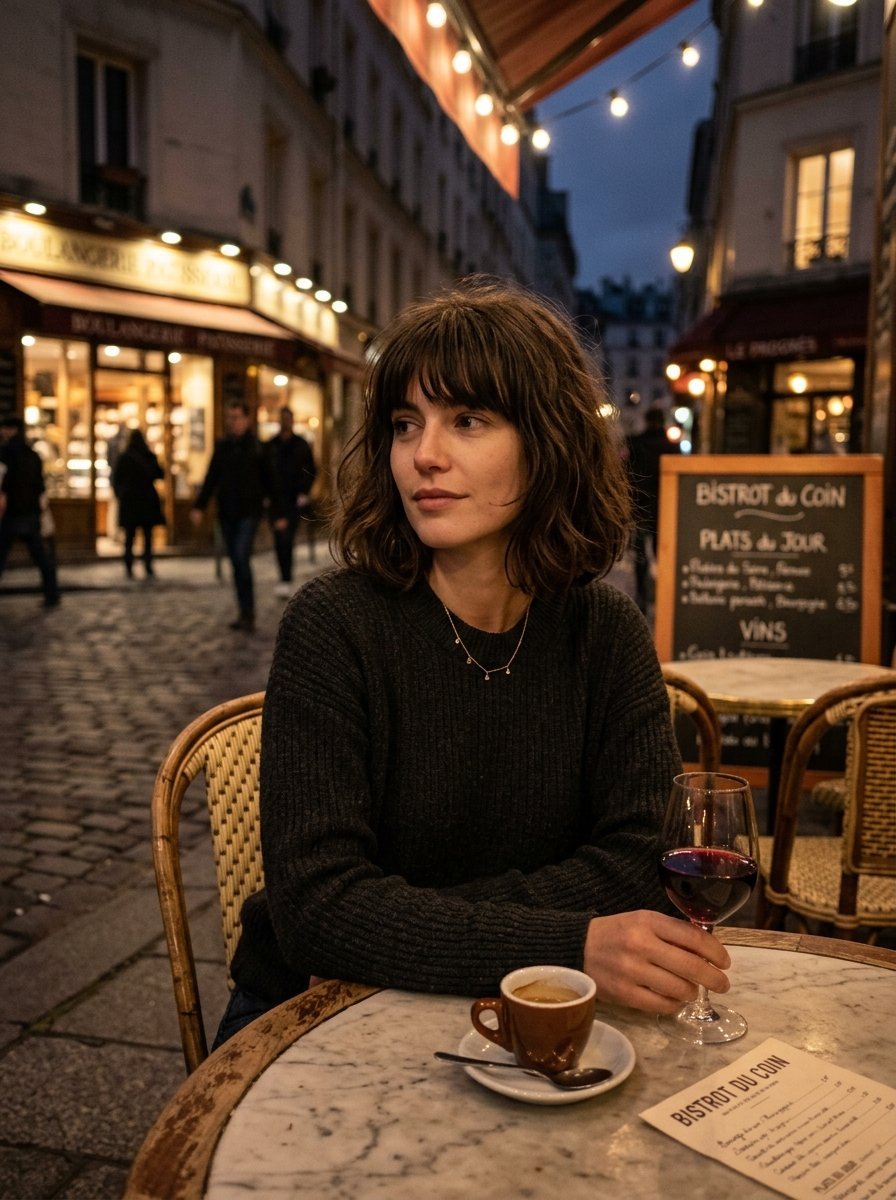
Picture a very relaxed, slightly messy bob with straight across bangs. The French girl look never goes out of style. I look at pictures of Jane Birkin for inspiration here. The fringe must look slightly overgrown. You want it grazing your eyelashes. The bob itself should hit right at the collarbone with blunt ends. I tell my clients to wash their bangs in the sink every morning. You do not need to wash the rest of the hair. Just blow dry the bangs quickly. Use dry shampoo from Klorane on the roots. This cut defines cool girl energy. The focus stays entirely on your eyes and cheekbones. It hides a large forehead instantly. I usually rough dry the fringe with my fingers. Skip the hairspray entirely. Let the hair separate naturally. It looks better on day two anyway. The messiness is the whole point.
10. Straight Blunt Cut With Micro Bangs
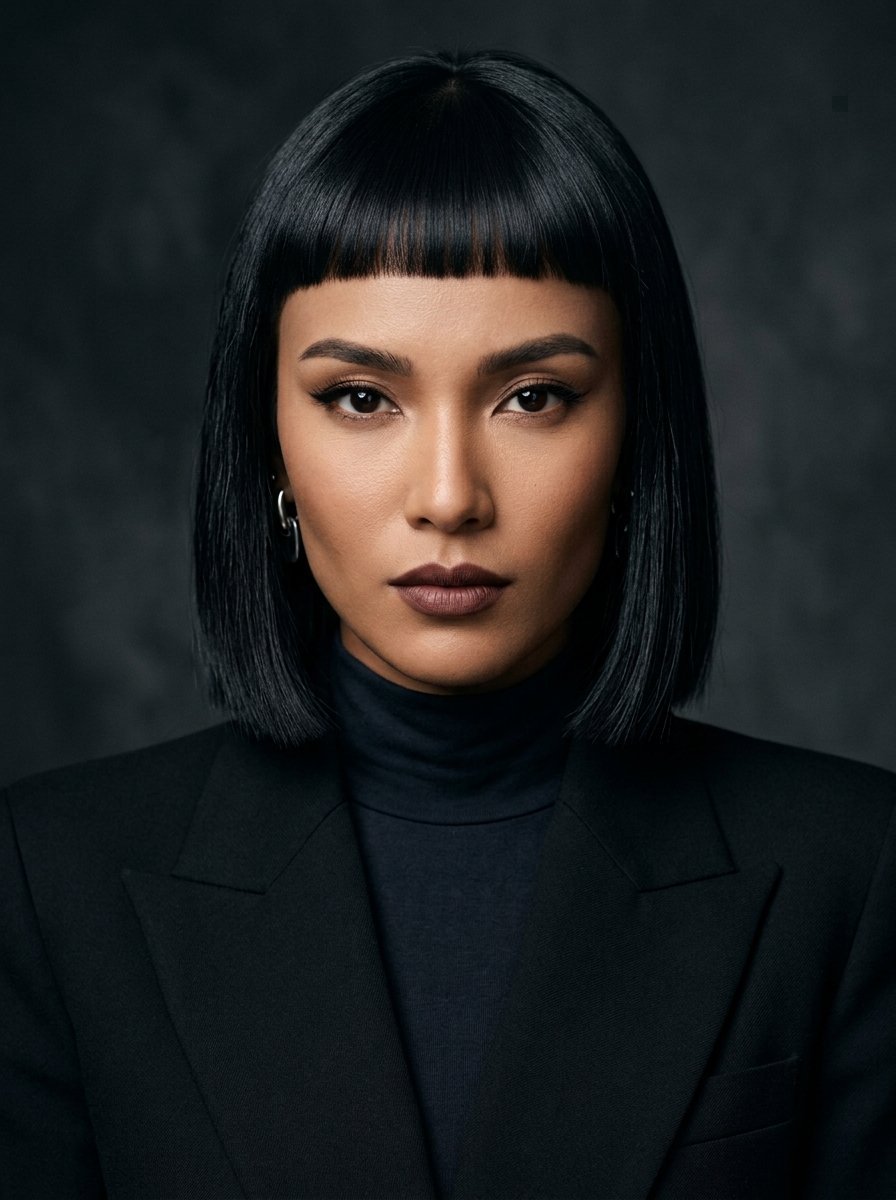
Micro bangs sit way above the eyebrows. This creates a very striking, high fashion look. A girl came into the salon last winter with completely flat, straight hair. I pitched micro bangs. She agreed instantly. We chopped them straight across, two inches above her brows. The contrast looked incredible. Her face completely opened up. You have to flat iron these bangs daily. A tiny half inch straightener works best. You will visit the salon every three weeks for a ten dollar bang trim. It demands dedication. But the visual payoff is immense. You look incredibly stylish even with a basic white t shirt and jeans. I love pairing this with a razor sharp, shoulder grazing length. The contrast between the short bangs and the medium length is beautiful. It makes your hair look very intentional and styled. Even when you just wake up, you look put together.
11. Mid Length Wavy Shag
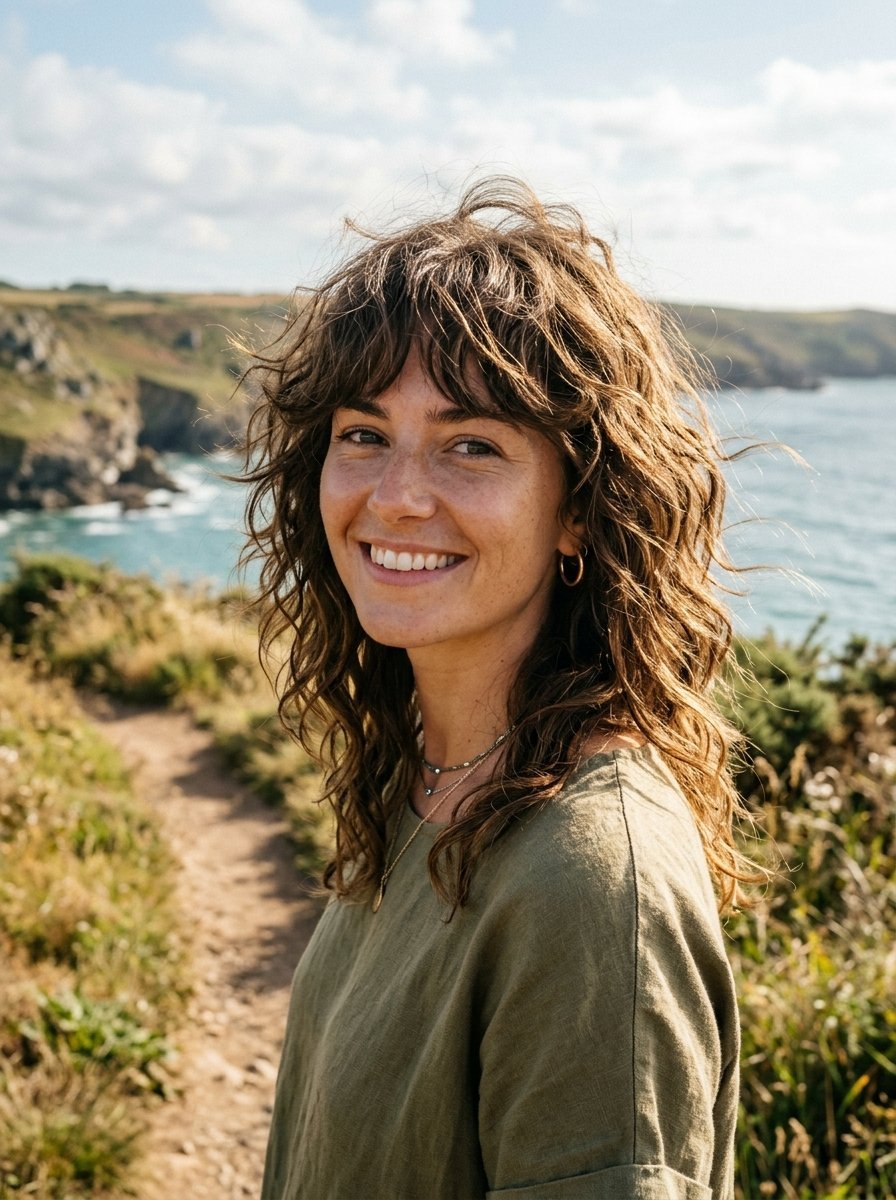
Fine hair often holds a natural wave. A shag cut brings that hidden wave to life. We take the weight off the top so the natural curl can spring up. You get a very cool, rock and roll vibe. I tell my wavy clients to stop fighting their texture. Fine hair actually looks thicker when you let it bend. A medium shag releases the weight pulling the curl down. I run a razor very lightly over the top layers. I use scissors for the bottom to keep it thick. Buy a bottle of Cult and King salt spray. Spray it on wet hair and literally walk out the door. The air does the work. The uneven, choppy ends make fine hair look incredibly full. It moves beautifully when you walk. This is my go to choice for low maintenance clients. You never need to touch a hairbrush again.
12. The Asymmetrical Shoulder Cut
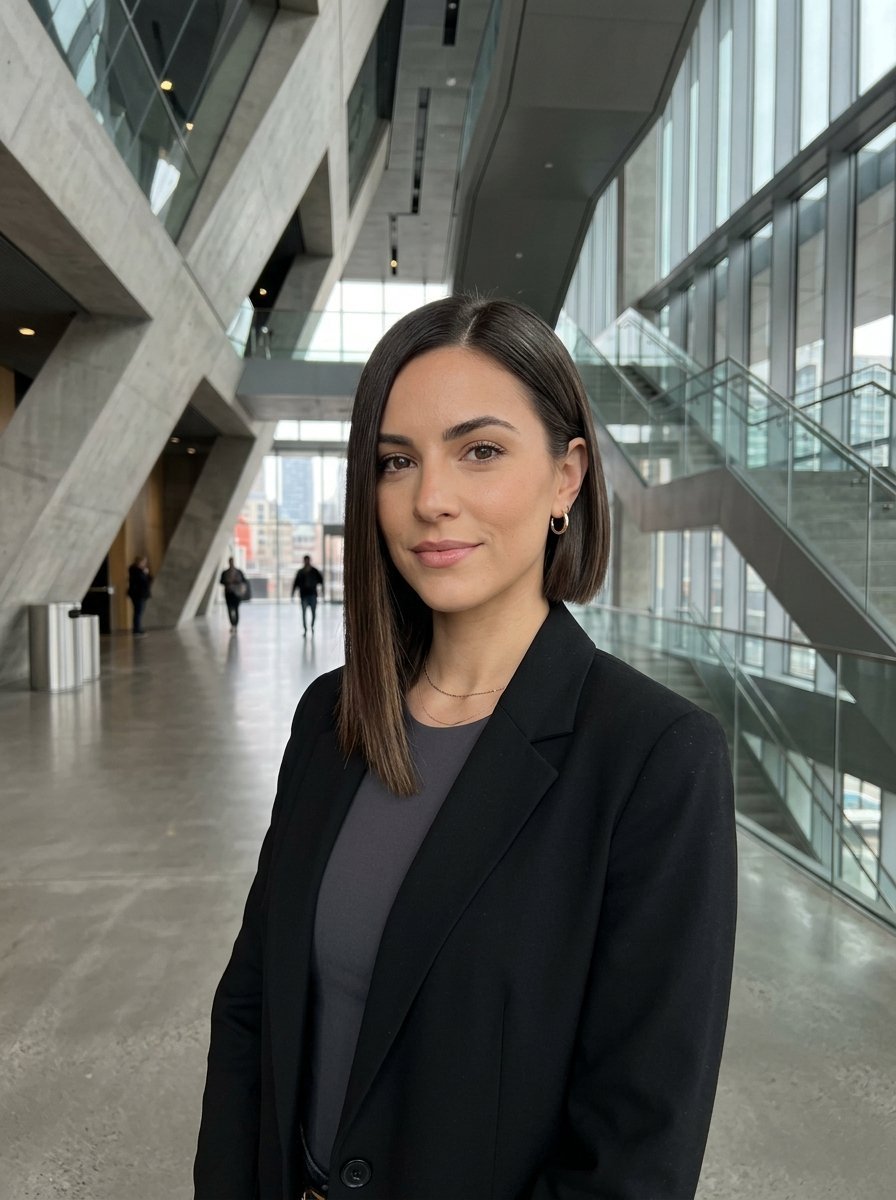
One side sits right at the collarbone. The other side rests just below the jaw. This imbalance forces your hair to stack nicely on the shorter side. I wore an asymmetrical cut during my twenties. One side touched my collarbone. The other sat precisely at my jawline. Every time I tucked the shorter side behind my ear, the hair looked massively thick on the long side. It tricks the eye. People focus on the sharp diagonal line instead of the hair density. You must keep this cut incredibly straight. A good smoothing serum from Kerastase keeps the edges glass like. I have seen clients look five years younger after getting this cut. It draws the eye sideways. This distracts from any thinness at the roots. You wear this straight or with a slight bend. A flat iron works best here. Keep the ends very crisp. It demands attention. You will stand out in any room.
13. Feathered Ends Medium Length
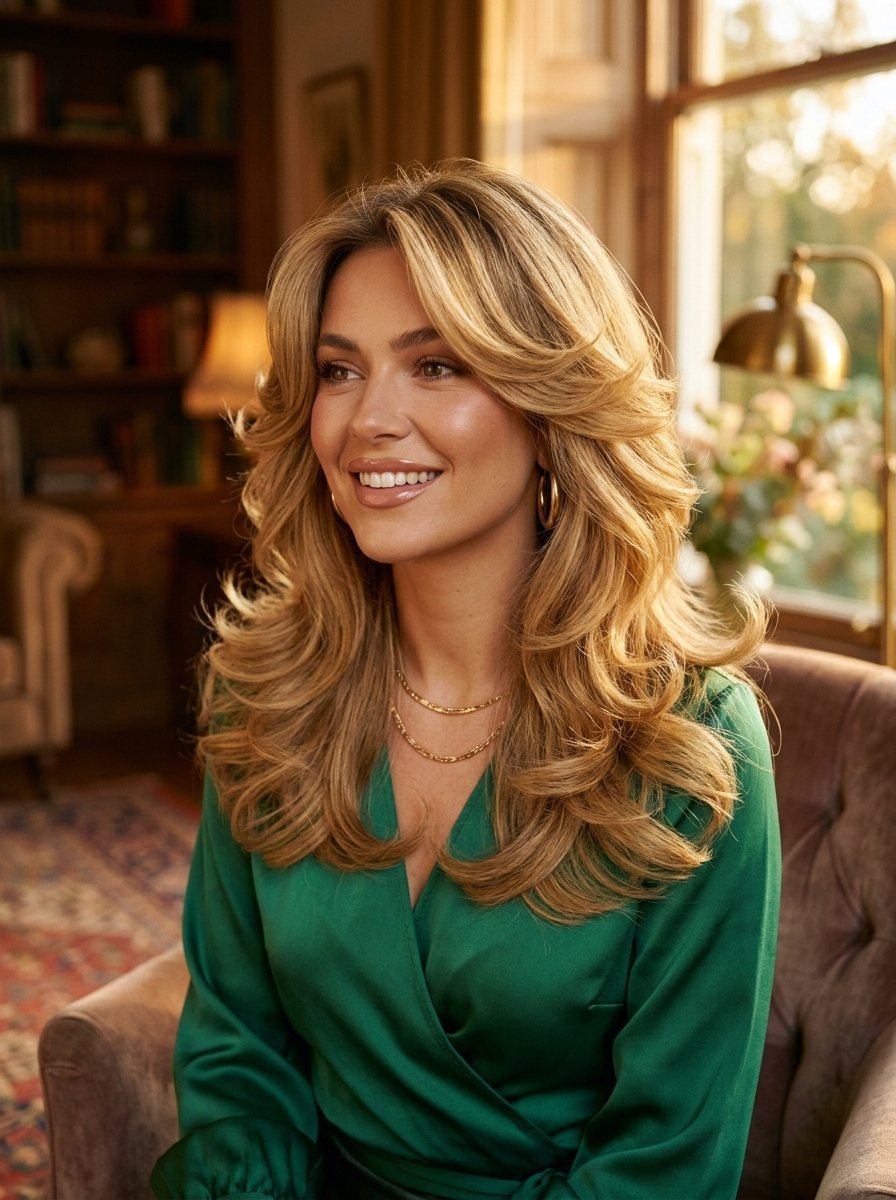
We take inspiration from Farrah Fawcett, but keep it modern. You leave the entire outline thick and blunt at the shoulders. We only feather the front two inches around the face. I teach my clients to use hot rollers. Put three Velcro rollers just around your face while you drink your coffee. When you take them out, the hair sweeps back beautifully. It widens the hair visually at the cheekbones. The ends flip outward gracefully. You keep the overall length blunt. We only texture the final inch of hair. This gives the illusion of width at the bottom. Your hair looks wider and fuller. I use a round brush to flick the ends out while blow drying. It feels very glamorous. Women with fine hair love this because it makes the ends look bouncy. The volume stays at the bottom. This balances out a wider forehead perfectly.
14. Choppy Layered Lob
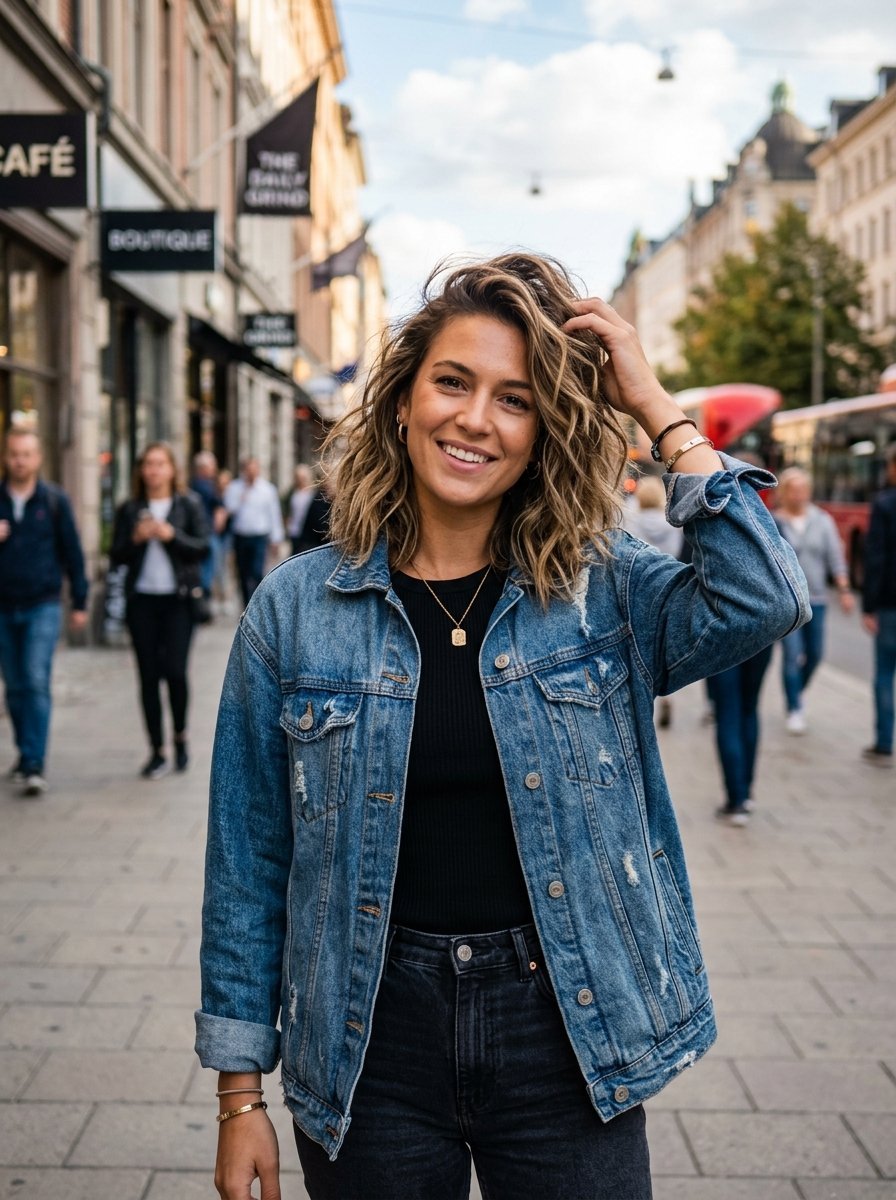
A lob means long bob. A choppy lob removes perfection from the equation. The ends look slightly jagged and broken. I never cut lobs completely straight on fine hair. I take my shears and cut vertically into the bottom inch. This breaks up the hard line. It creates a jagged edge that looks thicker when curled. I use a one inch Bio Ionic curling wand. I wrap random pieces and leave the ends completely straight. The straight ends push against each other. This creates a fake thickness that lasts for two days. You style this by throwing in a few messy waves with a curling wand. Leave the ends straight. This prevents the cut from looking too neat. Messy texture translates to visual thickness. You can hide a lot of thin spots with this intentional messiness. It forgives skipped washes and looks great with dry shampoo.
15. The Flipped Out Retro Cut

Think of a modern take on a vintage flip. The hair sits right on the shoulders and bends outward. The retro flip is having a massive moment right now. The ends hitting your shoulders naturally want to flip out anyway. I say lean into it. I cut a sharp baseline right at the collarbone. I blow dry the hair completely straight. Then I take a round brush and aggressively flick the bottom two inches outward. A strong hold hairspray locks it in. It looks very polished and intentional. This works exceptionally well for fine hair. The bend gives the hair physical shape and width. It refuses to lay flat. I cut the front pieces slightly shorter to blend into the flip. You just need a strong hold styling cream. Run it through damp hair. Use hot rollers on the ends for ten minutes. Let them cool completely. The shape will last all day long.
16. Face Framing Ghost Layers
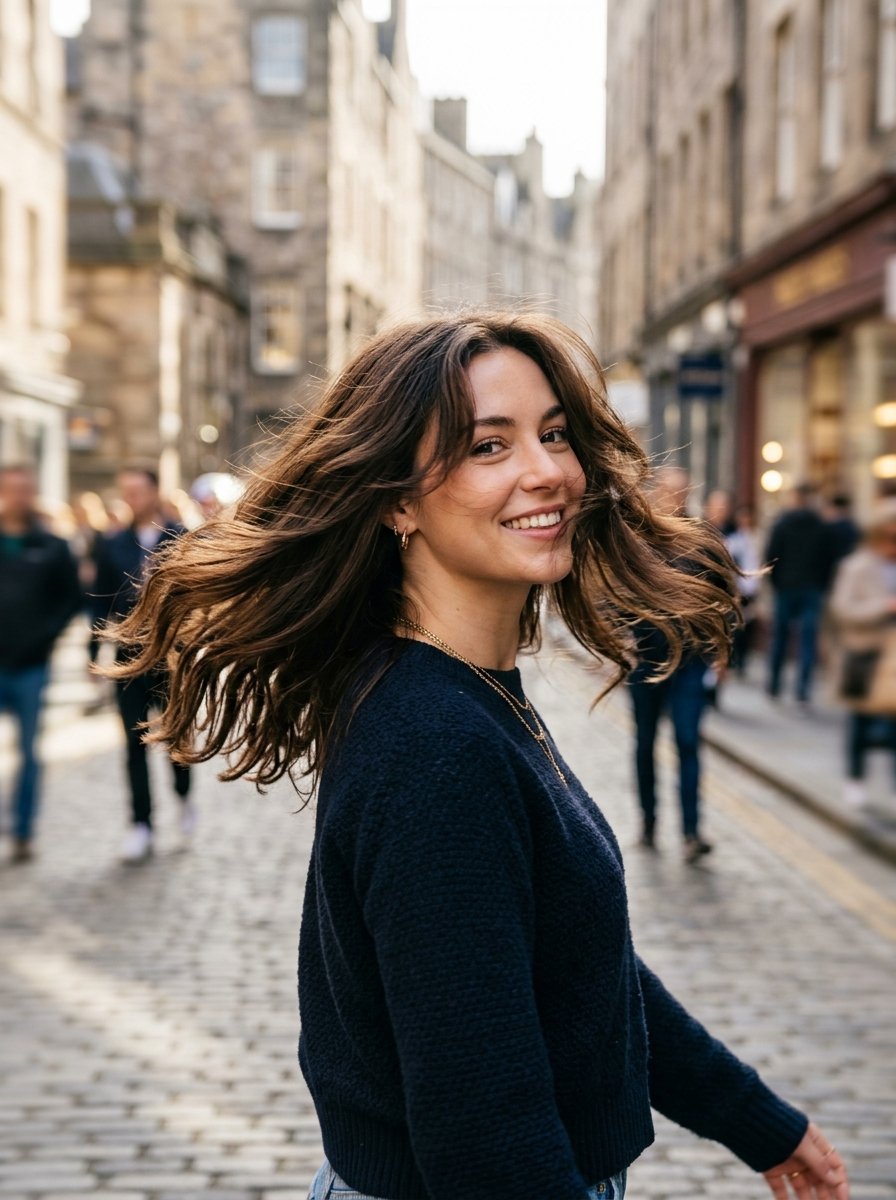
Ghost layers act like a secret weapon. I take diagonal sections around the face. I slide my scissors down very softly without closing them fully. This removes internal weight without disrupting the surface. When my client turns her head, the hair cascades. When she stands still, it looks like a solid, thick bob. I charge a premium for this cut because it takes intense precision. The visual payoff is massive. These layers move invisibly through your haircut. When your hair hangs straight, you cannot see them. When you turn your head, the hair cascades softly. This works perfectly around the face. You get the movement without thinning the perimeter. I absolutely love this technique for fine strands. It gives you a shape that looks rich and dense. You wash and go. The cut practically styles itself. You maintain massive weight at the ends while getting volume up top.
17. The Curly Shag For Fine Hair
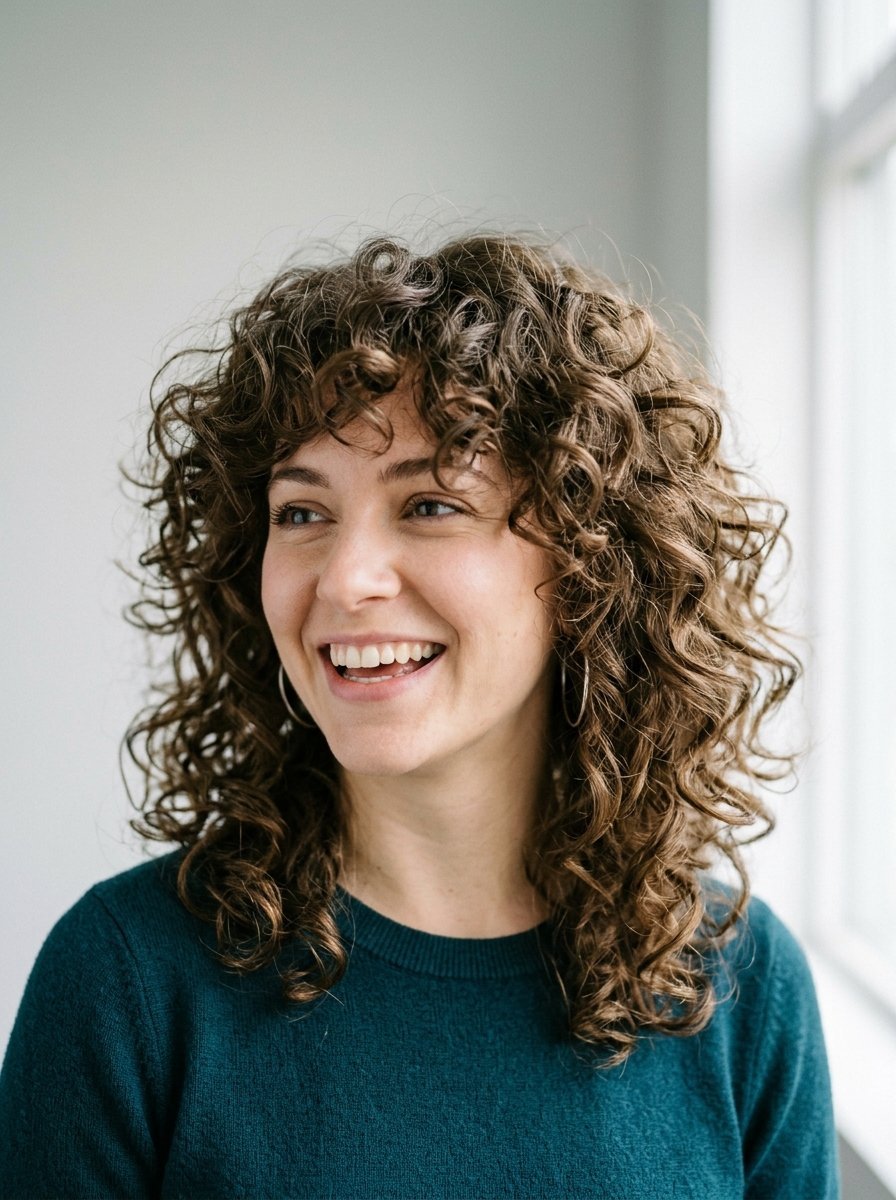
Many women with fine hair have natural curls they brush out. Stop doing that. A shoulder length shag tailored for fine curls is magical. Fine curly hair needs absolute respect. If you cut it wet, you will chop off too much. It shrinks drastically. I cut the hair completely dry, ringlet by ringlet. I shape a soft halo around the head. The layers rest gently on one another. This forces the curls outward instead of downward. I tell my clients to use Innersense curl cream. Rake it through wet hair and absolutely do not touch it while it dries. We cut soft, round layers all over the head. This allows the curls to stack on top of each other. The hair expands outward instead of hanging down. You just need a gentle curl jelly. Scrunch it in and leave it alone. The curls clump together to look insanely thick.
18. Sleek Center Part Glass Hair
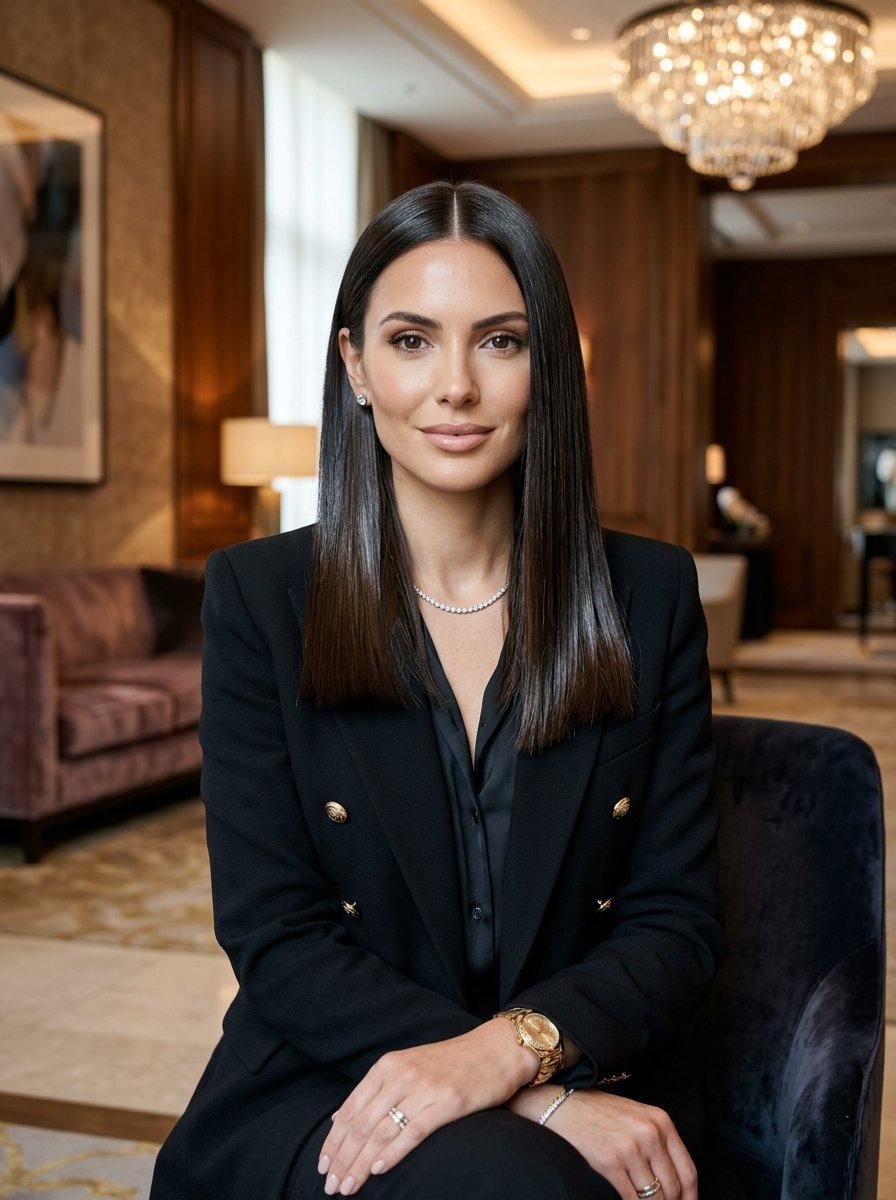
This is the ultimate polished look. The hair is cut dead straight at the collarbone. You see this cut on every red carpet right now. The hair looks like a sheet of pure glass. I cut it mercilessly straight at the collarbone. The middle part must be mathematically perfect. I use a tail comb to draw the line. I drench the hair in Color Wow Dream Coat before blow drying. This seals the cuticle tightly. The light reflection creates a massive illusion of density. It requires zero volume at the root. You part it exactly in the middle. The goal is maximum shine and a razor sharp edge. When fine hair is completely smooth and straight, it reflects massive amounts of light. This shine makes the hair look incredibly healthy and dense. I use a shine spray on my clients after flat ironing. You must get trims every six weeks to maintain this line. It looks wealthy. It looks flawless.
19. The Bottleneck Bang Lob
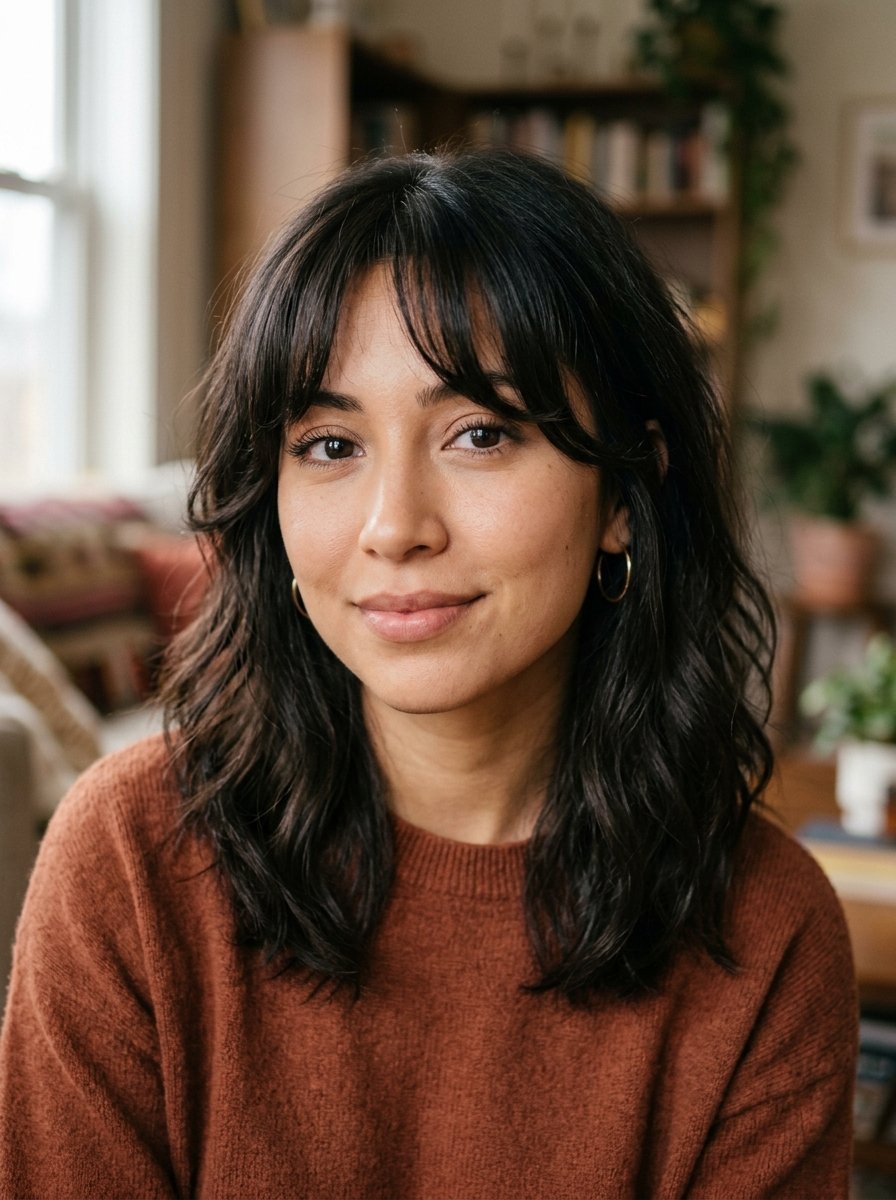
Bottleneck bangs start thin at the top, curve out around the eyes, and taper at the cheekbones. They look exactly like a glass bottle. I prefer bottleneck bangs over traditional curtain bangs for fine hair. They keep more hair attached to the crown. The center is wispy, but the sides curve heavily around the eyes. I cut these on my mom last year. She has very fine hair at her hairline. These bangs completely covered the sparse areas at her temples. You barely have to style them. They fall naturally into that beautiful bottle shape. These bangs blend seamlessly into a shoulder grazing cut. They are softer than straight bangs and less swoopy than curtain bangs. I love how they frame the eyes. They require very little styling effort. They grow out incredibly well. You get a textured, lived in feel instantly. It works wonders on fine hair because it keeps the crown looking full.
20. Hidden Crown Layers
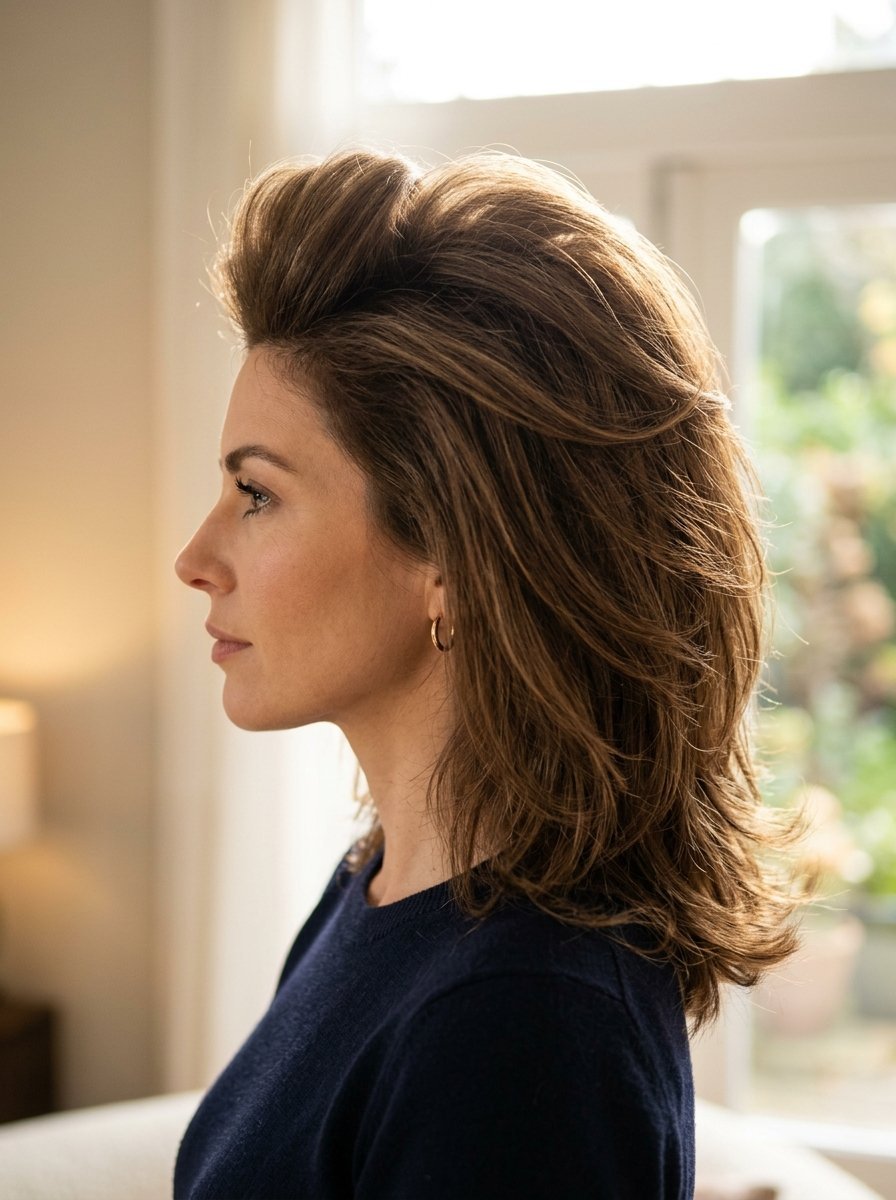
Volume at the crown is the hardest thing to get. Hidden crown layers solve this. I hate backcombing. It destroys fragile fine hair. Instead, I cut a tiny star shape at the apex of the head. I cut these pieces two inches shorter than the rest. When the hair falls naturally, these short pieces stand up. They prop up the longer hair resting on them. You get lift at the crown that never falls flat. My clients gasp when they see the profile view. It fixes flat heads instantly. A stylist cuts a small, star shaped section at the very top of your head. These short pieces sit under the longer top hair. They push the top hair up. You get a permanent root lift. I use this trick all the time in the salon. You never have to tease your hair again. Teasing ruins fine hair and causes massive breakage. This cut does the heavy lifting for you.
21. The Razored Ends Mid Length

Normally, I hate razors on fine hair. But there is one exception. Most stylists misuse razors. They shred fine hair into nothing. I use a fresh feather razor on just the final quarter inch of the hair. The rest of the cut is done with blunt scissors. This tiny bit of texturizing allows the ends to bend inward. They hug the neck softly. I only do this for clients who use heat protectant religiously. The delicate ends need constant protection from hot tools. If your hair is straight and fine, a light razor on just the very tips creates a feathery edge. You keep the cut blunt overall. You just soften the final millimeters. This allows the ends to tuck under naturally. It hugs your neck and shoulders perfectly. I only do this on extremely healthy hair. If your ends are damaged, we use scissors. This gives a soft, romantic finish to a medium length cut.
22. Shoulder Length U Shape Cut
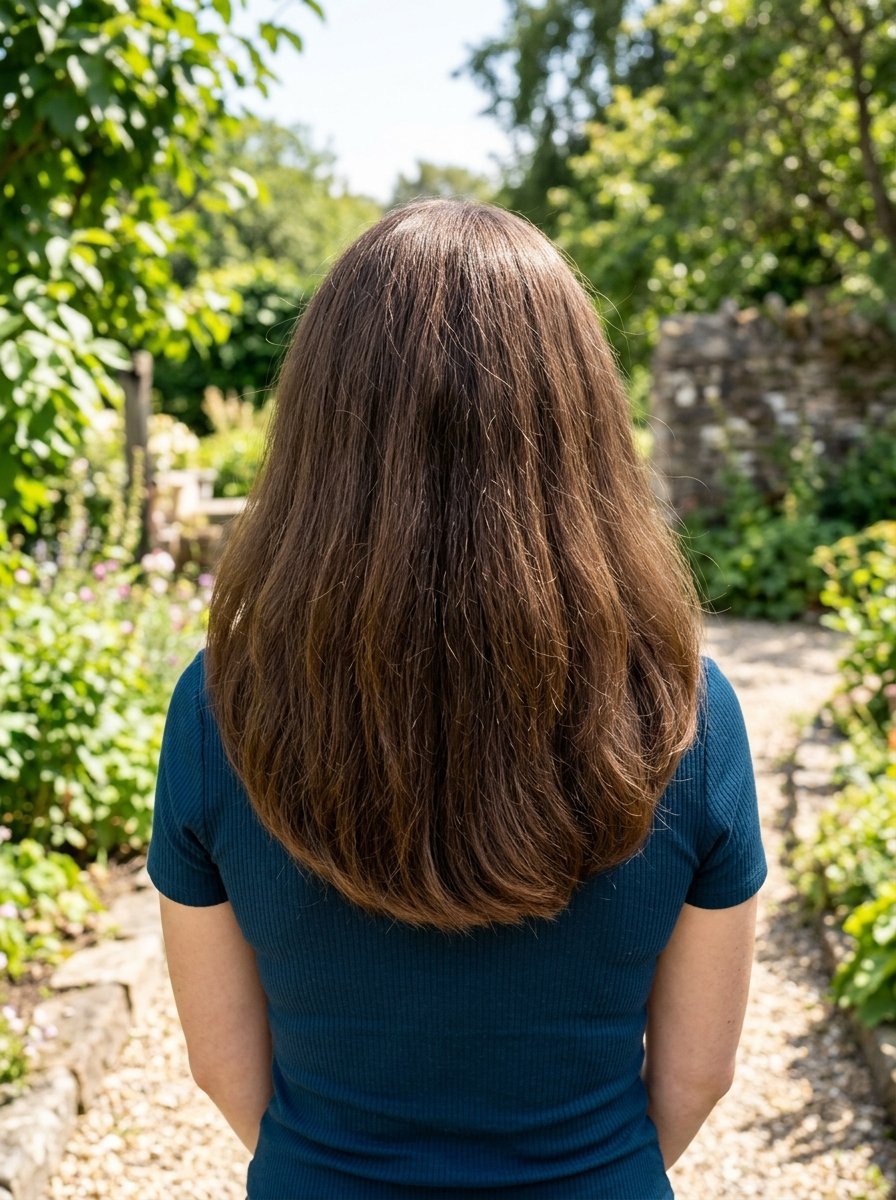
We round the back heavily to create a U shape. The U shape remains a classic for a reason. I pull all the hair to the back and cut a deep curve. The shortest pieces in front hit the collarbone. The back drops down lower. This forces all the hair to clump together visually in the middle. When my clients tie their hair up, the ponytail feels solid and thick. You do not need any special styling tools for this. It falls perfectly every single time. The front pieces are slightly shorter than the middle back. This pulls all the visual weight to the center. It makes your ponytail look twice as thick. I always suggest this for women growing their hair out. It maintains the density perfectly. You get beautiful movement when you walk. It requires almost zero styling. The shape holds itself naturally. It is a classic shape that never fails fine hair.
Frequently Asked Questions
How do I style fine hair without making it flat?
I always tell my clients to start in the shower. Skip heavy conditioners on your roots. Apply them only to your ends. When you step out, rough dry your hair upside down until it is eighty percent dry. This lifts the roots off the scalp permanently. Then use a round brush just on the ends. Never spray heavy oils near your part. I found this out the hard way after looking greasy all day. Stick to lightweight texture sprays. Volume powders work miracles if you use them right at the scalp line.
How often should I trim a shoulder grazing cut?
You need to see your stylist every six to eight weeks. Fine hair shows split ends much faster than thick hair. When the ends fray, the hair looks thinner instantly. A blunt line keeps the density intact. I have watched clients wait twelve weeks. Their hair always looks stringy by that time. Keeping the perimeter fresh is your best defense against flat hair. It costs money, but regular maintenance changes everything. A ten minute dust trim keeps your baseline solid.
Do layers actually help thin hair?
Layers only work if you place them correctly. Too many layers will destroy your baseline. Your ends will look like spider webs. I keep layers strictly around the face or hidden in the crown. You must leave the bottom layer completely solid. This preserves the bulk. Tell your stylist you want long, invisible layers. If they pull out a thinning shear, run away fast. Thinning shears are the absolute worst enemy of fine textures. They shred the interior completely.
Which styling tools work best for medium length hair?
You only need three things. A blow dryer with a cold shot button. A ceramic round brush. A flat iron with adjustable heat. I constantly see people burning their fine hair at four hundred degrees. Turn the heat down to three hundred. Fine hair shapes easily. You do not need extreme heat. The cold shot button locks the volume in place after you brush it. Buy a good heat protectant spray. It creates a physical shield around your fragile ends.
Final Thoughts
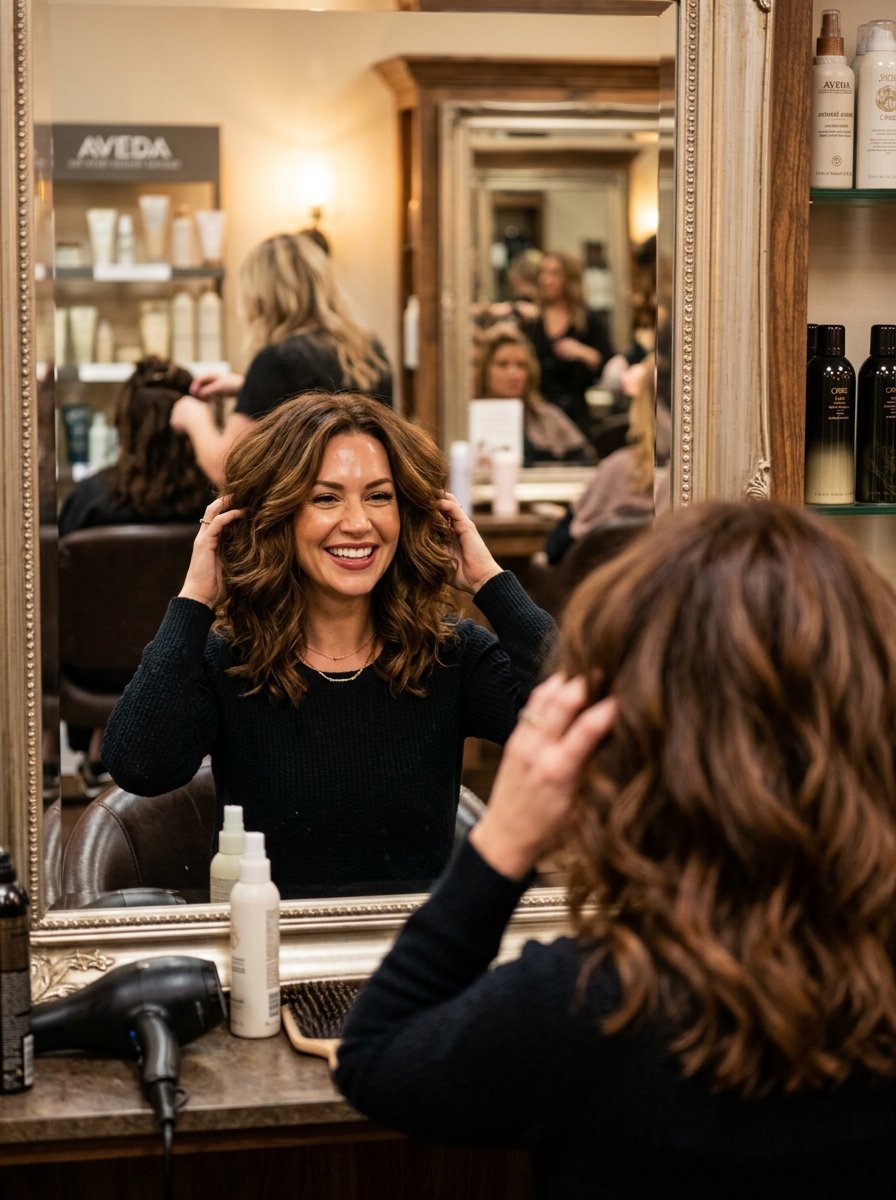
Finding the right cut for fine hair takes a little patience. I struggled with flat hair for years before realizing how geometry changes everything. You do not have to settle for lifeless roots. The shoulder grazing length offers the perfect balance. It keeps the weight off your scalp while giving you enough length to pull back. Show your stylist these specific shapes. Talk about keeping the baseline blunt. Protect your ends with regular trims. Avoid heavy products near your roots. I want you to feel completely confident the next time you look in the salon mirror. Which of these cuts will you ask for next?

Sarah Mitchell — Founder & Editor-in-Chief
Sarah Mitchell is the founder and editorial voice behind Hair Level Up. A licensed cosmetologist with more than 15 years of experience, she has styled A-list celebrities for editorial shoots and red carpets, with work featured in Vogue, Elle, and Harper’s Bazaar. Early in her career, she trained under the legendary hairstylist Oribe in New York, an apprenticeship that still shapes her editorial eye today. Sarah founded Hair Level Up in 2020 after one bad haircut convinced her that women deserved a destination that felt like a magazine, taught like a stylist, and inspired like an art gallery. She oversees every story from concept to publication, guided by a simple belief: a good story teaches you something, but a great one makes you feel beautiful while it does.