15 French Twist Variations for Modern Sophistication
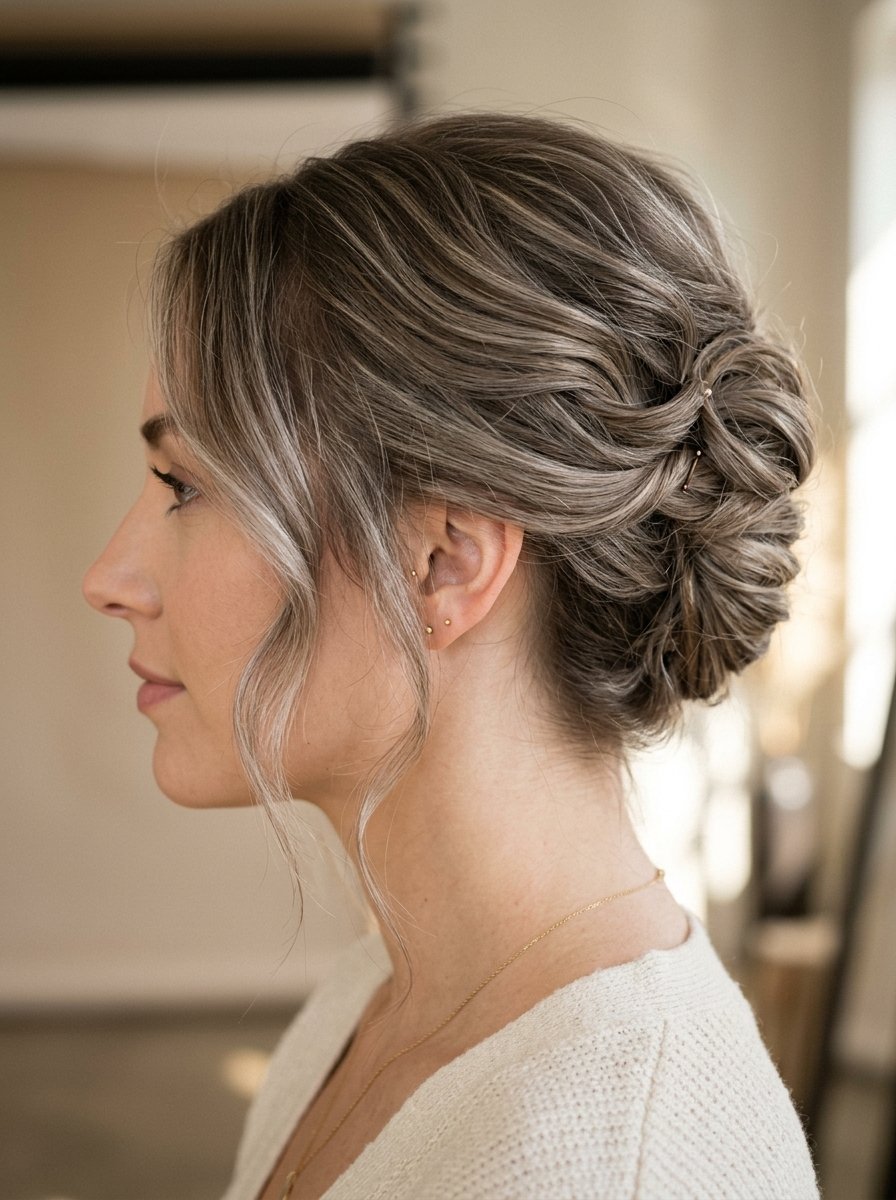
An elegant upscale dinner party in downtown Manhattan requires an appearance that commands attention without looking like you tried too hard. Last winter, I watched a colleague walk into a high-profile media gala wearing a classic updo that looked stiff, heavily lacquered, and completely frozen in 1995. She spent the entire night tilting her head stiffly, terrified that a single dance move would shatter her hairspray shield. That moment changed how I view formal styling. True modern elegance requires movement, touchable texture, and a sense of ease. The modern interpretation of this classic look provides exactly that balance. It offers a secure hold that lasts through a long evening while maintaining a soft, natural appearance. This guide breaks down the exact methods to transform a traditional updo into an everyday statement of style.
Executive Summary
The following guide details fifteen distinct methods to create an upscale updo that suits various hair textures, lengths, and formal requirements. You will gain a practical understanding of how to balance secure hair mechanics with a soft, contemporary aesthetic using accessible tools. The analysis covers options ranging from a five-minute casual loop to complex partitioned structures designed for professional events. Each tutorial outlines exact placement, tension requirements, and specific tool selections based on individual density profiles. The evaluation omits stiff structural formulas, focusing instead on pliable hold, natural movement, and immediate self-correction techniques during styling. By applying these specific sectioning patterns and pin angles, you can achieve a secure, professional-grade finish that remains comfortable all day.
1. The Classic Redefined
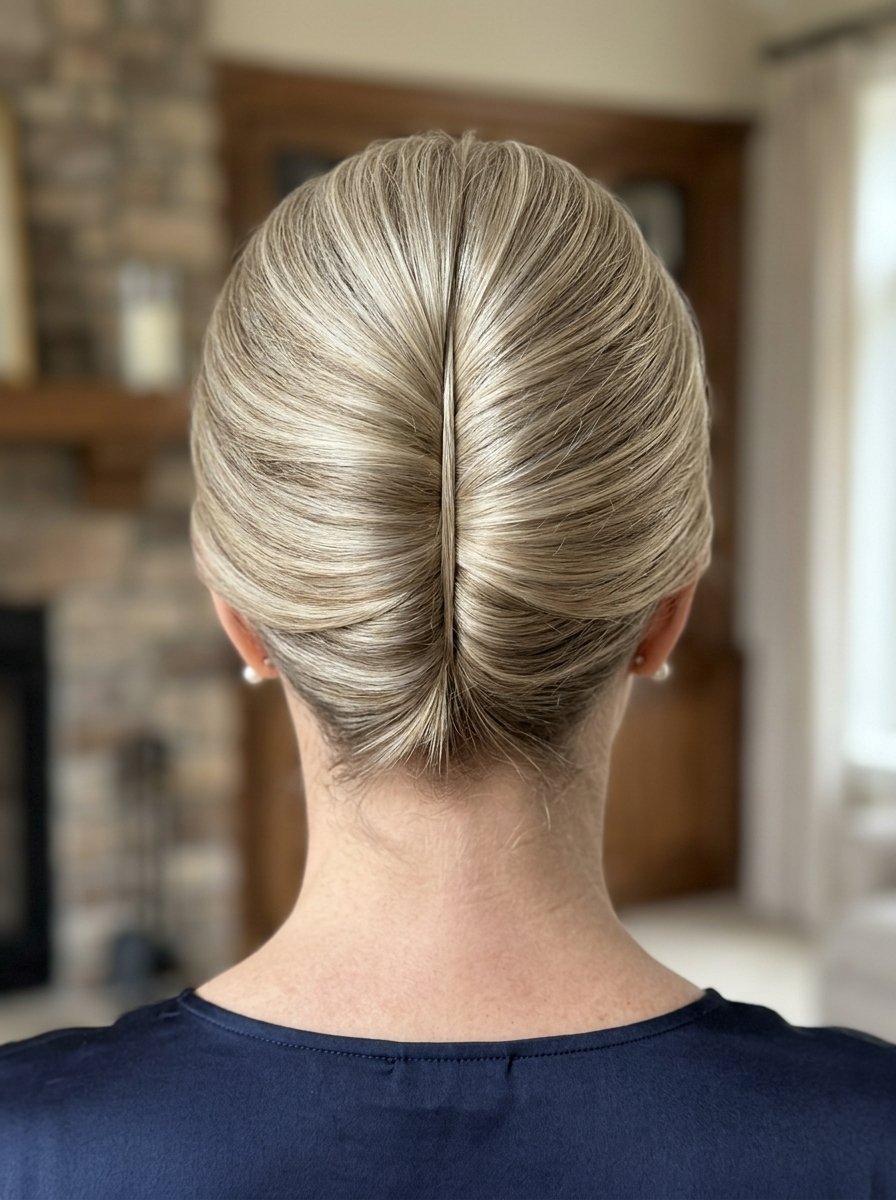
The traditional vertical roll often looks rigid when pinned with excessive product. A modern approach uses a softer foundation that relies on finger tension rather than heavy backcombing to create a clean silhouette.
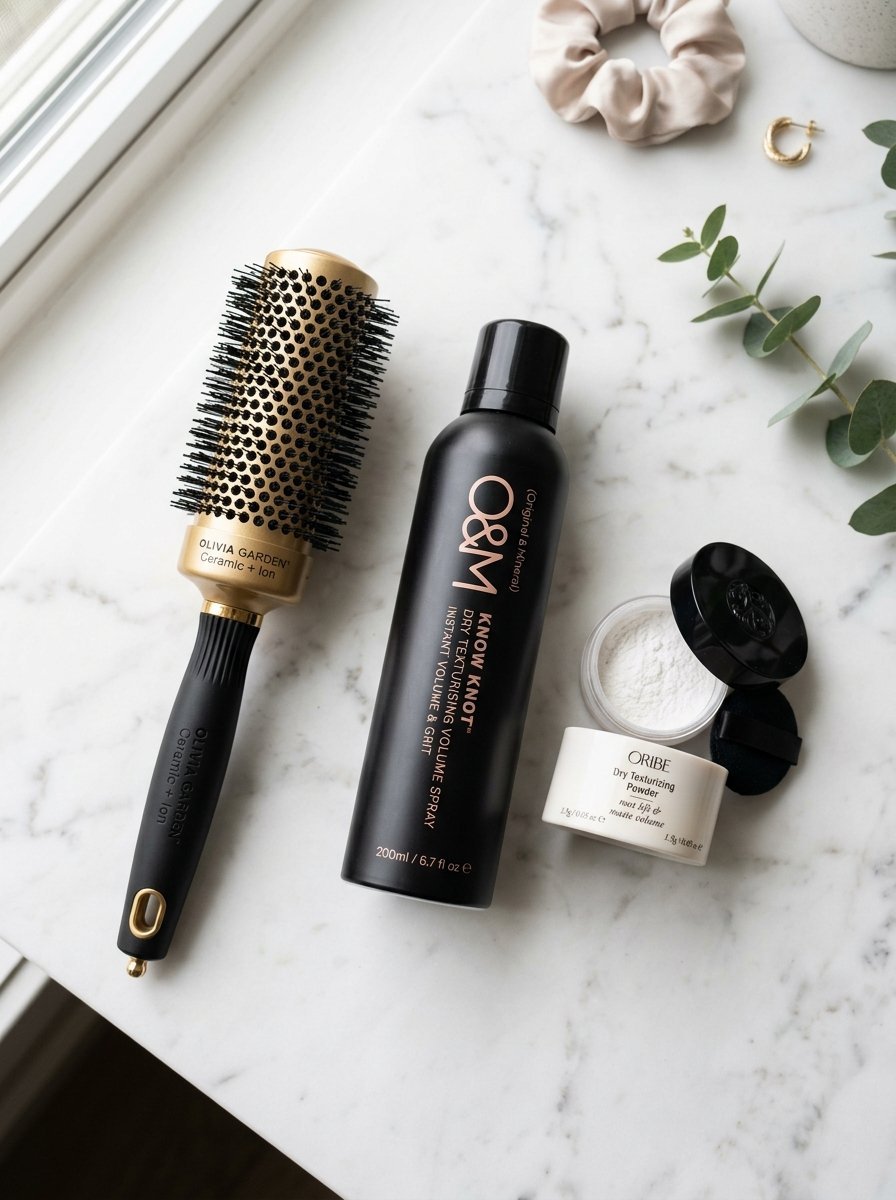
In my experience, preparing the hair with a dry texturizing spray like Oribe Dry Texturizing Spray creates the necessary friction without leaving a sticky residue. Gather the hair into a low ponytail at the nape of the neck, then pull the strand slightly to the left side of your spine. Secure a vertical row of bobby pins from the bottom upward, overlapping them in an interlocking pattern to form a solid anchor line.
Roll the length of the hair tightly over your fingers toward the right, tucking the ends completely inside the pocket created by the fold. Insert long U-pins through the ridge of the roll, catching both the twisted hair and the anchored base pins. This specific angling locks the structure in place for hours.
- Prep time: 7 minutes
- Ideal for: Straight or wavy hair of medium density
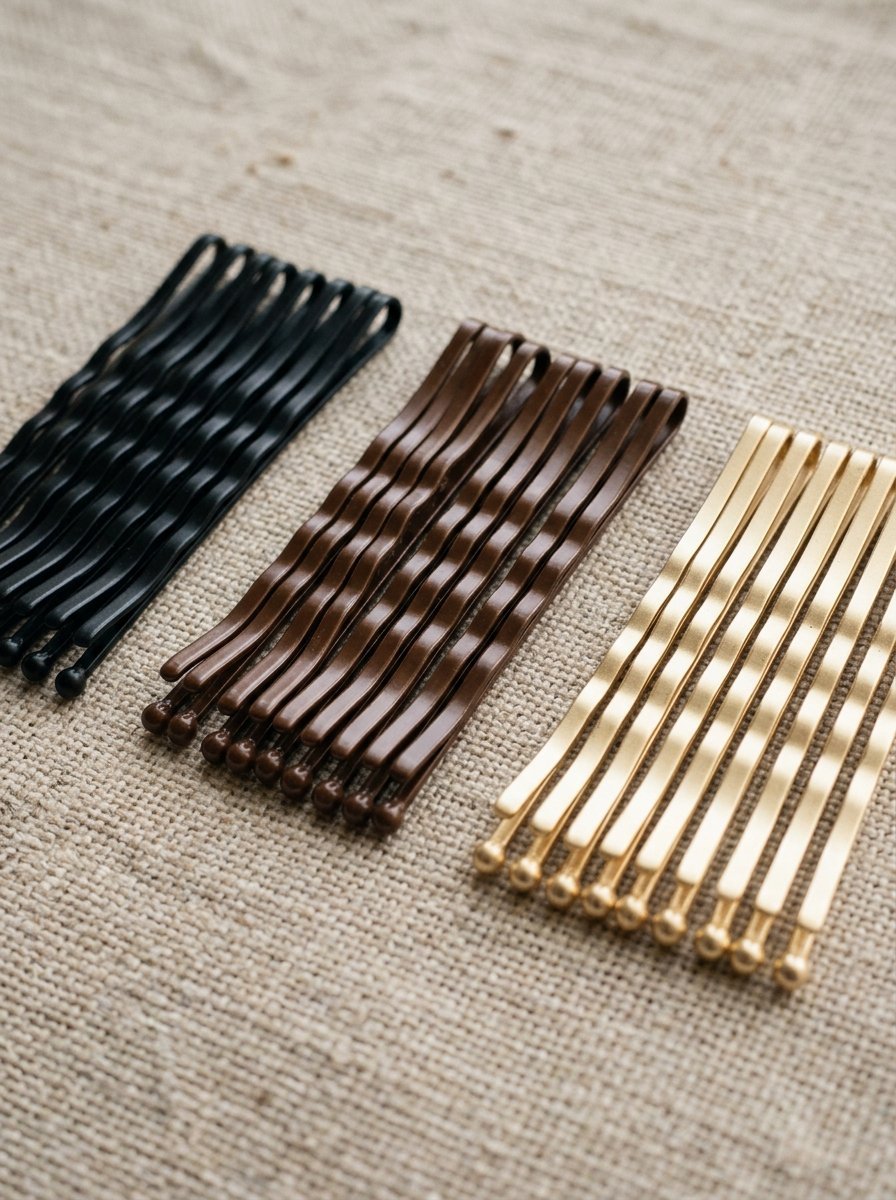
- Core tools: Interlocking bobby pins, open U-pins
2. The Messy Casual Loop

A relaxed version of this style works well for weekend outings or casual office environments where a polished look feels too formal. This method favors loose framing over perfect alignment.
I spent three months trying to get this look right on fine hair without it slipping out by noon. The secret lies in skipping the brush entirely and using only your hands to gather the volume. Pull the length back loosely, leaving out several front pieces around the ears and jawline to soften the frame. Twist the section upward, allowing the top portion to flop forward over the main roll.
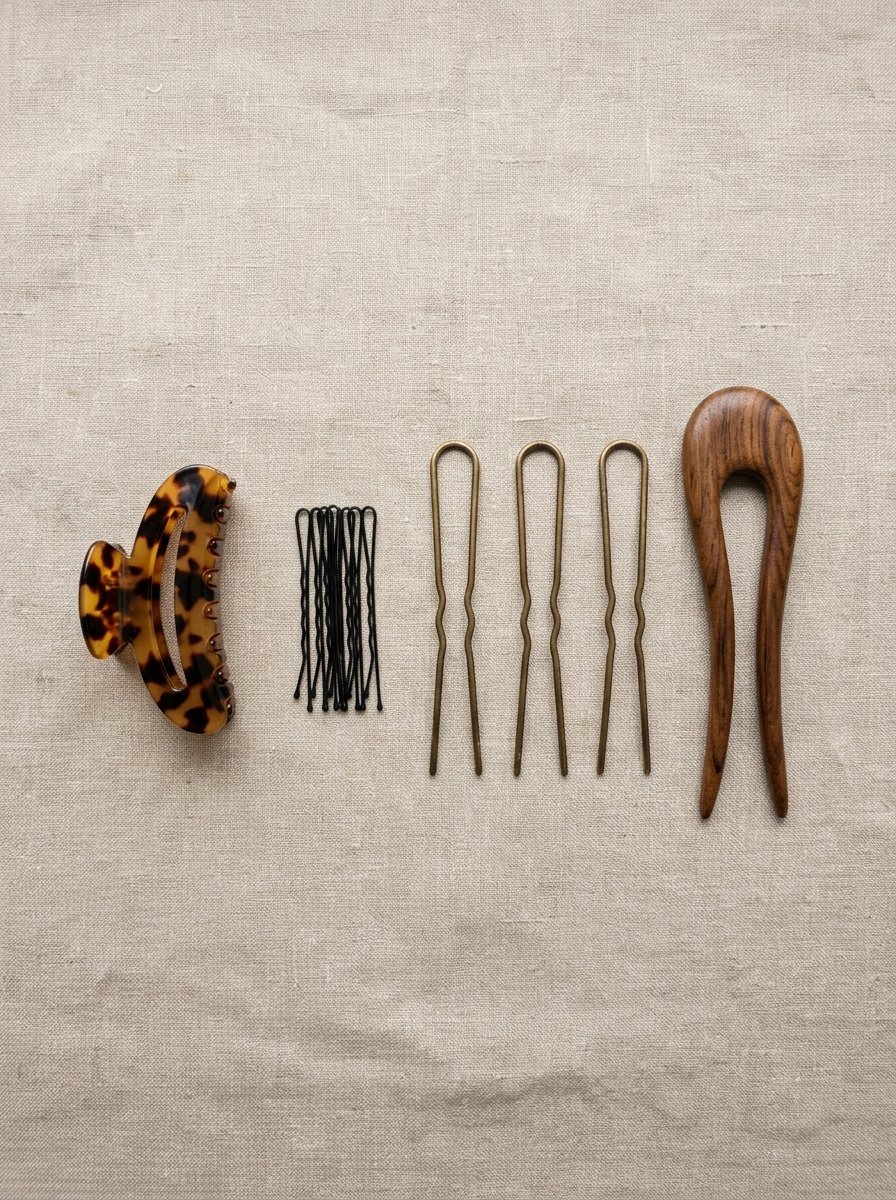
Secure the middle section with a single medium-sized claw clip from tortoiseshell resin, letting the top ends cascade loosely over the top of the clip. This creates an organic shape that looks deliberate rather than careless.
- Prep time: 4 minutes
- Ideal for: Second-day wavy or curly textures
- Core tools: Medium resin claw clip, fingers
3. The Low-Slung Silhouette
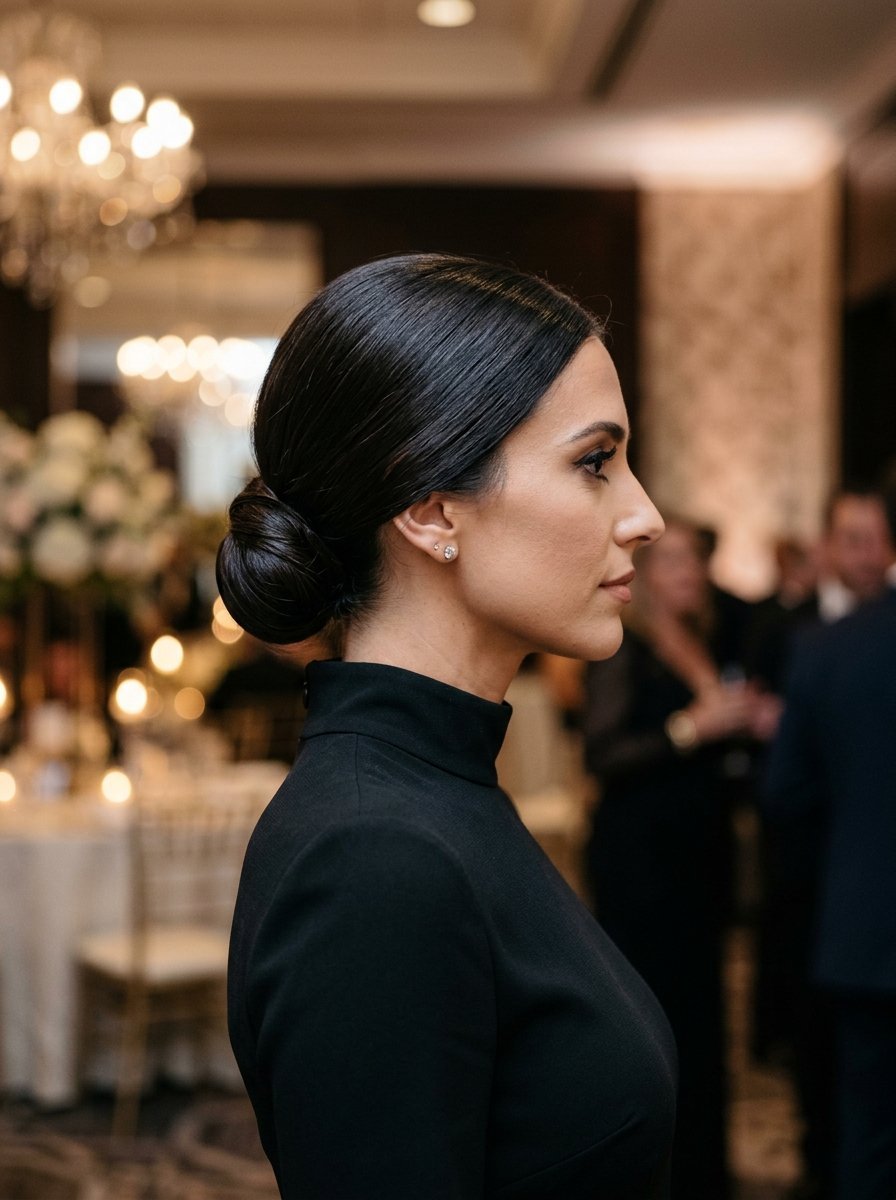
Positioning the bulk of the updo below the occipital bone creates an understated profile that complements high-necked clothing and formal evening wear.
This variation requires horizontal sectioning to manage the weight distribution effectively. Divide the hair into two sections from ear to ear across the back of the head. Secure the lower section into a tight, flat twist against the nape, pinning it flat with heavy-duty pins.
Drape the top section loosely over the lower base, rolling the ends inward to meet the bottom fold. This distribution prevents the style from pulling uncomfortably on the scalp during long wear.
- Prep time: 10 minutes
- Ideal for: Thick, heavy, or long hair lengths
- Core tools: Heavy-duty long pins, sectioning clips
4. The Half-Up Mini Twist
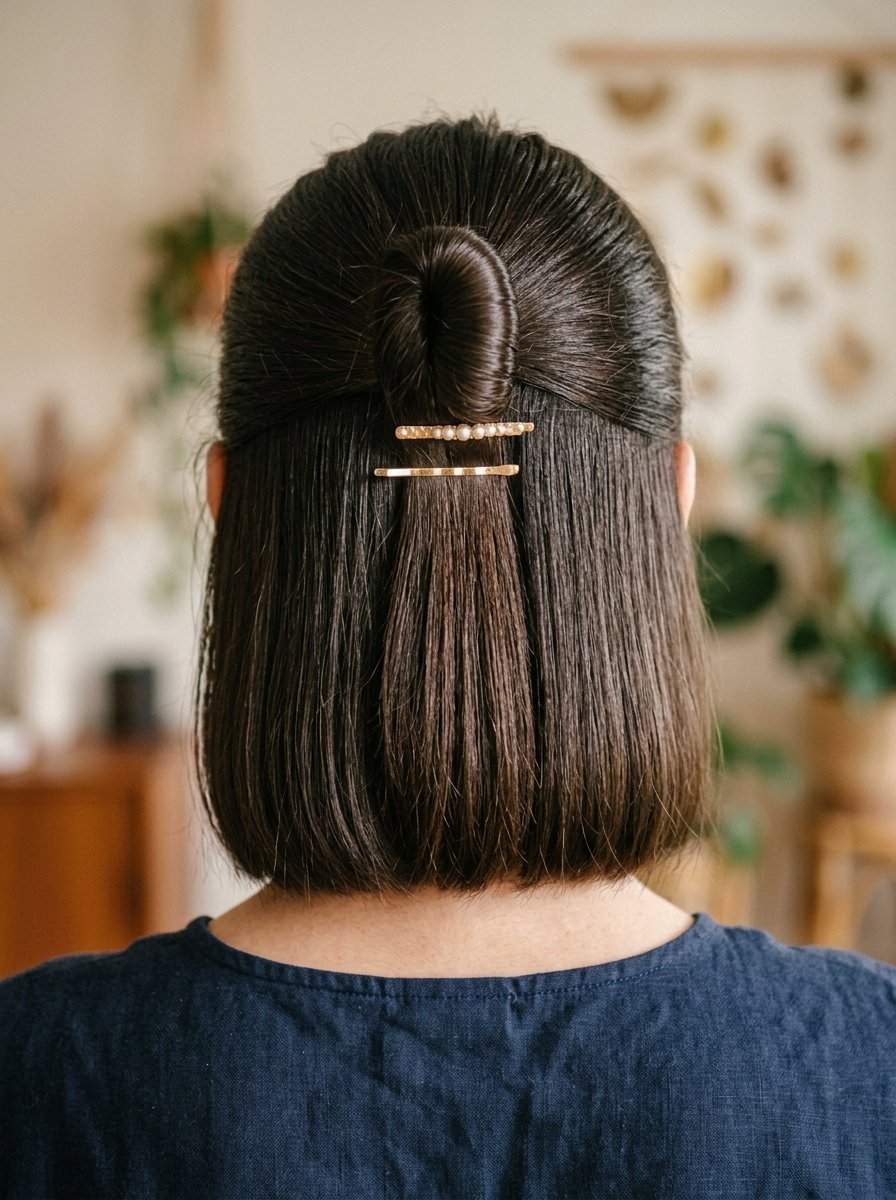
Short hair lengths often lack the necessary volume to secure a full vertical roll at the back of the head. This mini version captures the clean lines of the original style using only the top half of the hair.
Section off the hair from the temples back to the crown of the head. Gather this smaller portion, twisting it gently toward the center line while pushing upward slightly to create a small amount of lift at the front. Insert two small decorative bobby pins horizontally across the seam to lock the mini twist. Leave the lower half of your hair straight or styled in loose waves to contrast with the neat structure above.
- Prep time: 5 minutes
- Ideal for: Bob lengths, lob lengths, fine textures
- Core tools: Small decorative bobby pins
5. The Double Vertical Roll
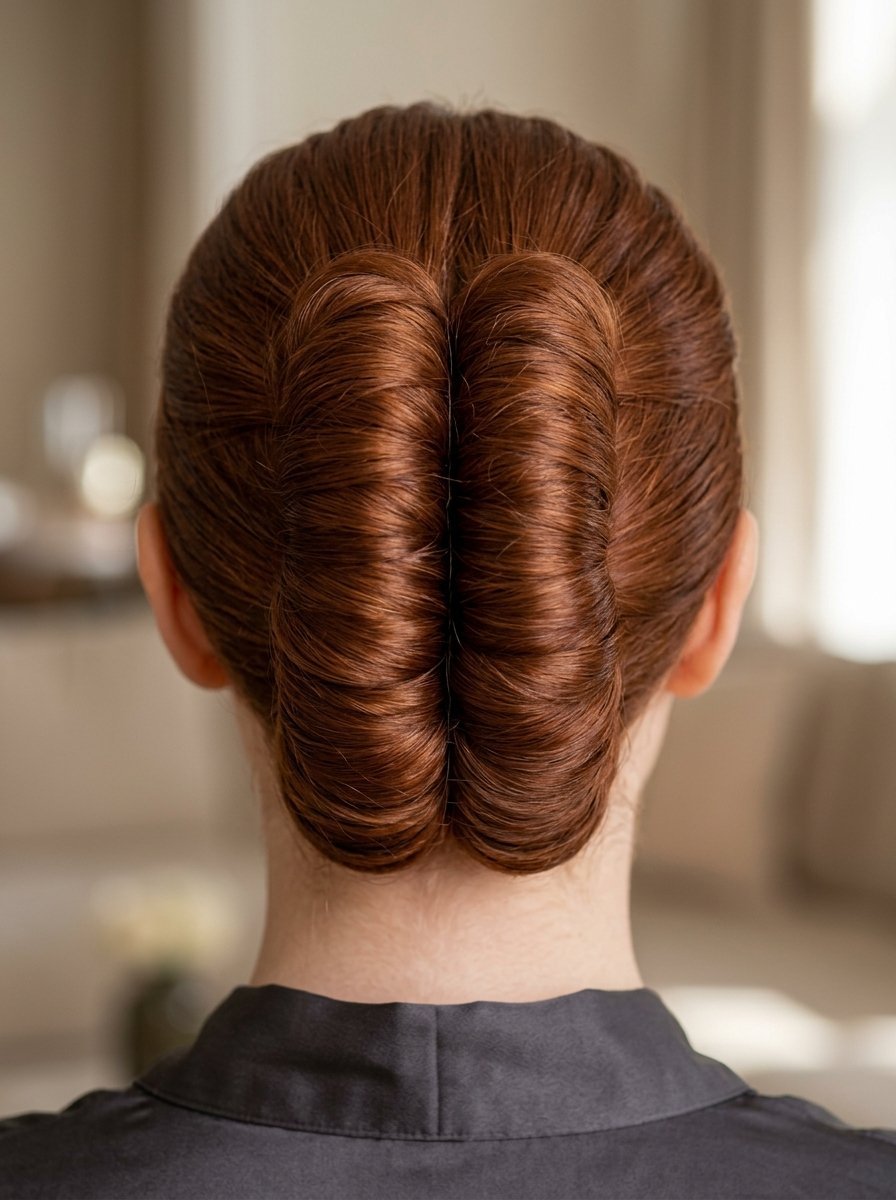
Thick hair types frequently overwhelm a single twist, resulting in a bulky shape that projects too far from the back of the head. Dividing the volume into two side-by-side rolls resolves this balance issue.
Create a clean center part down the back of the head from the crown to the nape. Secure the left section out of the way while working on the right side first. Roll the right section inward toward the center line and pin it flat along the seam.
Next, unclip the left section, rolling it inward toward the right side so the two folds meet exactly in the center. Interlock U-pins straight down the middle seam where the two rolls touch, hiding the pins completely within the hair.
- Prep time: 12 minutes
- Ideal for: High-density, coarse, or thick hair types
- Core tools: Sectioning clips, standard U-pins
6. The Braided Inversion
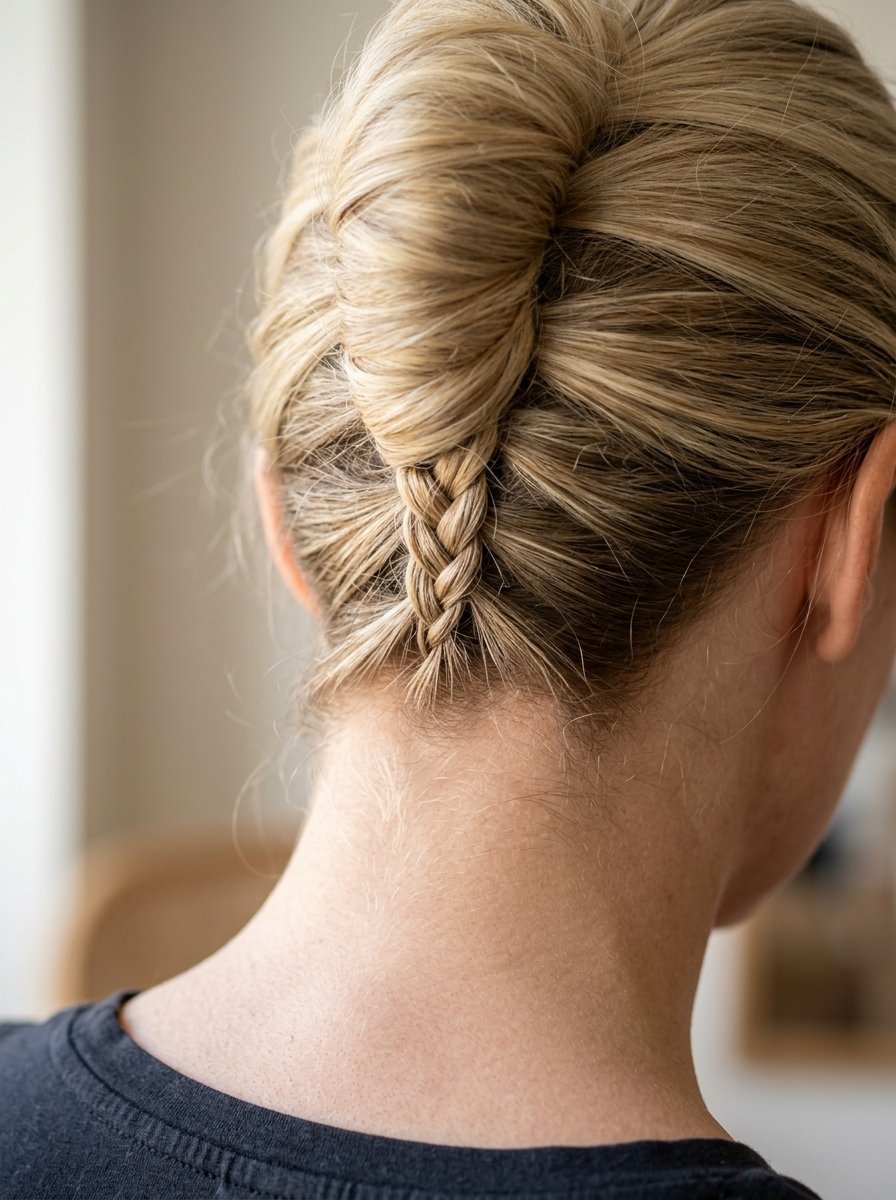
Incorporating a hidden braid adds structural integrity to fine hair that usually slips out of smooth pins within an hour of styling.
Start by creating a small three-strand braid at the very bottom of the nape, using a section of hair about one inch wide. Braid upward for three inches along the center line of the head, securing the end with a small clear elastic band. Gather the remaining loose hair along with this braid, twisting everything together into a standard vertical roll.
The interior braid provides a textured anchor for your pins, preventing them from sliding down smooth hair strands throughout the day.
- Prep time: 9 minutes
- Ideal for: Fine, slippery, or freshly washed hair
- Core tools: Clear elastic bands, standard bobby pins
7. The Tousled Crown Variation
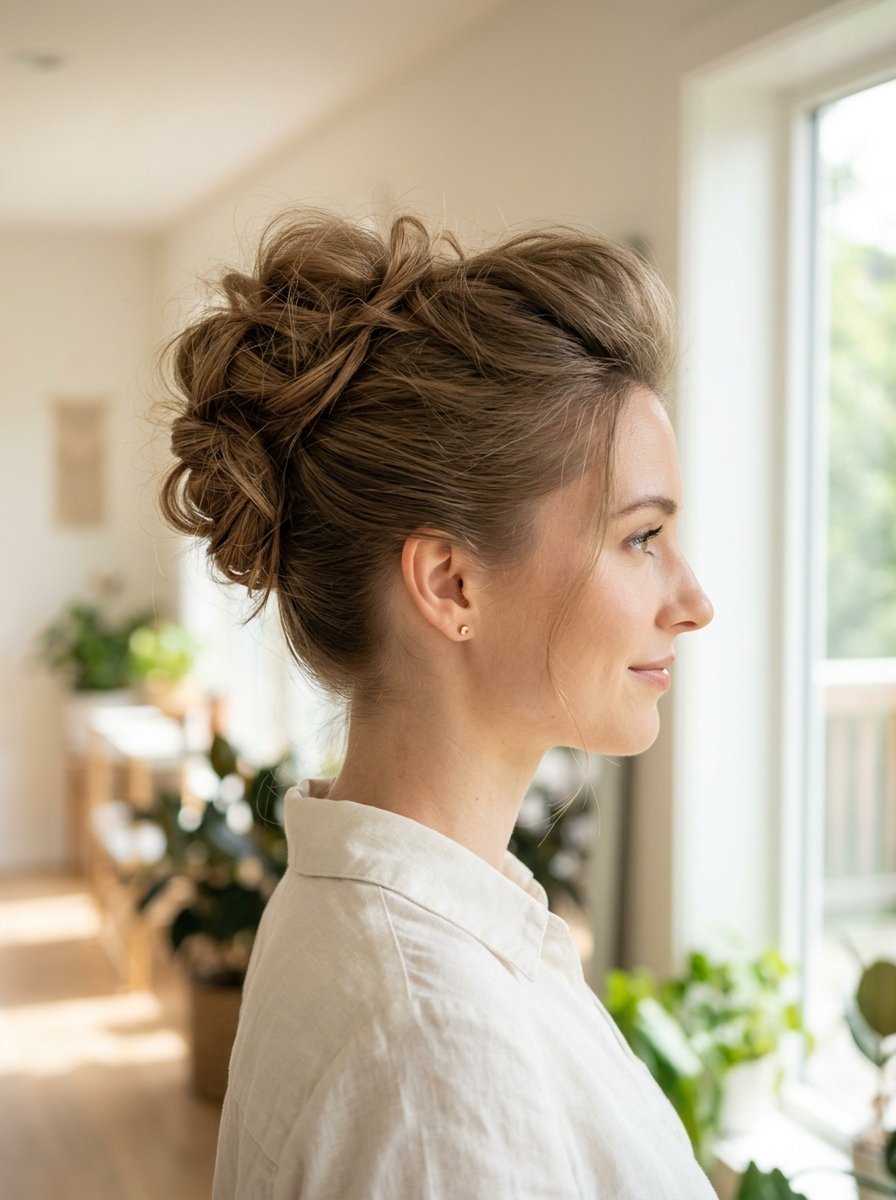
Adding volume to the top section creates an elongated profile that balances round face shapes and suits modern bridal styles.
Apply a small amount of texturizing powder to the crown section before gathering your hair. Lightly lift the root area using a wide-tooth comb, pushing the hair forward slightly to create a gentle puff.
Gather the remainder of the hair into a mid-height vertical roll, keeping the sides snug while maintaining the loose fullness at the top. Secure the roll just below the high point of the crown to lock in the height.
- Prep time: 8 minutes
- Ideal for: Fine hair needing volume, round face shapes
- Core tools: Texturizing powder, wide-tooth comb
8. The Sleek Red Carpet Finish
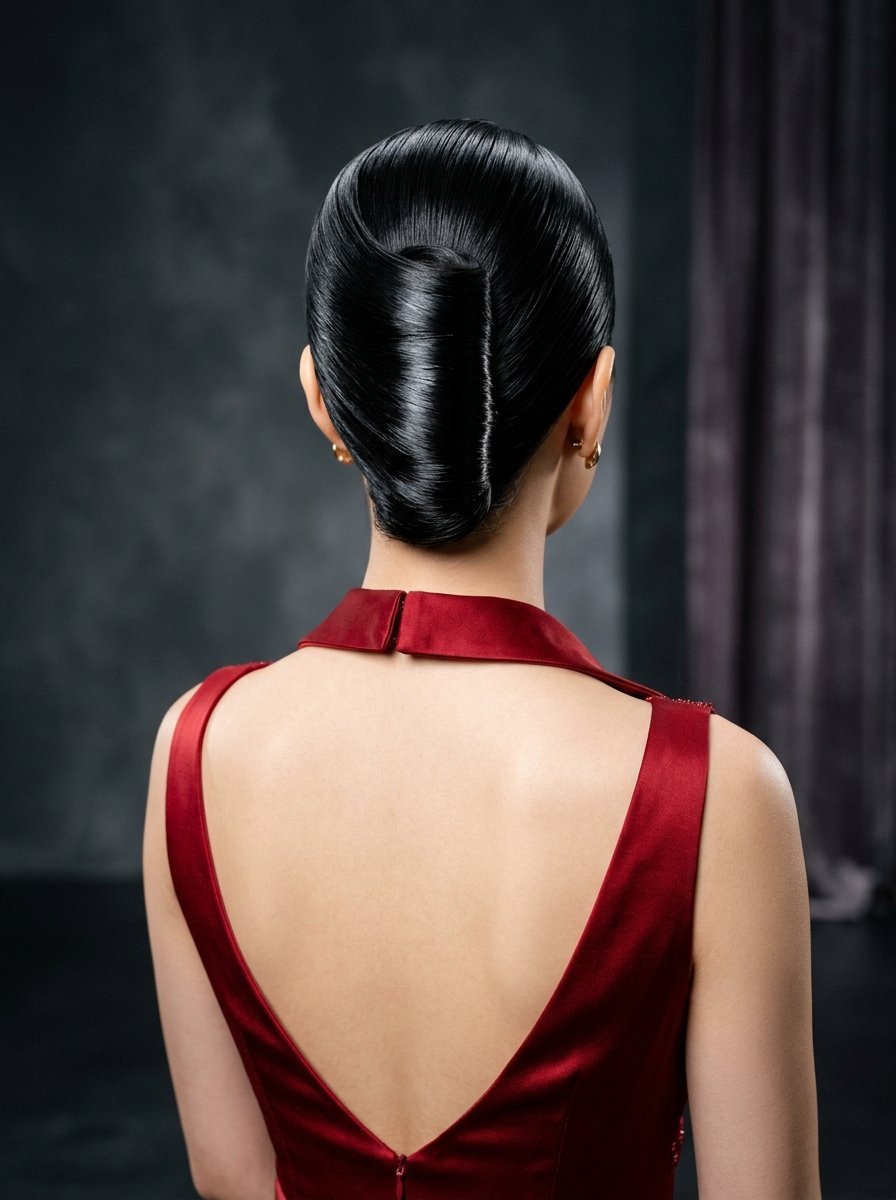
A polished surface with zero flyaways provides a sharp, high-fashion appearance suitable for black-tie galas or corporate presentations.
Apply a lightweight styling cream through dry hair from roots to ends to ensure absolute smoothness. Use a natural boar bristle brush to smooth the hair back into a flawless ponytail shape without securing it with an elastic.
Twist the length tightly upward, using the side of your hand to smooth out any bumps along the left panel. Pin the seam every half-inch with matte black pins that match your hair color to prevent unwanted reflections under bright lighting.
- Prep time: 15 minutes
- Ideal for: Straight, processed, or smoothed hair
- Core tools: Boar bristle brush, styling cream, matte pins
9. The Texturized Curly Roll
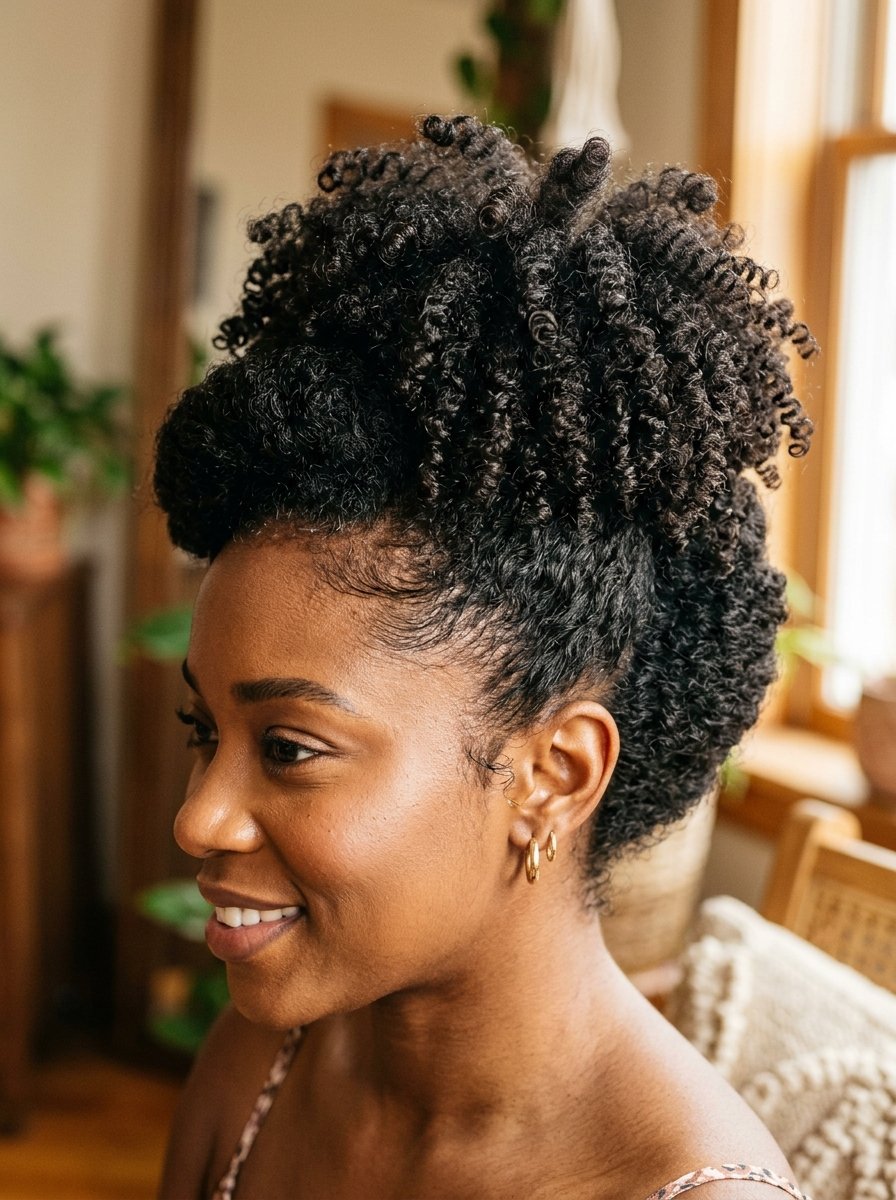
Natural curls and coils provide excellent built-in hold, requiring fewer pins and no synthetic texturizers to maintain structural integrity.
Avoid brushing or combing the hair, which disrupts the natural pattern and creates unwanted frizz. Apply a moisturizing leave-in cream to define the coils before styling. Gather the curls loosely at the nape, lifting them upward toward the crown.
Allow the natural curl pattern to dictate the shape of the roll, securing the structure with extra-wide hair pins designed specifically for thick curls. Let the coiled ends burst out beautifully at the top of the twist.
- Prep time: 6 minutes
- Ideal for: Curly, coily, or heavily texturized hair types
- Core tools: Extra-wide curly hair pins, leave-in cream
10. The French Pin Minimalist
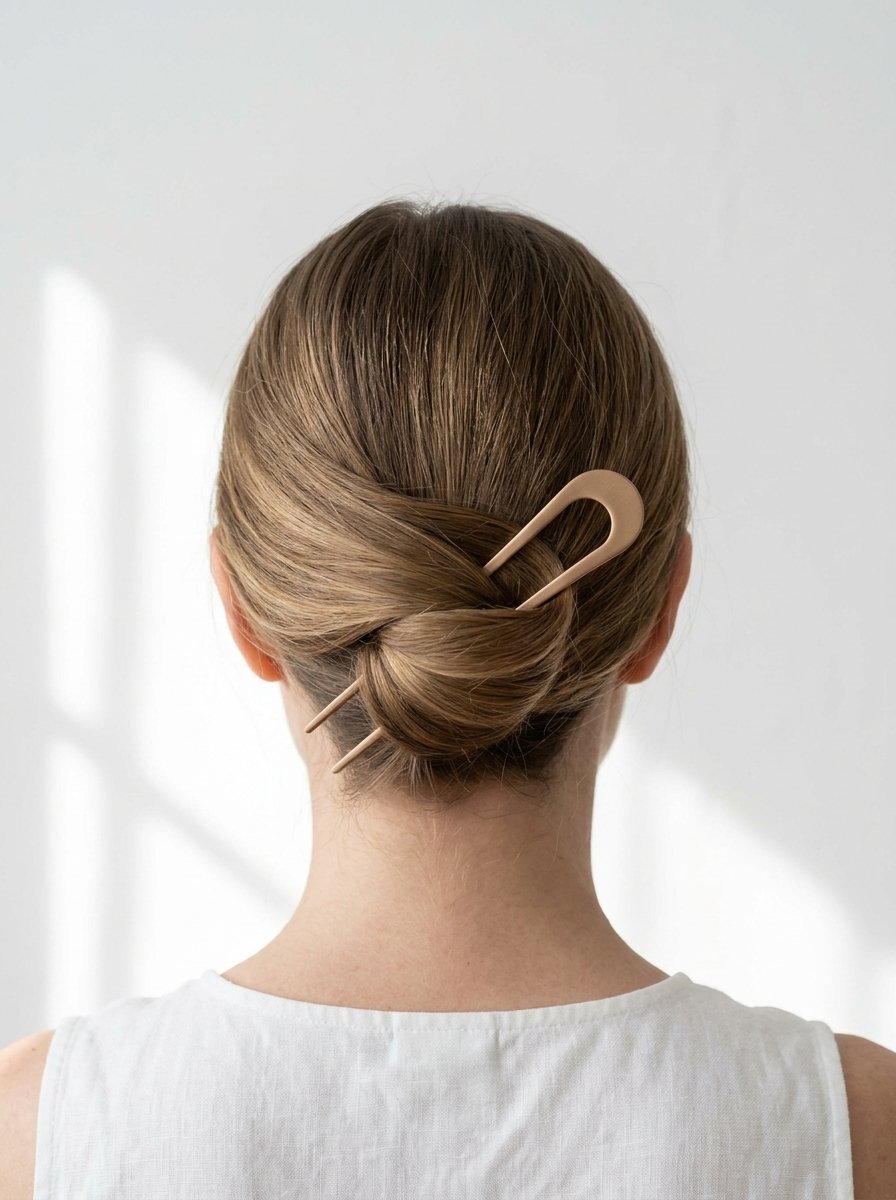
Using a single decorative U-shaped pin or hair fork creates a clean look that places minimal stress on the scalp and roots.
Gather the hair into a low ponytail in one hand. Place a three-inch metal or wooden French pin horizontally across the top of the ponytail base. Wrap the hair length up and over the pin, rotating the pin 180 degrees upward and inward against the scalp.
Push the prongs downward into the dense core of the twist to lock it. The physical physics of the counter-twist holds the entire weight securely without any additional fastening tools.
- Prep time: 3 minutes
- Ideal for: Medium to long hair of uniform thickness
- Core tools: One three-inch decorative French pin
11. The Diagonal Swept Profile
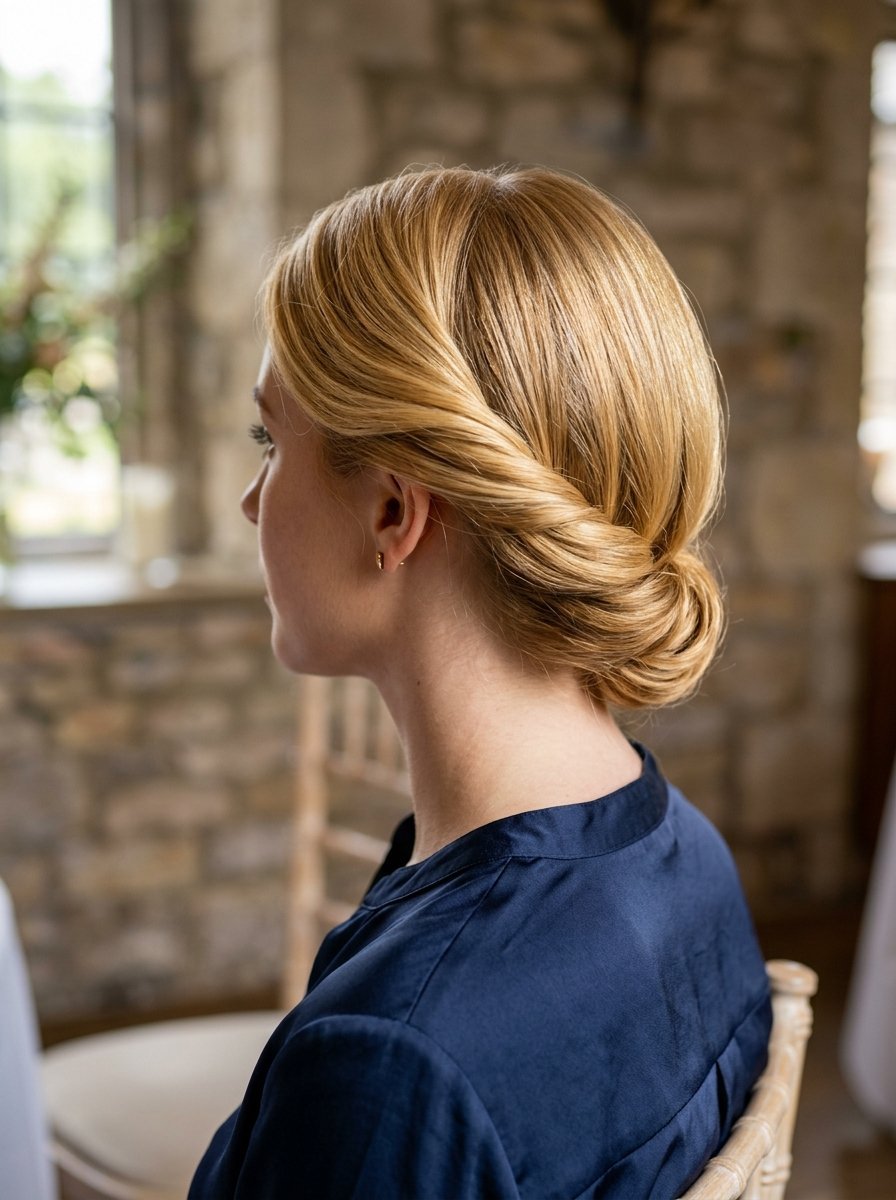
Angling the main seam diagonally from the left ear down to the right side of the nape offers an interesting asymmetry that looks striking from side angles.
Brush the hair thoroughly toward the left side of the head, securing a diagonal row of pins from the top left down toward the center nape. Wrap the remaining length down and across toward the right side, following the slanted line of your initial pins.
Tuck the ends securely under the diagonal fold, pinning along the angled seam to complete the fluid line.
- Prep time: 11 minutes
- Ideal for: Long, layered hair shapes
- Core tools: Smooth dressing brush, standard pins
12. The Cropped Length Solution
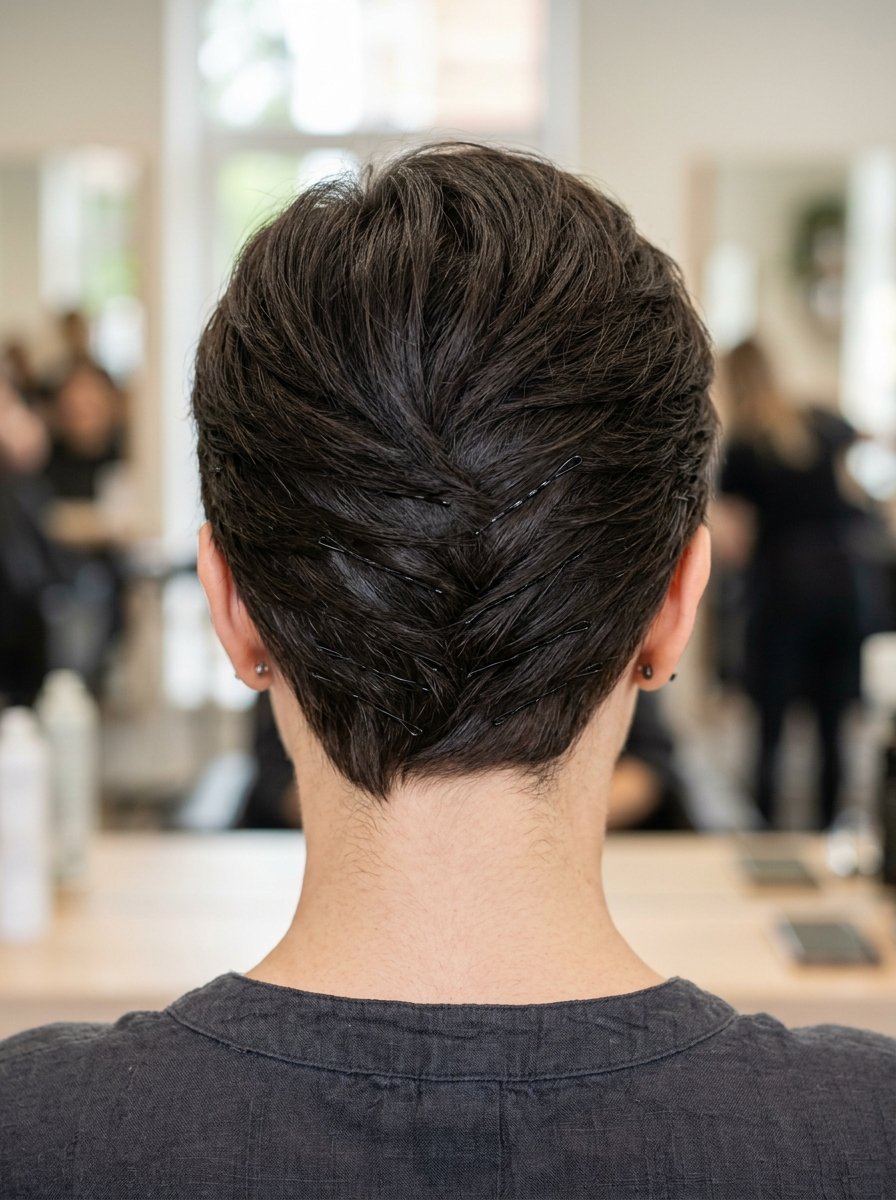
Short cuts like chin-length bobs can achieve this look by working with overlapping side panels rather than a single large roll of hair.
Divide the hair into three sections: two side panels stretching from behind the ears forward, and one back section. Twist the back section into a small vertical knot and pin it flat against the scalp.
Pull the left side panel backward, smoothing it over the center knot, and pin it down. Pull the right side panel back over the left panel, tucking the raw edges underneath before securing the final seam.
- Prep time: 10 minutes
- Ideal for: Chin-length hair, layered bobs
- Core tools: Small bobby pins, sectioning clips
13. The Ribbon-Woven Accent
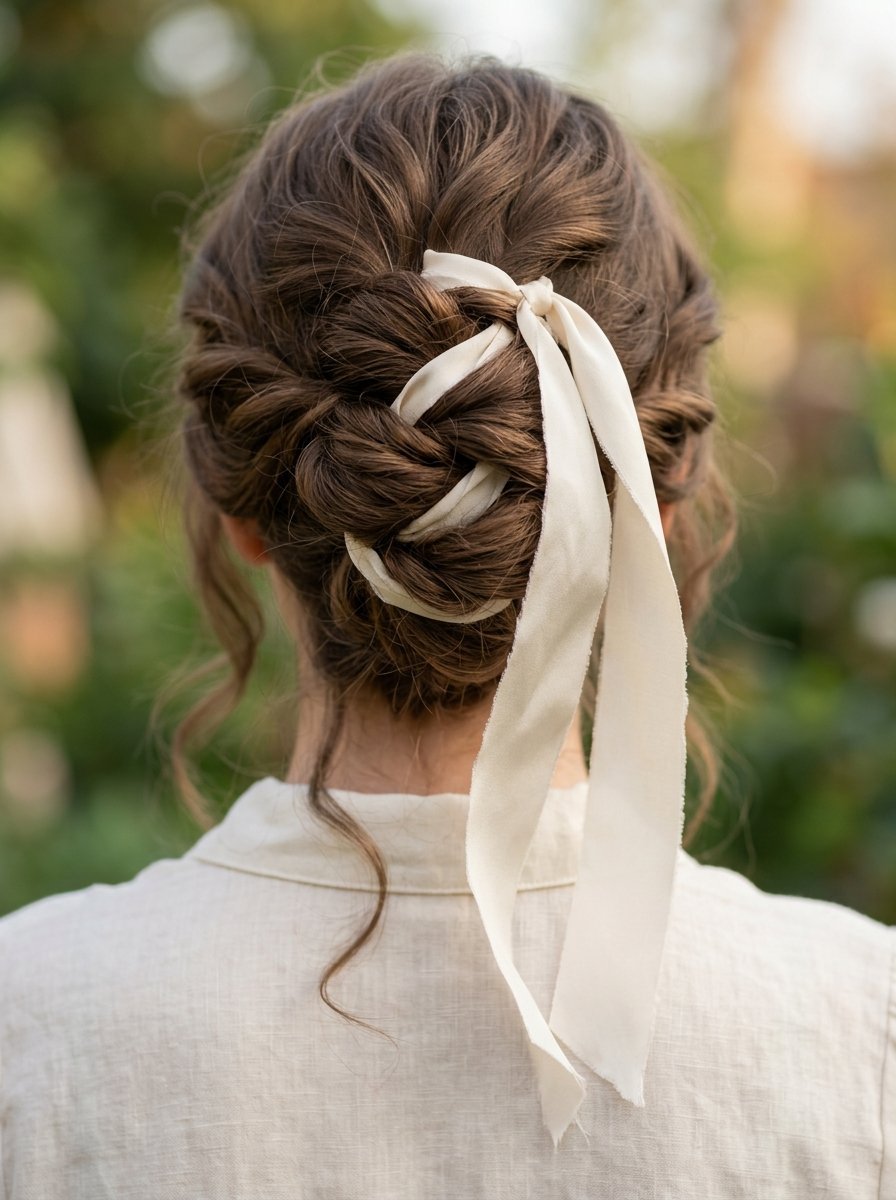
Weaving a silk ribbon into the twist adds a delicate touch of color that makes the style stand out on visual platforms like Pinterest.
Tie a long silk ribbon around a small section of hair at the nape of the neck before starting the twist. As you roll the hair upward, let the ribbon mix naturally with the strands so it peeks through the final seam.
Let the remaining ribbon ends hang down loosely from the top of the roll alongside any face-framing pieces of hair.
- Prep time: 9 minutes
- Ideal for: Casual parties, festival styles, youthful looks
- Core tools: Silk ribbon, standard bobby pins
14. The Triple Stacked Knot
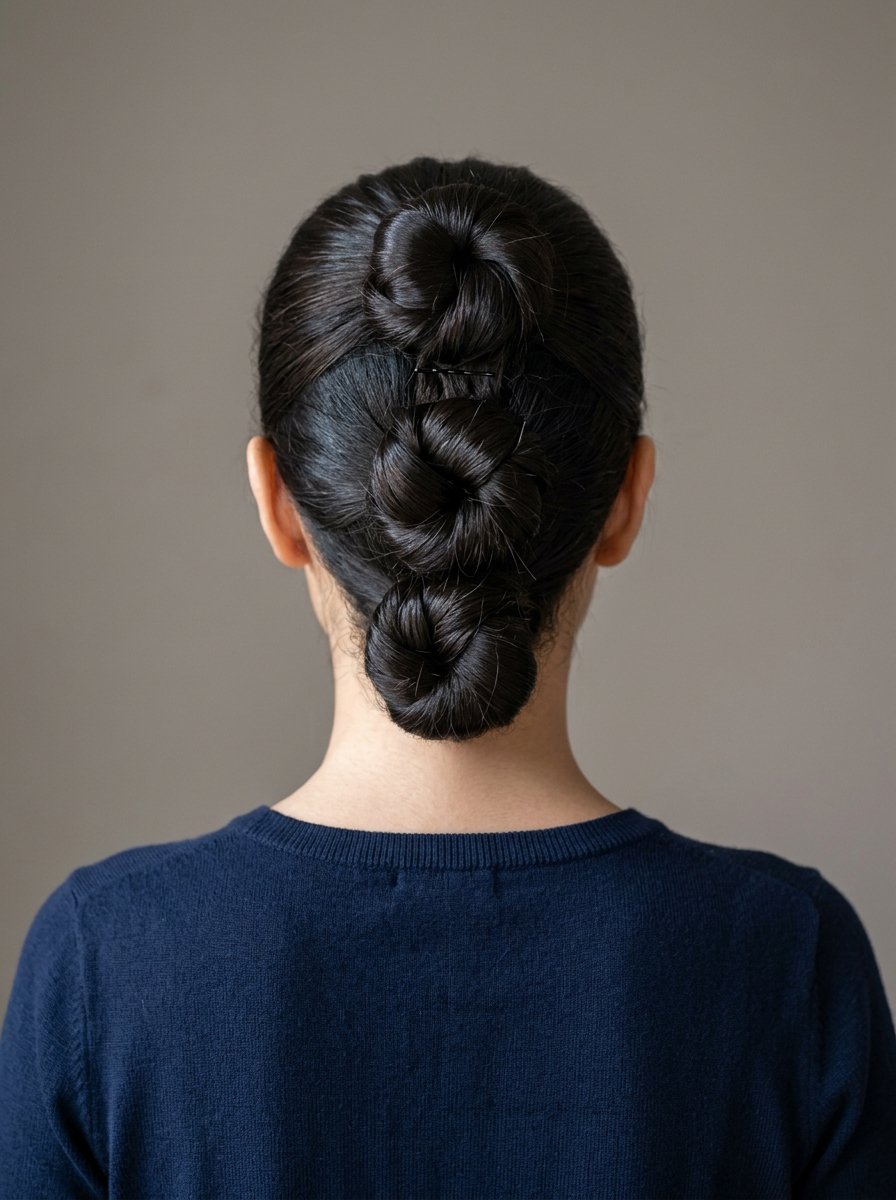
For exceptionally long hair that creates too much bulk when rolled vertically, stacking three distinct buns horizontally provides a balanced alternative.
Divide the hair vertically into three equal sections down the back of the head. Twist the top section into a compact knot and pin it securely.
Repeat the process with the middle and lower sections, alignment-checking them so they touch tightly to form a continuous textured column down the spine.
- Prep time: 14 minutes
- Ideal for: Waist-length hair, very thick hair
- Core tools: Clear elastics, heavy grip pins
15. The Wrapped Bang Variation
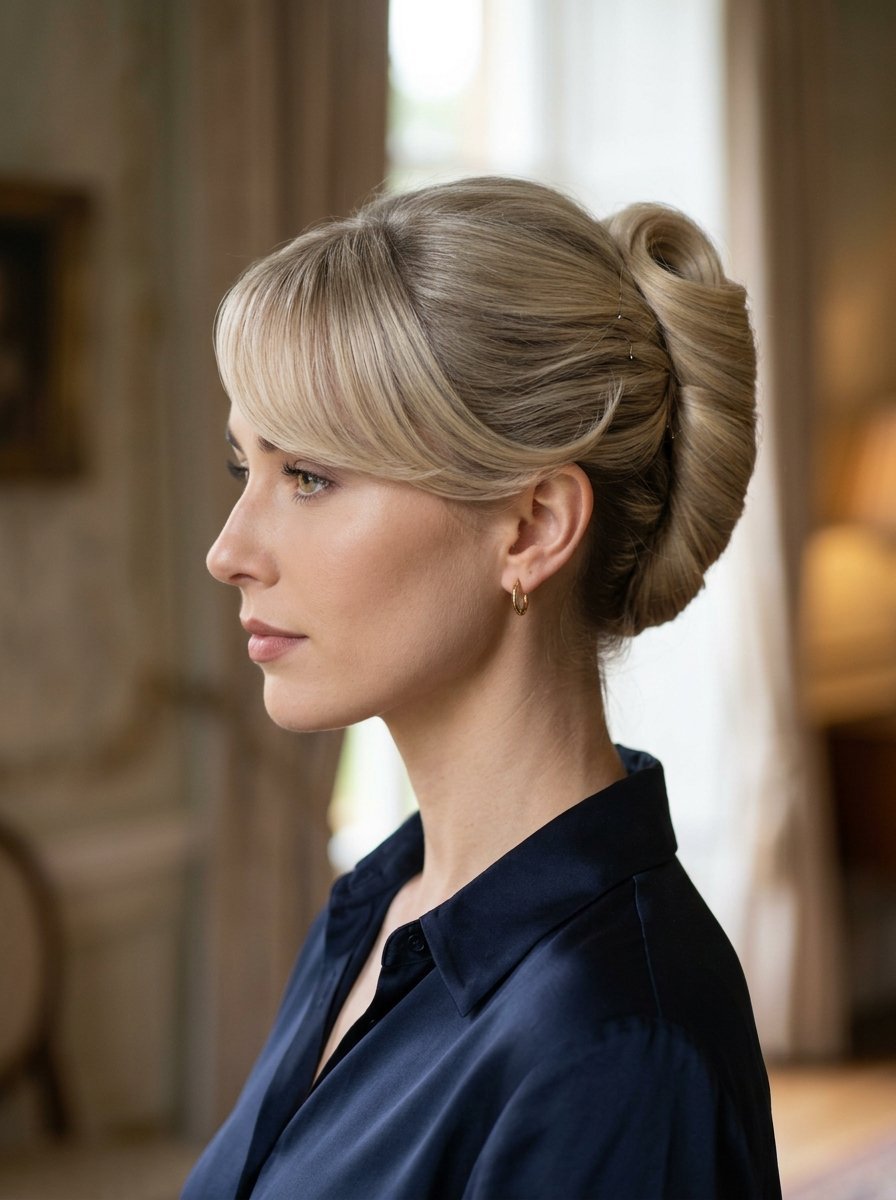
This style incorporates heavy front bangs or curtain layers into the updo, sweeping them smoothly across the forehead for a vintage-inspired look.
Separate your fringe or front layers from the rest of your hair before working on the back. Secure the back section into a classic vertical roll using your preferred method.
Take the front section, swoop it gently across the forehead toward the side of the roll, and pin the ends directly into the top seam of the twist.
- Prep time: 8 minutes
- Ideal for: Styles with curtain bangs or fringe layers
- Core tools: Tail comb, pinning grips
Troubleshooting and Maintenance
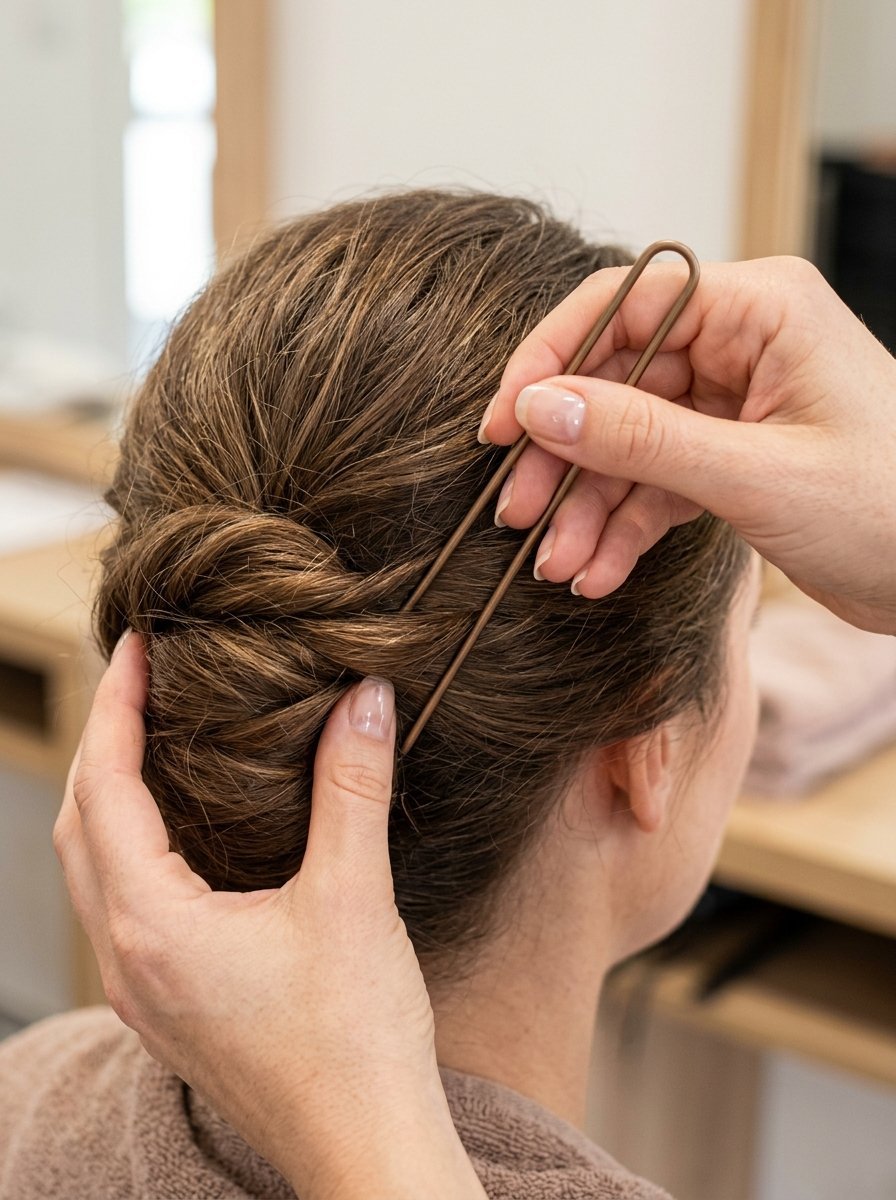
Even with careful preparation, styling issues can happen due to weather changes or differences in hair texture. The following comparative matrix outlines common structural problems and provides exact mechanical fixes to restore hold.
| Structural Problem | Primary Root Cause | Immediate Corrective Fix |
| Roll sags at the nape | Loose initial anchor pins | Insert two interlocked bobby pins upward at a 45-degree angle under the bottom curve. |
| Slipping mid-day | Hair is too clean or smooth | Spray the tips of your U-pins with dry shampoo before inserting them into the roll. |
| Top heavy shape | Uneven weight distribution | Unpin the top third, spread the volume horizontally, and re-secure flatter to the crown. |
| Visible pin shine | Wrong pin finish or color | Replace glossy pins with matte-finished options that match your exact base shade. |
Frequently Asked Questions
How do I stop my hair pins from hurting my scalp?
Pain usually happens when a pin grabs too much hair close to the scalp, creating uneven tension on the hair roots. To fix this, always insert your pins at a right angle to the head until you touch the scalp, then flip the pin flat against the head before pushing it in completely. This method spreads the weight evenly across the anchor line instead of pulling on a single spot.
Can I do this look on freshly washed hair?
Clean hair often lacks the natural grip needed to hold an updo securely. If you need to style fresh hair, apply a generous amount of sea salt spray or texturizing lotion to damp strands before blow-drying. This step adds artificial grip to the hair fiber, giving your pins a solid foundation to hold onto.
What is the difference between a U-pin and a bobby pin?
Bobby pins feature tight, touching prongs designed to clamp and lock small sections of hair firmly in place. U-pins have wide, open prongs meant to slide through large volumes of hair to link separate sections together without compressing the overall shape.
How do I hide the ends of my hair if I have layers?
Short layers often pop out along the main seam of the vertical roll. To hide them, tuck a small strip of lightweight hair netting over the ends before rolling the hair inward. The net holds the loose layers together inside the fold, keeping them completely hidden from view.
Will this styling method cause hair breakage over time?
This style is actually much gentler on your hair than a standard ponytail elastic, which concentrates stress on a single spot. To prevent any damage, avoid using metal pins with damaged protective plastic tips, and never force a pin through a tight knot of hair.
Strategic Next Steps

To master this styling method, start by practicing the classic vertical roll on second-day hair using only four large U-pins to learn how to balance the weight. Once you feel comfortable with the basic finger placement, try the French Pin Minimalist variation for a quick everyday look, or experiment with the Double Vertical Roll if your hair is thick. Focus on mastering the pin-flip technique to secure the style comfortably without relying on chemical sprays.
What specific variation best fits your daily routine? Let me know in the comments below, or share your own experiences with keeping updos secure throughout the day.

Sarah Mitchell — Founder & Editor-in-Chief
Sarah Mitchell is the founder and editorial voice behind Hair Level Up. A licensed cosmetologist with more than 15 years of experience, she has styled A-list celebrities for editorial shoots and red carpets, with work featured in Vogue, Elle, and Harper’s Bazaar. Early in her career, she trained under the legendary hairstylist Oribe in New York, an apprenticeship that still shapes her editorial eye today. Sarah founded Hair Level Up in 2020 after one bad haircut convinced her that women deserved a destination that felt like a magazine, taught like a stylist, and inspired like an art gallery. She oversees every story from concept to publication, guided by a simple belief: a good story teaches you something, but a great one makes you feel beautiful while it does.