20 Chic Chignon Hairstyles for Evening Events
A sleek evening look often depends entirely on your hair. While loose waves face the constant threat of humidity, a structured chignon offers guaranteed elegance that lasts until midnight. This classic style has evolved far beyond the stiff, over-sprayed buns of the past. Modern variations incorporate rich texture, deliberate placement, and architectural shapes that frame the face beautifully. Choosing the right variation requires matching the specific silhouette of your dress with a complementary hair balance.
In my years styling clients for galas and red carpets, I noticed that the most memorable looks rely on contrast. A high-neck gown requires a clean, sky-high knot, while an off-the-shoulder dress gains a romantic edge from a low, twisted style. The modern chignon adapts to your personal style while securing your length firmly out of your face. Exploring these refined options will help you discover a signature evening look that feels secure and looks effortless.
Executive Summary
The classic chignon remains the definitive choice for formal evening wear due to its unmatched versatility and structural permanence. This guide analyzes twenty distinct chignon variations tailored for different hair lengths, face shapes, and gown necklines. You will find detailed breakdowns of modern structural techniques, required tools, and precise placement strategies to achieve flawless results. The analysis covers everything from ultra-sleek minimalist loops to textured, voluminous bridal twists. Each featured style includes direct step-by-step assembly methods, specific hair prep routines, and troubleshooting steps for fine or heavy hair types. Readers will gain the exact technical knowledge needed to create or request a secure, red-carpet-ready updo that maintains its form throughout long events.
1. The Classic Low Smooth Loop
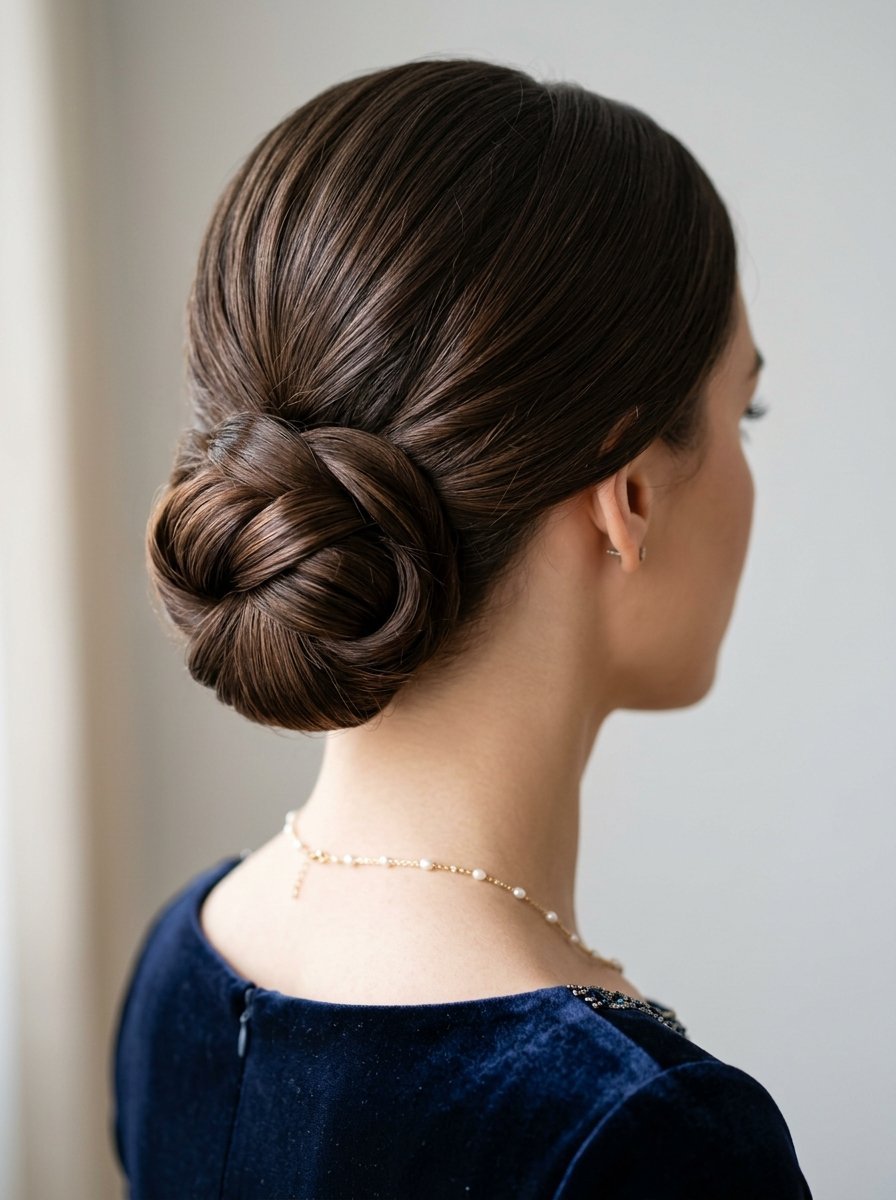
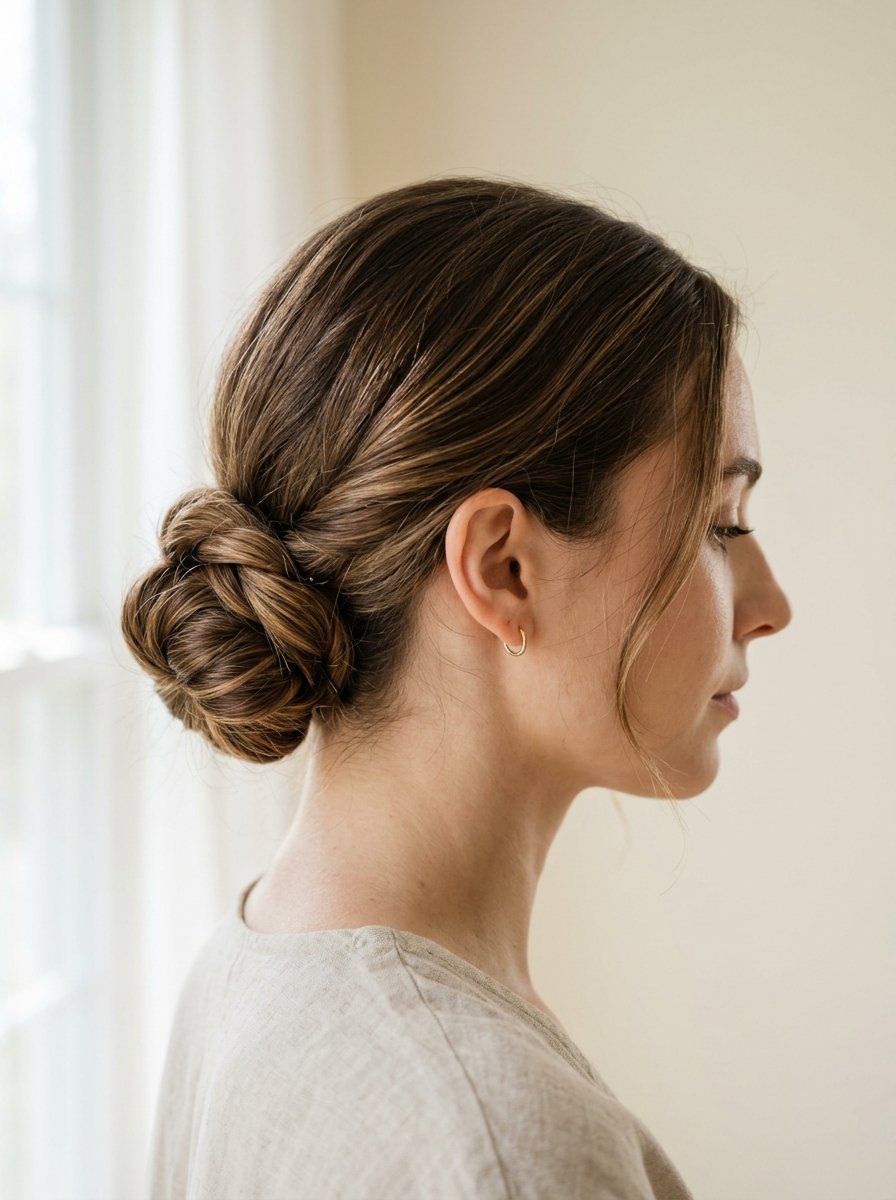
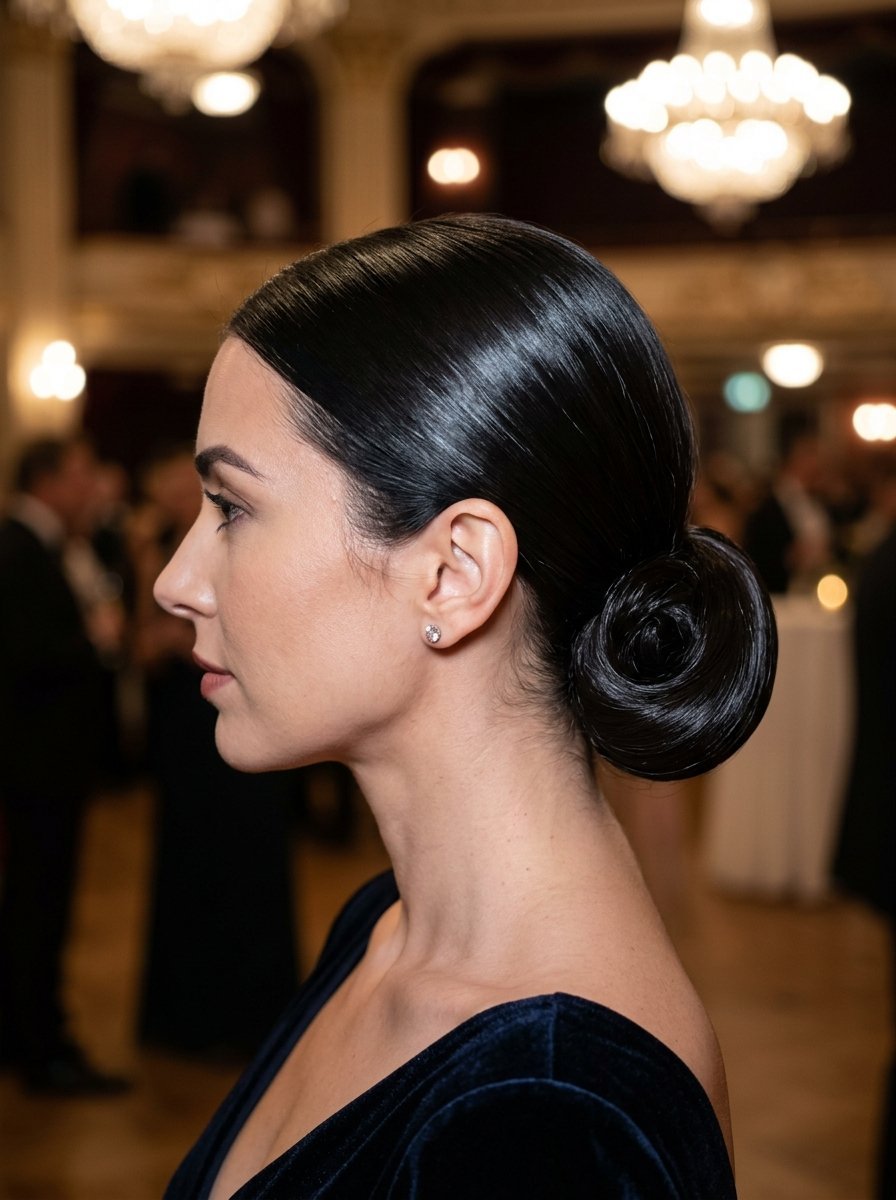
The foundation of elegant styling rests on the smooth low loop. This silhouette sits tightly at the nape of the neck, creating a clean line from the profile view. It works exceptionally well for formal black-tie events where your gown features an intricate back design that demands visibility.
Step-by-Step Assembly Method
- Apply a lightweight smoothing cream to damp hair from roots to ends.
- Blow-dry the hair straight using a natural bristle paddle brush to eliminate frizz.
- Create a sharp center split using a metal-tipped parting comb.
- Gather the hair into a low ponytail at the nape and secure it with a clear elastic.
- Fold the ponytail length upward, forming a neat loop, and wrap the remaining ends around the base.
- Fix the shape firmly using four structural target hairpins inserted downward.
Pro Styling Secrets
In my experience, achieving an glass-like finish requires prepping the hair twenty-four hours prior. Clean hair lacks the natural grip needed to hold a smooth loop without sliding. I recommend utilizing the Got2b Glam Force hair gel mixed with two drops of hair oil to tame flyaways without creating a stiff texture. This combination keeps the style immaculate for hours.
2. The Textured Romantic Twist
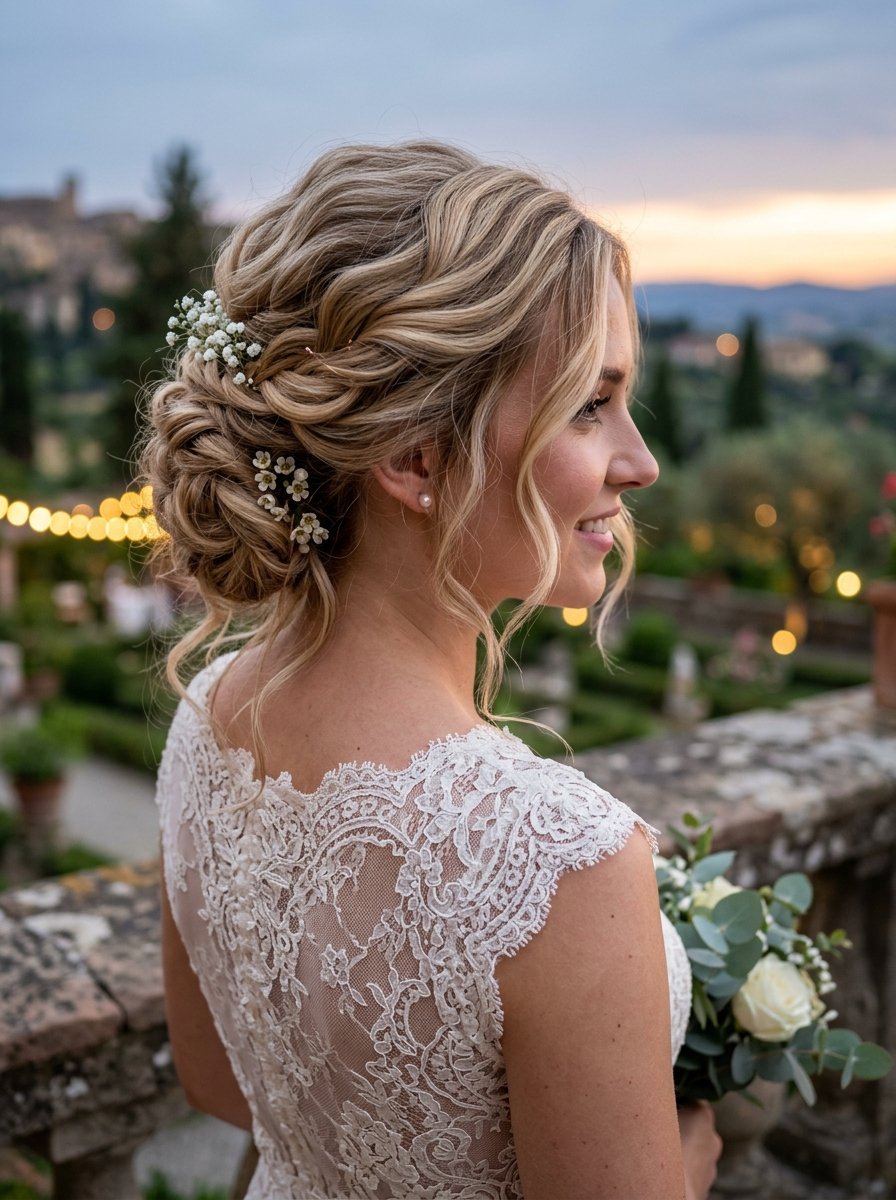
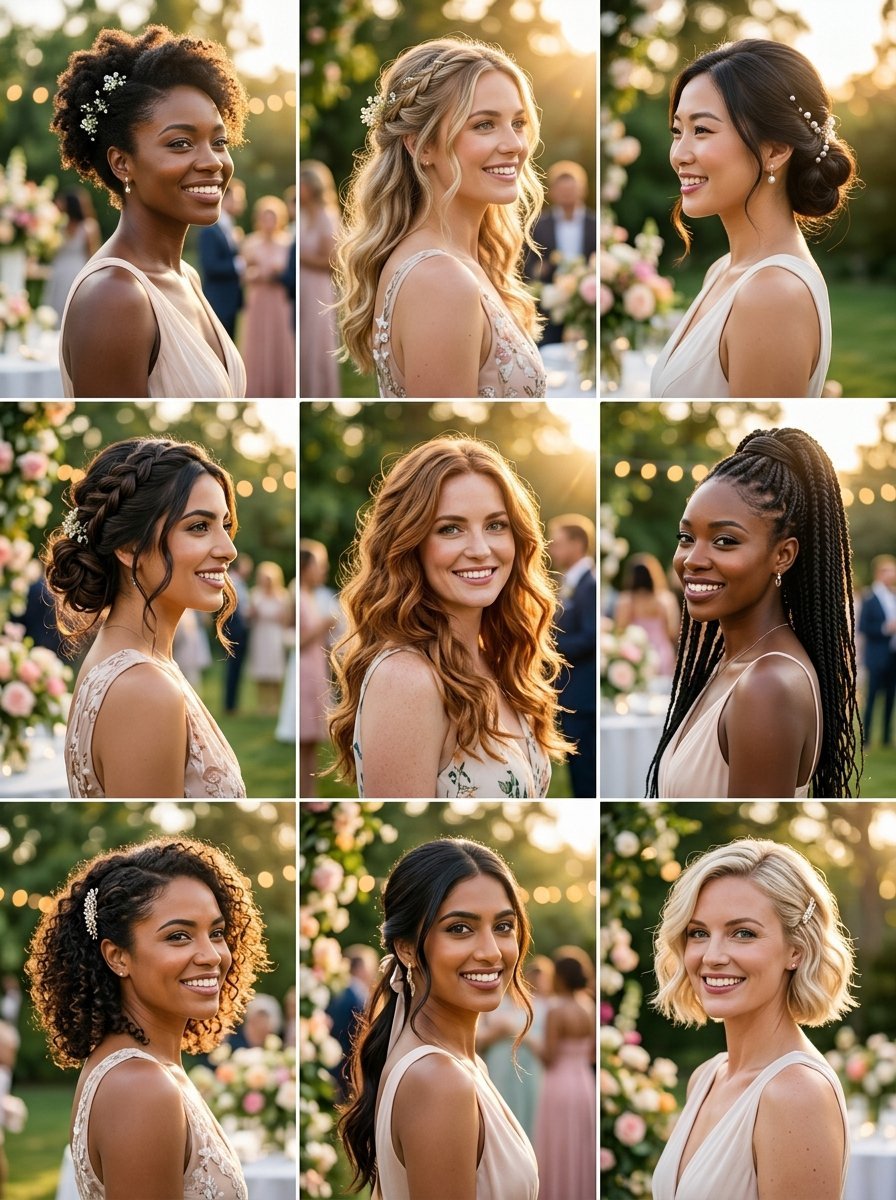
This style relies on soft dimension and deliberate imperfections. It suits outdoor evening gatherings, spring weddings, and dresses made of flowing chiffon or delicate lace fabric. The volume concentrates around the crown, softening sharp facial angles beautifully.
Step-by-Step Assembly Method
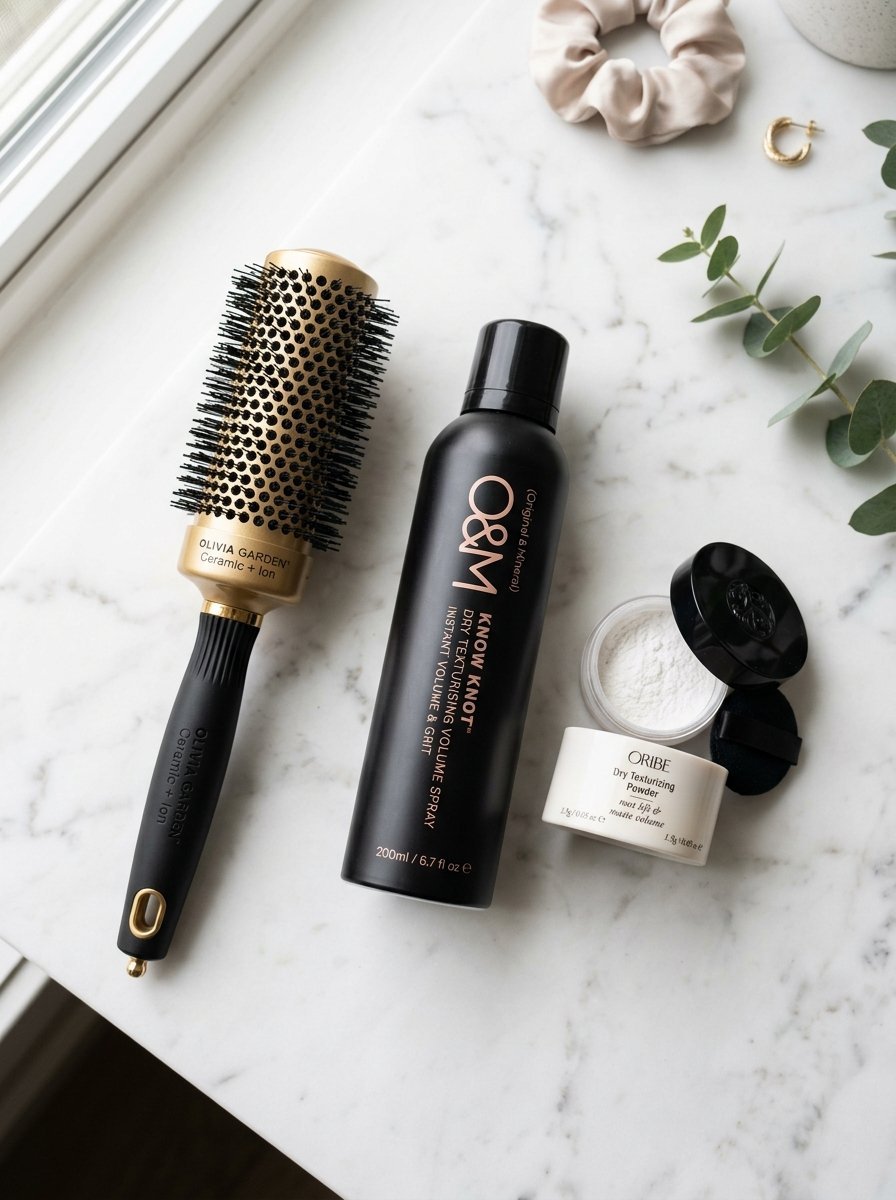
- Mist the entire length of the hair with a dry texturizing spray for volume.
- Create loose waves using a one-inch curling wand, leaving the ends uncurled.
- Backcomb the crown section lightly to build a supportive interior cushion.
- Gather the hair loosely at the back of the head, twisting it upward into a vertical roll.
- Secure the core of the twist using large U-pins driven directly into the crown cushion.
- Pull two small strands free around the ears to frame the face naturally.
Pro Styling Secrets
I have seen many stylists fail here by over-working the hair. The secret lies in leaving the outer layer untouched after curling. Use the Oribe Dry Texturizing Spray generously before pins go in. If the hair looks too neat, use your palms to gently massage the sides of the head to release natural texture.
3. The Structural Architectural Knot
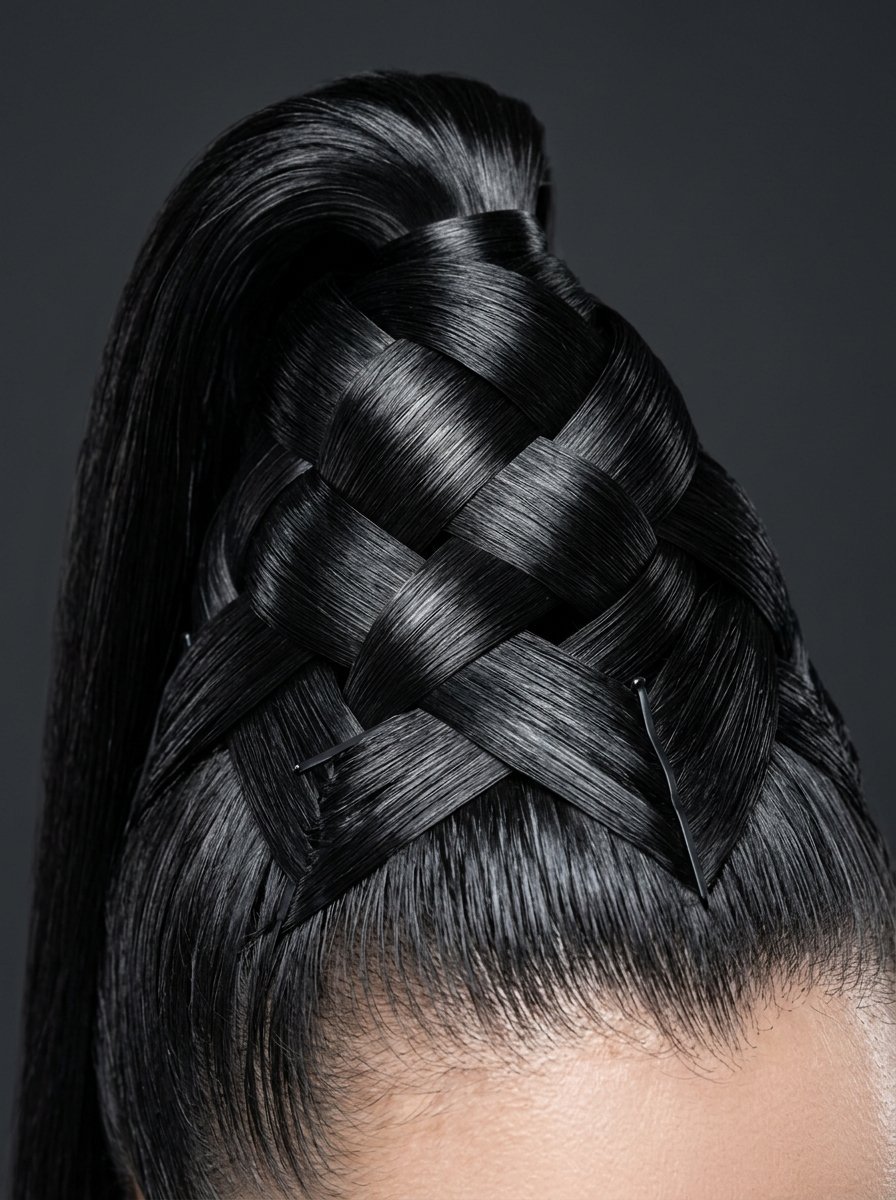
This high-fashion variation treats hair like sculpture. It uses clean, interlocking sections to create geometric interest at the back of the head. It pairs perfectly with modern minimalist gowns, sharp tuxedo suits, and bold statement jewelry.
Step-by-Step Assembly Method
- Flat iron the hair in small sections until the texture is completely uniform.
- Apply a high-shine pomade evenly across the roots for a wet-look finish.
- Secure hair into a high ponytail positioned exactly at the crown of the head.
- Divide the ponytail into two equal sections and tie them into a literal knot.
- Tuck the loose ends underneath the main structure to hide the structural elastics.
- Anchor the knot using heavy-duty black bobby pins hidden inside the hair folds.
Pro Styling Secrets
The main challenge here is keeping the sections distinct rather than letting them merge. I prefer using the Kenra Platinum Silkening Gloss on each individual strand before tying the knot. This step keeps the edges incredibly crisp and prevents the style from looking like a messy bun.
4. The French Pleat Hybrid
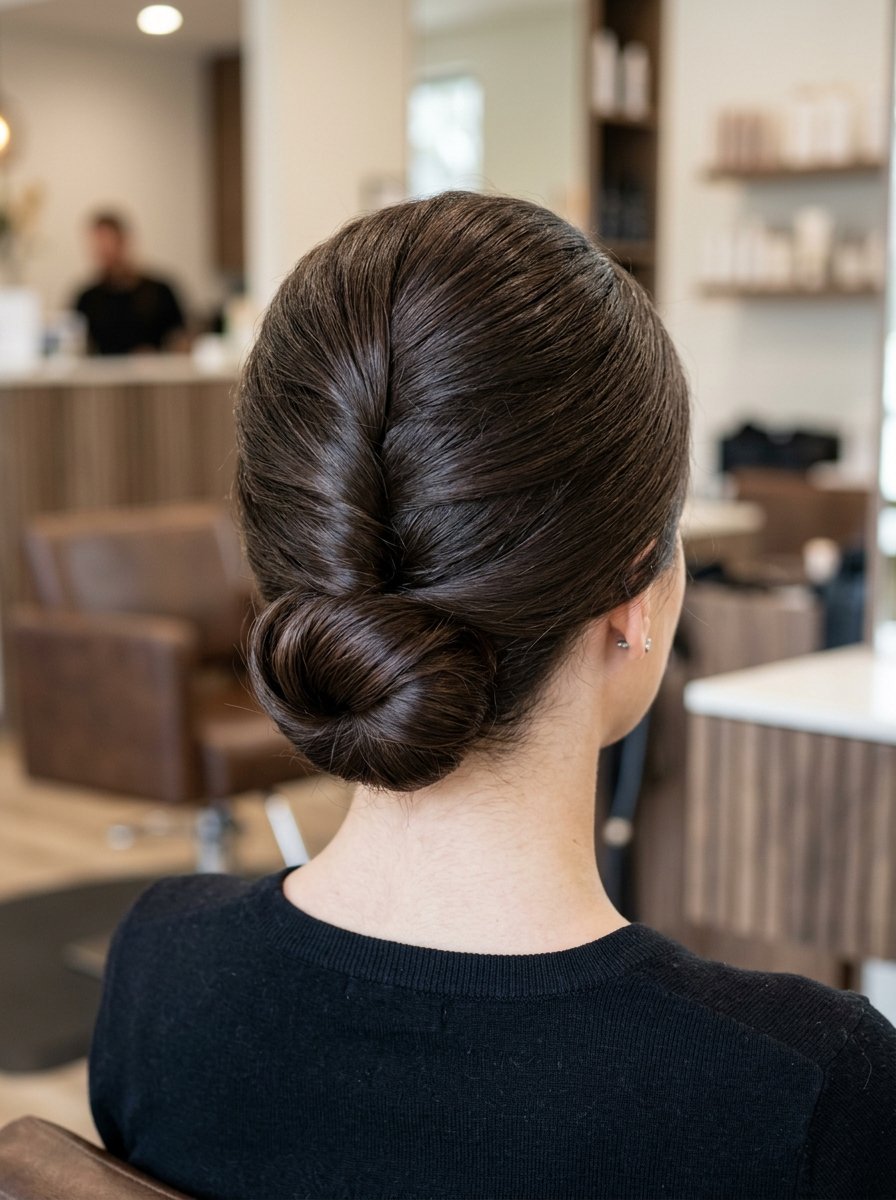
This look combines the classic vertical sweep of a French twist with the rounded fullness of a traditional chignon bun. It is an excellent choice for women with thick, coarse hair that requires structured containment.
Step-by-Step Assembly Method
- Section off the front top hair from ear to ear and pin it away temporarily.
- Sweep the remaining back hair to the left side and secure it with a vertical row of interlocking pins.
- Roll the hair back toward the right, forming a clean vertical seam along the center.
- Drop the top section, backcomb the base, and smooth it back over the vertical roll.
- Fold the remaining tail into a rounded bun shape at the nape and pin securely.
- Mist the finished shape with a strong-hold finishing spray to set the structure.
Pro Styling Secrets
When creating this hybrid for a major gala last winter, I discovered that regular pins cannot support the weight of thick hair long term. Switch to long, heavy-duty Amish hairpins instead. They lock the inner seam perfectly without bending out of shape.
5. The Messy Bohemian Loop
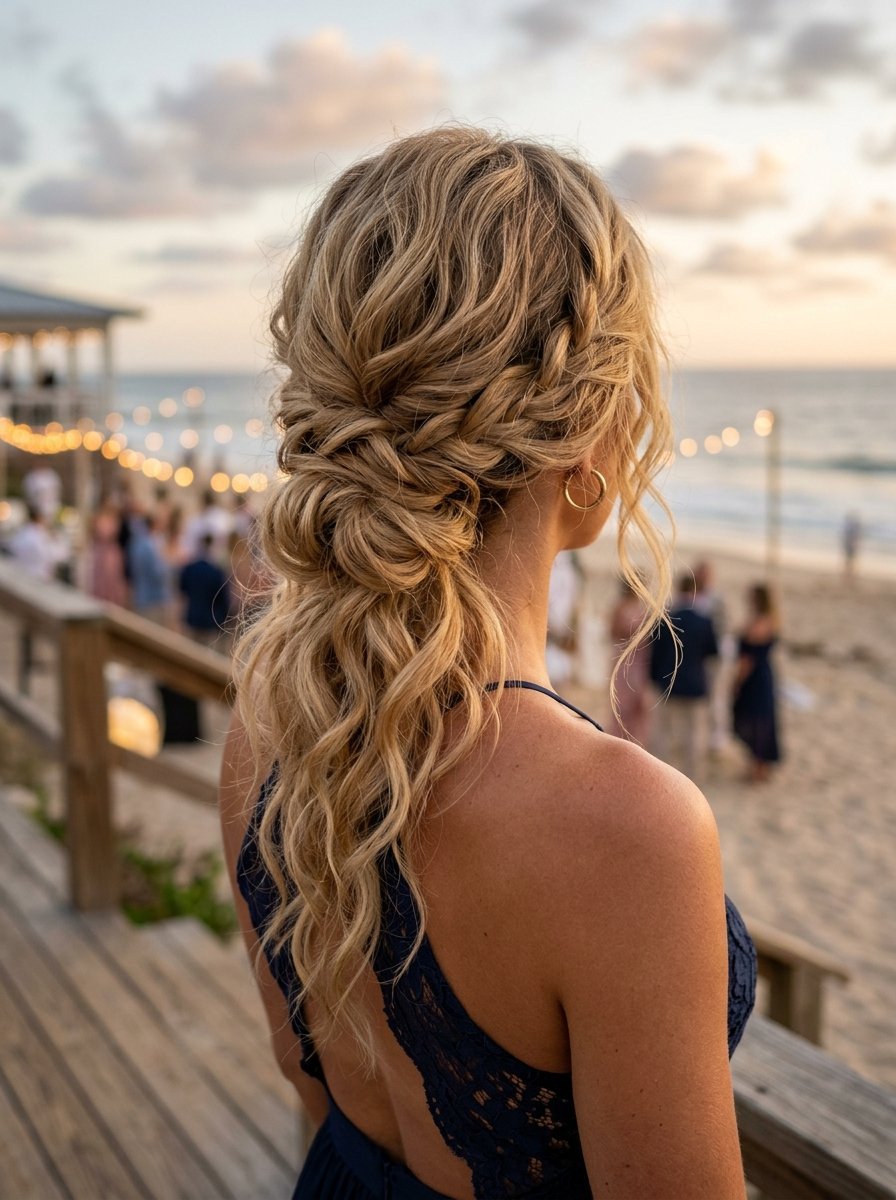
Perfect for casual evening events or beachside formal gatherings, this style offers a relaxed take on elegance. It creates the illusion of thick hair even on fine textures by utilizing strategic pulling techniques.
Step-by-Step Assembly Method
- Prepare the hair with a generous amount of sea salt spray for matte texture.
- Rough-dry the hair using your fingers rather than a brush to maintain natural movement.
- Gather the length into a loose ponytail, allowing the ears to remain partially covered.
- Pull the hair halfway through the final loop of the elastic band to leave the ends exposed.
- Fan out the loop horizontally, securing the outer edges to the scalp with small pins.
- Tug gently at the crown to create uneven, lived-in height across the top.
Pro Styling Secrets
The common trap here is making the style look messy instead of intentionally undone. Avoid touching the front hairline until the back loop is completely secure. I use the Bumble and bumble Surf Spray to get that gritty texture that stays up without looking greasy.
6. The Sleek Side-Swept Bun
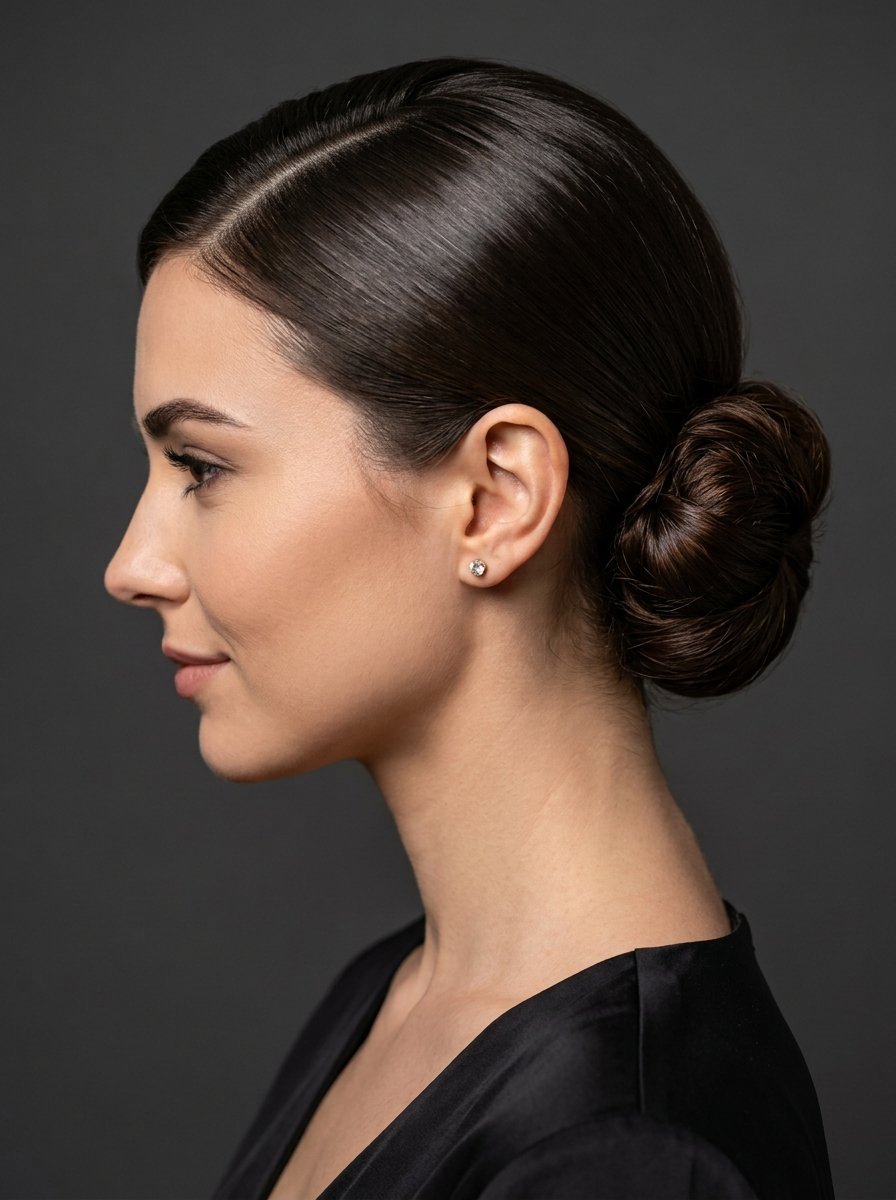
This asymmetrical look provides a sophisticated profile, making it a favorite for photography-heavy events. It balances one-shoulder dresses or gowns with dramatic side asymmetrical details beautifully.
Step-by-Step Assembly Method
- Establish a deep side part aligned with the outer arch of your left eyebrow.
- Smooth all hair across the back of the head toward the lower right ear.
- Secure the hair into a side ponytail using a firm elastic thread.
- Twist the length tightly until it begins to coil naturally around its own base.
- Flatten the coil against the head, securing the perimeter with short bobby pins.
- Set the sleek side with a fine layer of firm-hold hairspray.
Pro Styling Secrets
To prevent the long side from bagging out over the course of an evening, tilt your head backward while securing the ponytail. When you return your head to a natural upright position, the tension tightens across the back, ensuring a smooth surface.
7. The Braided Halo Chignon
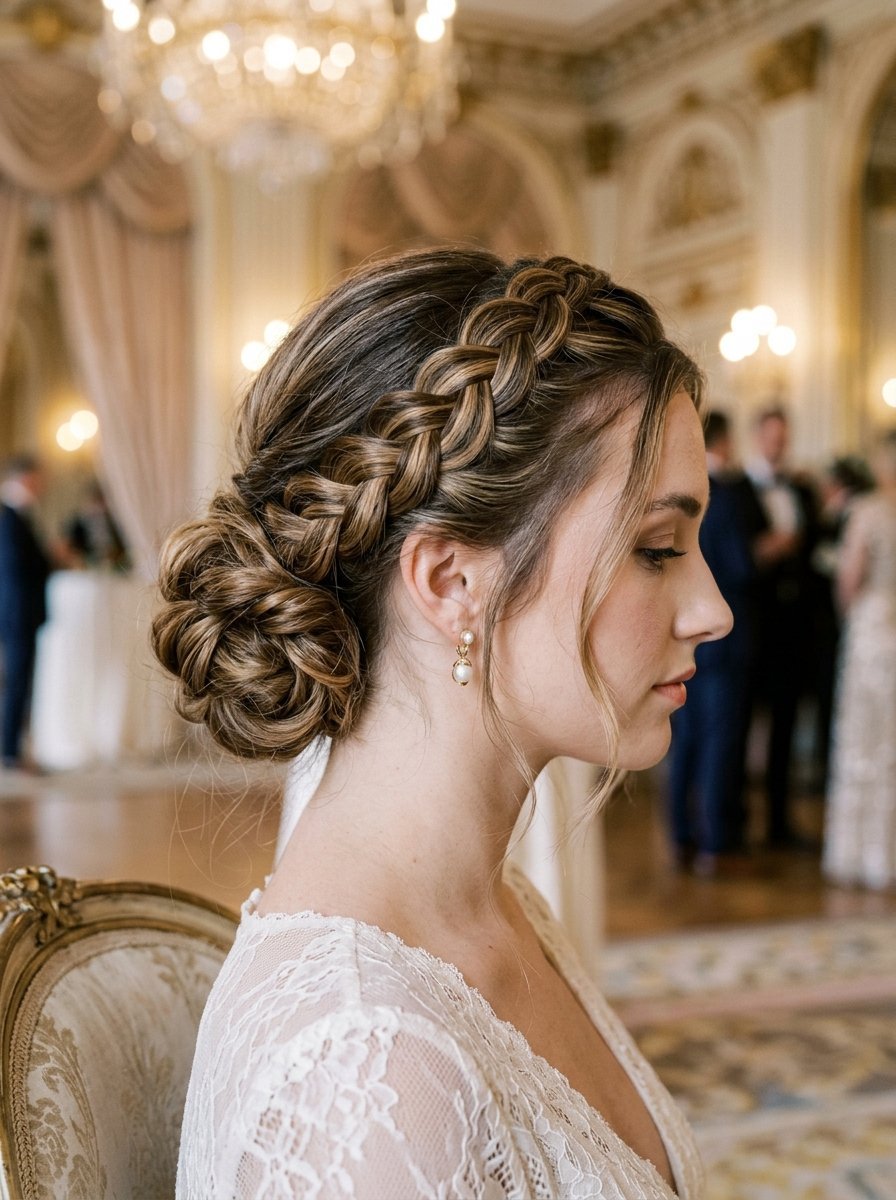
This style weaves a perimeter braid into a low bun, adding intricate detail that shows up beautifully on lighter or highlighted hair. It provides an excellent option for brides seeking a romantic style.
Step-by-Step Assembly Method
- Separate a three-inch section of hair along the front hairline from ear to ear.
- Create a three-strand Dutch braid along this front section, moving toward the right side.
- Gather the remaining unbraided back hair into a simple low bun at the nape.
- Wrap the tail of the Dutch braid around the base of the low bun to hide the elastic.
- Secure the braid tip underneath the bun using two crossed bobby pins.
- Massage the braid loops gently to expand their width for a fuller appearance.
Pro Styling Secrets
Plaiting the hair too tightly makes the look appear juvenile rather than elegant. I apply a light coating of Redken Powder Grip to my fingertips before braiding. This gives the necessary traction to control the strands while allowing the braid to be pulled wide later.
8. The Vintage Hollywood Wave Roll
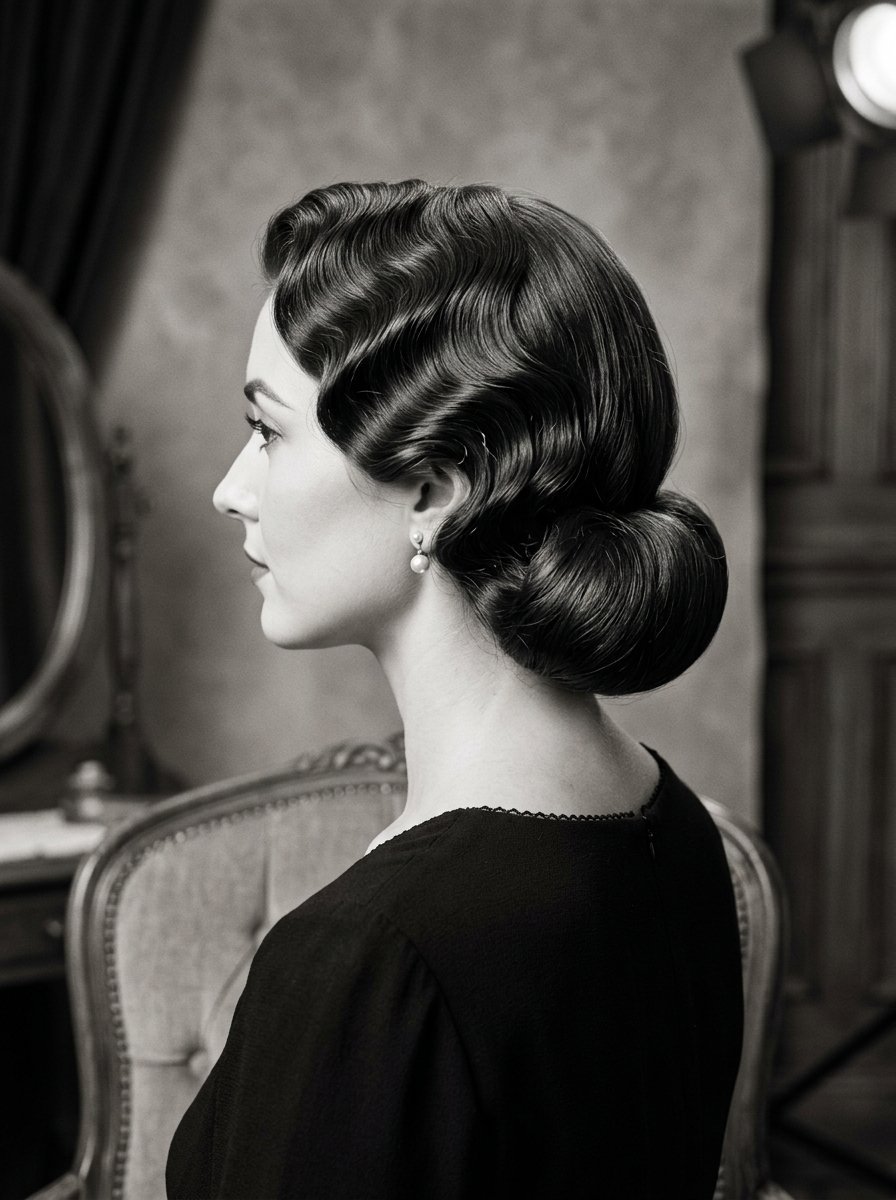
Drawing inspiration from 1940s glamour, this chignon incorporates a structured finger wave pattern through the front sections before terminating in a smooth horizontal roll at the neck line.
Step-by-Step Assembly Method
- Apply setting lotion to damp hair and create a sharp, dramatic side parting.
- Set the front section into deep waves using setting clips and a blow dryer.
- Roll the back length tightly around a foam hair rat wrapper positioned at the nape.
- Pin the foam roll directly to the base of the skull using strong industrial pins.
- Carefully remove the front clips, letting the wave pattern blend into the side of the roll.
- Use a glossy mist spray across the entire surface for high reflected shine.
Pro Styling Secrets
Finding a foam rat that matches your exact hair color is crucial to prevent visibility if the hair shifts. In my experience, if your hair is fine, backcombing the section before wrapping it around the foam keeps the foundation entirely hidden.
9. The Triple Twisted Rosette
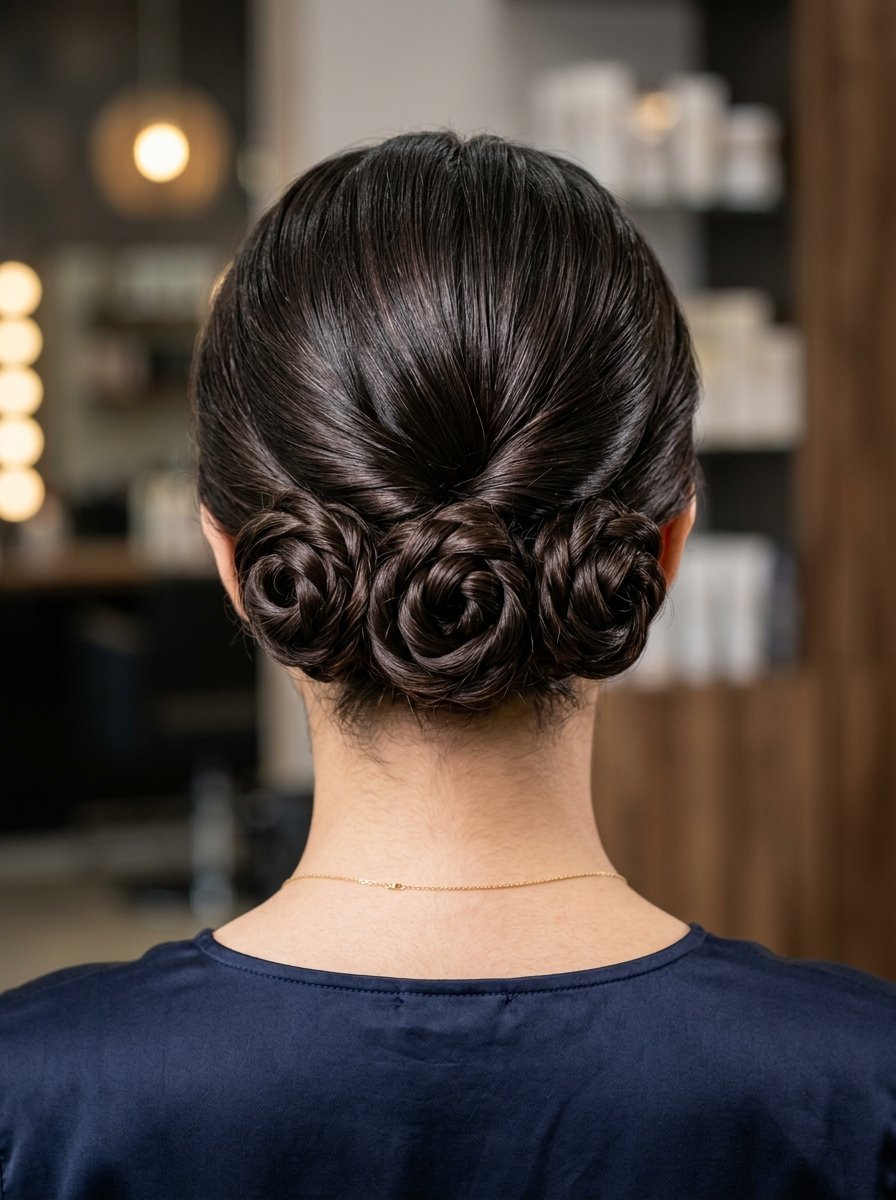
This complex-looking style consists of three smaller buns placed horizontally across the nape of the neck. It offers a creative alternative for women who find a single large chignon too heavy or bulky.
Step-by-Step Assembly Method
- Divide the hair vertically into three equal sections across the back of the head.
- Secure each individual section into a low ponytail close to the neck line.
- Twist the center ponytail into a tight rope, coil it clockwise, and pin it flat.
- Repeat the twisting process with the left section, coiling it counter-clockwise.
- Twist the right section clockwise, tucking its ends behind the center rosette.
- Interlock the three rosettes by placing pins horizontally through their touching edges.
Pro Styling Secrets
Keep the heights of all three bases perfectly level to avoid an uneven appearance. Mark your placement by looking directly into a mirror before tying the elastics. Use a firm pomade like Suavecito to keep each rosette crisp and clear.
10. The High-Volume Crown Chignon
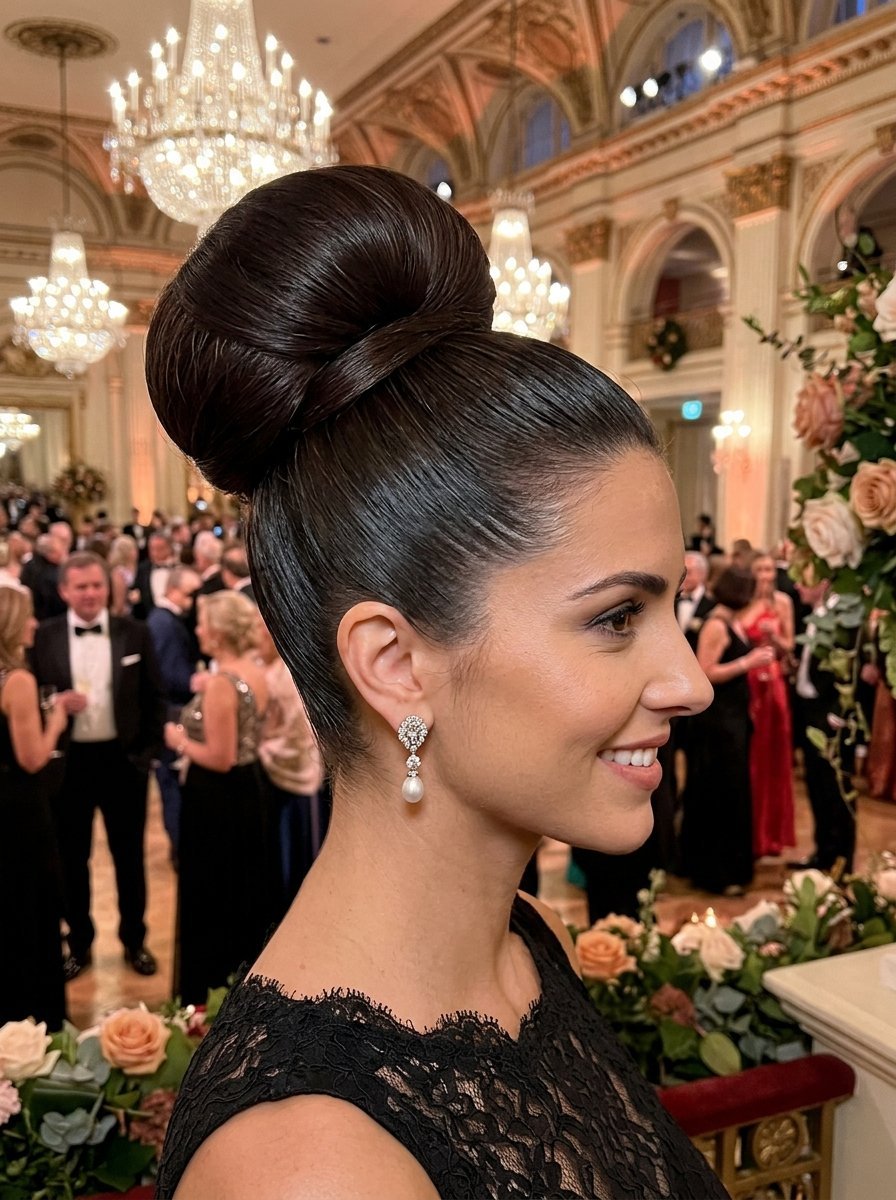
This variation shifts the bulk of the updo upward toward the upper back of the head. It provides maximum height, making it ideal for round face shapes or petite frames wearing dramatic ballroom gowns.
Step-by-Step Assembly Method
- Flip the head upside down and brush all hair toward the top crown.
- Secure the hair into a high ponytail using a thick bungee band for maximum tension.
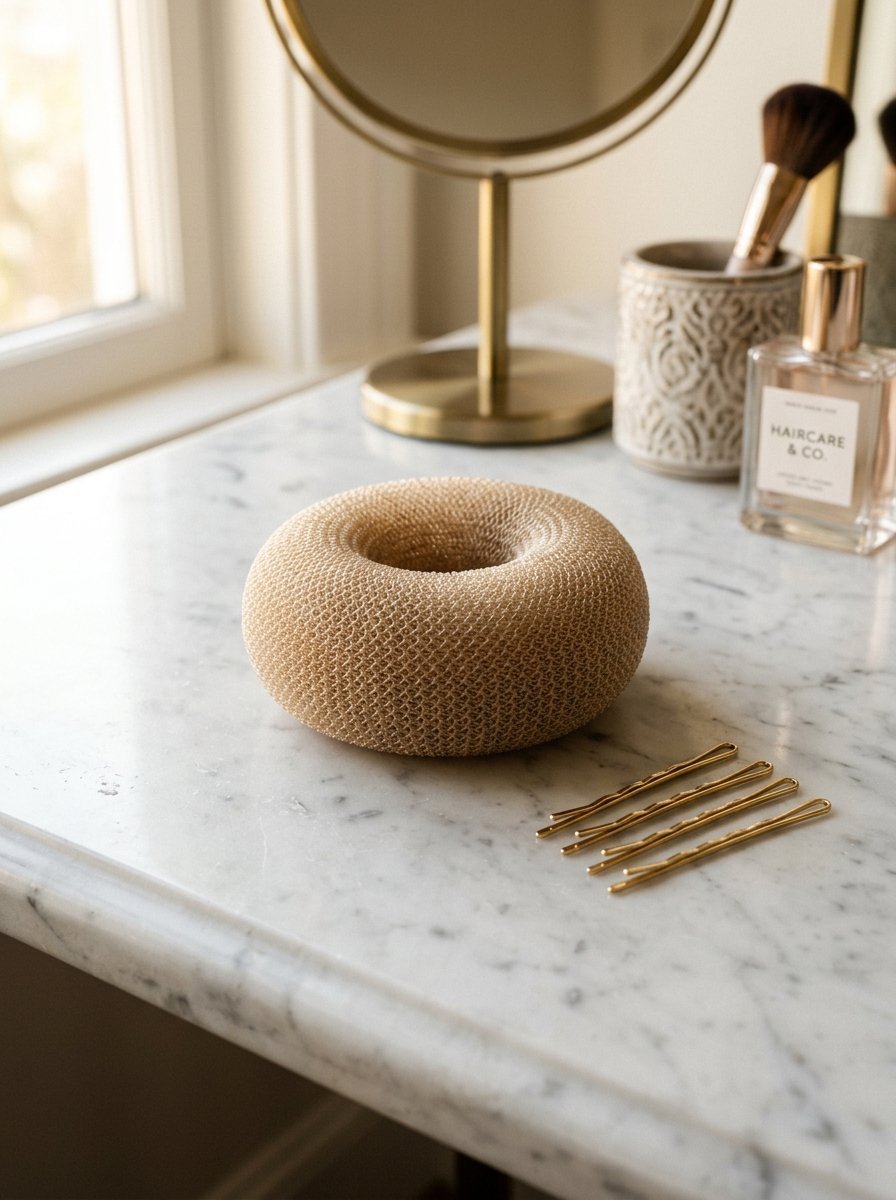
- Slide a donut-shaped hair padding piece over the ponytail down to the base.
- Spread the hair evenly over the padding, obscuring the foam completely from all angles.
- Slip a second elastic over the hair-covered padding to lock the shape in place.
- Wrap the remaining loose ends around the base and pin them out of sight.
Pro Styling Secrets
A high bun can pull painfully on the scalp if the weight distribution is wrong. Anchor the bungee band tightly but place two bobby pins horizontally directly underneath the base elastic. This creates a tiny shelf that supports the weight and prevents sag.
11. The Wrapped Ribbon Chignon
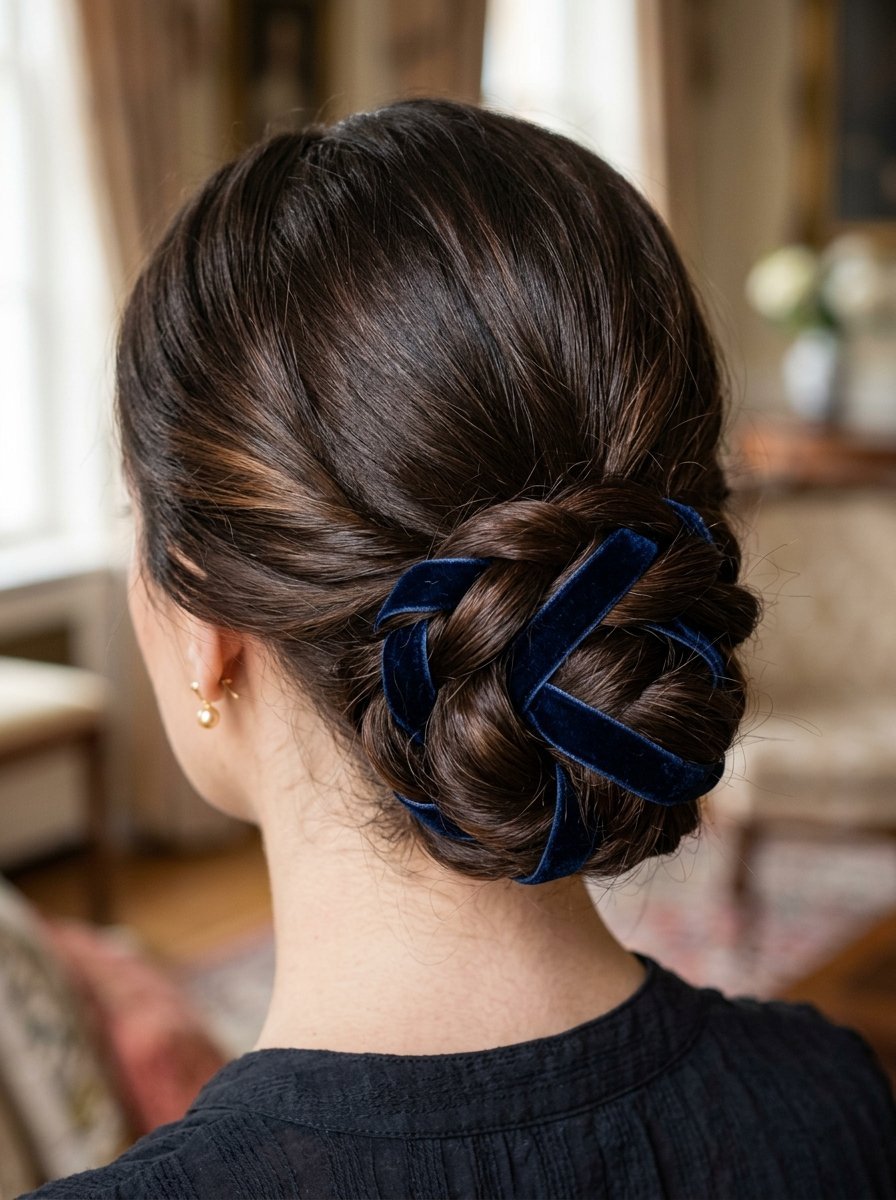
This style integrates a luxury fabric accessory, such as silk ribbon or velvet cord, directly into the hair twists. It allows you to match your hair details directly to your evening gown fabric.
Step-by-Step Assembly Method
- Tie a long silk ribbon onto the base of a secure low ponytail at the nape.
- Split the ponytail into two sections, letting one ribbon end merge into each strand.
- Twist the two sections together, weaving the ribbon through the hair fibers naturally.
- Roll the twisted rope into an elegant loop shape against the back of the head.
- Pin the shape down, ensuring the fabric remains visible on the exterior surfaces.
- Finish by tying the loose ribbon ends into a delicate bow beneath the bun structure.
Pro Styling Secrets
Velvet ribbon stays in place much better than silk, which tends to slide right out of clean hair. If you must use silk, spray the ribbon fabric with a dry shampoo before weaving it. This simple trick adds the grip needed to keep it secure.
12. The Wispy Face-Framing Bun
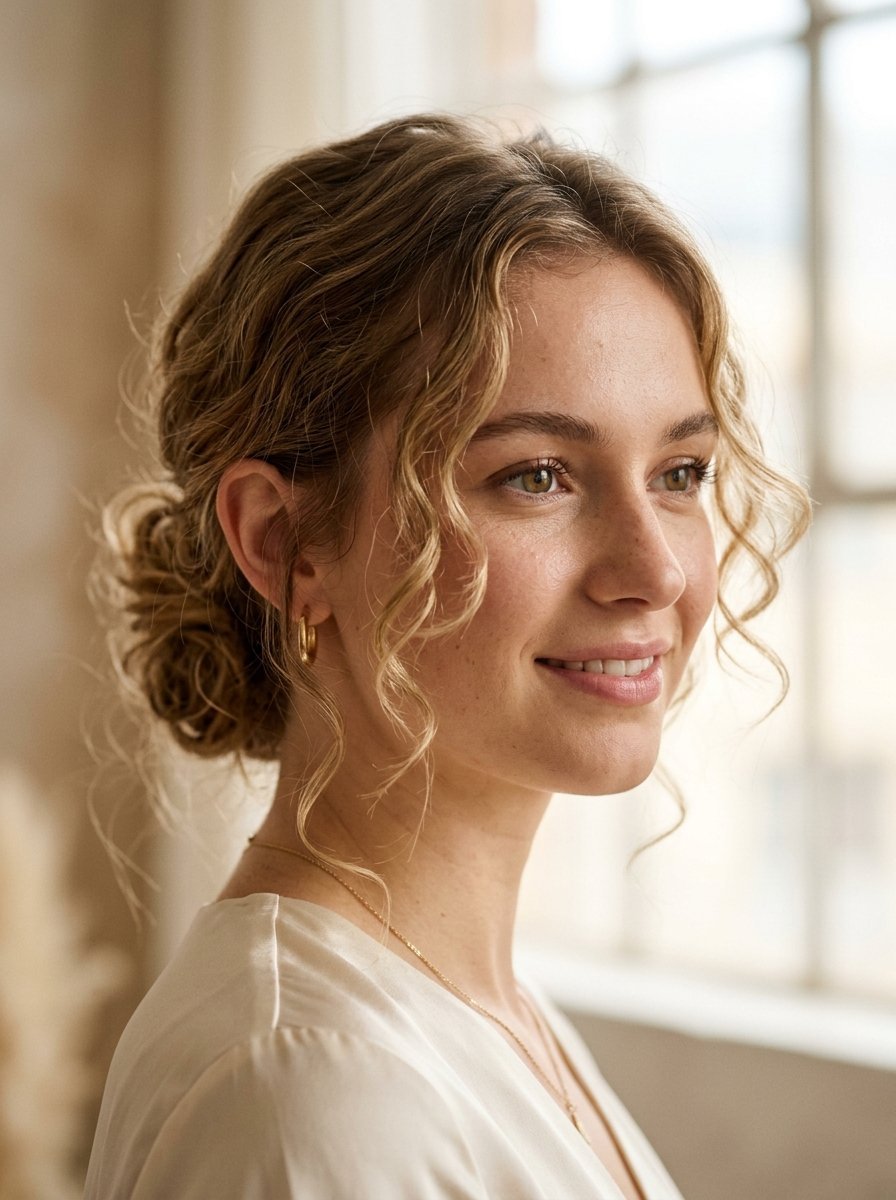
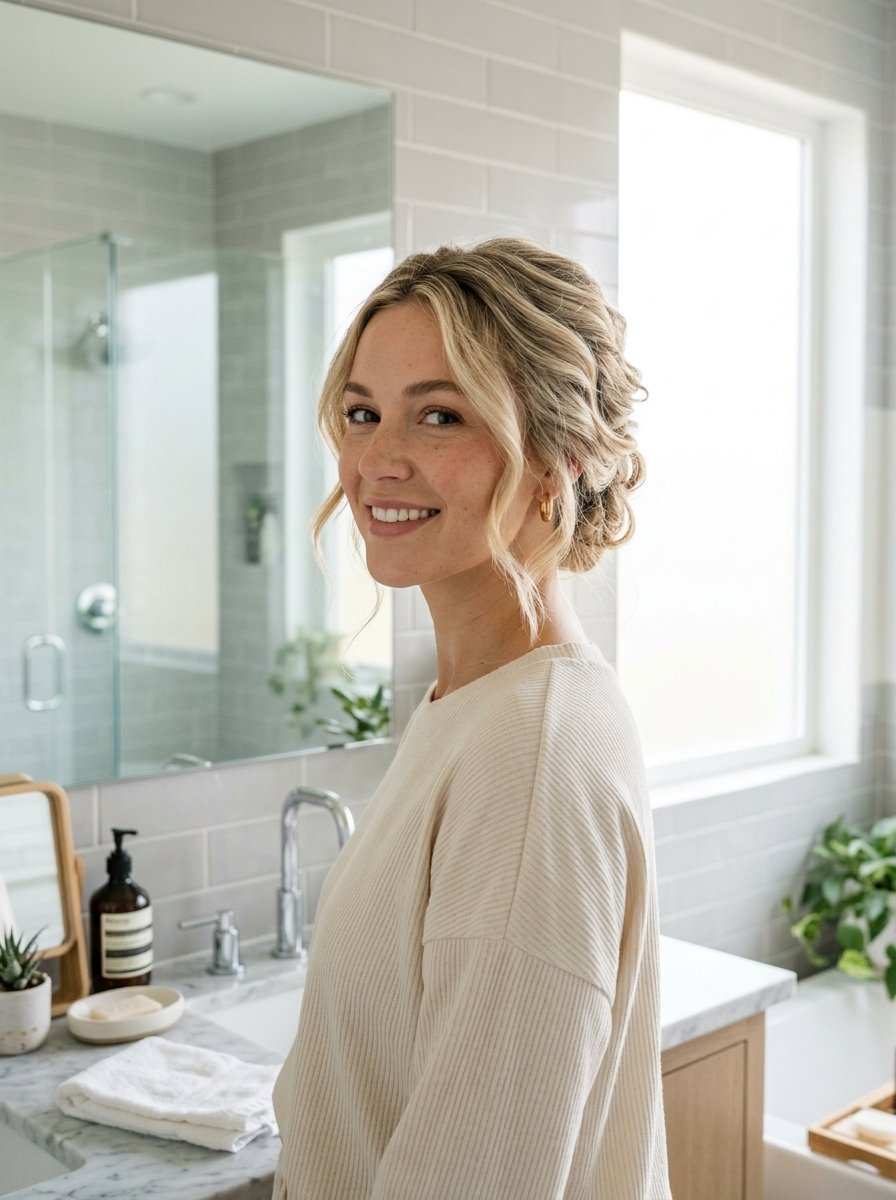
Designed for soft, delicate features, this style focuses heavily on the strands left out around the perimeter. The bun itself remains simple, serving as an anchor for romantic curls around the face.
Step-by-Step Assembly Method
- Use a tail comb to isolate fine sections of hair at the temples, ears, and nape.
- Gather the remaining bulk of the hair into a simple, un-teased low chignon.
- Secure the main bun using small, lightweight hairpins to keep the look airy.
- Use a half-inch curling iron to shape the isolated face-framing strands into soft tendrils.
- Break up the curls gently using your fingers to prevent a stiff appearance.
- Spray the loose pieces with a flexible-hold mist that allows natural movement.
Pro Styling Secrets
Do not pull out the tendrils after the bun is finished, as this creates messy gaps in the style. Isolate them first before creating the bun. I prefer using the Living Proof Flex Hairspray to keep the tendrils soft and touchable instead of crunchy.
13. The Origami Folded Chignon
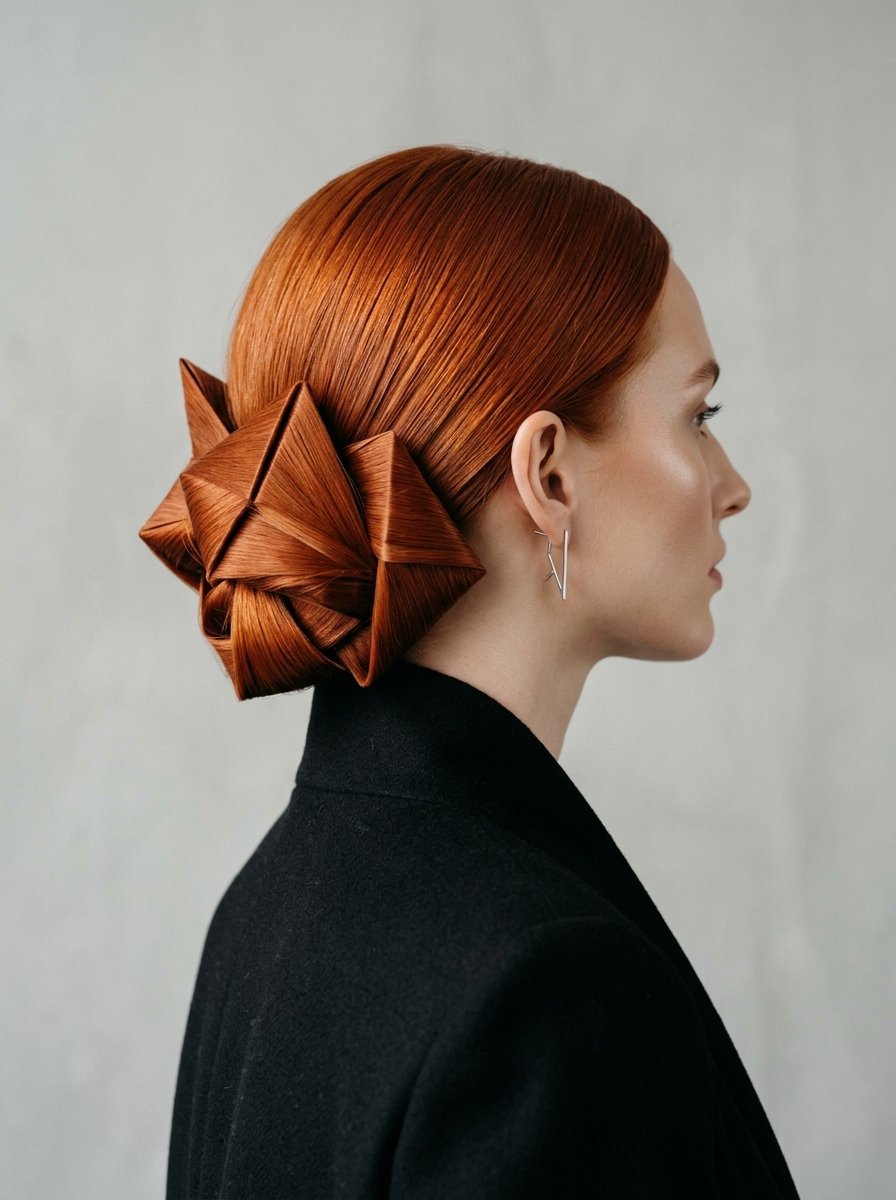
A contemporary variation that relies on sharp angles and flat planes rather than round coils. It looks incredibly striking on thick, bone-straight hair textures with high-contrast color.
Step-by-Step Assembly Method
- Straighten the hair completely using a flat iron and a heat protective spray.
- Secure the length into a sleek ponytail positioned at the mid-back of the head.
- Flatten the ponytail strand against the head, folding it upward at a sharp ninety-degree angle.
- Secure the fold point firmly using two flat, extra-long styling clips hidden inside.
- Fold the remaining tail back down, creating a crisp, flat Z-shape silhouette.
- Secure the top and bottom fold points with strong, concealed pins.
Pro Styling Secrets
This look requires absolute precision to look successful. If you have layers, they will pop out of the sharp folds immediately. Apply a liberal layer of Moroccanoil Styling Cream to the ponytail to bind shorter layers together before attempting the folds.
14. The Split-Twin Chignon
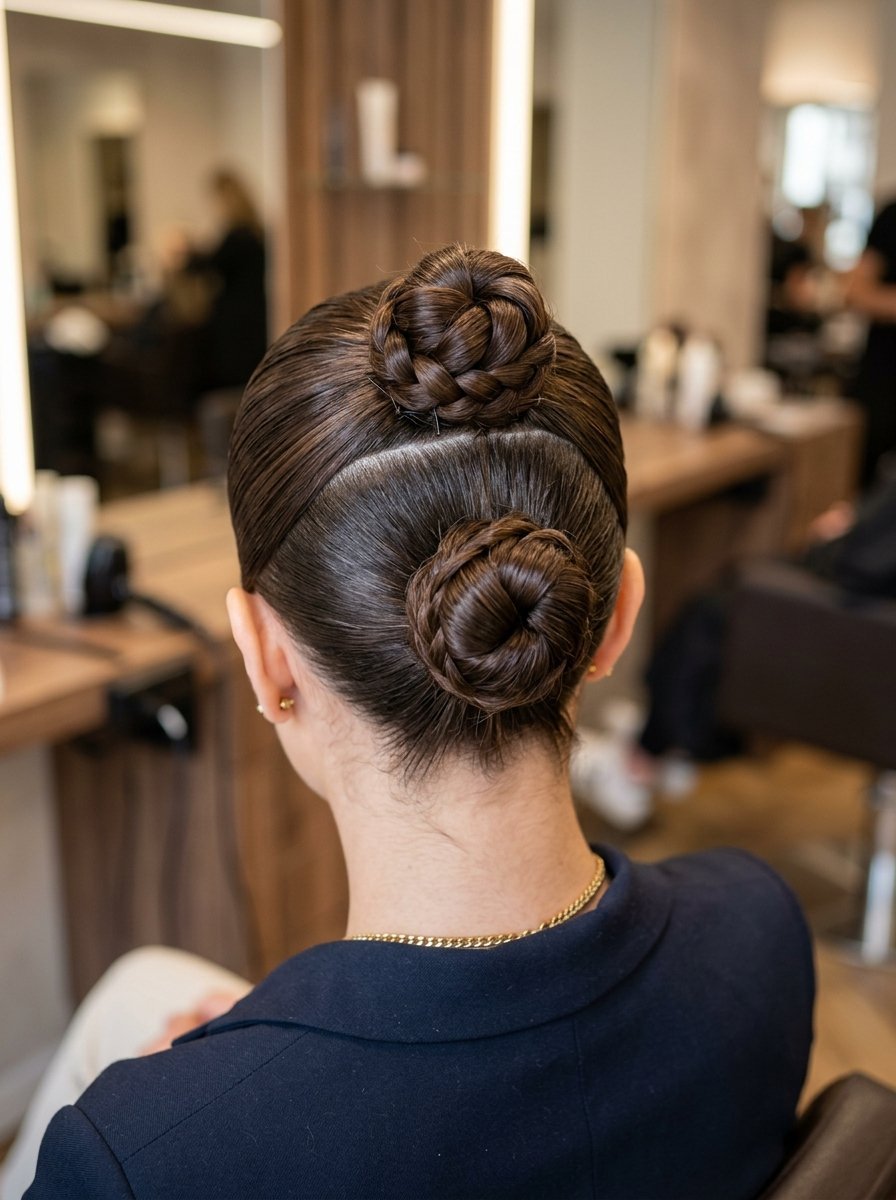
This style splits the classic look into two stacked components placed vertically along the back seam. It creates a longer, more elongated head silhouette that looks modern and fresh.
Step-by-Step Assembly Method
- Divide the hair horizontally into a top half and a bottom half section.
- Secure the top half into a ponytail at the mid-crown and the bottom half at the nape.
- Twist the top ponytail into a small, tight bun and pin it flat against the scalp.
- Twist the lower ponytail upward, wrapping it around the lower edge of the top bun.
- Blend the two shapes together using long pins that pass through both cores.
- Smooth down the side profiles using a fine-tooth comb coated in hairspray.
Pro Styling Secrets
The gap between the two ponytails must disappear entirely during the final pinning stage. I always use hair extension pieces in the top ponytail if the client has fine hair. This ensures both buns have equal volume and density.
15. The Intertwined Fishtail Updo
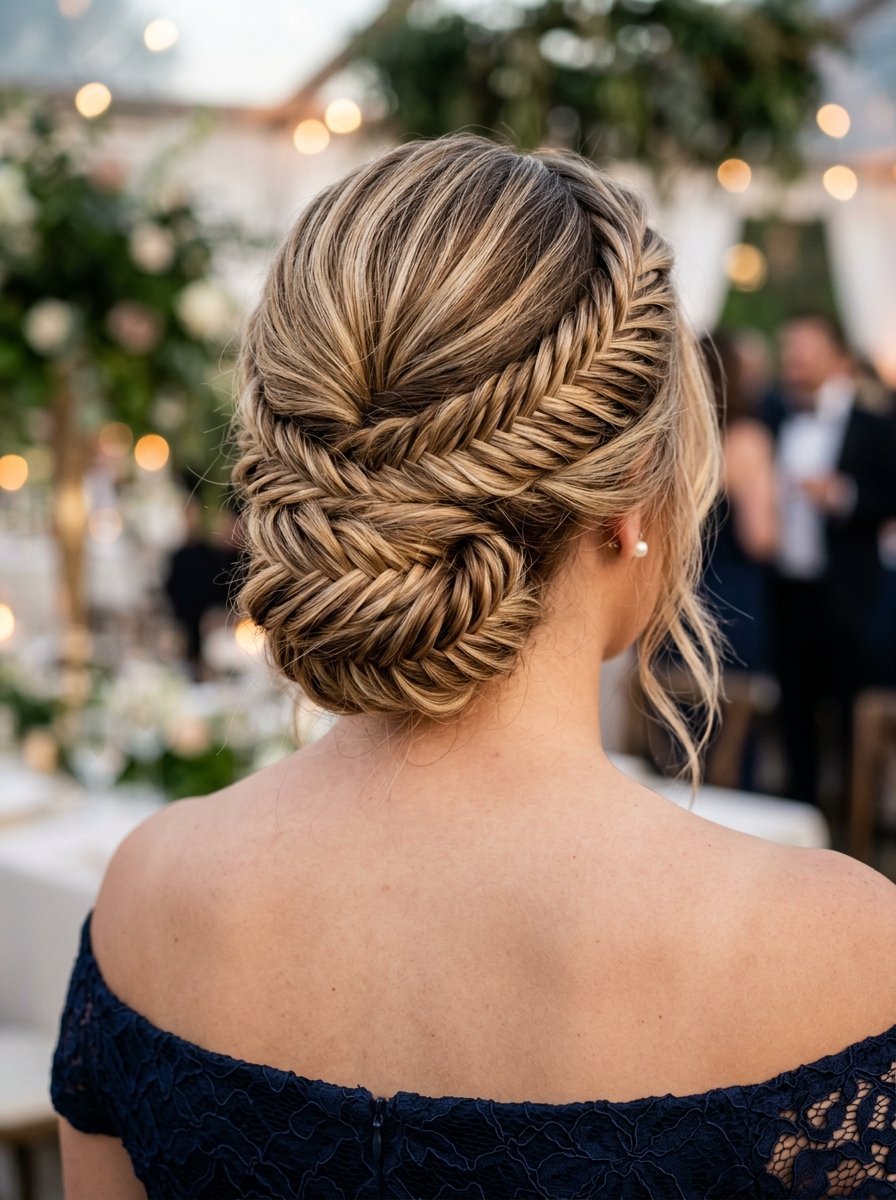
An intricate option that uses a fishtail braid pattern as the base material for the chignon loop. The fine detail provides an excellent canvas for dimensional hair colors.
Step-by-Step Assembly Method
- Pull all hair back into a low ponytail and split it into two equal halves.
- Take a tiny strand from the outer left edge and pass it to the inner right side.
- Take a tiny strand from the outer right edge and pass it to the inner left side.
- Repeat this crossing pattern until you reach the ends, creating a tight fishtail braid.
- Roll the finished braid upward toward the base, flattening the shape horizontally.
- Pin the wide sides of the braid flat to the head using U-shaped hairpins.
Pro Styling Secrets
A classic fishtail can take a long time to complete and can make your arms tired. To speed up the process while maintaining definition, use larger outer strands but spray them with Sebastian Shaper Plus before crossing them over. This keeps the look clean and fast.
16. The Polished Ballerina Wrap
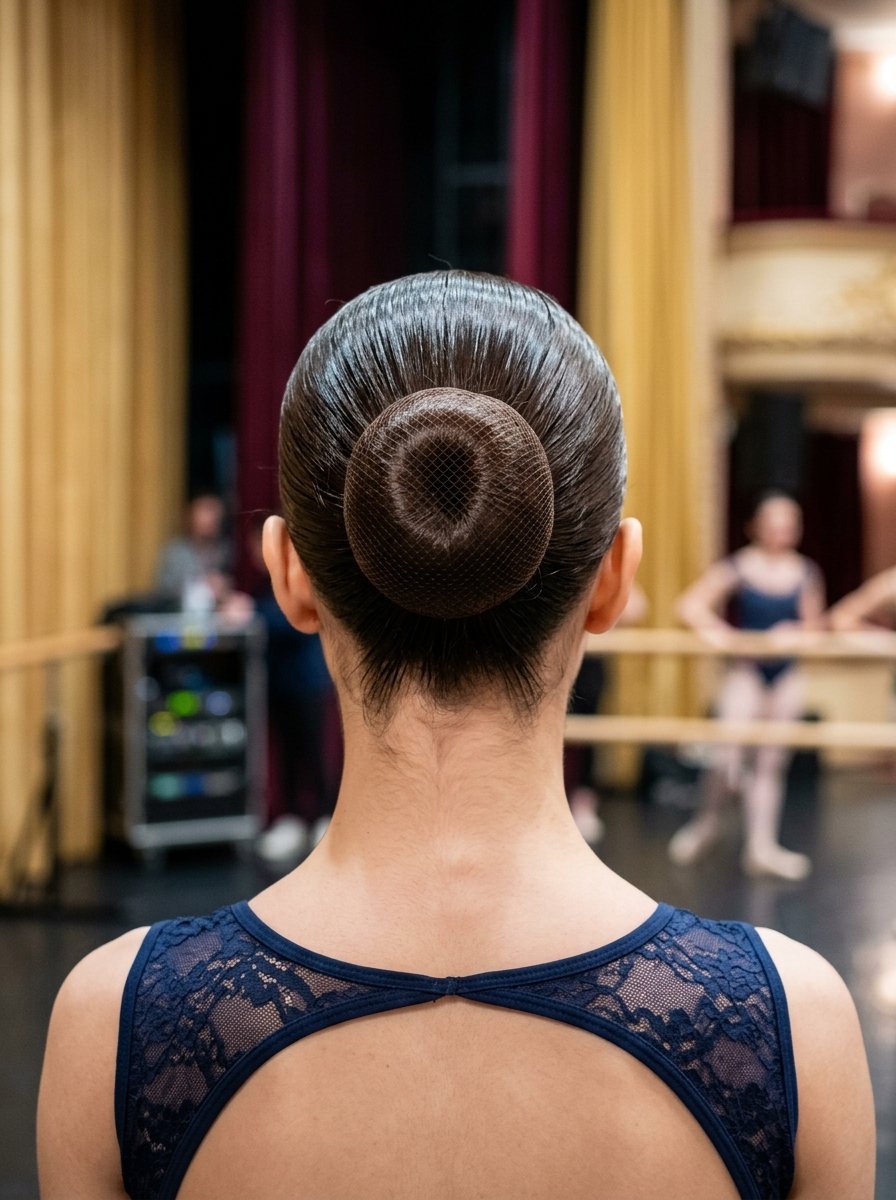
The sleekest option available, this style leaves no strand loose. It creates a completely smooth silhouette that draws all attention to your facial features and shoulder line.
Step-by-Step Assembly Method
- Brush dry hair thoroughly to remove all tangles and natural parting lines.
- Mist the roots heavily with water to make the hair malleable for smooth styling.
- Pull the hair back tightly, securing it into a ponytail exactly in the center of the head.
- Twist the ponytail into a neat strand, wrapping it around the base elastic smoothly.
- Place a fine nylon hairnet over the bun to contain any short popping ends completely.
- Pin the perimeter securely and dry the wet roots with a diffuser to lock the shine.
Pro Styling Secrets
The hairnet is the ultimate secret weapon used by professionals that clients rarely think to buy. Choose an invisible net that matches your hair shade perfectly. It keeps the chignon completely free of frizz even during sweaty summer outdoor events.
17. The Knotted Rope Chignon
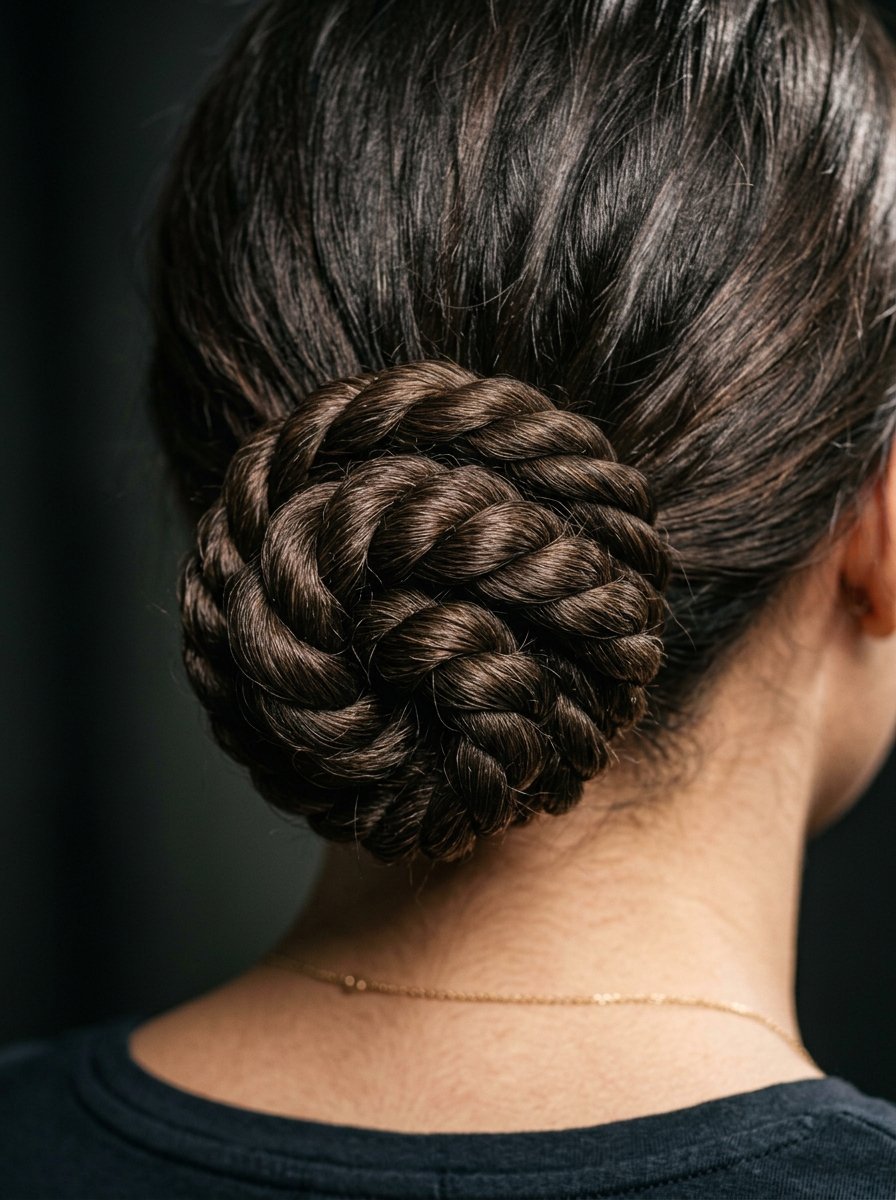
This style utilizes two distinct rope twists coiled around each other to create a high-relief texture that catches evening light beautifully from every angle.
Step-by-Step Assembly Method
- Create a secure low ponytail and divide the length into two equal strands.
- Twist both individual strands clockwise tightly until they begin to stiffen.
- Wrap the two twisted strands counter-clockwise around each other to form a rope braid.
- Secure the bottom end of the rope braid with a clear silicone elastic band.
- Coil this heavy rope around the main base elastic, creating a thick dimensional circle.
- Drive long pins through the center of the knot to fix the heavy structure safely.
Pro Styling Secrets
Twisting the individual strands clockwise but wrapping them together counter-clockwise is the key mechanical step. This opposing tension locks the rope together so it never unravels during movement. Use a strong pomade to keep the fibers neat.
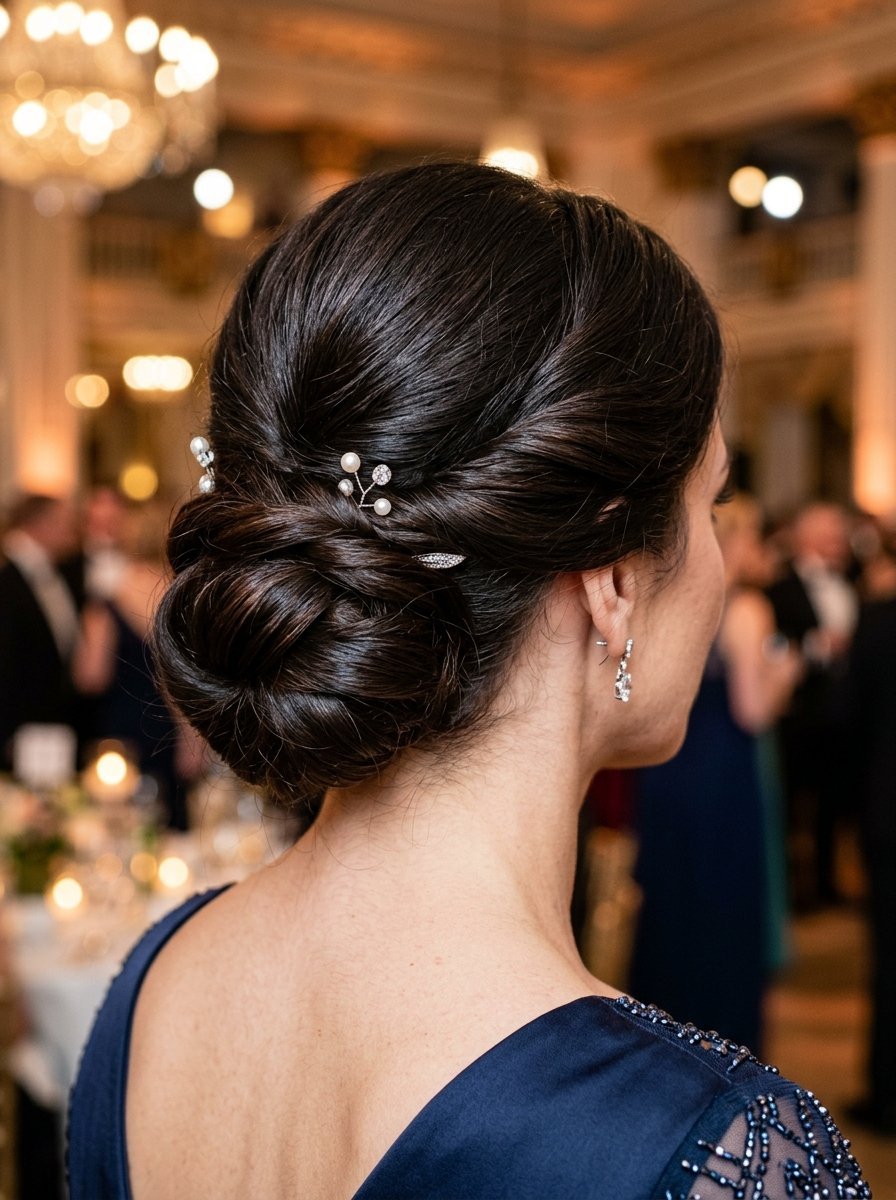
18. The Crown Pearl Inlaid Bun
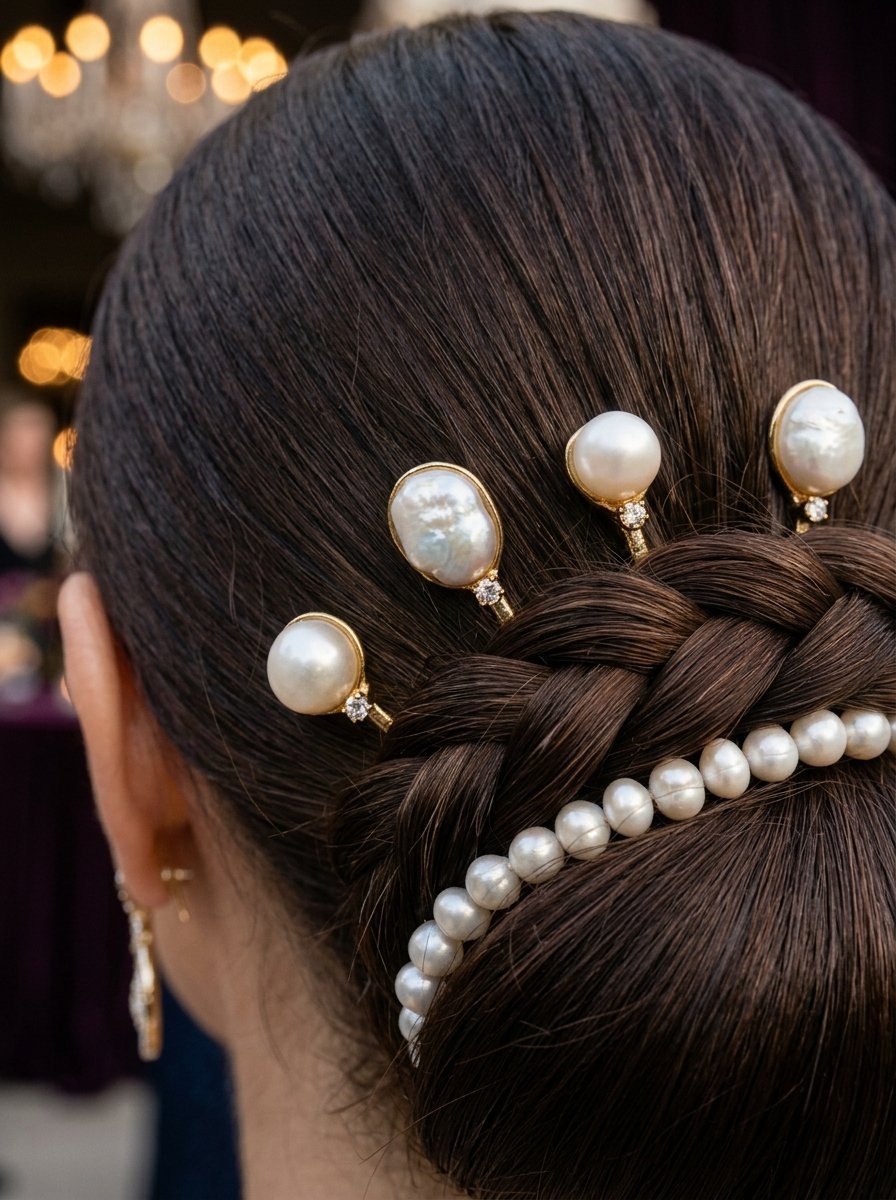
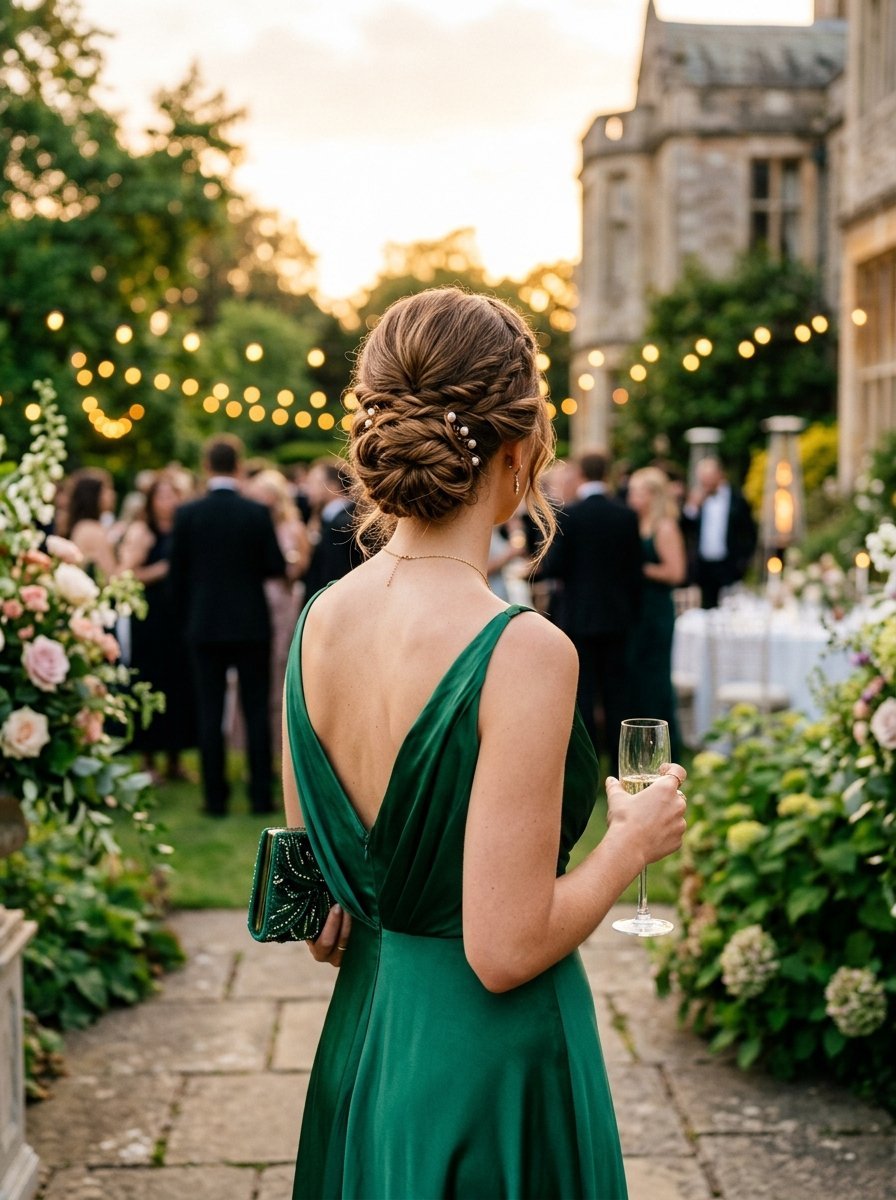
This style incorporates decorative hair jewelry, specifically pearl-tipped pins, pushed directly into the finished lines of a classic low chignon for a regal finish.
Step-by-Step Assembly Method
- Create a smooth, classic low chignon using the standard loop method described earlier.
- Ensure the bun surface is completely smooth and free of visible pins or elastics.
- Select six to eight high-quality pearl-tipped hairpins of varying sizes.
- Insert the pearl pins into the top seam of the bun, spacing them half an inch apart.
- Push the pins in at an angle so they lock into the internal base elastic securely.
- Test the security of the pearls by gently shaking your head from side to side.
Pro Styling Secrets
Never use cheap plastic pearls because they reflect camera flashes poorly, looking white and artificial. Invest in real freshwater pearl pins or high-grade glass crystals. They catch the light with a soft, expensive glow that elevates your look.
19. The Deep Wave Asymmetric Roll
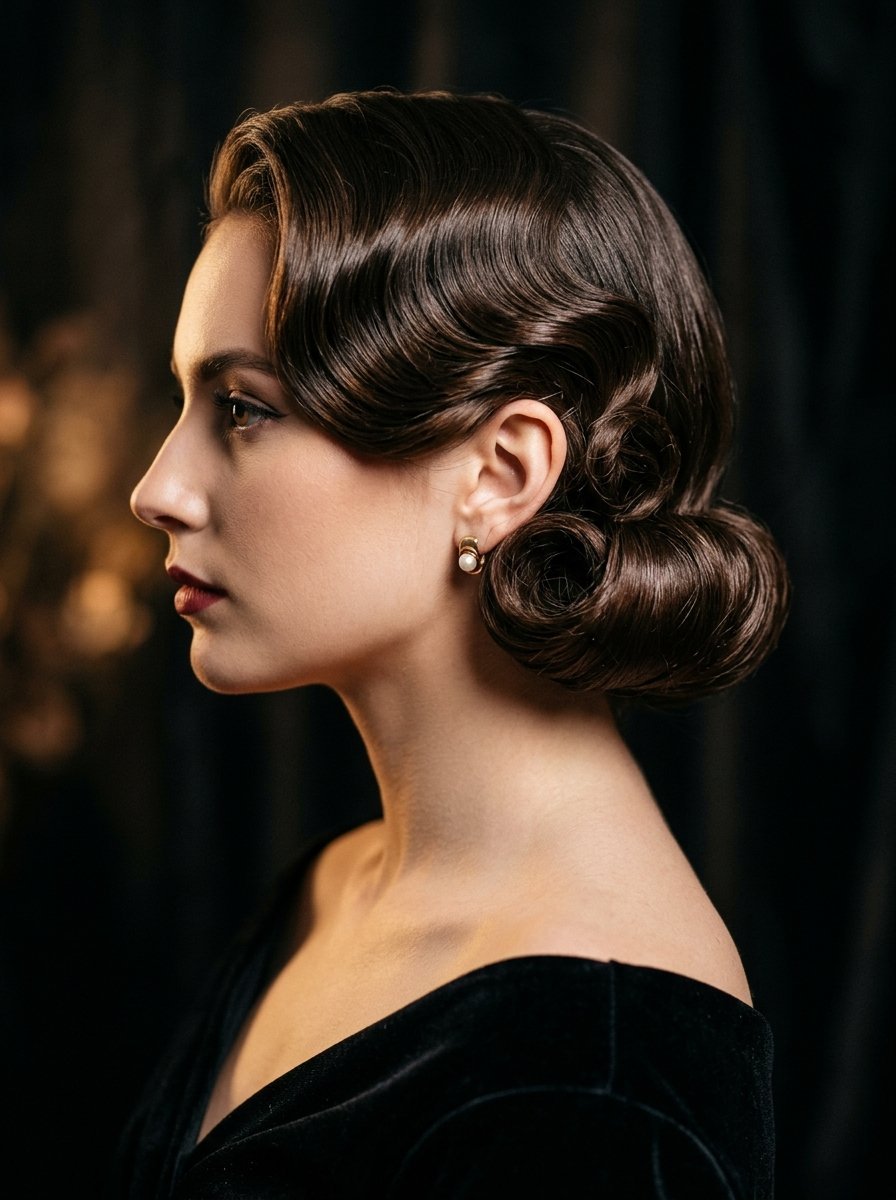
This look features deep vintage finger waves on one side of the head that cascade downward, terminating into a low, rolled chignon tucked behind the opposite ear.
Step-by-Step Assembly Method
- Create a deep left-side part and apply curl-defining mousse to damp hair.
- Blow-dry the hair using a round brush to build body and movement through the front.
- Use a triple-barrel waving iron on the right side to create deep, consistent waves.
- Gather all hair behind the left ear, rolling the ends inward into a horizontal tube.
- Secure the tube structure flat against the scalp using long metal hairpins.
- Brush the right-side waves smoothly so they flow seamlessly into the left roll.
Pro Styling Secrets
To keep the deep wave pattern from separating into separate pieces, comb through the waves with a wide-tooth comb coated in a light glossing serum. This fuses the strands into a singular, solid wave formation that looks incredibly polished.
20. The Modern Tousled Loop
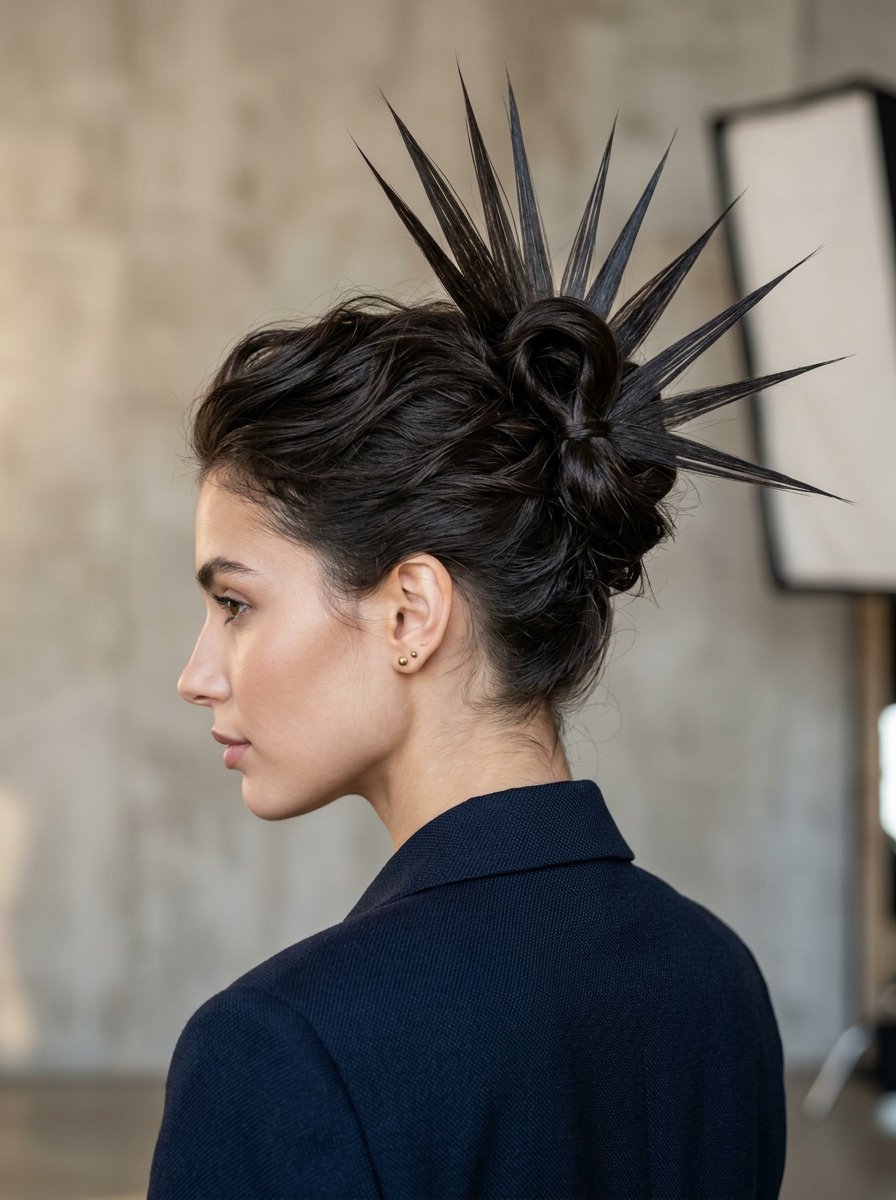
An updated take on the classic bun that leaves the very tips of the hair pointing straight out of the top, creating a playful, youthful contrast to an otherwise formal style.
Step-by-Step Assembly Method
- Apply texturizing paste to dry hair, working it through from mid-lengths to ends.
- Pull hair into a mid-height ponytail, leaving the final loop incomplete.
- Allow two inches of the hair ends to point upward out of the top of the elastic.
- Flat iron these exposed ends until they are completely straight and sharp.
- Fan out the lower loop section, pinning the sides down while leaving the top ends free.
- Mist the spikey ends with a strong glue spray to maintain their sharp direction.
Pro Styling Secrets
This style can look accidental if the ends are not completely straight. Use a mini flat iron to sharpen the exposed tips after the bun is pinned. This deliberate sharpness proves the look is intentional high-fashion rather than a gym bun.
Structural Preparation Tools Reference
The success of an evening updo depends heavily on the tools used before the pinning process begins. Having the correct hardware on hand ensures your style remains intact through hours of movement.
| Tool Name | Primary Purpose | Best Hair Type | Price Range |
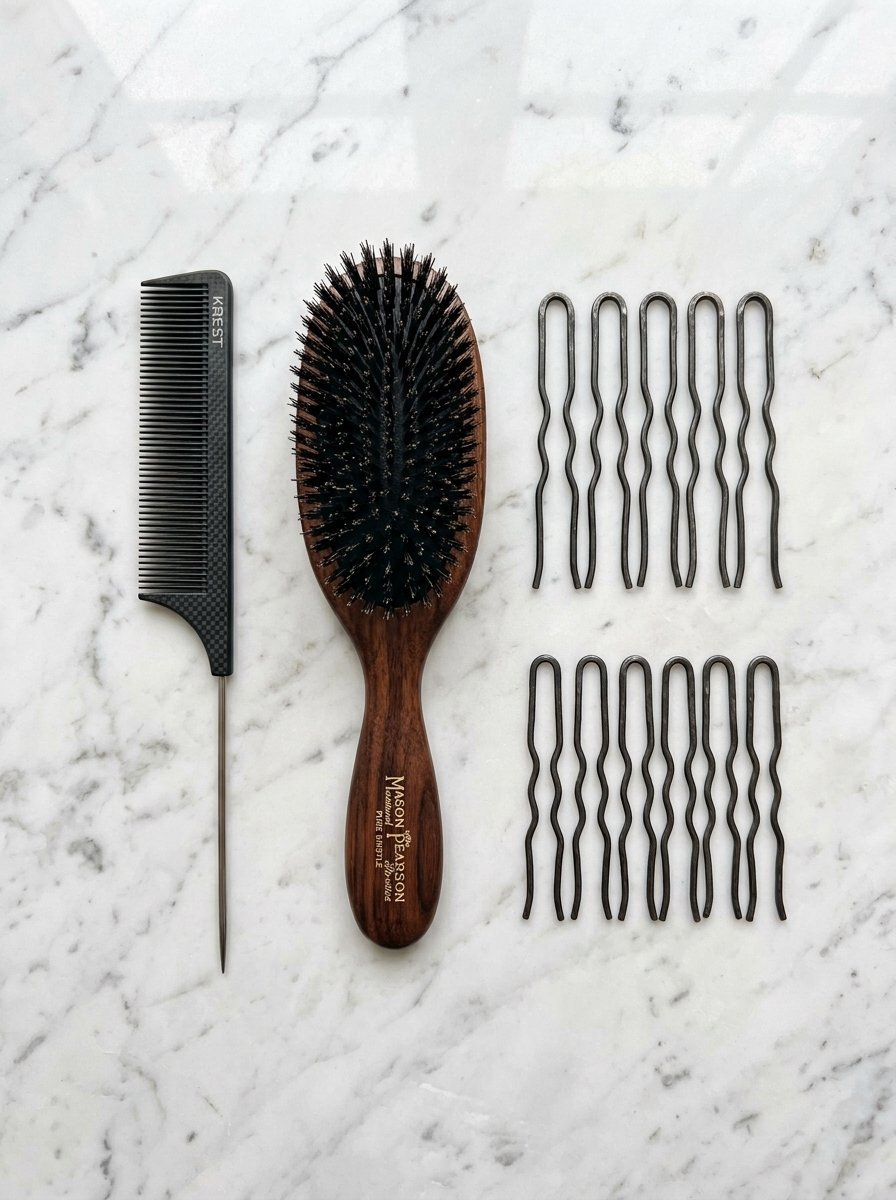
| Metal-Tipped Comb | Creating sharp, precise parts and clean sections | All Hair Types | $5 – $10 |
| Natural Bristle Brush | Smoothing the outer cuticle layer for high shine | Fine to Medium | $20 – $40 |
| Bungee Hair Bands | Securing high ponytails without snagging fibers | Thick and Heavy | $8 – $12 |
| Amish U-Pins | Anchoring heavy structural buns without bending | Coarse or Long | $10 – $15 |
| Nylon Hairnets | Containing fine flyaways and short layers smoothly | Fine or Layered | $5 – $8 |
Frequently Asked Questions
How do I make my chignon last all night without falling out?
The secret to lasting hold lies in creating a solid internal anchor. Always start with a secure ponytail base using a bungee band rather than a standard elastic loop. Drive your hairpins directly through the core of this base ponytail. This mechanical connection ensures the weight of the bun is supported by the tightest part of the style, preventing slippage during dancing or movement.
Can I create an elegant chignon if I have short hair?
Yes, you can easily achieve this look with shoulder-length hair by using a foam padding insert matching your hair color. Secure your short hair into a small ponytail, place the foam rat over the base, and pin your short lengths over the foam to create the illusion of fullness. Alternatively, adding a matching human hair clip-in piece to your ponytail provides the necessary length to complete complex twists.
Should I wash my hair on the day of the evening event?
I recommend washing your hair twenty-four hours before your event rather than the same day. Freshly washed hair is too slick and lacks the natural texture needed to hold pins securely. If you must wash it the same day, apply a generous amount of volumizing mousse to wet strands before blow-drying to create artificial grip within the hair fibers.
What is the difference between a bun and a chignon?
A traditional bun is created by wrapping hair around itself in a simple circular shape, often sitting high on the head. A chignon is specifically positioned low at the nape of the neck and involves more complex styling techniques such as folding, looping, or twisting the hair strands. The term comes from the French phrase for the nape of the neck.
How do I prevent bobby pins from causing scalp pain?
Scalp pain occurs when pins capture too much hair, creating excessive tension on a small area of skin. To avoid this, use larger U-shaped hairpins to distribute the weight across a wider area. Ensure the wavy side of your classic bobby pin faces downward toward the scalp, as this design feature is intended to grip the hair smoothly without digging into the skin.
Which style works best for a high-neck evening dress?
A high-neck gown pairs best with a high-volume crown chignon or a sleek ballerina wrap. Placing the bun high on the head elongates your neck line and prevents the hair from rubbing against the fabric collar of your dress. This separation keeps both your updo neat and your dress neckline clean and visible throughout the evening.

Sarah Mitchell — Founder & Editor-in-Chief
Sarah Mitchell is the founder and editorial voice behind Hair Level Up. A licensed cosmetologist with more than 15 years of experience, she has styled A-list celebrities for editorial shoots and red carpets, with work featured in Vogue, Elle, and Harper’s Bazaar. Early in her career, she trained under the legendary hairstylist Oribe in New York, an apprenticeship that still shapes her editorial eye today. Sarah founded Hair Level Up in 2020 after one bad haircut convinced her that women deserved a destination that felt like a magazine, taught like a stylist, and inspired like an art gallery. She oversees every story from concept to publication, guided by a simple belief: a good story teaches you something, but a great one makes you feel beautiful while it does.